
Disclosure: This post contains affiliate links. I may earn a commission, but these are products I use, love, and genuinely recommend.
Sometimes it’s the smallest details that make the biggest difference, and this kitchen project is proof of that!
Five years ago, we renovated our kitchen with IKEA SEKTION cabinet bases and custom fronts from Nieu Cabinet Doors. I always envisioned adding decorative skirt boards along the bottom for a more furniture-inspired look, but like so many renovation details, it kept getting pushed down the list.
Our standard toe kicks were supposed to be temporary, but five years later, they were still there!
I’d put off the project for years, partly because I wasn’t sure how to work around our integrated dishwasher. But I finally decided to give it a try, and now? My only regret is not doing it sooner!
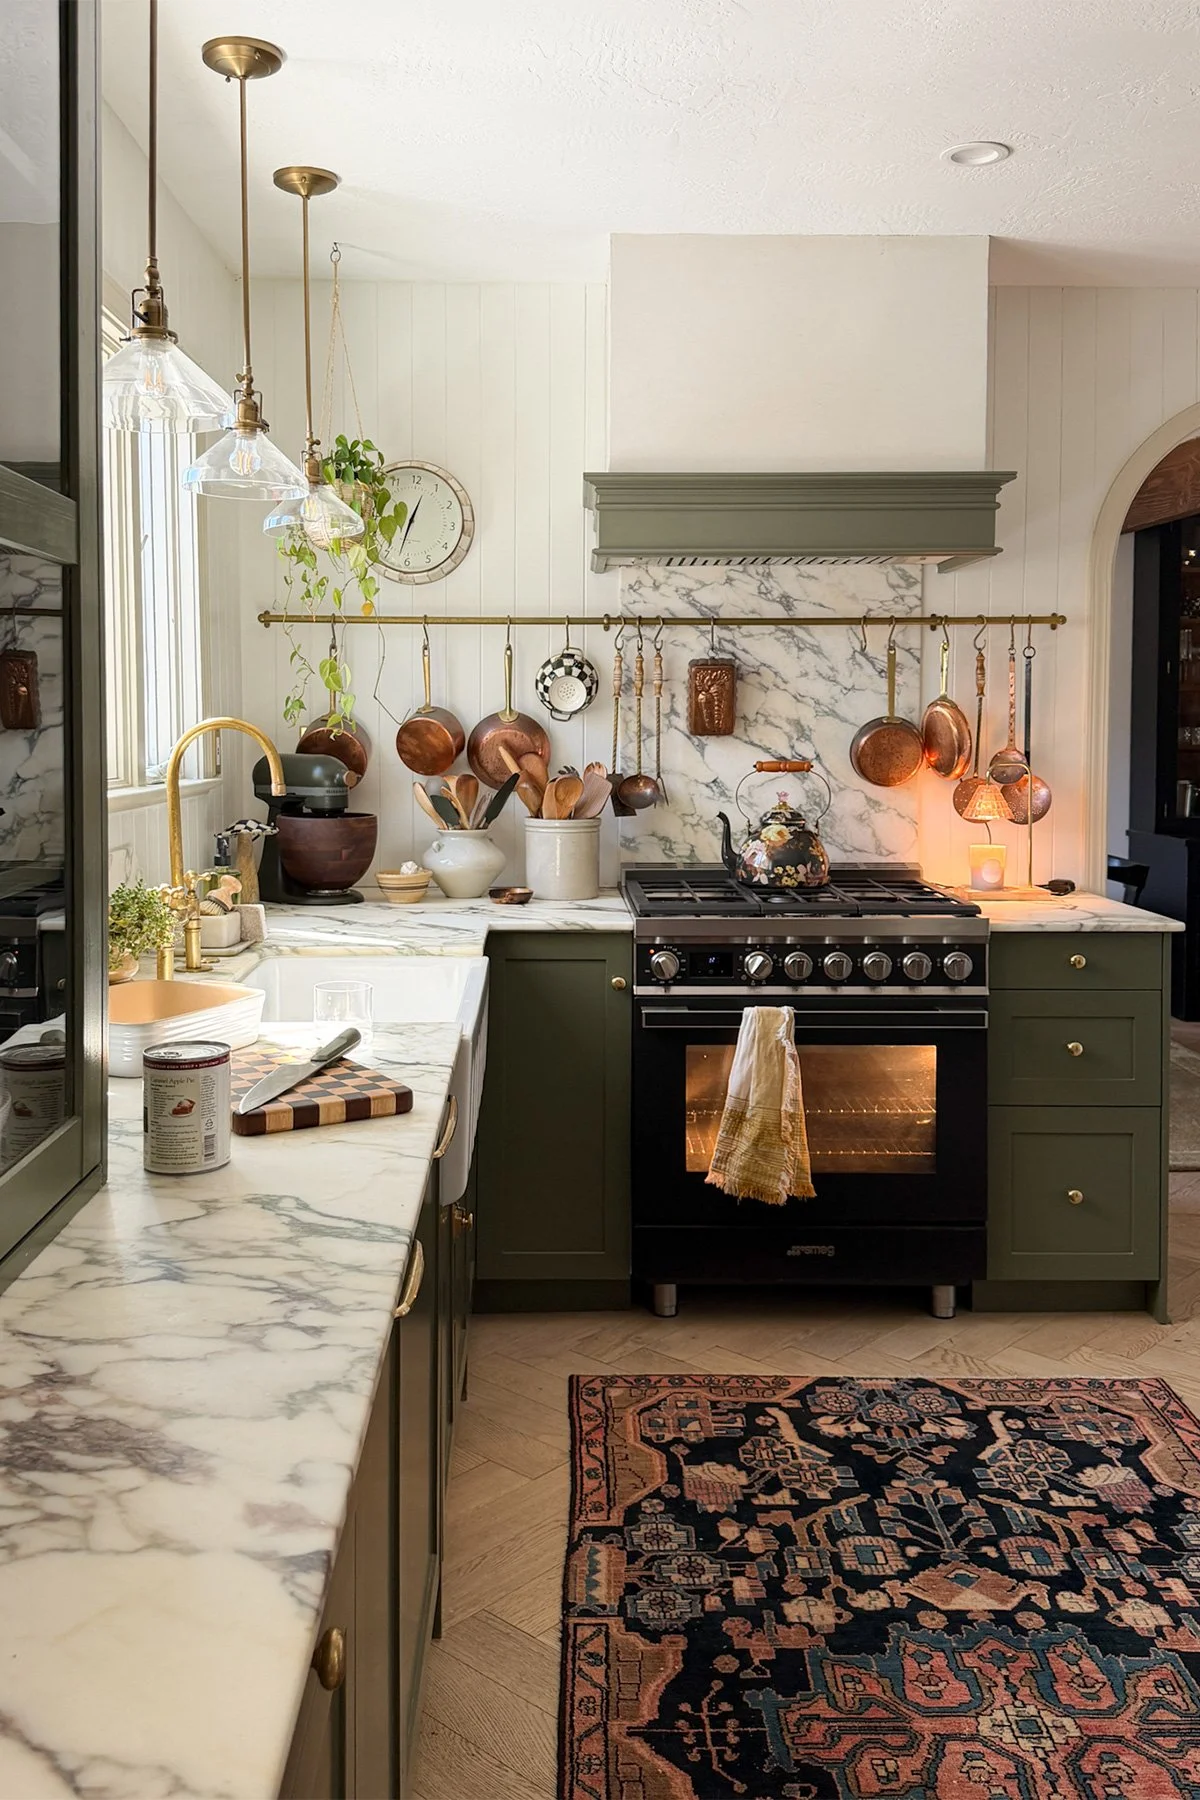
BEFORE
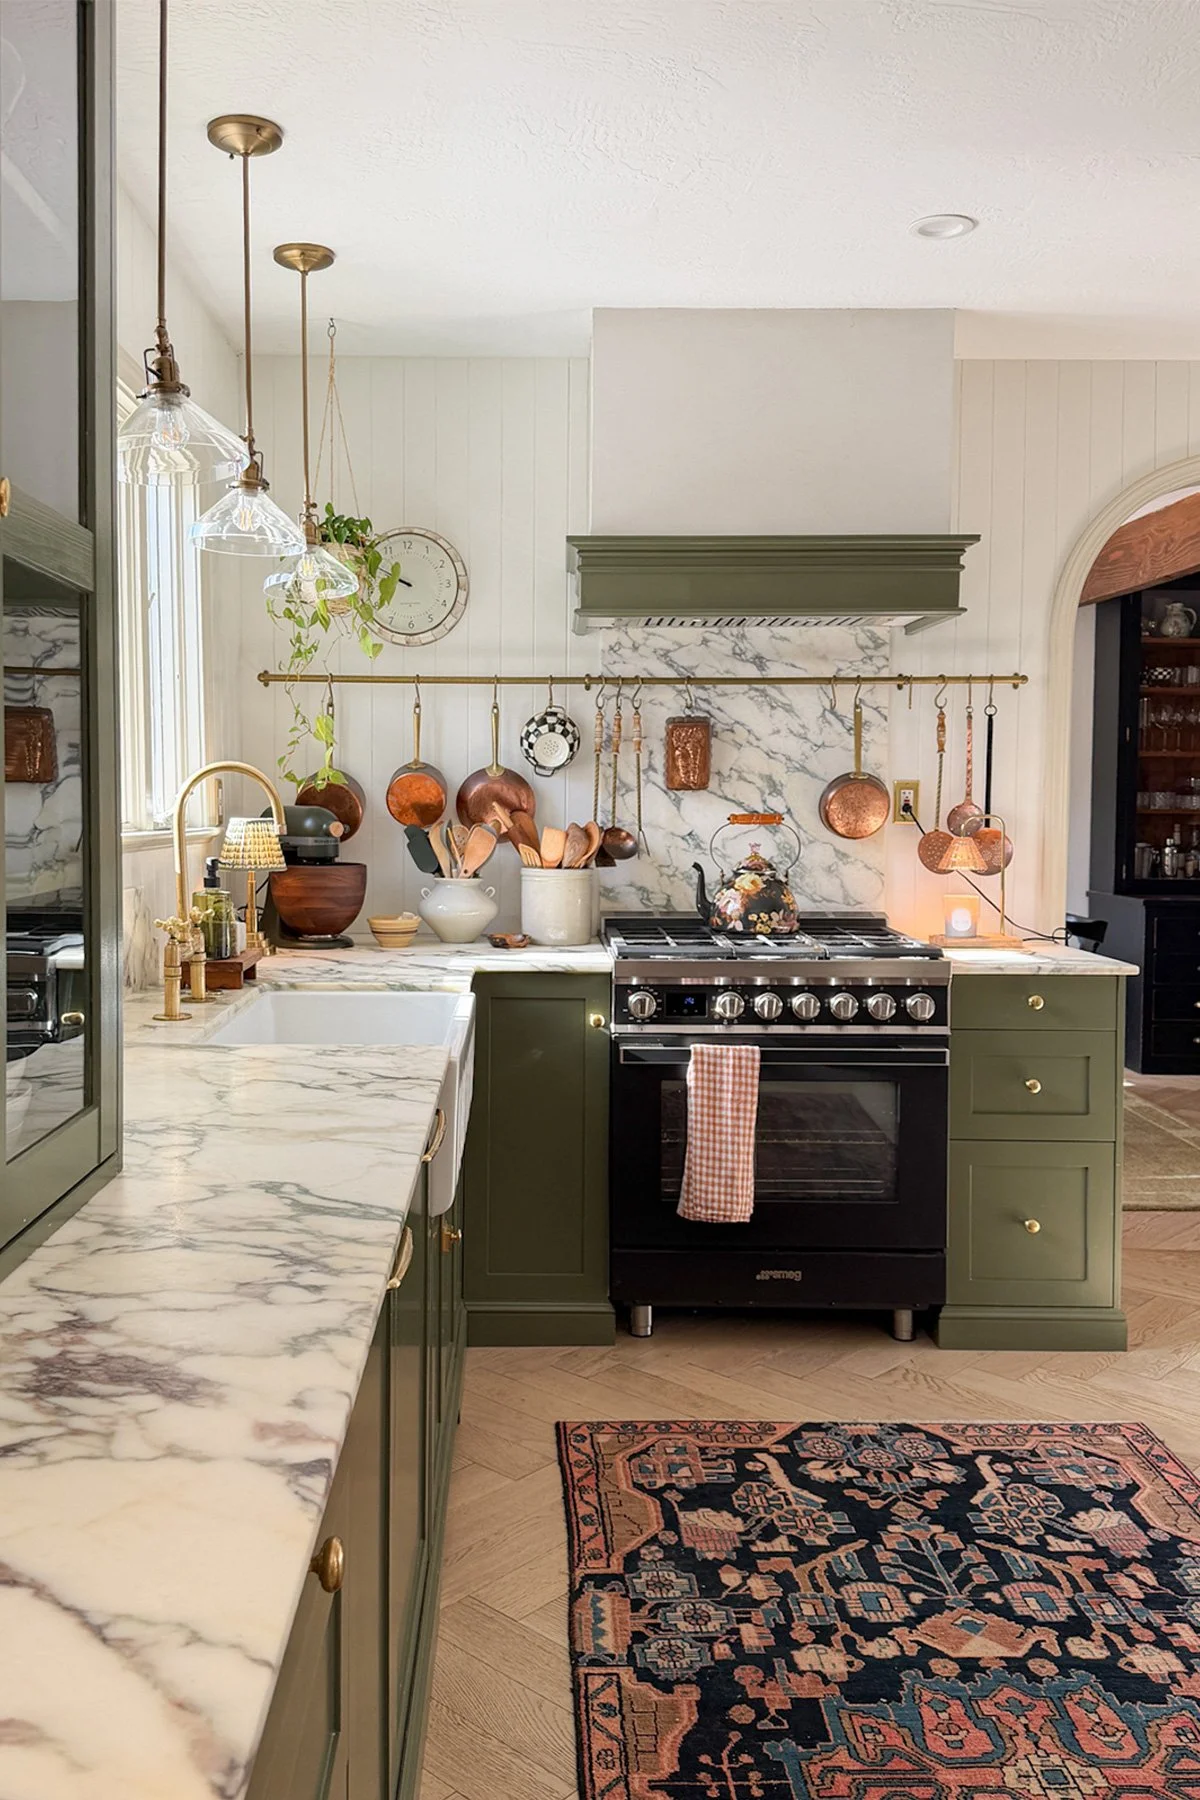
AFTER
Why Add Skirt Boards to Kitchen Cabinets?
I’ve always loved the look of traditional, furniture-inspired cabinetry. Those little architectural details that make cabinets feel more like a beautiful piece of furniture rather than something that came straight out of a box.
And while I love our IKEA kitchen, I wanted to give it a little more of that custom, built-in look.
Traditional kitchen cabinets typically have recessed toe kicks, which create a small gap at the bottom of the cabinets to accommodate your feet while standing at the counter.
Skirt boards, on the other hand, bring that decorative detail forward, creating a more finished, furniture-like appearance. It’s a subtle difference, but visually, I think it changes everything!
The best part is that we didn’t have to replace our cabinets or make any major modifications to achieve the look. Just a few pieces of trim, a little creativity, and finally finding the motivation to tackle a project I’d been thinking about for five years.
What We Used
For this project, we used:
Solid wood decorative baseboards
Our existing IKEA toe-kick boards
Wood screws
Small wood blocks for additional support
Finishing nails
Magnetic push latches for the dishwasher panel
Paint to match our existing cabinets (Sage Green Light by Sherwin-Williams)
Tools:
We intentionally chose solid wood baseboards instead of MDF because we wanted something durable that could better withstand everyday wear and tear in a busy kitchen.
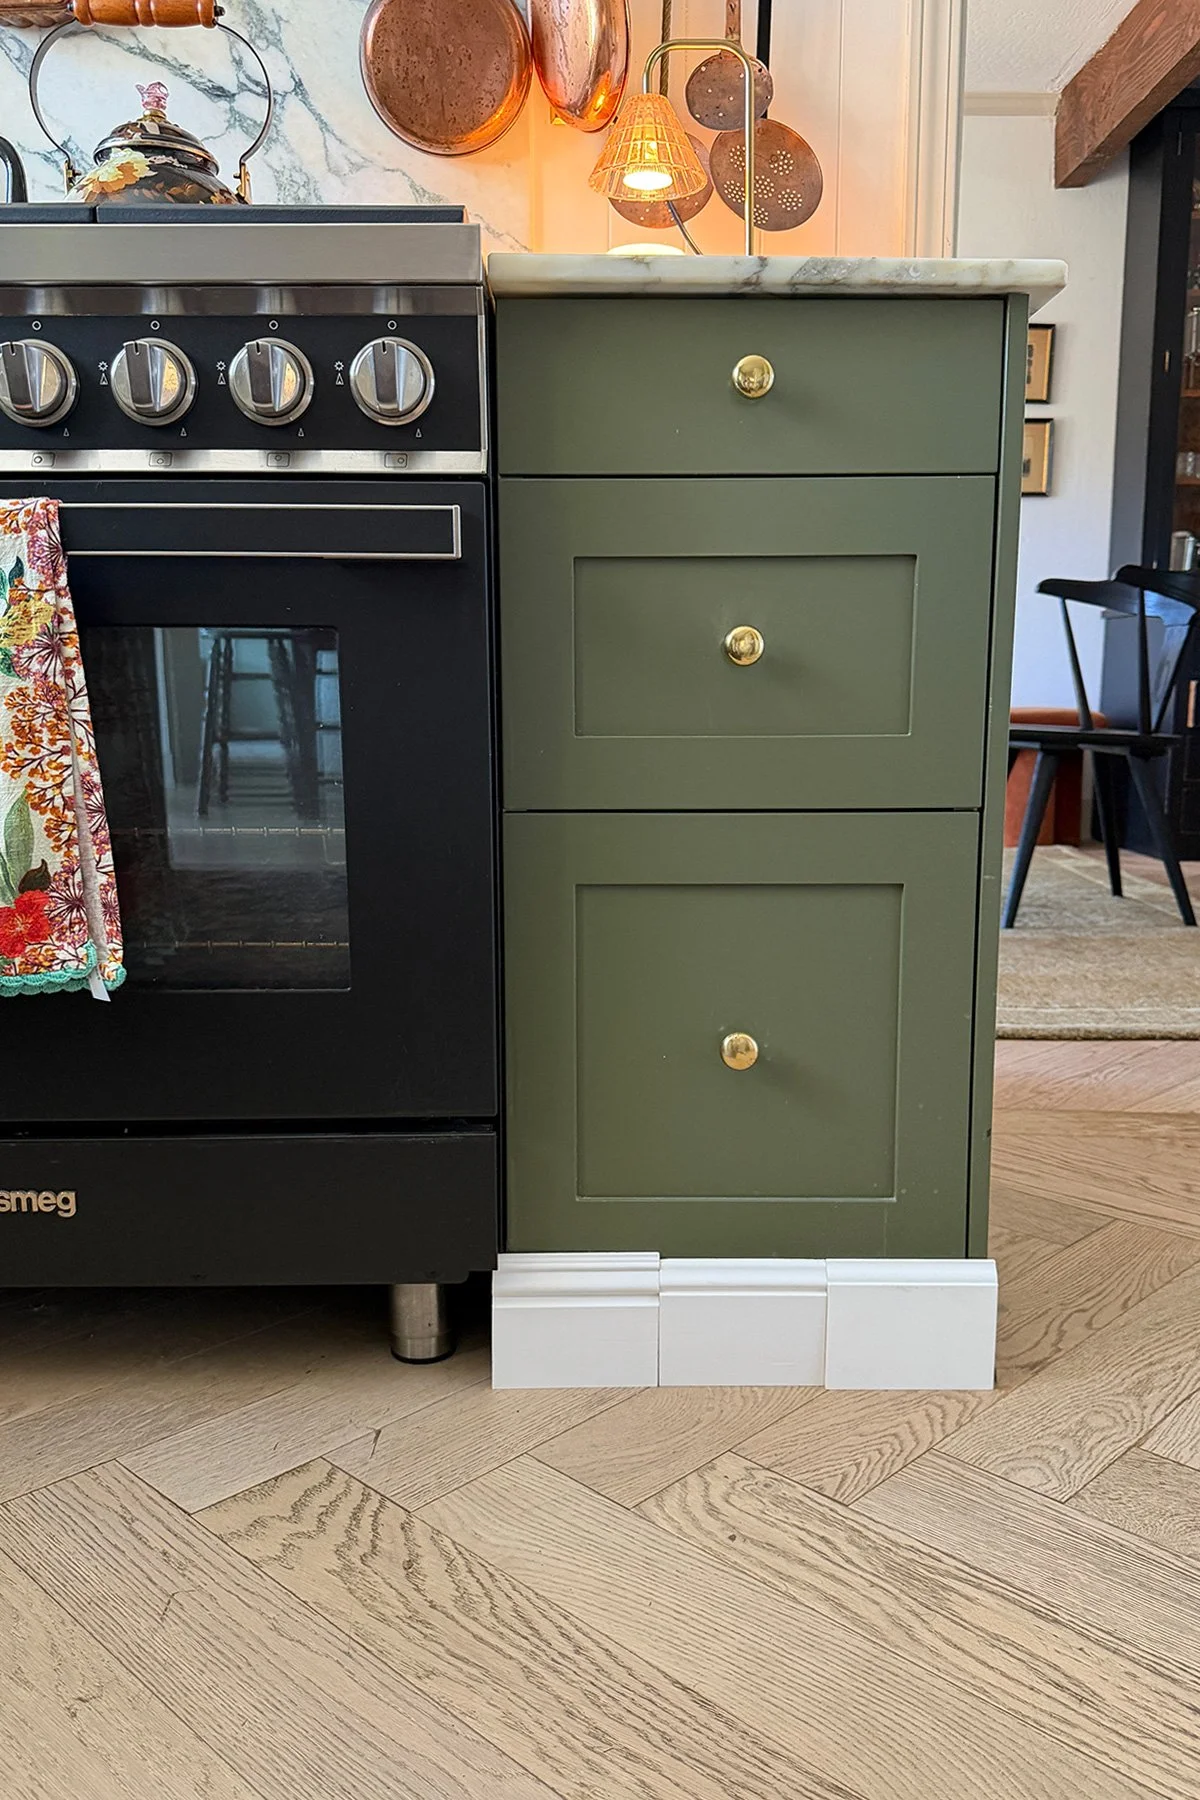
How We Installed Decorative Skirt Boards on Our IKEA Cabinets
Step 1: Creating a Base for the New Skirt Boards
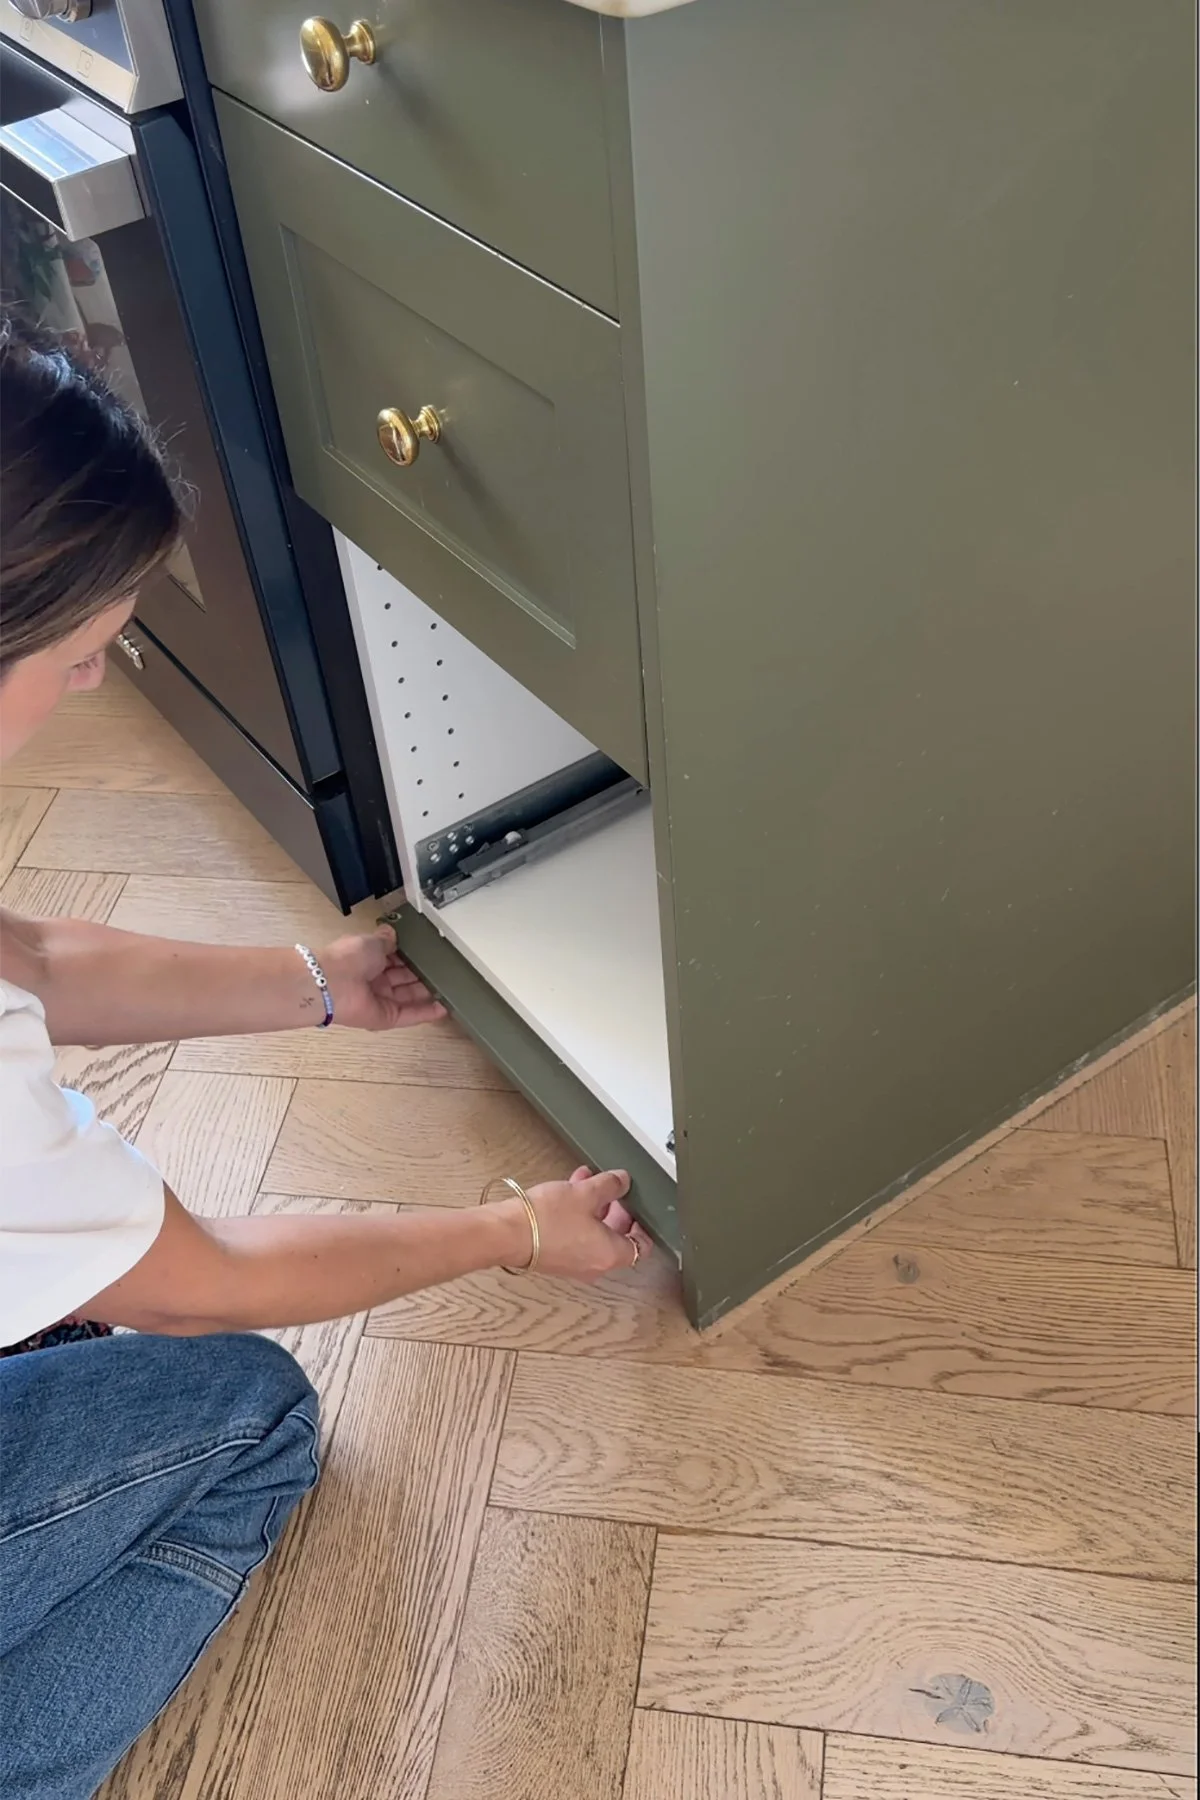
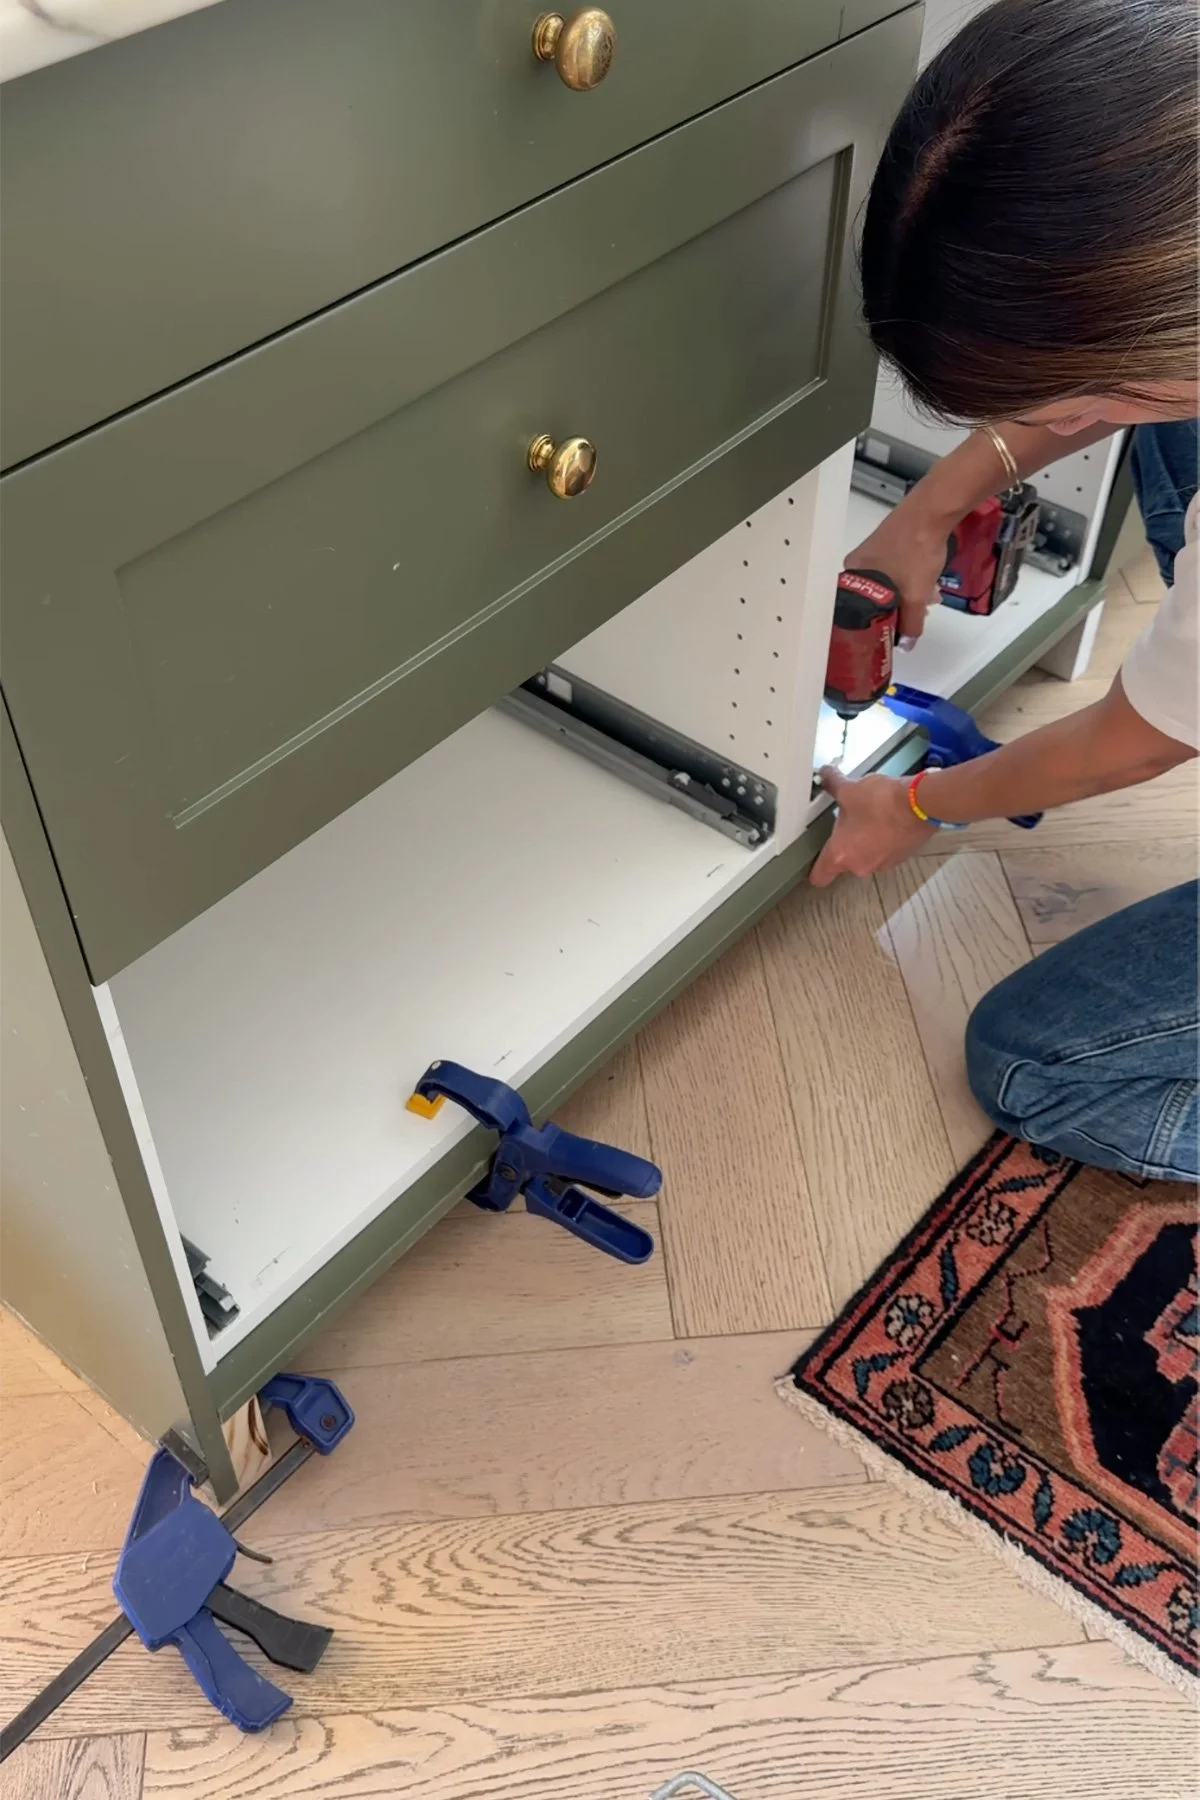
The first thing we needed to figure out was how to securely attach the new baseboards to our existing IKEA cabinets. Luckily, we still had the original toe-kick boards from when we renovated our kitchen. And here’s a funny little detail: we never actually secured them permanently because they were always supposed to be temporary! I guess five years counts as temporary around here.
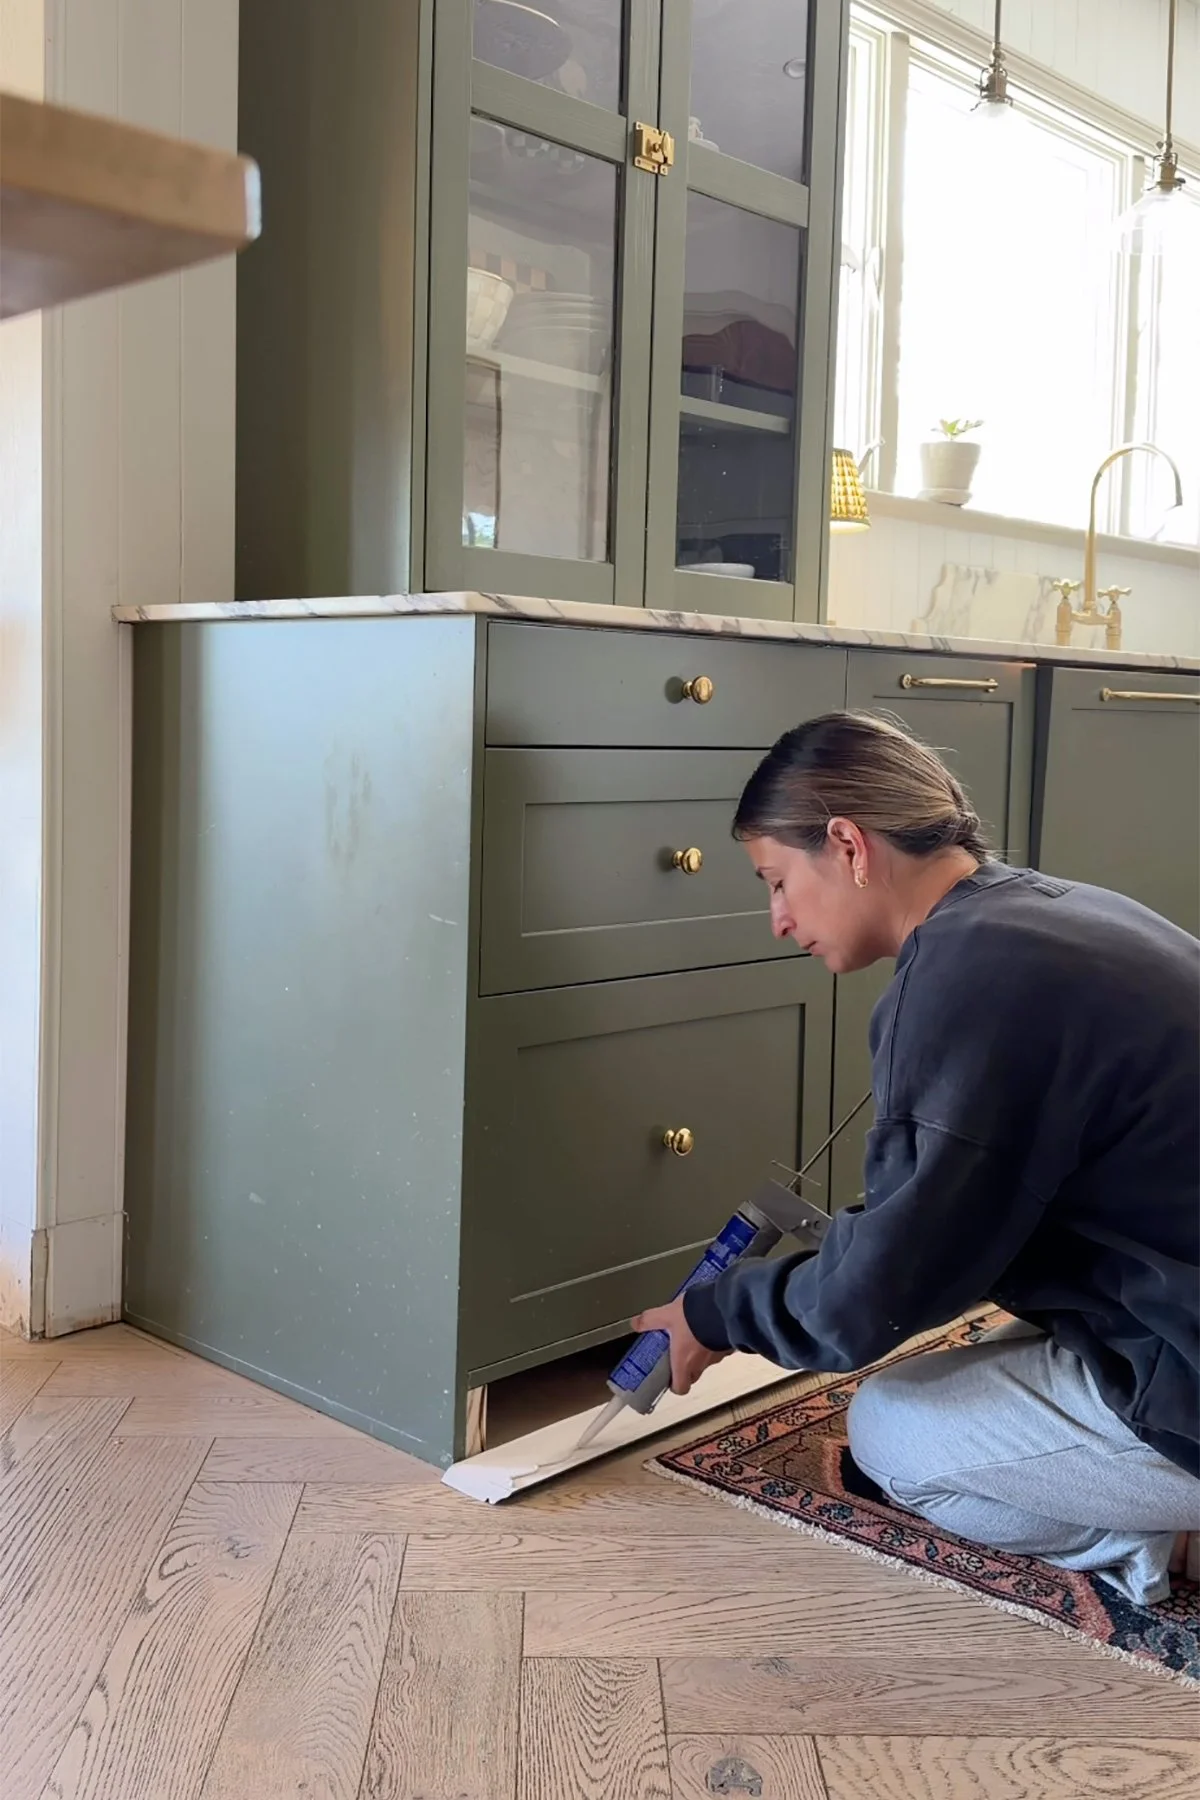
Instead of getting rid of them, we decided to reuse them to create a solid mounting surface for our new decorative baseboards. We positioned the existing toe-kick boards underneath the cabinet bases and secured them using construction adhesive and screws. This created a sturdy surface where we could attach the new trim. We also added a few small wood blocks in certain areas to provide additional support and give us more places to nail the baseboards securely. It was a relatively simple solution that worked perfectly for our existing cabinets.
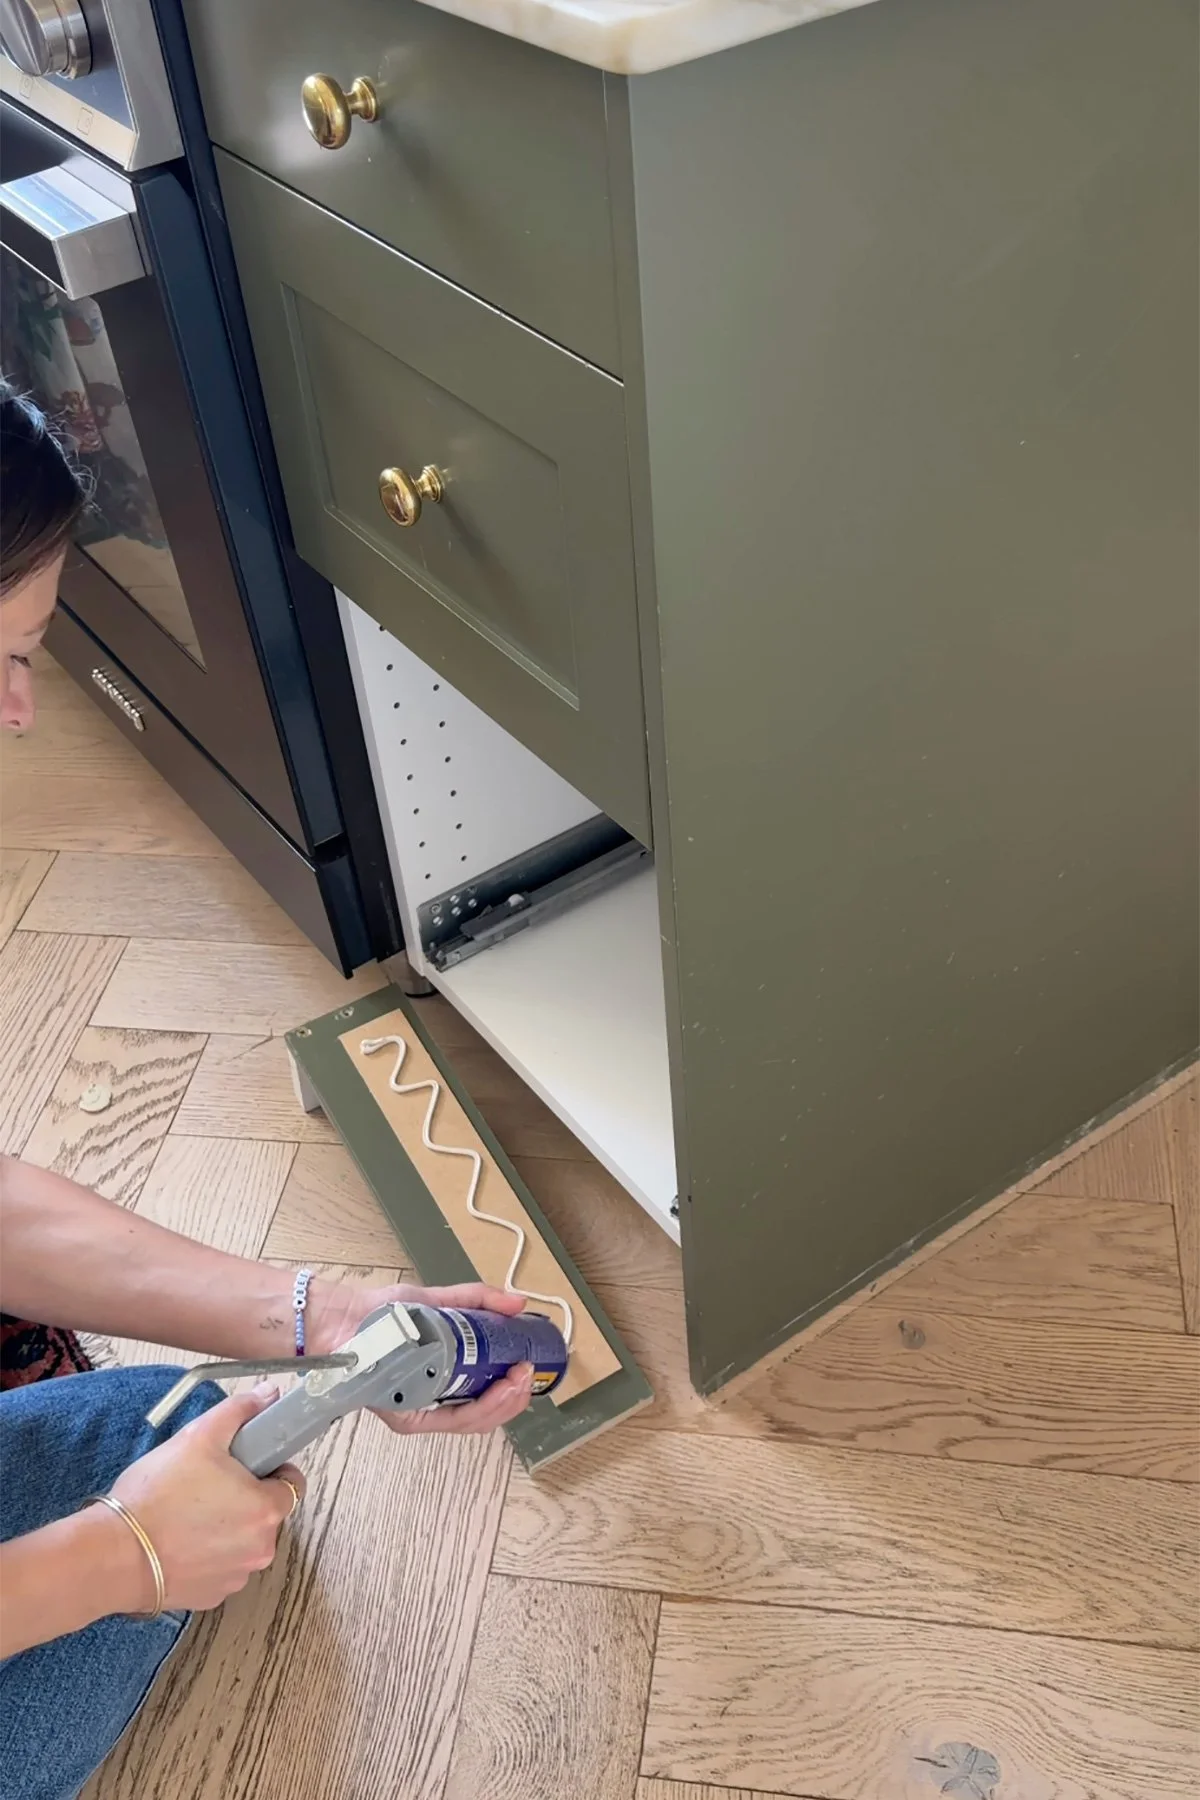
Step 2: Preparing and Painting the Decorative Baseboards
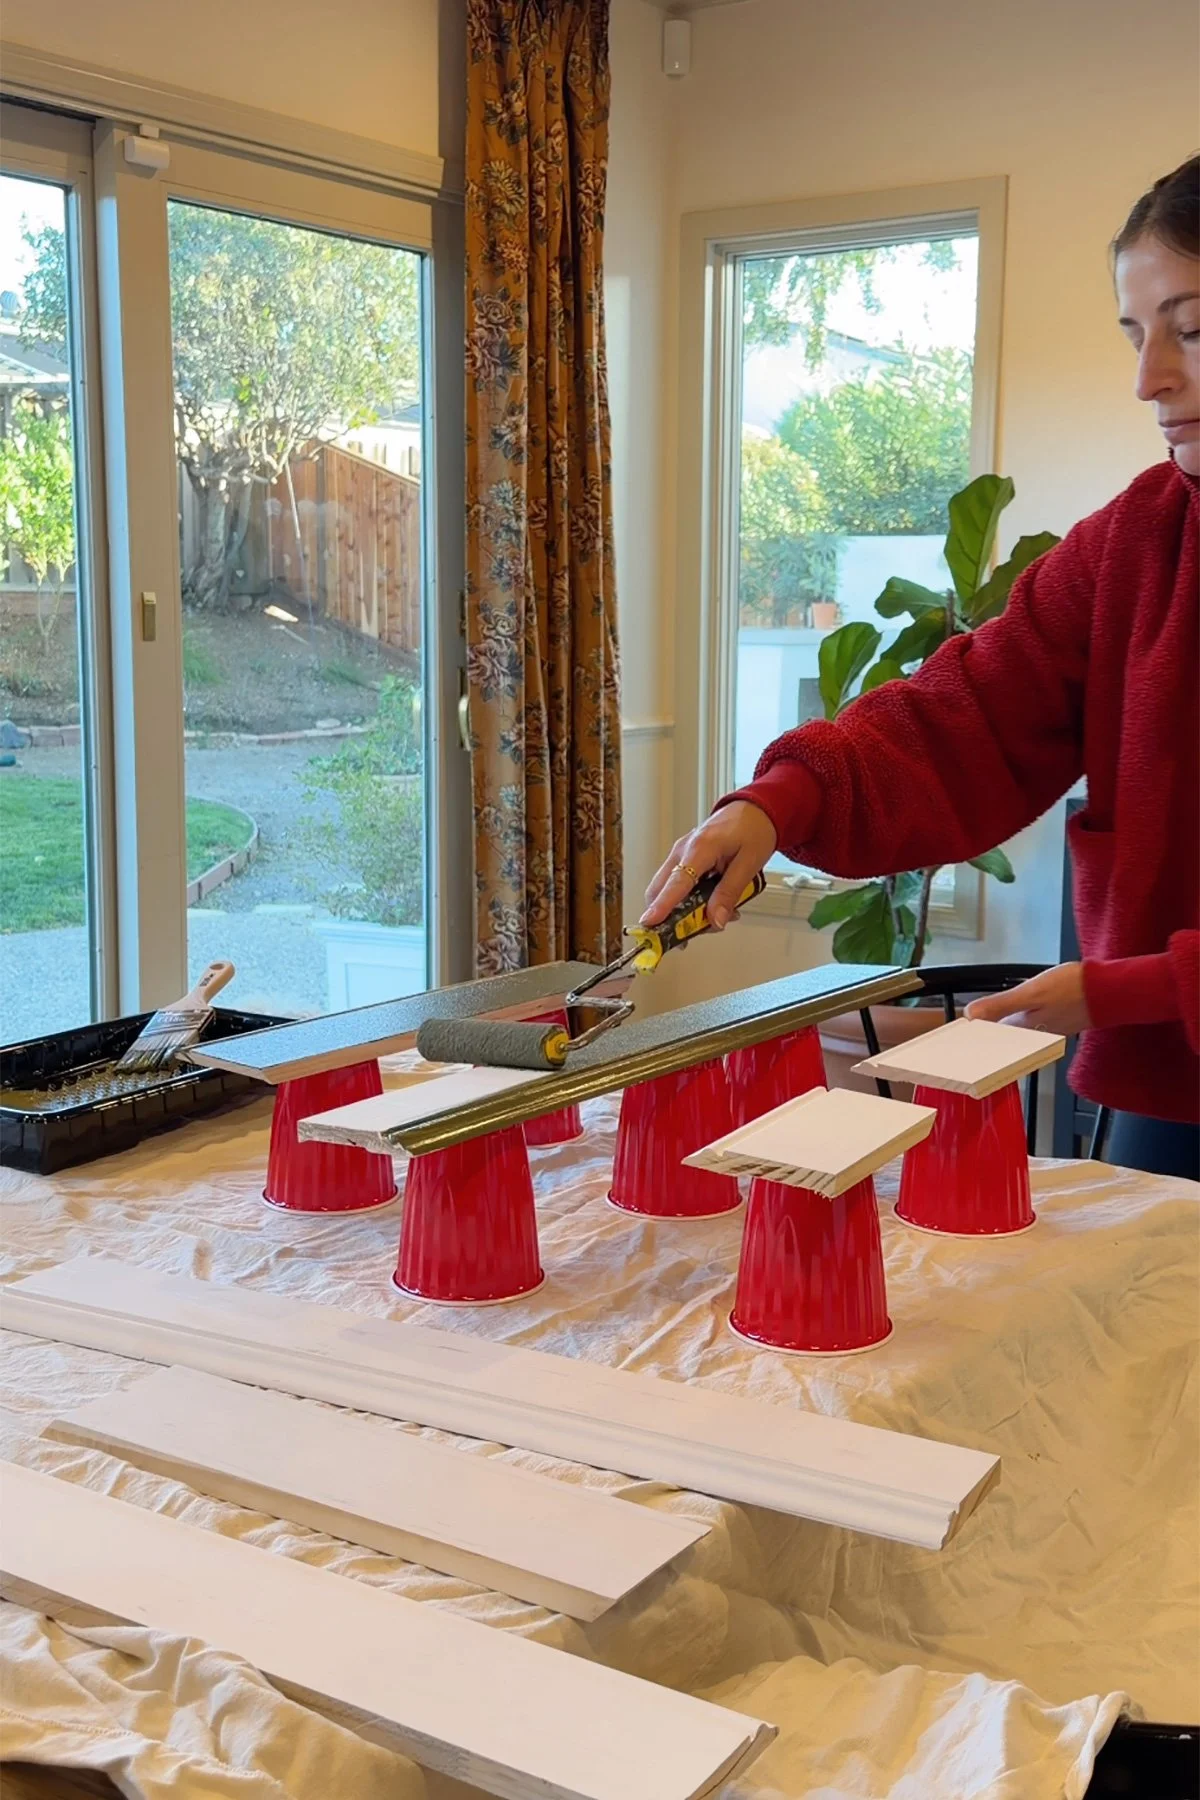
Once we had our mounting surfaces in place, it was time to prepare the new baseboards. I purchased enough solid wood baseboards to cover the perimeter of our kitchen cabinets. I chose a decorative profile that would give our cabinets a more traditional, furniture-inspired look without being too ornate.
One thing I’m so glad we did was paint all the boards before installing them! Trust me, this made the entire process so much easier. Painting all those little decorative details once they’re installed, especially so close to the floor, would have been a pain. By painting everything beforehand, we only had to worry about touching up a few nail holes once the installation was complete. If you’re planning a similar project, I highly recommend doing this step before attaching the boards to your cabinets.
Step 3: Installing the Skirt Boards
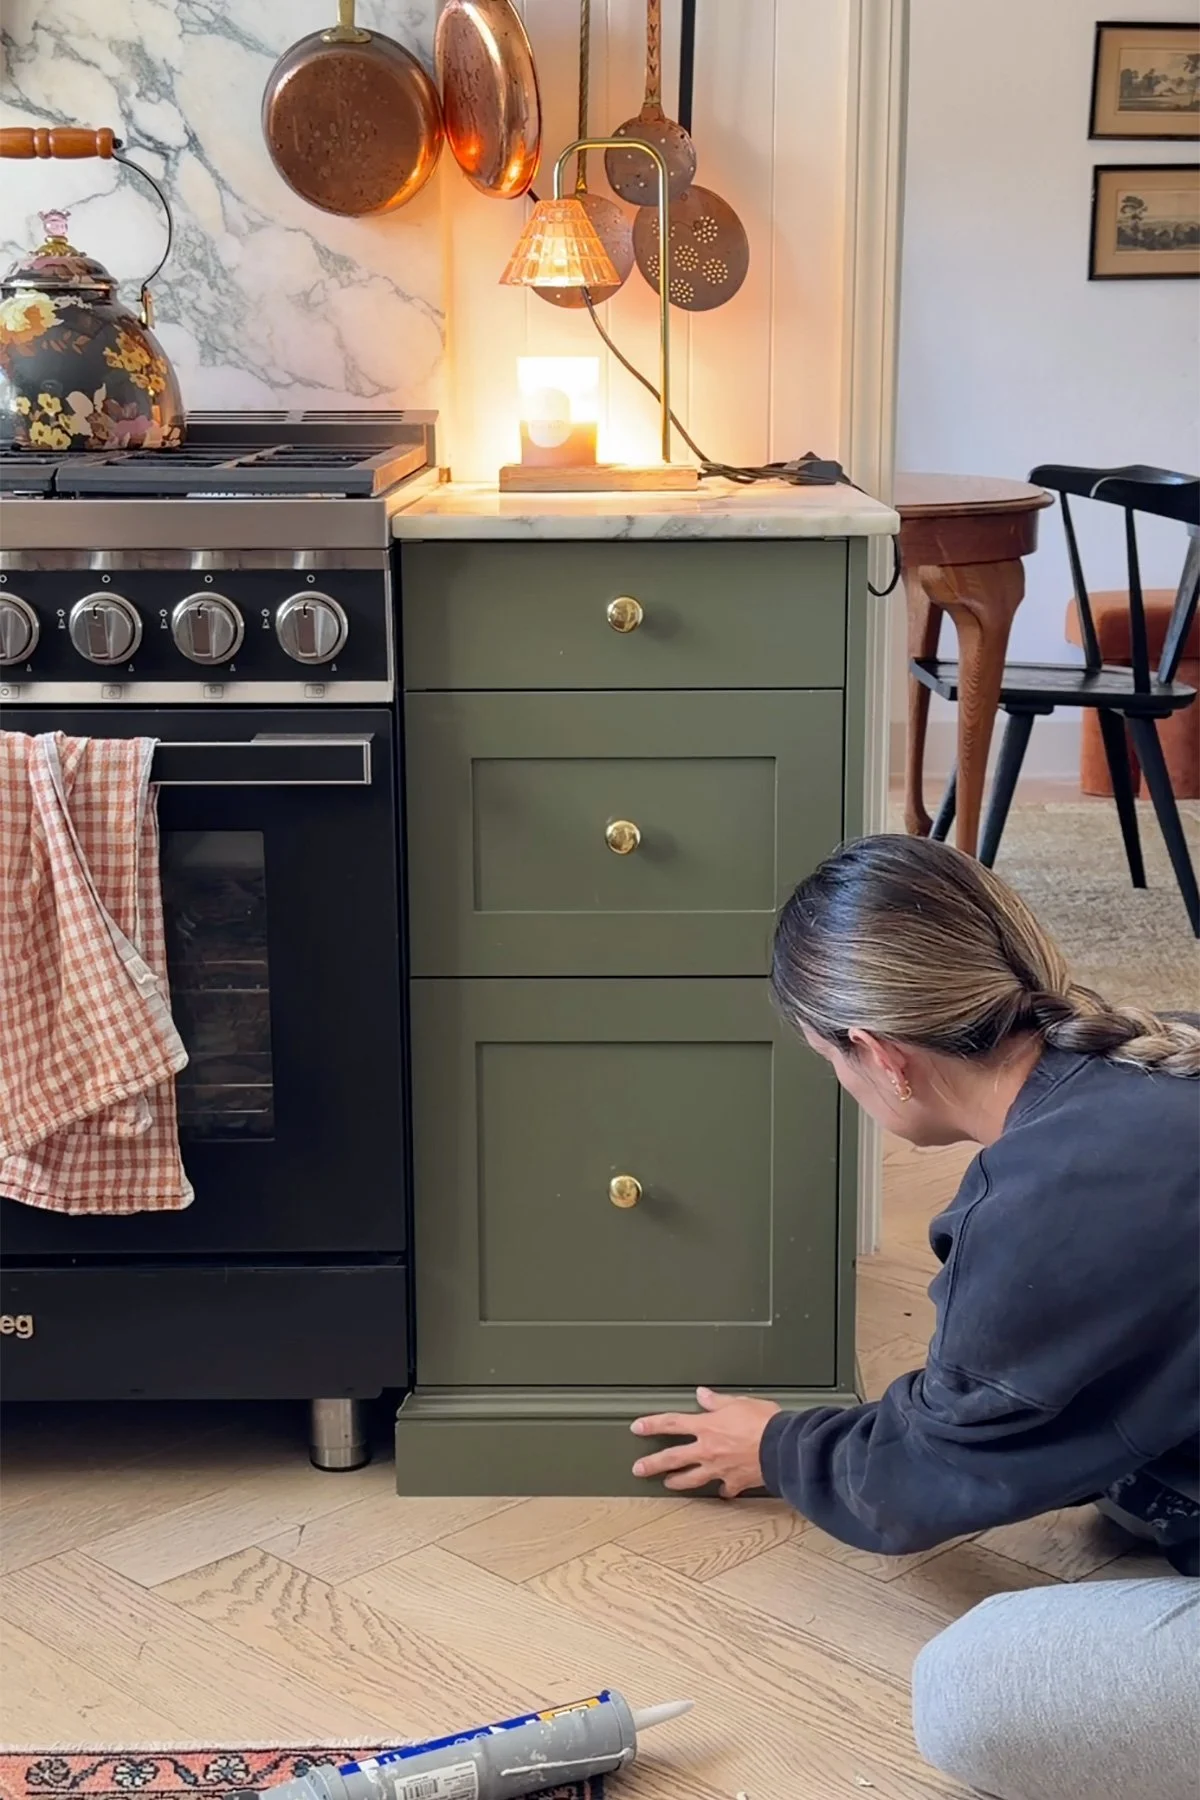
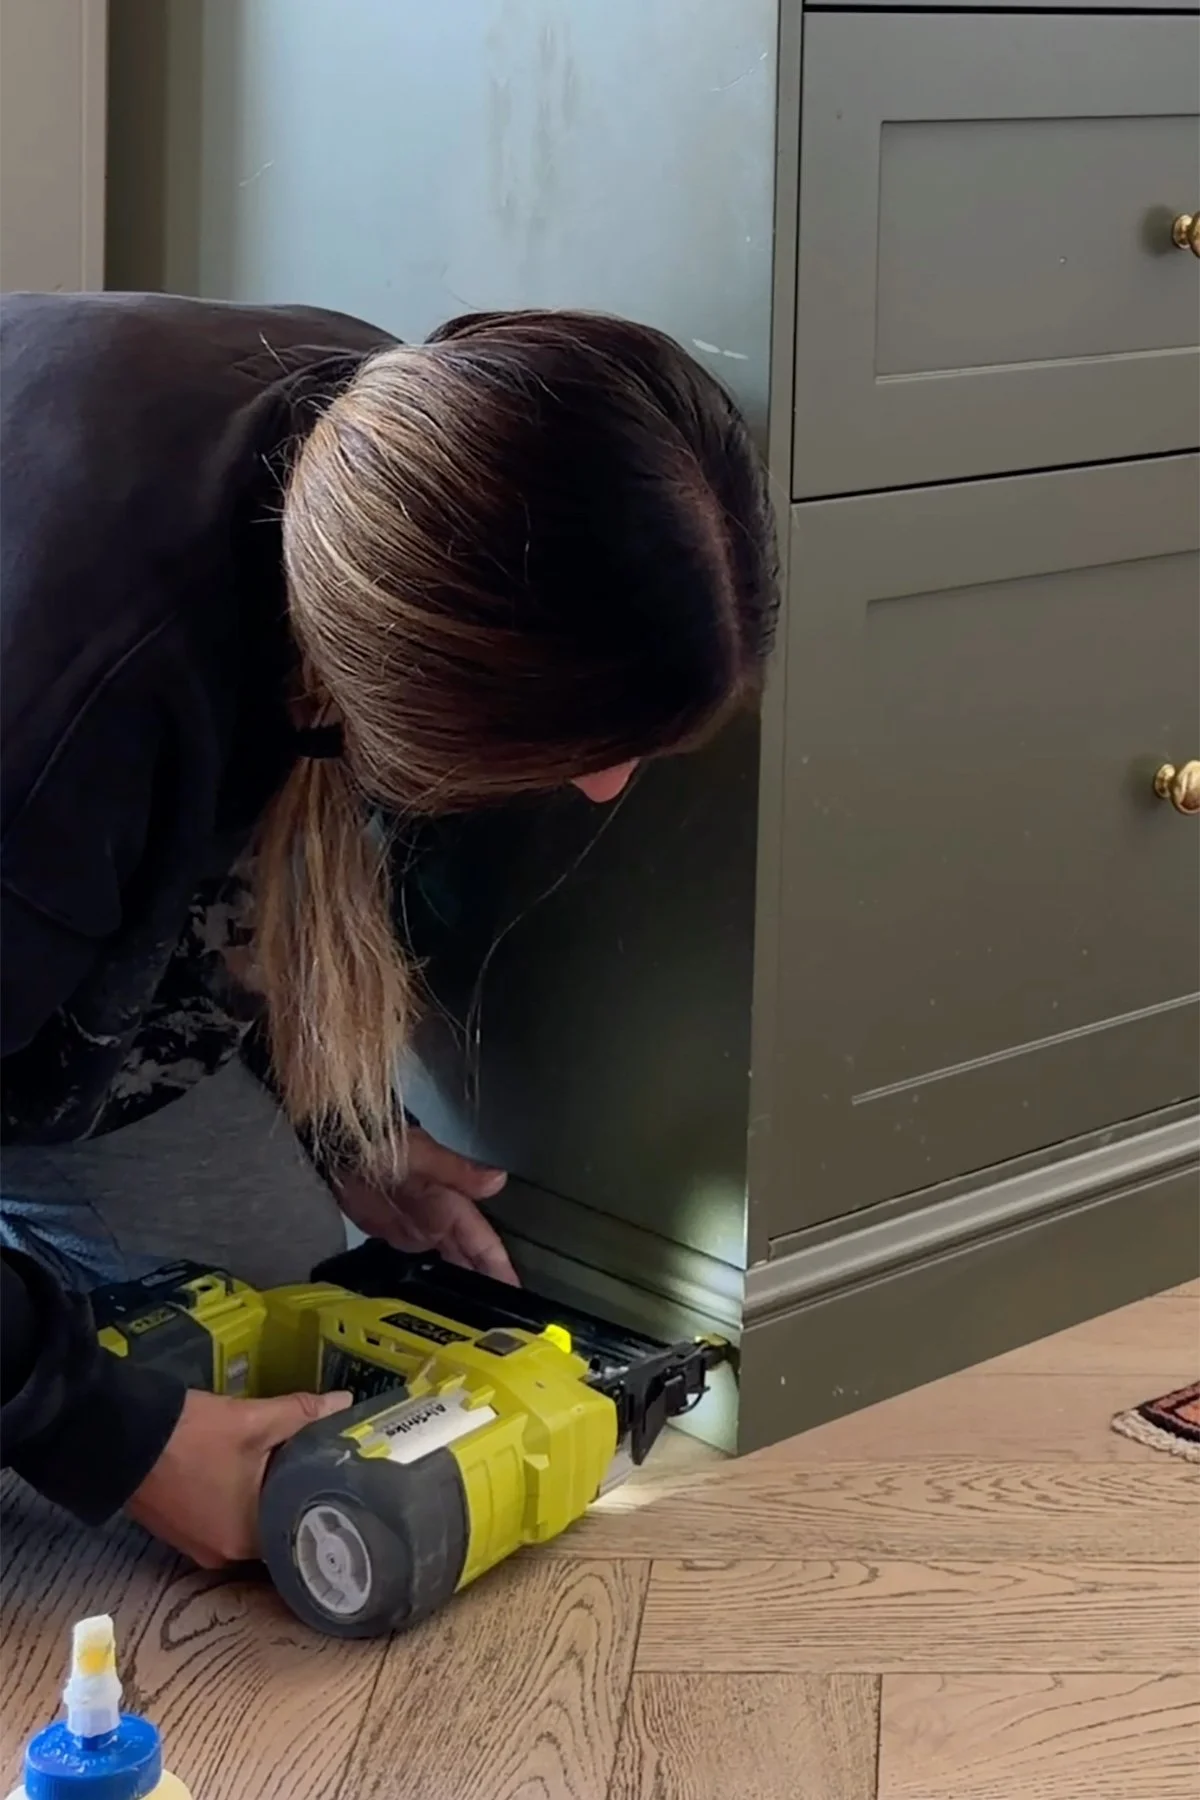
With our baseboards painted and ready to go, we started measuring, cutting, and installing them along the perimeter of our cabinets. To attach them, we used a combination of construction adhesive and a few finishing nails. The construction adhesive provides the main bond, while the finishing nails helped hold the boards securely in place as the adhesive cured. We didn’t need to use a ton of nails, which also meant fewer holes to fill and touch up afterward.
We worked our way around the kitchen, making sure the boards were properly aligned and the corners fit together neatly. And honestly, seeing those first few pieces installed was so satisfying! The cabinets immediately started looking more like the furniture-style cabinetry I had envisioned when we first renovated our kitchen.
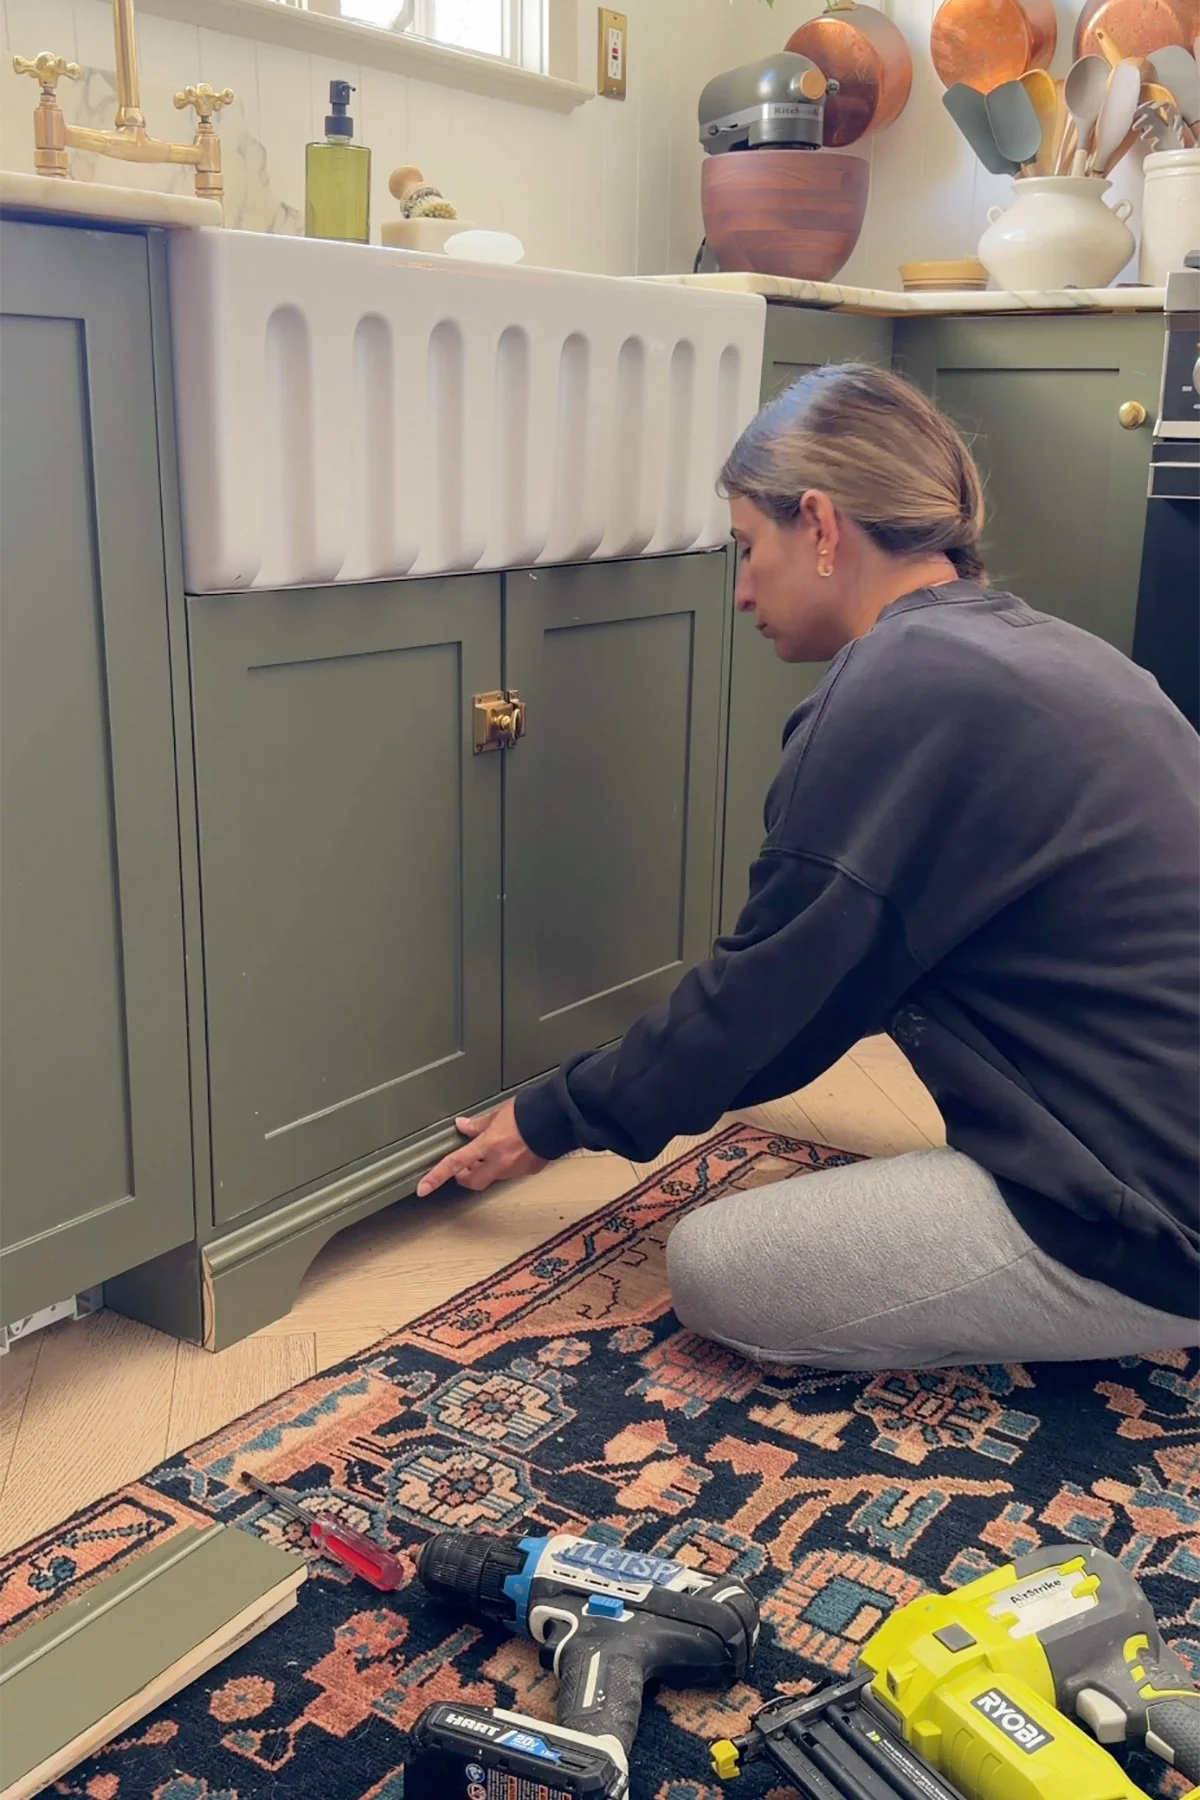
Step 4: Adding a Curved Detail Under the Kitchen Sink
This might be my favorite part of the entire project.
While I loved the idea of having skirt boards along the bottom of our cabinets, we decided that leaving a little extra toe space underneath the kitchen sink would be more practical. After all, it’s one of the busiest areas in our kitchen, and we spend quite a bit of time standing there. But instead of leaving a standard rectangular opening, I wanted to make it feel intentional. So we designed a curved skirt board for that section.
And I think that little detail elevated the entire project! It adds just enough softness and character while still giving us the extra room we wanted for our feet. It’s one of those small details that might not immediately catch your eye, but once you notice it, it makes the whole kitchen feel a little more special.
Step 5: Making the Skirt Boards Work Around Our Integrated Dishwasher
Now, this was the part that had intimidated me for years!
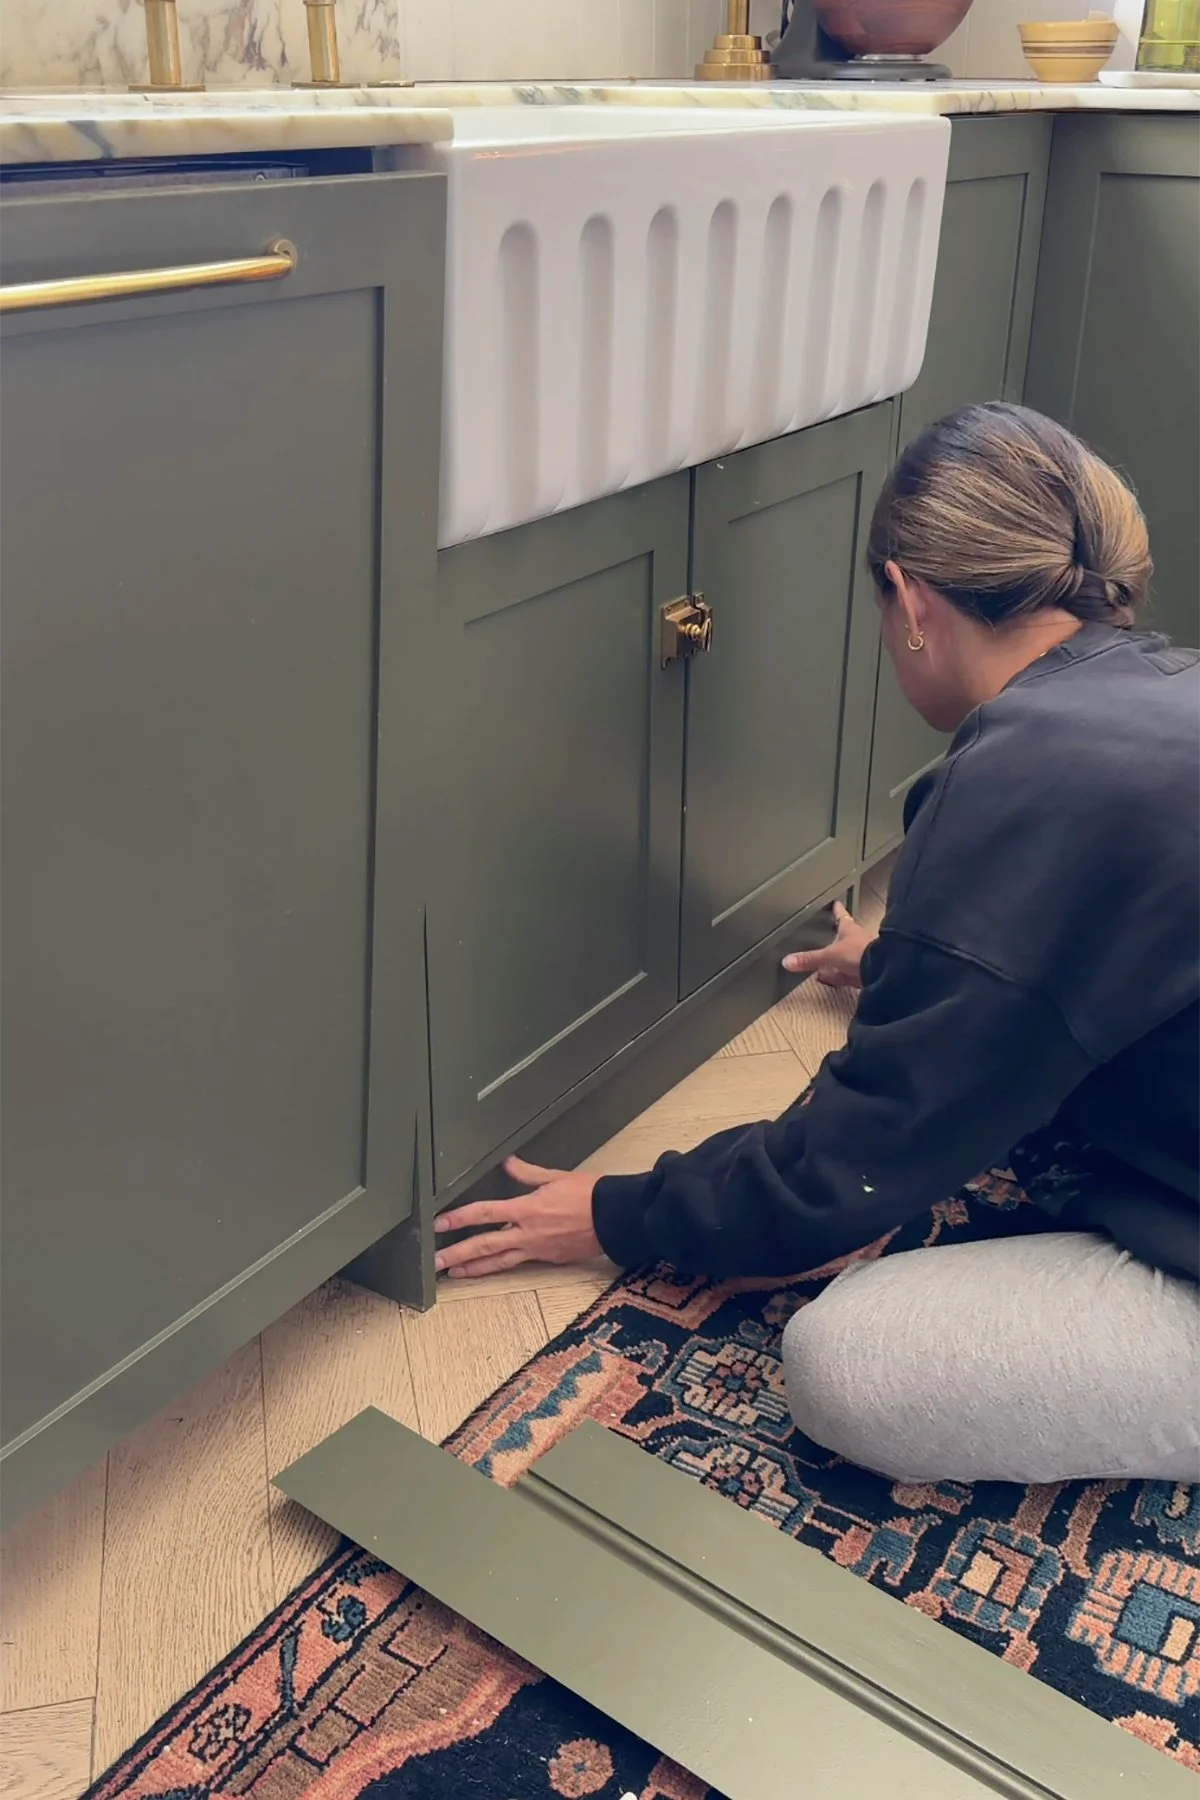
We have an integrated dishwasher with a cabinet front, and figuring out how to install a decorative skirt board underneath it without interfering with the door was probably the biggest reason I kept postponing this project. After finding some inspiration on Instagram, we came up with a solution that worked perfectly!
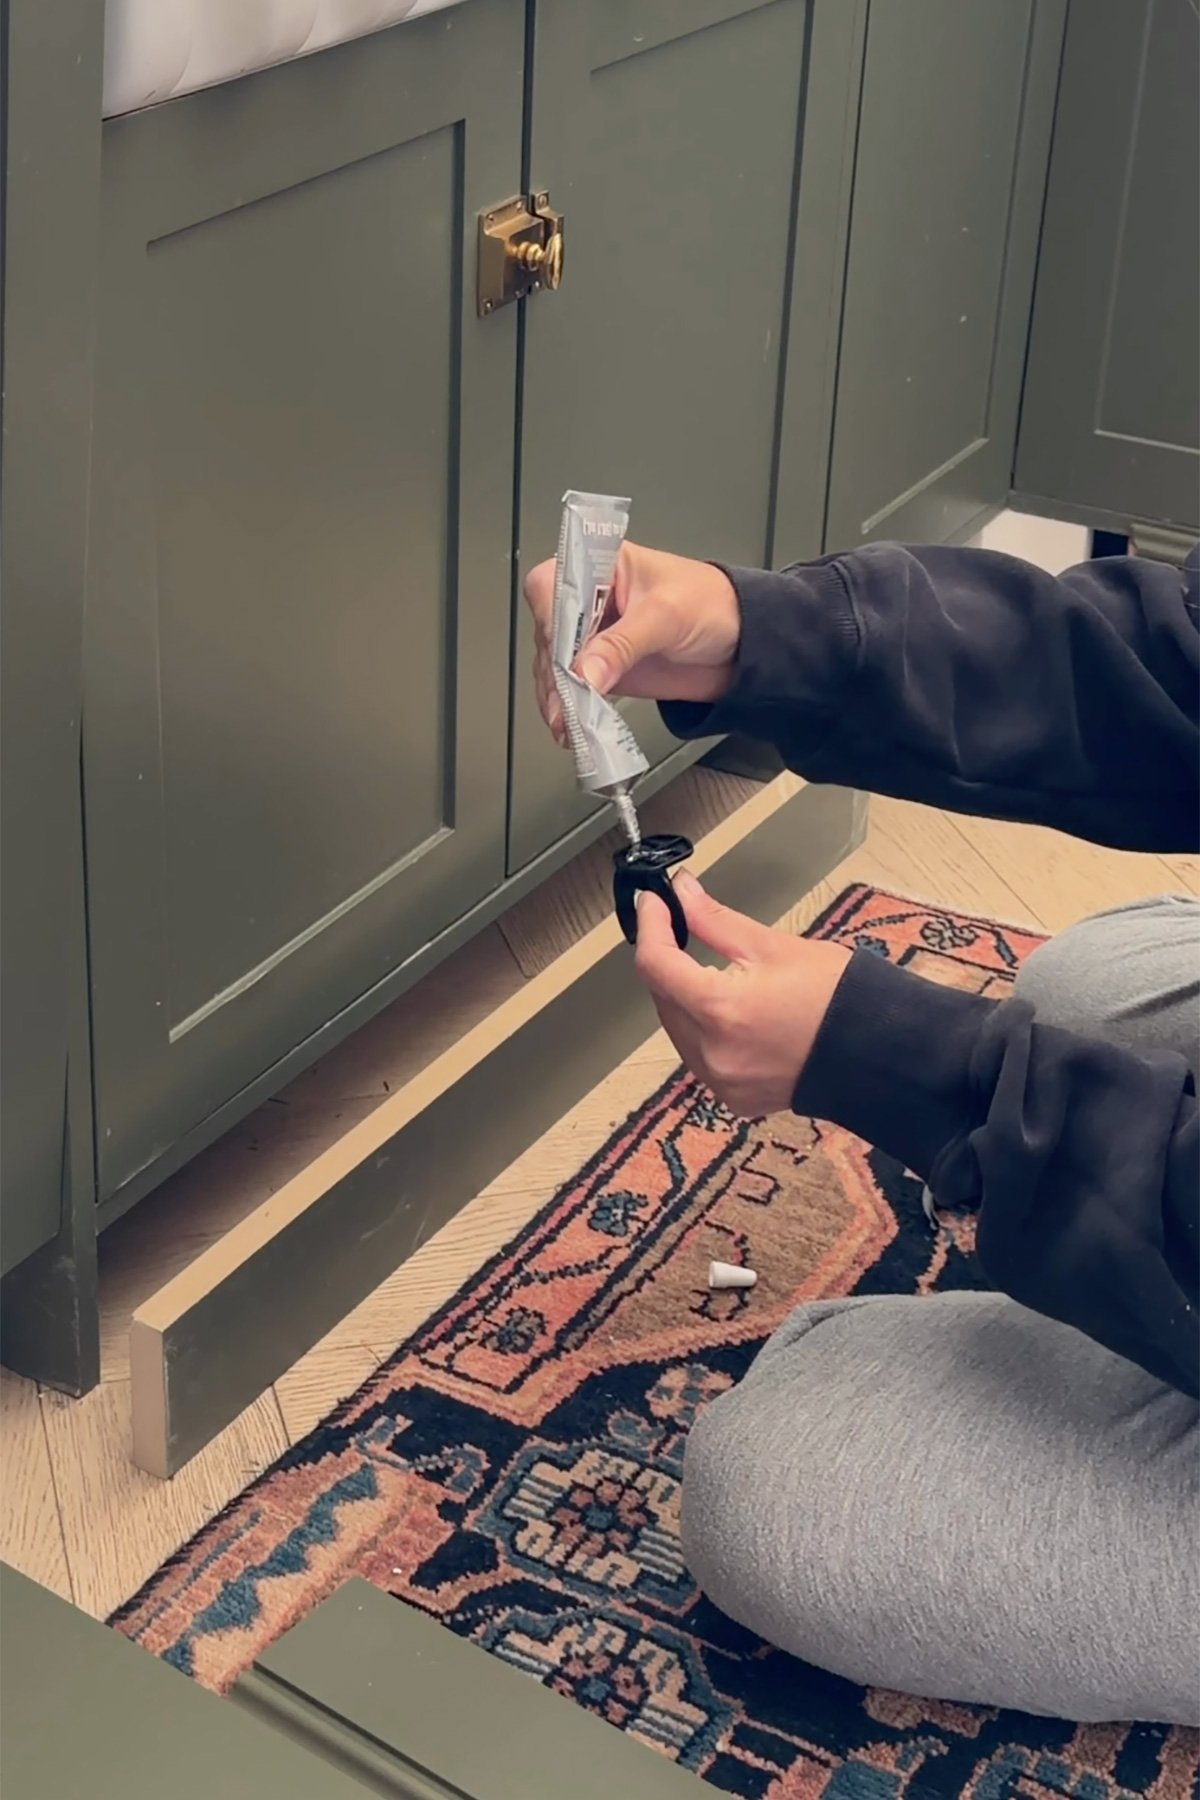
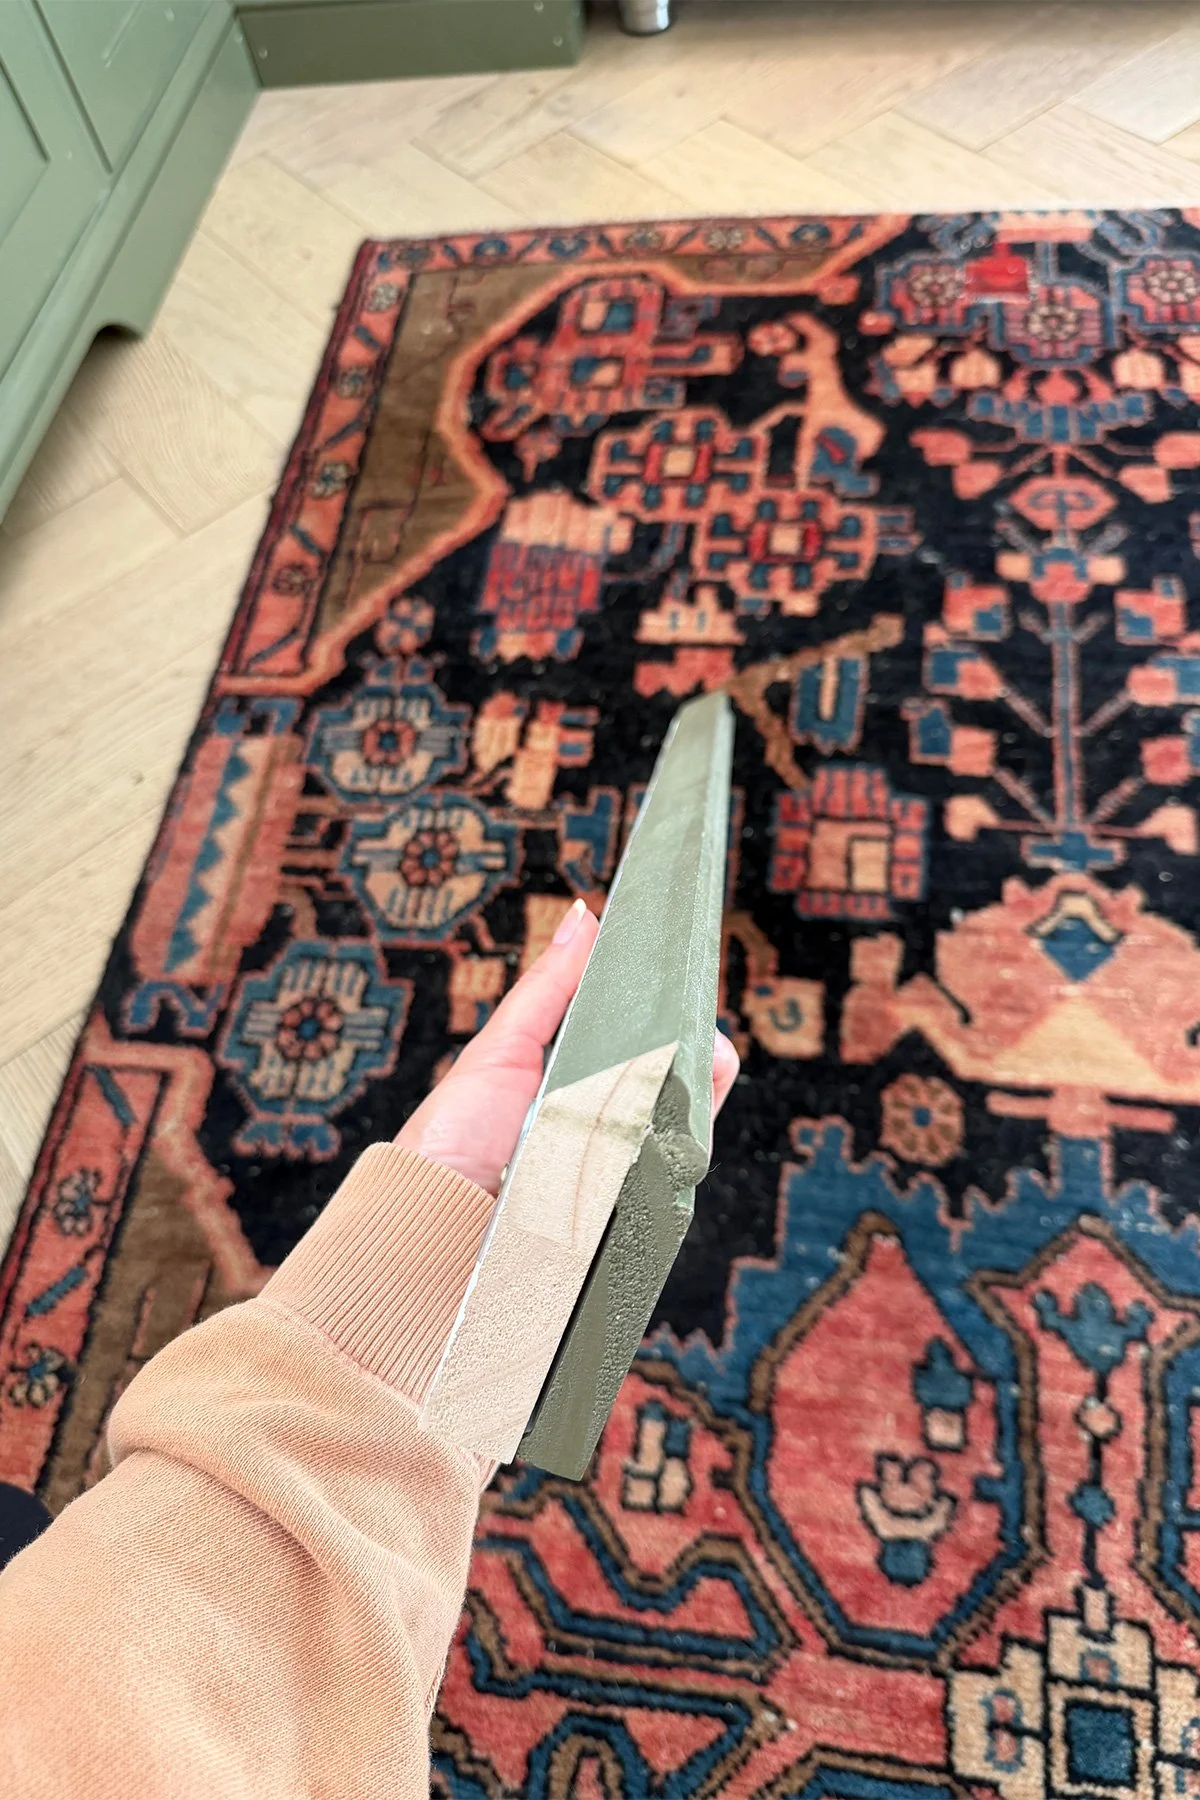
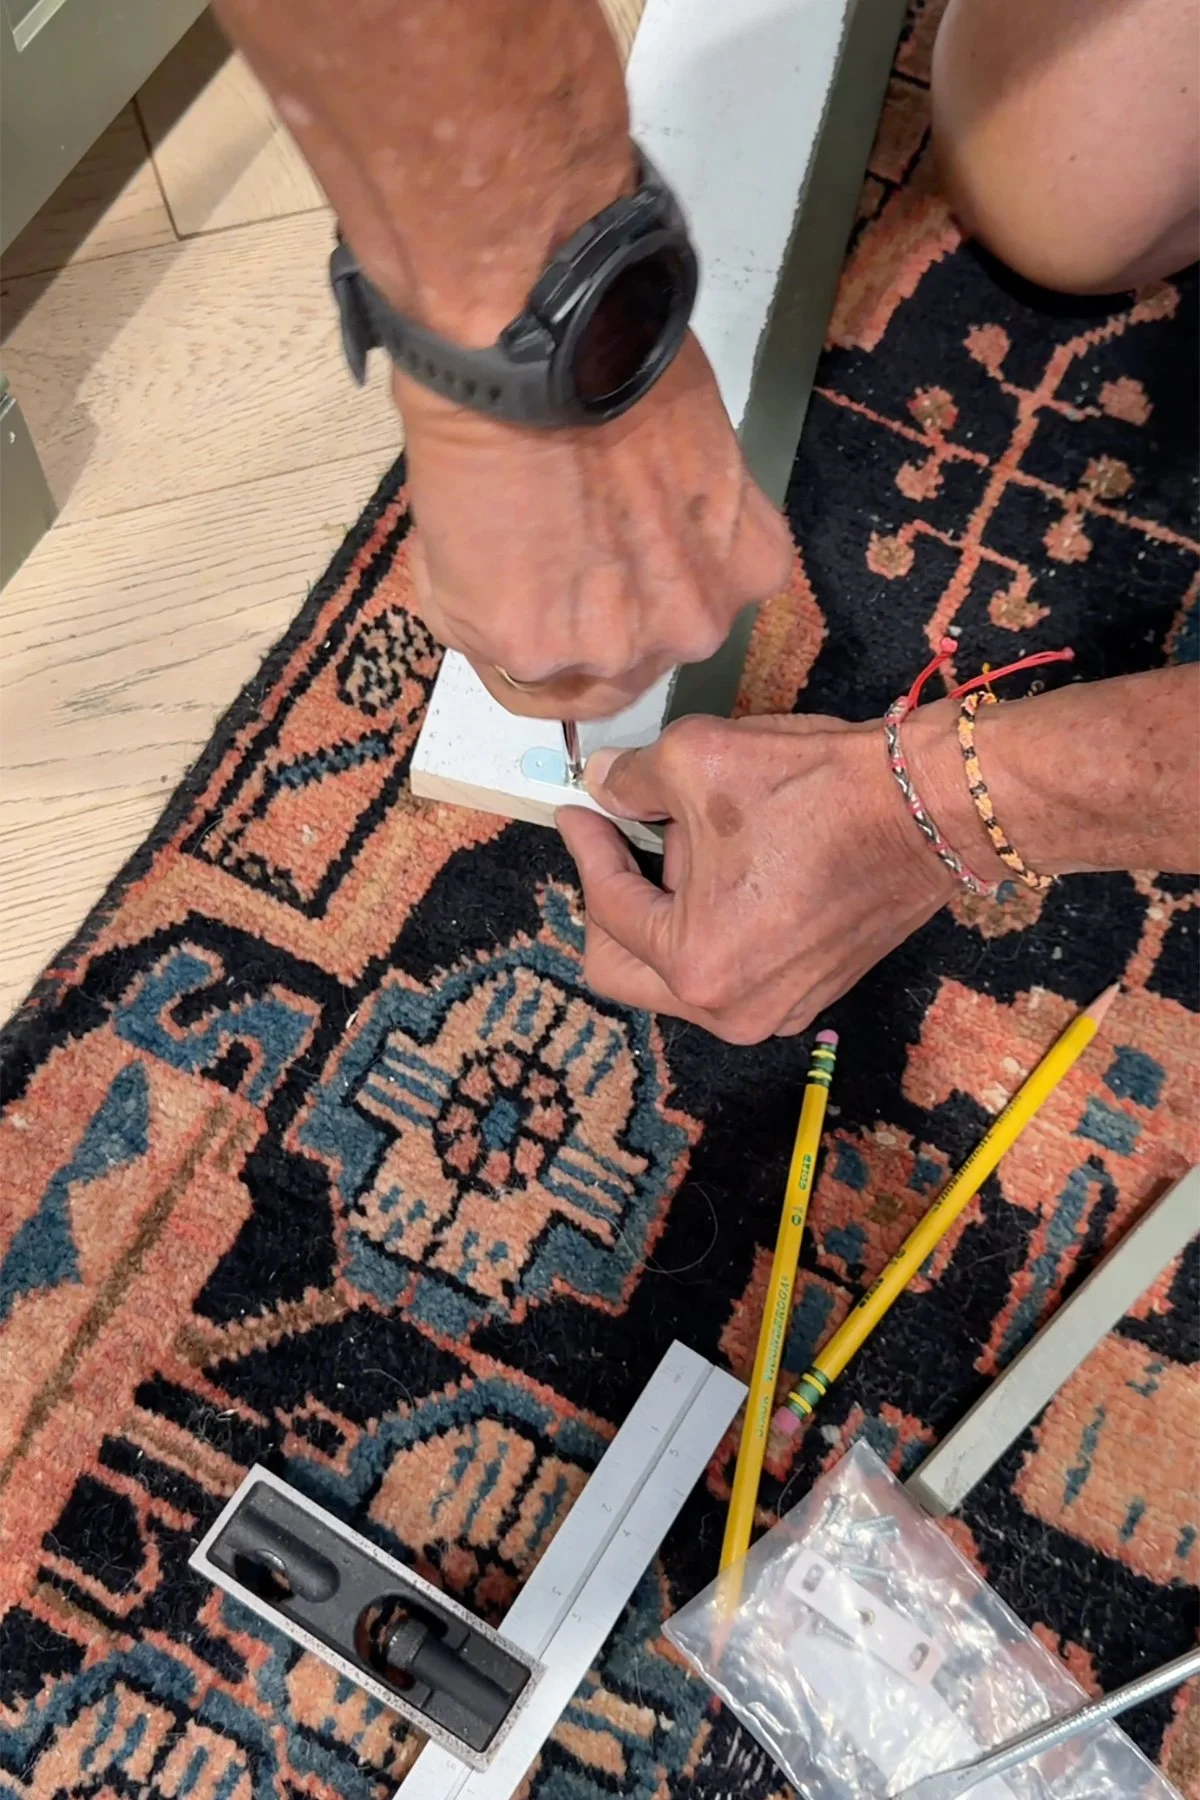
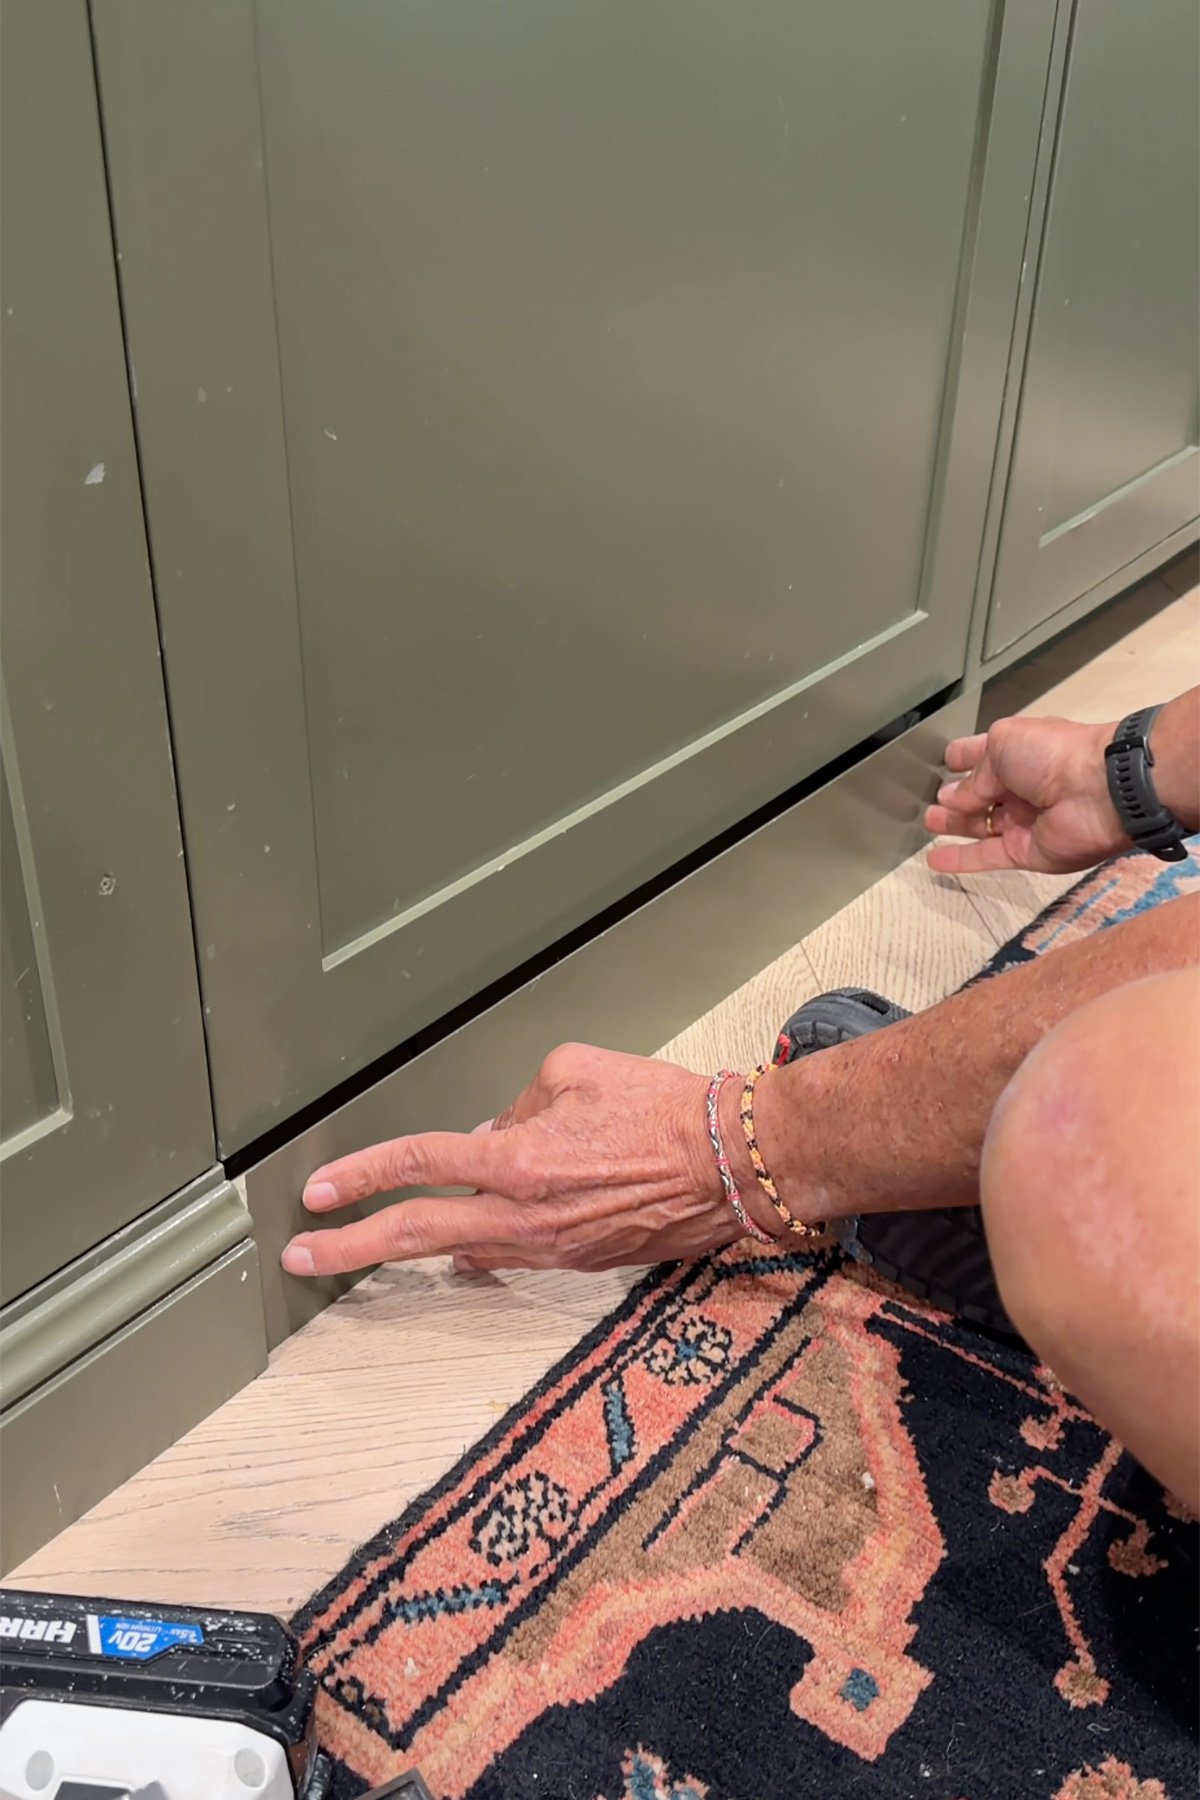
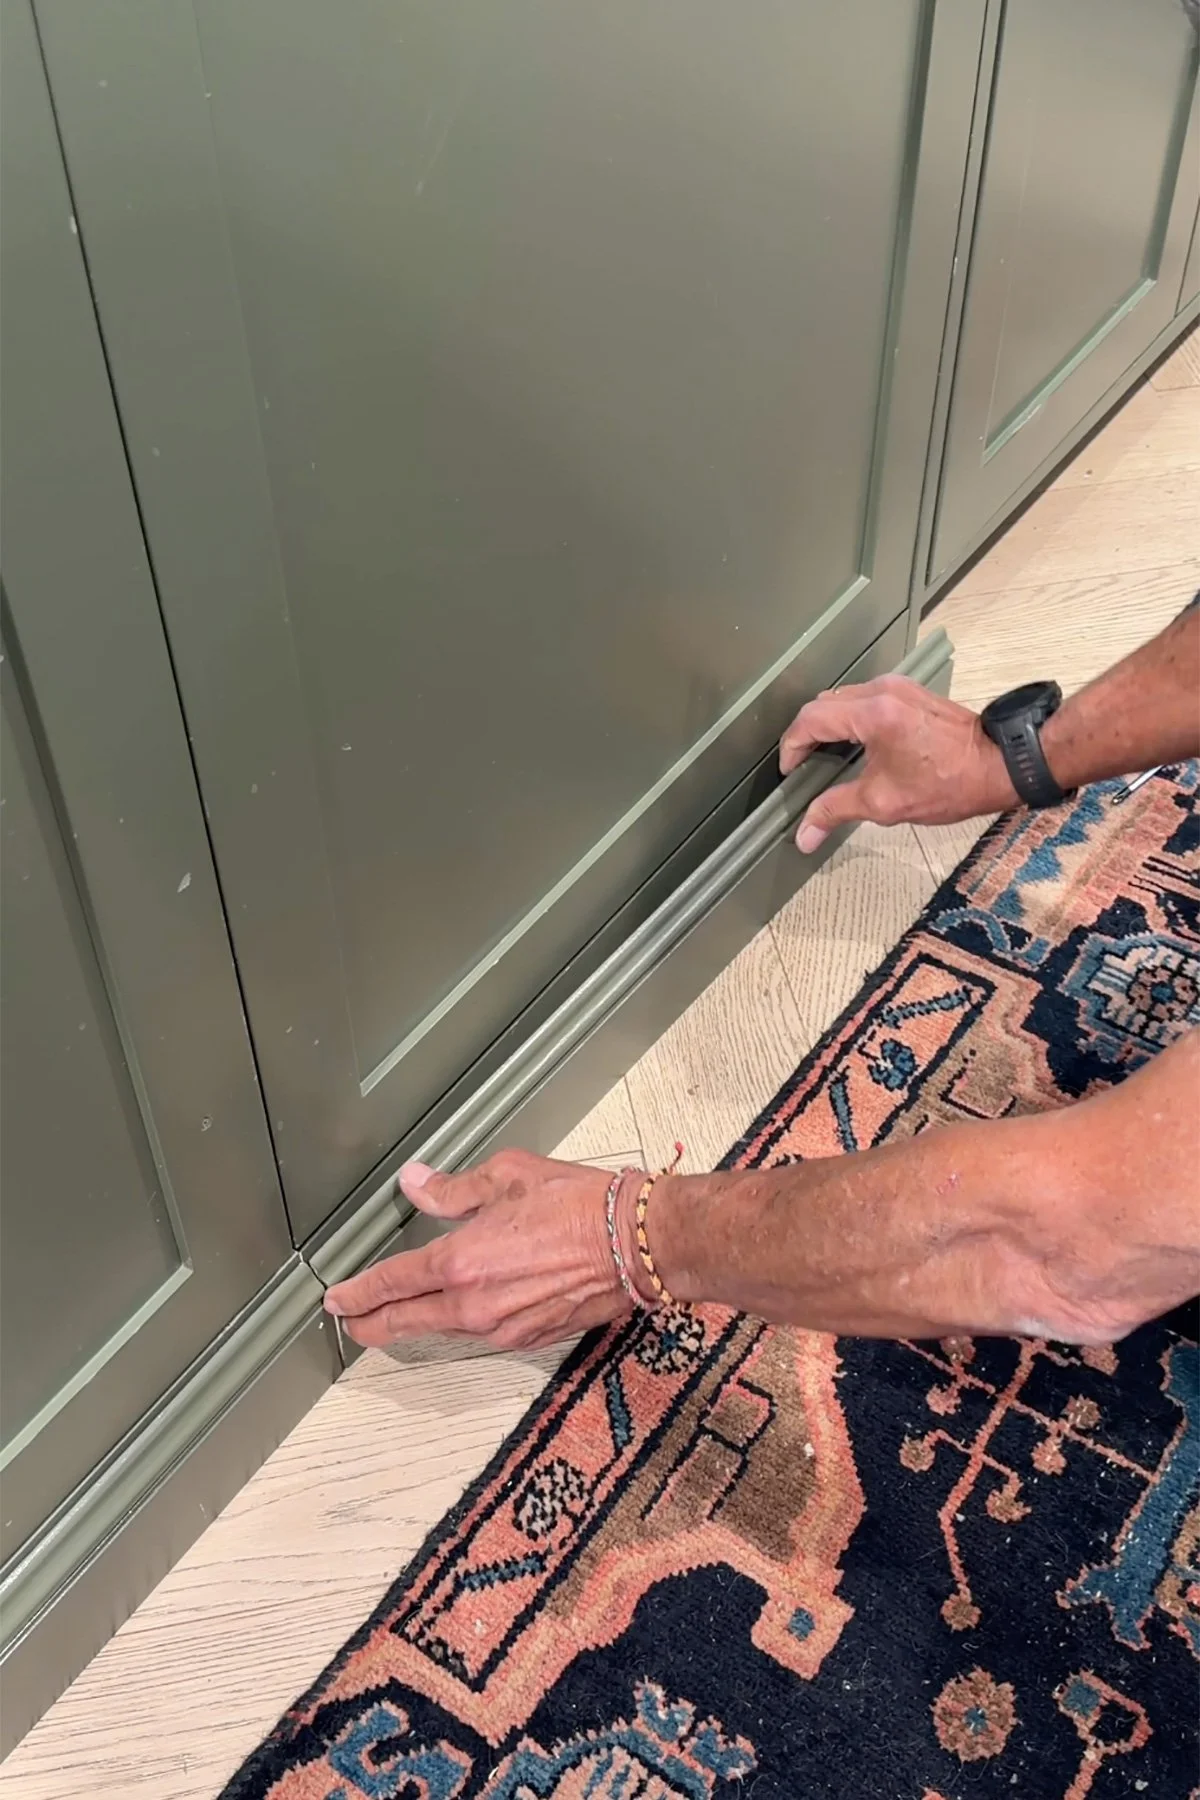
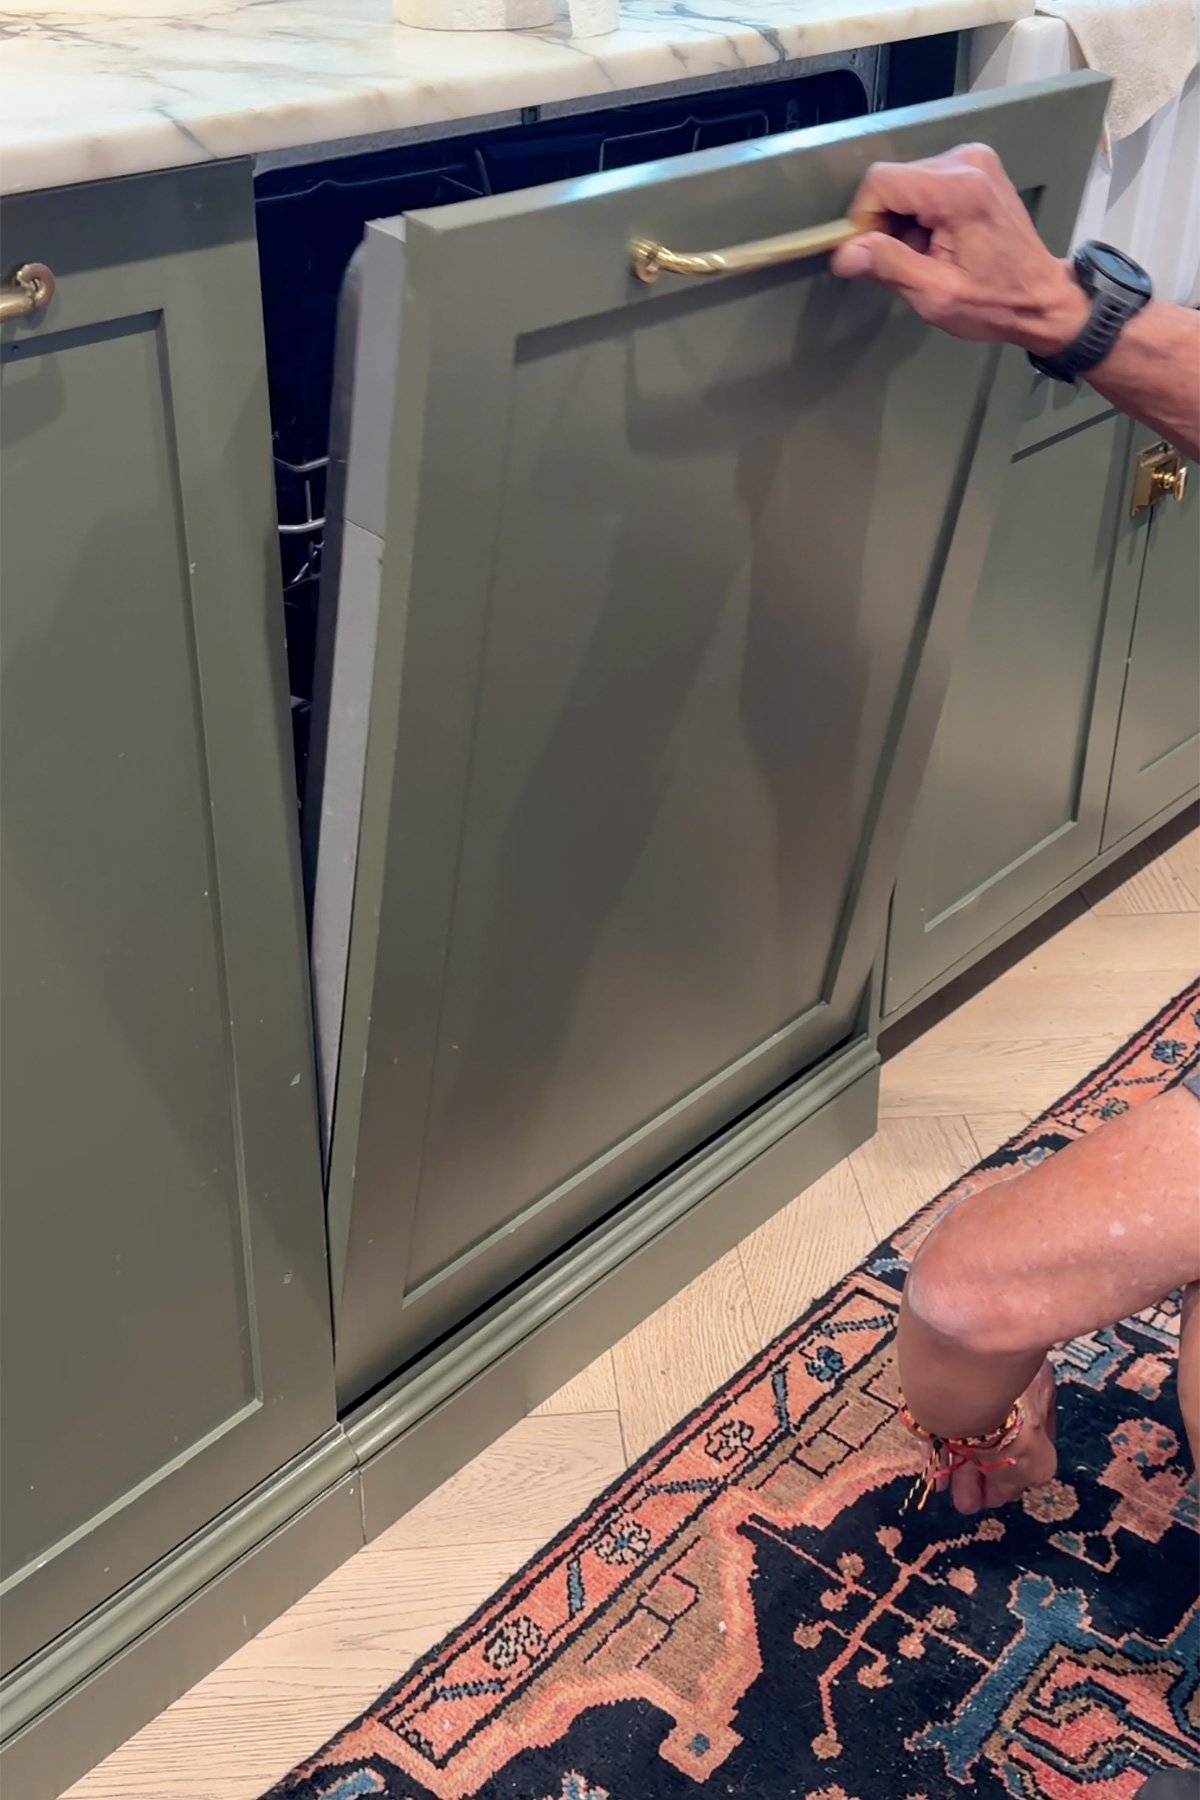
Instead of permanently attaching the skirt board underneath the dishwasher, we used magnetic push latches to create a removable panel. That way, we can easily remove it whenever we need access underneath the appliance. But here’s the clever part! We cut the top edge of the skirt board at a 45-degree angle, creating enough clearance for the dishwasher door to open and close freely.
And no, we don’t have to remove the magnetic panel every time we use the dishwasher! It stays in place, just like the rest of our skirt boards. The angled cut gives the door more than enough room to open without hitting the trim. Such a simple solution to something I’d spent years overthinking!
Keep in mind that dishwasher clearances and service-access requirements vary by model, so be sure to check your appliance’s installation instructions before attempting something similar.
This is how the boards look when installed underneath the dishwasher
Step 6: Finishing Touches
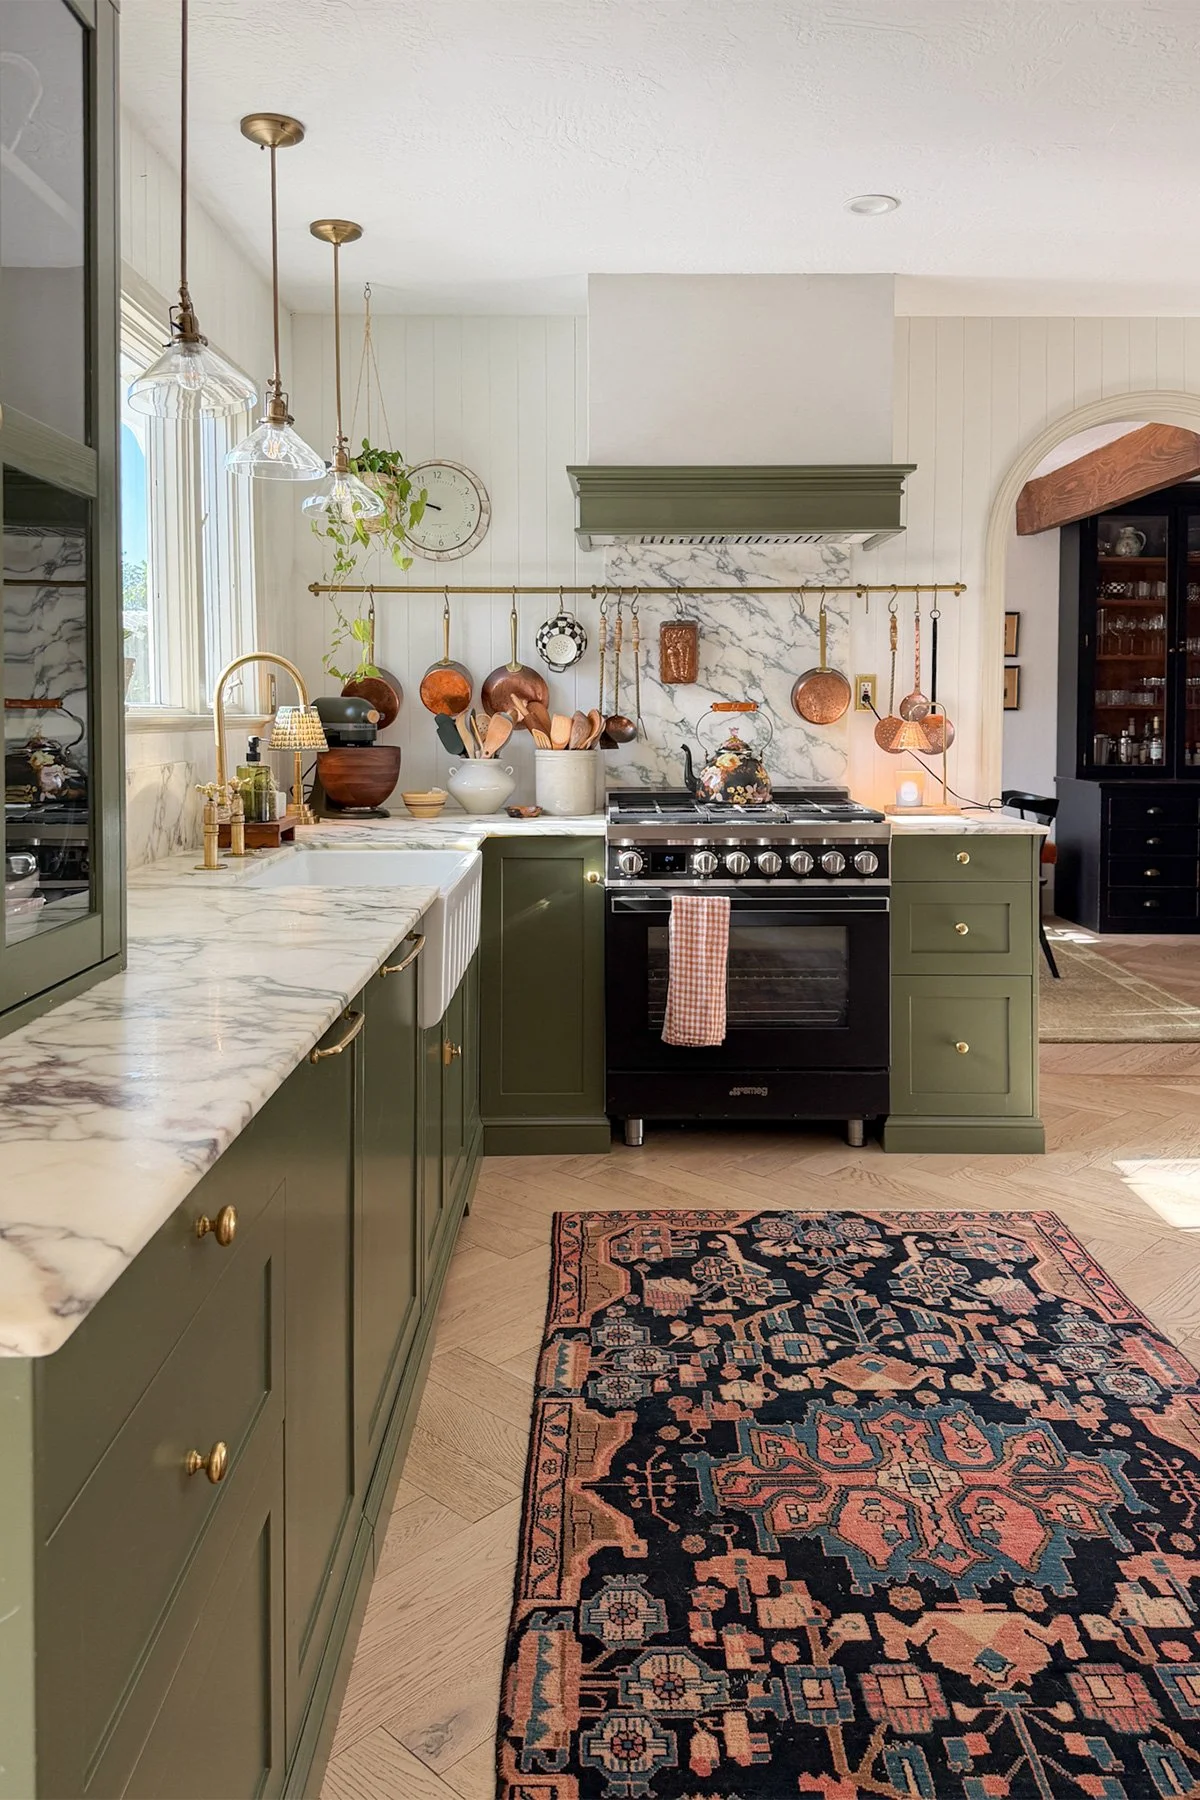
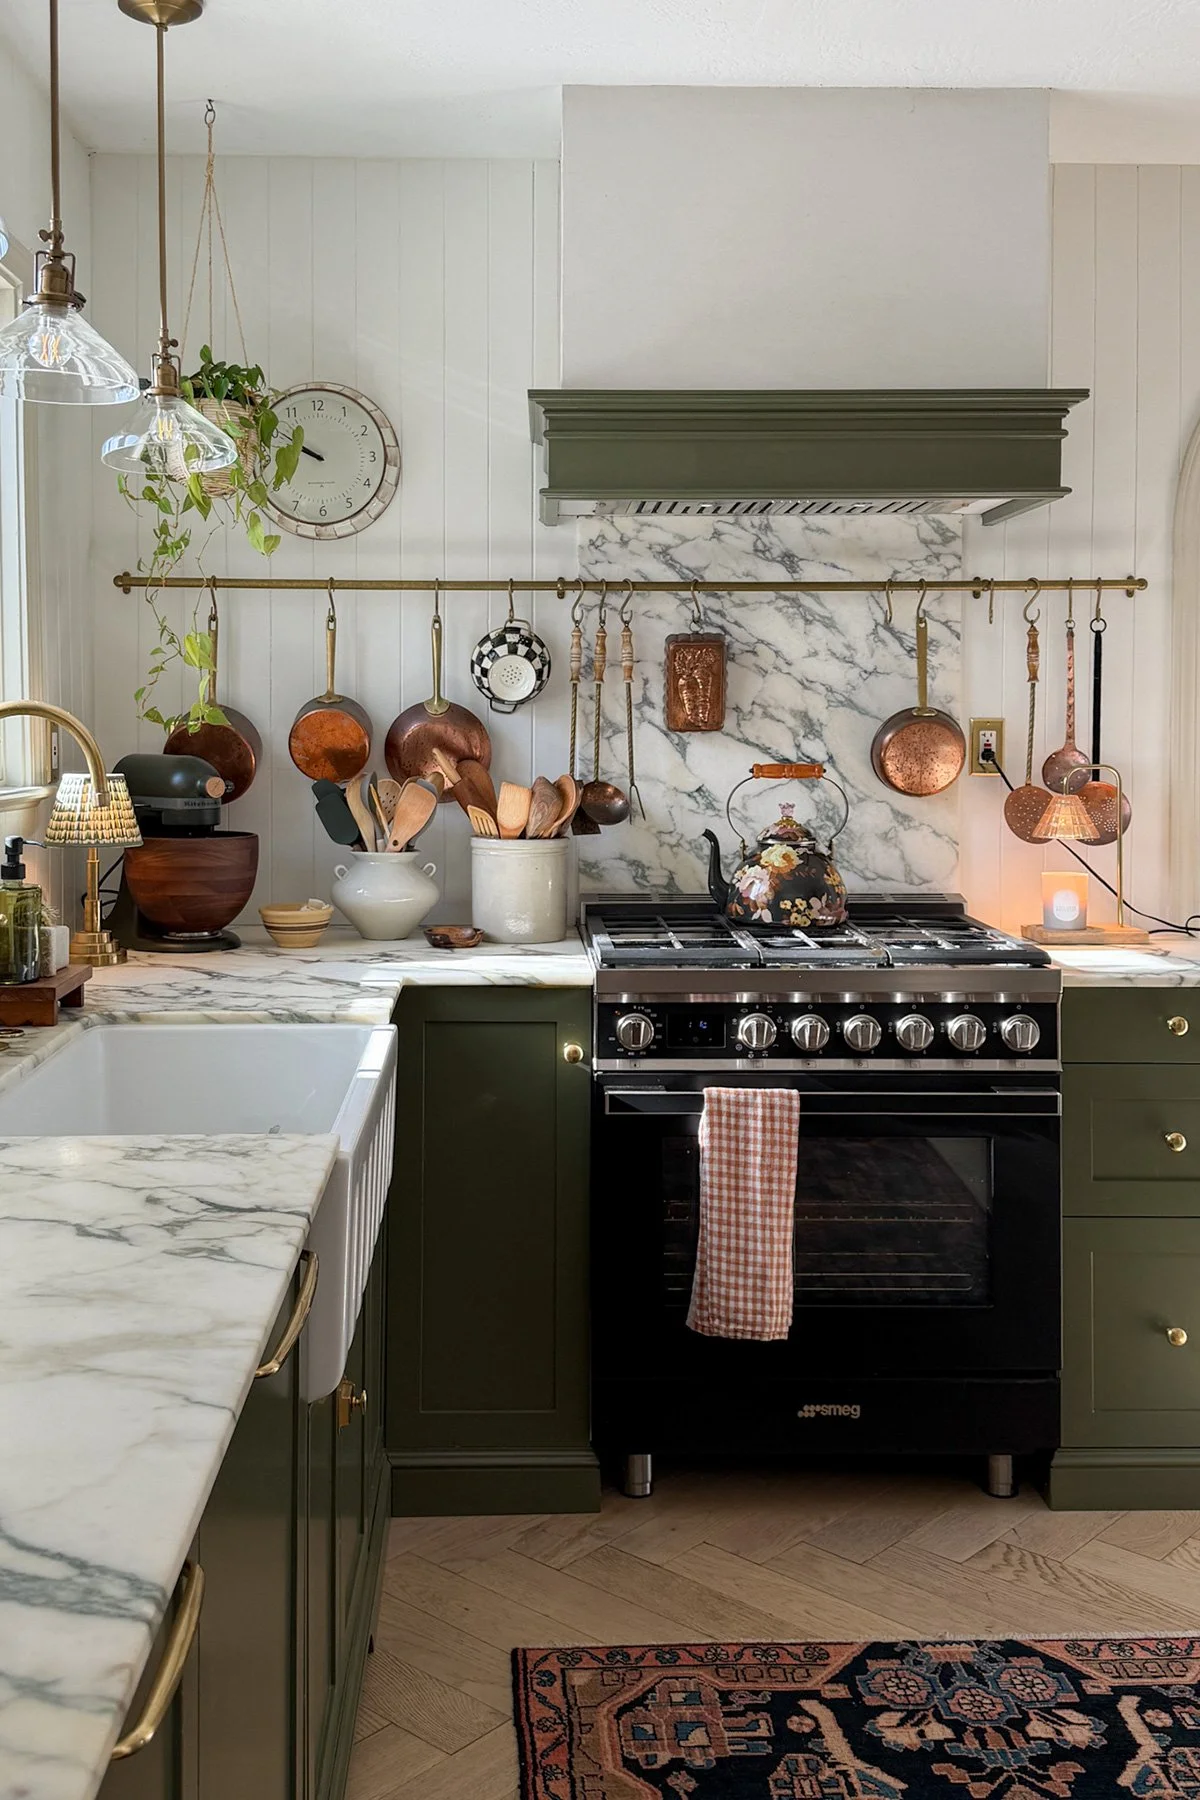
Since we had already painted the boards before installation, there wasn’t much left to do once everything was in place. We filled the small nail holes and touched up the paint where needed. And that was pretty much it!
No crawling around on the kitchen floor trying to paint intricate molding details, which I was very happy about. Sometimes a little extra preparation makes the biggest difference.
But What About Your Toes?
Well, I didn’t expect this little project to be so controversial!
After sharing the transformation on Instagram, I received quite a few comments from people who were convinced we would spend the rest of our lives stubbing our toes on our cabinets. And I get it. There’s a reason recessed toe kicks exist!
But here’s my perspective. If you stand in front of your kitchen cabinets and pay attention to where your feet naturally rest, you might notice that your toes don’t always extend into that recessed area. At least, that’s been our experience. There are also plenty of freestanding kitchen ranges and furniture-style cabinets that don’t have recessed toe kicks.
Of course, everyone’s kitchen habits and preferences are different, and I completely understand why someone might prefer the traditional recessed design. For us, it hasn’t been an issue. And in the one area where we wanted a little more room for our feet, underneath the sink, we incorporated that curved opening.
I think it’s a good compromise between function and aesthetics. Ultimately, this is one of those design decisions that comes down to personal preference. And that’s perfectly fine!
You might also like this post:
Two DIY IKEA Hacks: How to Make Furniture Look Custom
Will the Skirt Boards Get Damaged?
Another concern that came up quite a bit was durability. Wouldn’t the boards get scratched by the vacuum? What about shoes constantly hitting them?
My answer is pretty simple: I think of them the same way I think of regular baseboards throughout our home. They’re going to experience some everyday wear and tear, and I might need to touch up the paint from time to time. And that’s okay!
We also made a conscious decision to use solid wood instead of MDF because we wanted something that would hold up better to occasional bumps and everyday use. No painted surface is completely maintenance-free, but I don’t think that’s a reason to avoid adding a detail you love.
And there’s another benefit I didn’t fully appreciate until we finished the project. Cleaning is so much easier! I no longer have to worry about that recessed area collecting dust and crumbs. Everything is much more accessible, and I love that.
Frequently Asked Questions
Can You Add Decorative Skirt Boards to IKEA SEKTION Cabinets?
Yes! We were able to add decorative skirt boards to our existing IKEA SEKTION kitchen cabinets by reusing the original toe-kick boards as a mounting surface.
Depending on your cabinet configuration, you may need to make some adjustments, but it’s definitely possible to achieve a more custom look without replacing your cabinets.
Can You Still Open an Integrated Dishwasher?
Absolutely! We cut the top edge of the skirt board underneath our dishwasher at a 45-degree angle to provide enough clearance for the door to open and close normally. The panel stays in place during everyday use and can be removed using the magnetic push latches whenever we need access underneath the appliance. Just make sure to check the clearance and access requirements for your specific dishwasher model.
Do Skirt Boards Make Standing at the Counter Uncomfortable?
This really comes down to personal preference. For us, it hasn’t been an issue.
We also incorporated a curved opening underneath the sink to provide a little extra toe space in one of the busiest areas of our kitchen. If you’re considering this project, I’d recommend paying attention to how you naturally stand at your countertops before deciding whether to eliminate the recessed toe kicks.
Are Solid Wood Skirt Boards Durable?
We chose solid wood specifically because we wanted something that could better withstand everyday use. Just like regular baseboards, they may need occasional paint touch-ups, but that’s something we’re comfortable with.
Is It Better to Paint the Boards Before or After Installation?
Before, without a doubt!
Painting the boards before installation made the entire process so much easier. Once everything was installed, we only had to fill and touch up a few nail holes. I would absolutely do it this way again.
Would I Do It Again?
Without hesitation! This project turned out to be so much simpler than I had imagined, and I genuinely wish we had done it when we first renovated our kitchen. But I suppose that’s part of the process of making a home your own. Sometimes you have an idea, live with the space for a while, and eventually figure out how to make it happen.
I think it’s easy to get caught up in the idea that a renovation needs to be done all at once, but our home has taught me otherwise. We’ve been slowly adding, changing, and improving things over the years, and some of my favorite updates have been the simplest ones.
These skirt boards didn’t change the layout of our kitchen or require replacing a single cabinet. But they added exactly the kind of character I’d been wanting all along. And now that I know how much I love them, I can confidently say I’d do this in every kitchen I own.
My only regret? Waiting five years to give it a try.
Home doesn’t happen overnight 🤎
You might also like this post:


Sometimes it’s the smallest details that make the biggest difference in a space. And this little kitchen project is proof of that!