Two DIY IKEA Hacks: How to Make Furniture Look Custom
To be completely honest, I'm not a huge fan of DIYs. You probably wouldn’t guess that, considering how many I’ve shared, plus the fact that my husband and I practically built our entire kitchen ourselves! But I do it for the love of design, bringing my ideas to life, and yes, saving money along the way. I might not enjoy the mess, but I absolutely love the satisfaction of creating something with my own hands.
That’s exactly how these two projects came to life: out of a need for specific furniture pieces, using what I already had on hand, and sticking to a budget. Both of these DIYs are built around a plain Ikea piece (the IKEA Havsta cabinet). Spoiler alert: they turned out even better than I expected. And since so many of you loved them when I shared them on Instagram, I’m breaking down all the details in this post.
First Project: The Kitchen Cabinet
This project started because I had been searching for months for the perfect vintage cabinet for our kitchen, checking antique stores, but nothing ever fit the space quite right. Just when I was about to give up, I started thinking about a plan B.
That’s when I glanced over at the white IKEA cabinet we have near the family room and had a lightbulb moment: what if I try the top section of that cabinet in the kitchen, just as a temporary solution while I keep hunting for the perfect vintage piece?
Spoiler alert: it’s been almost three years, and it’s still up... and I love it!
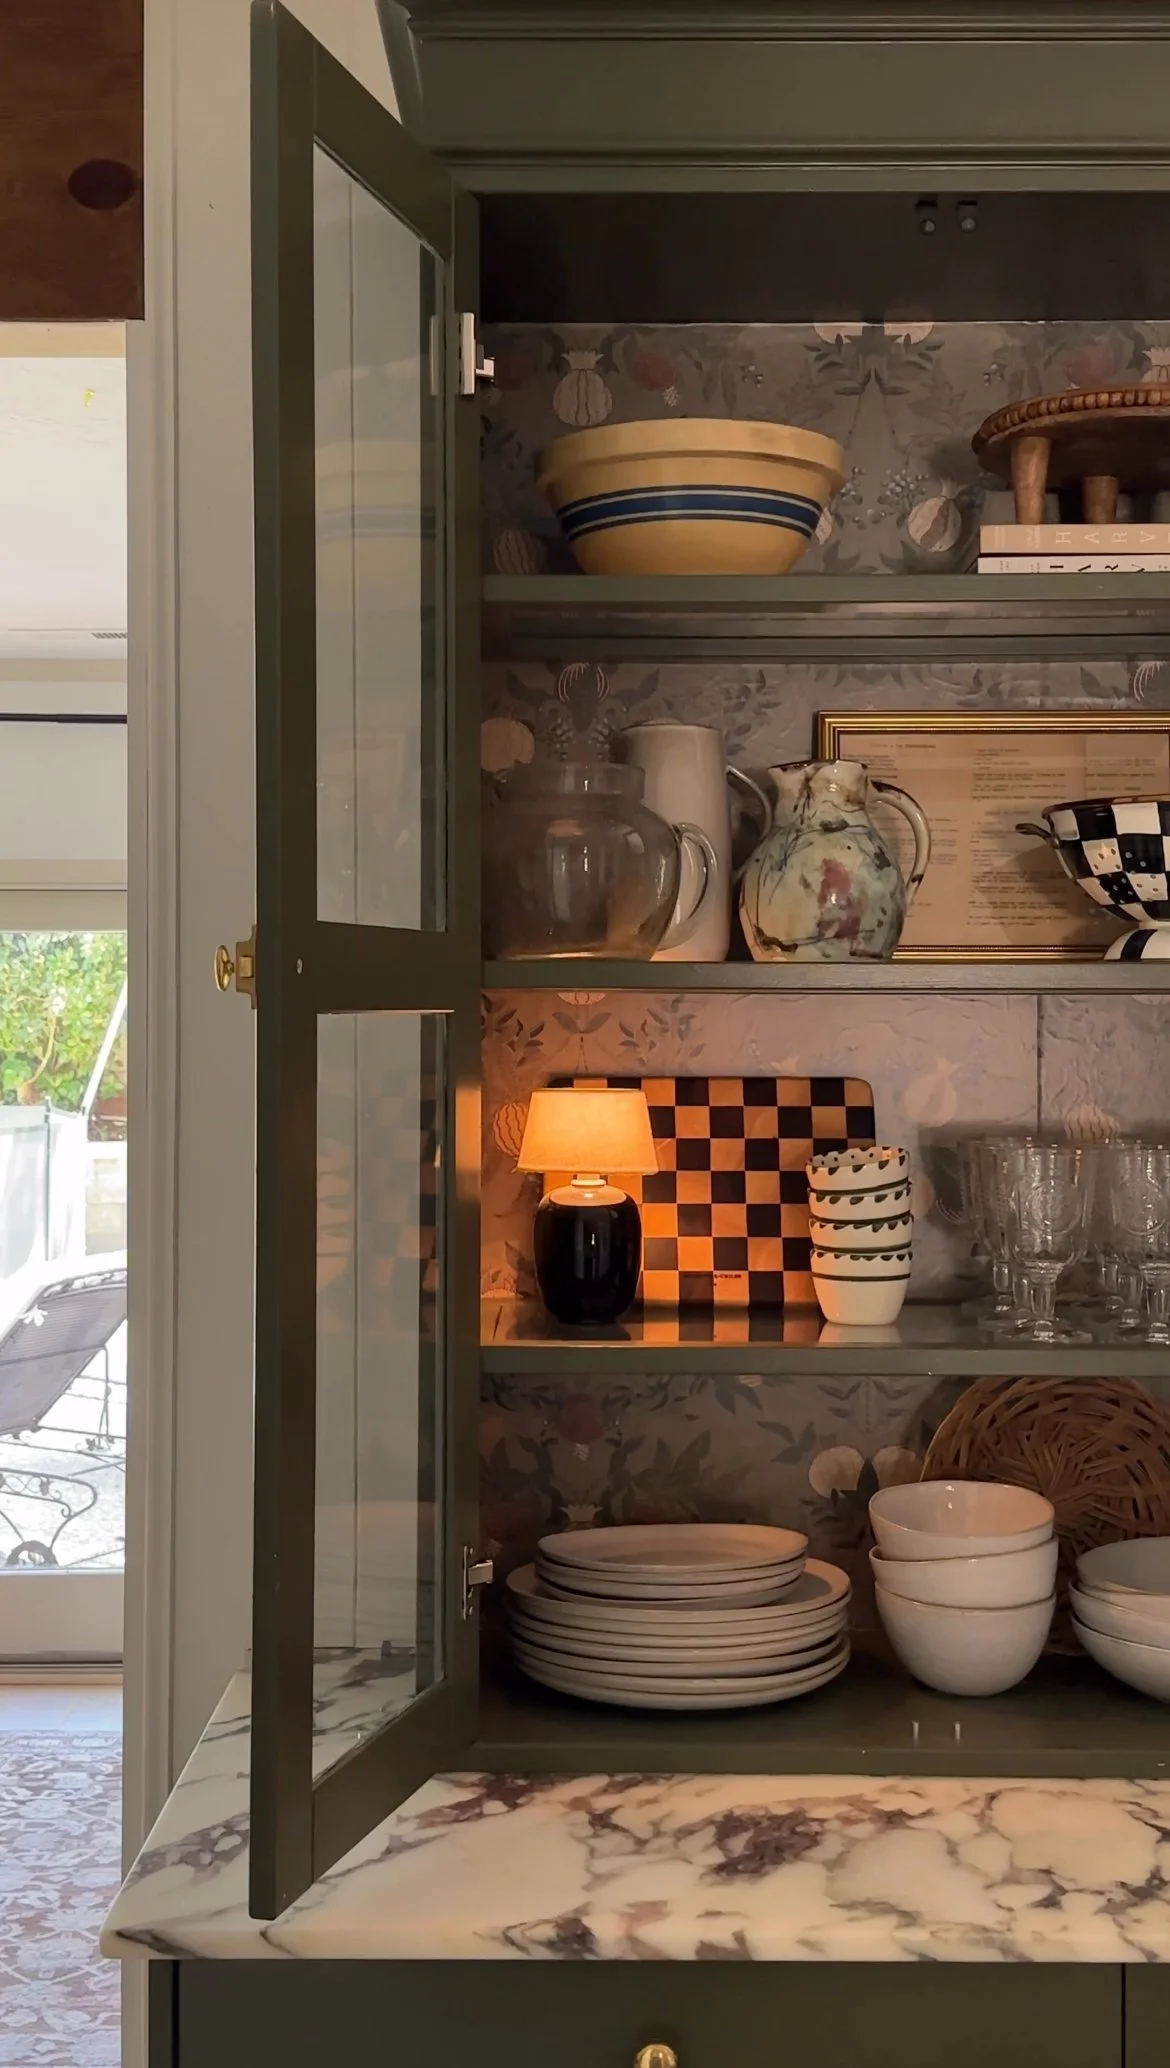
I also installed this wallpaper, but changed it a year later.

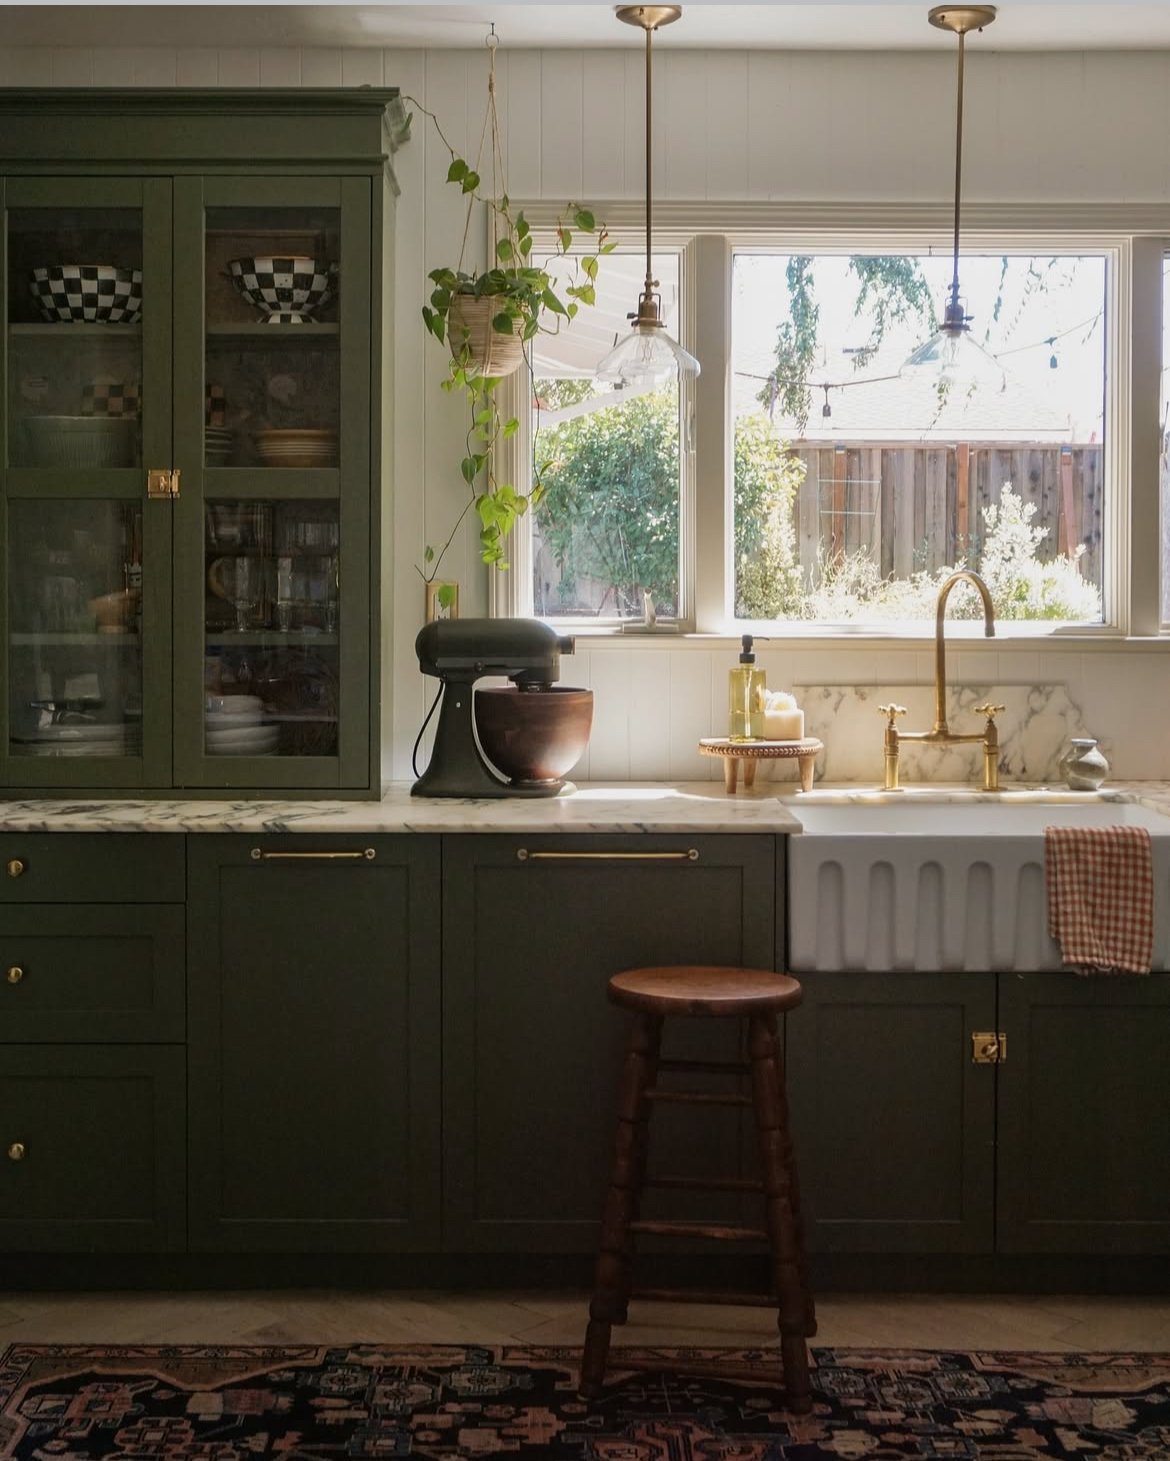
I have to say, the IKEA Havsta cabinet really impressed me. It’s well-made, incredibly affordable for a wood-and-glass piece.
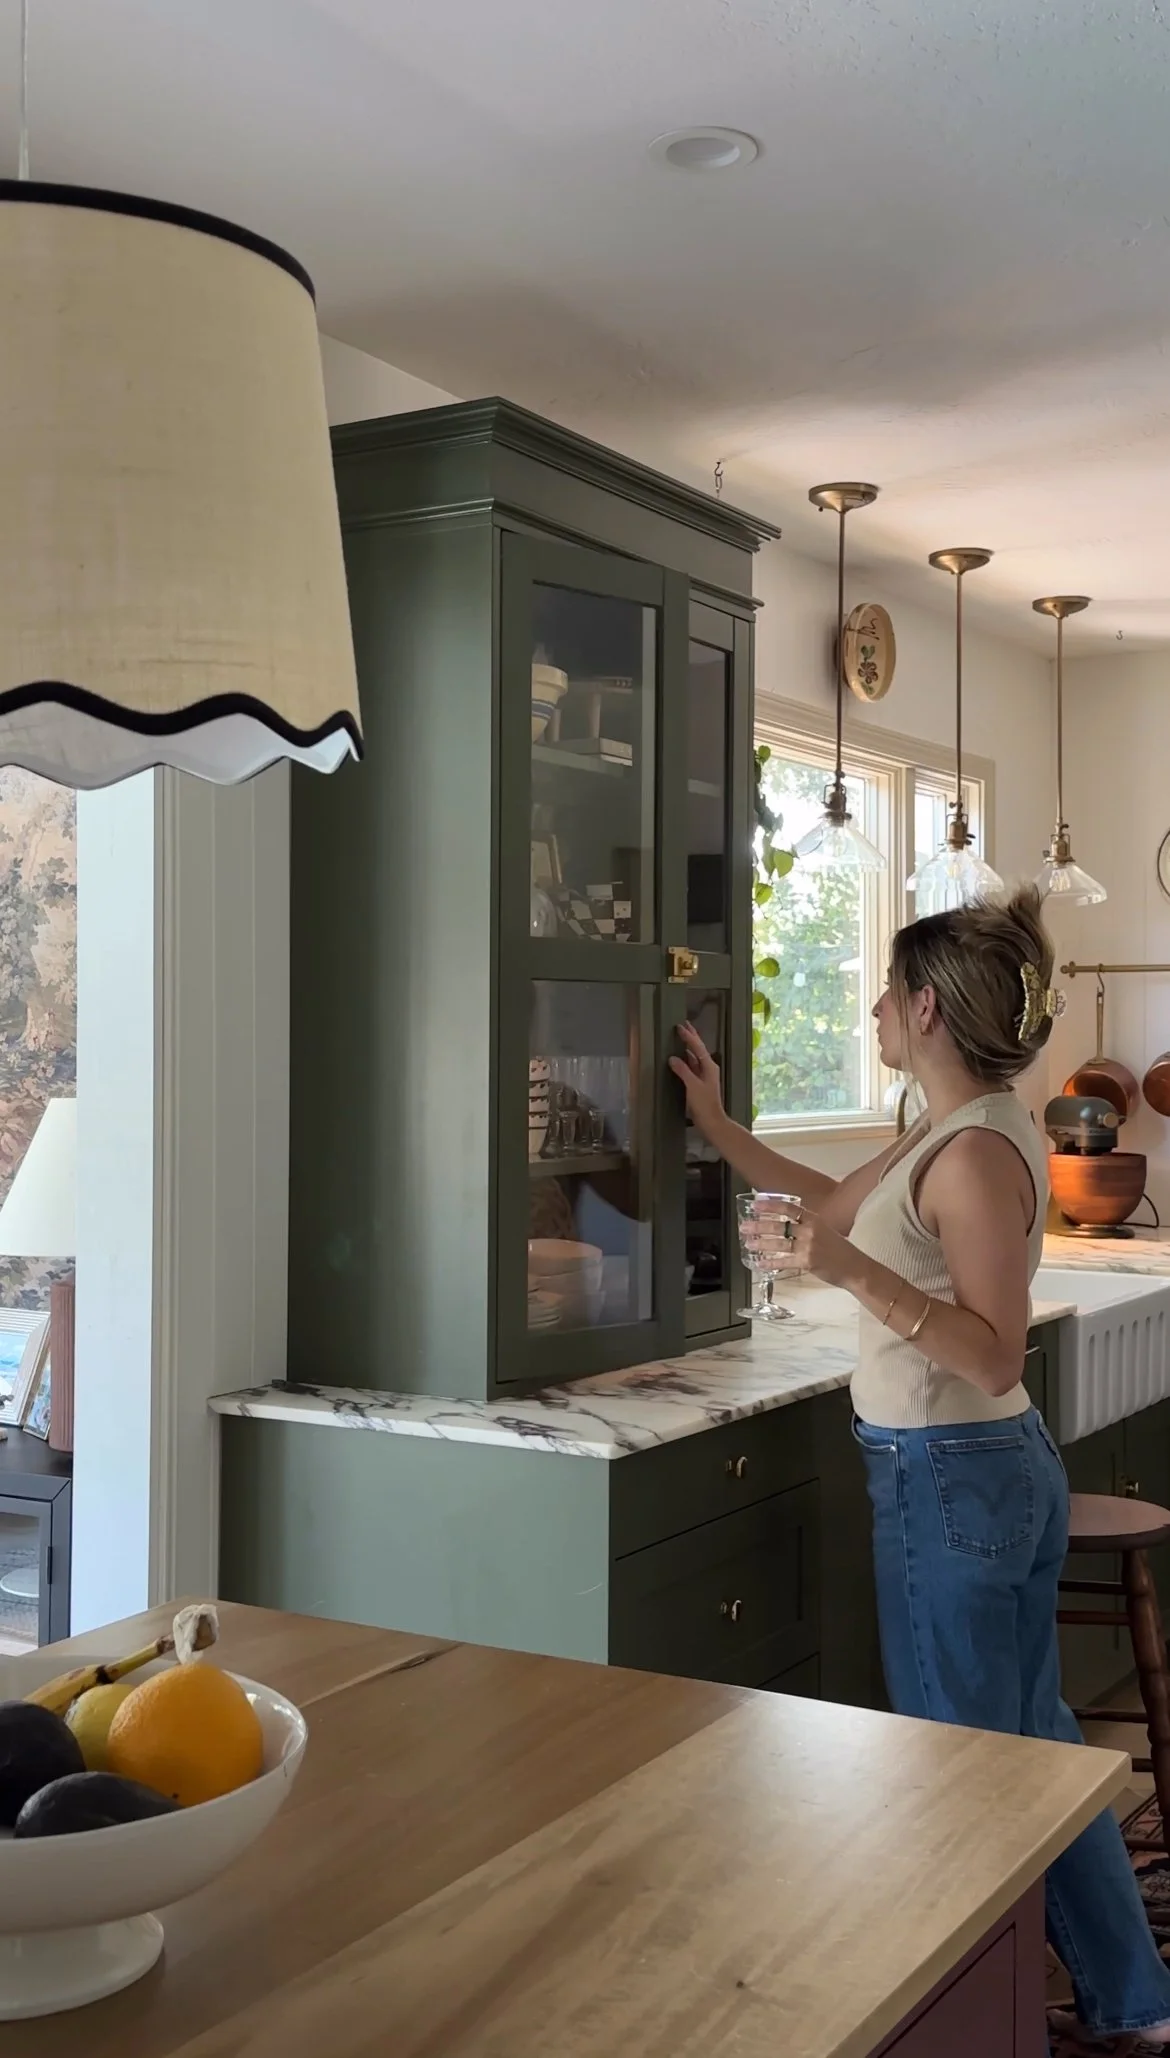
The plan was simple: to add height so it would look more built-in sitting on top of the kitchen counter. I was so inspired by English kitchen design, where you typically find a hutch or cupboard sitting on the countertop, I think it’s so charming! makes it look more like furniture than just a kitchen cabinet. And this particular view of our kitchen can be seen from the front door so the idea of making it look less than a kitchen view was ideal in my head.
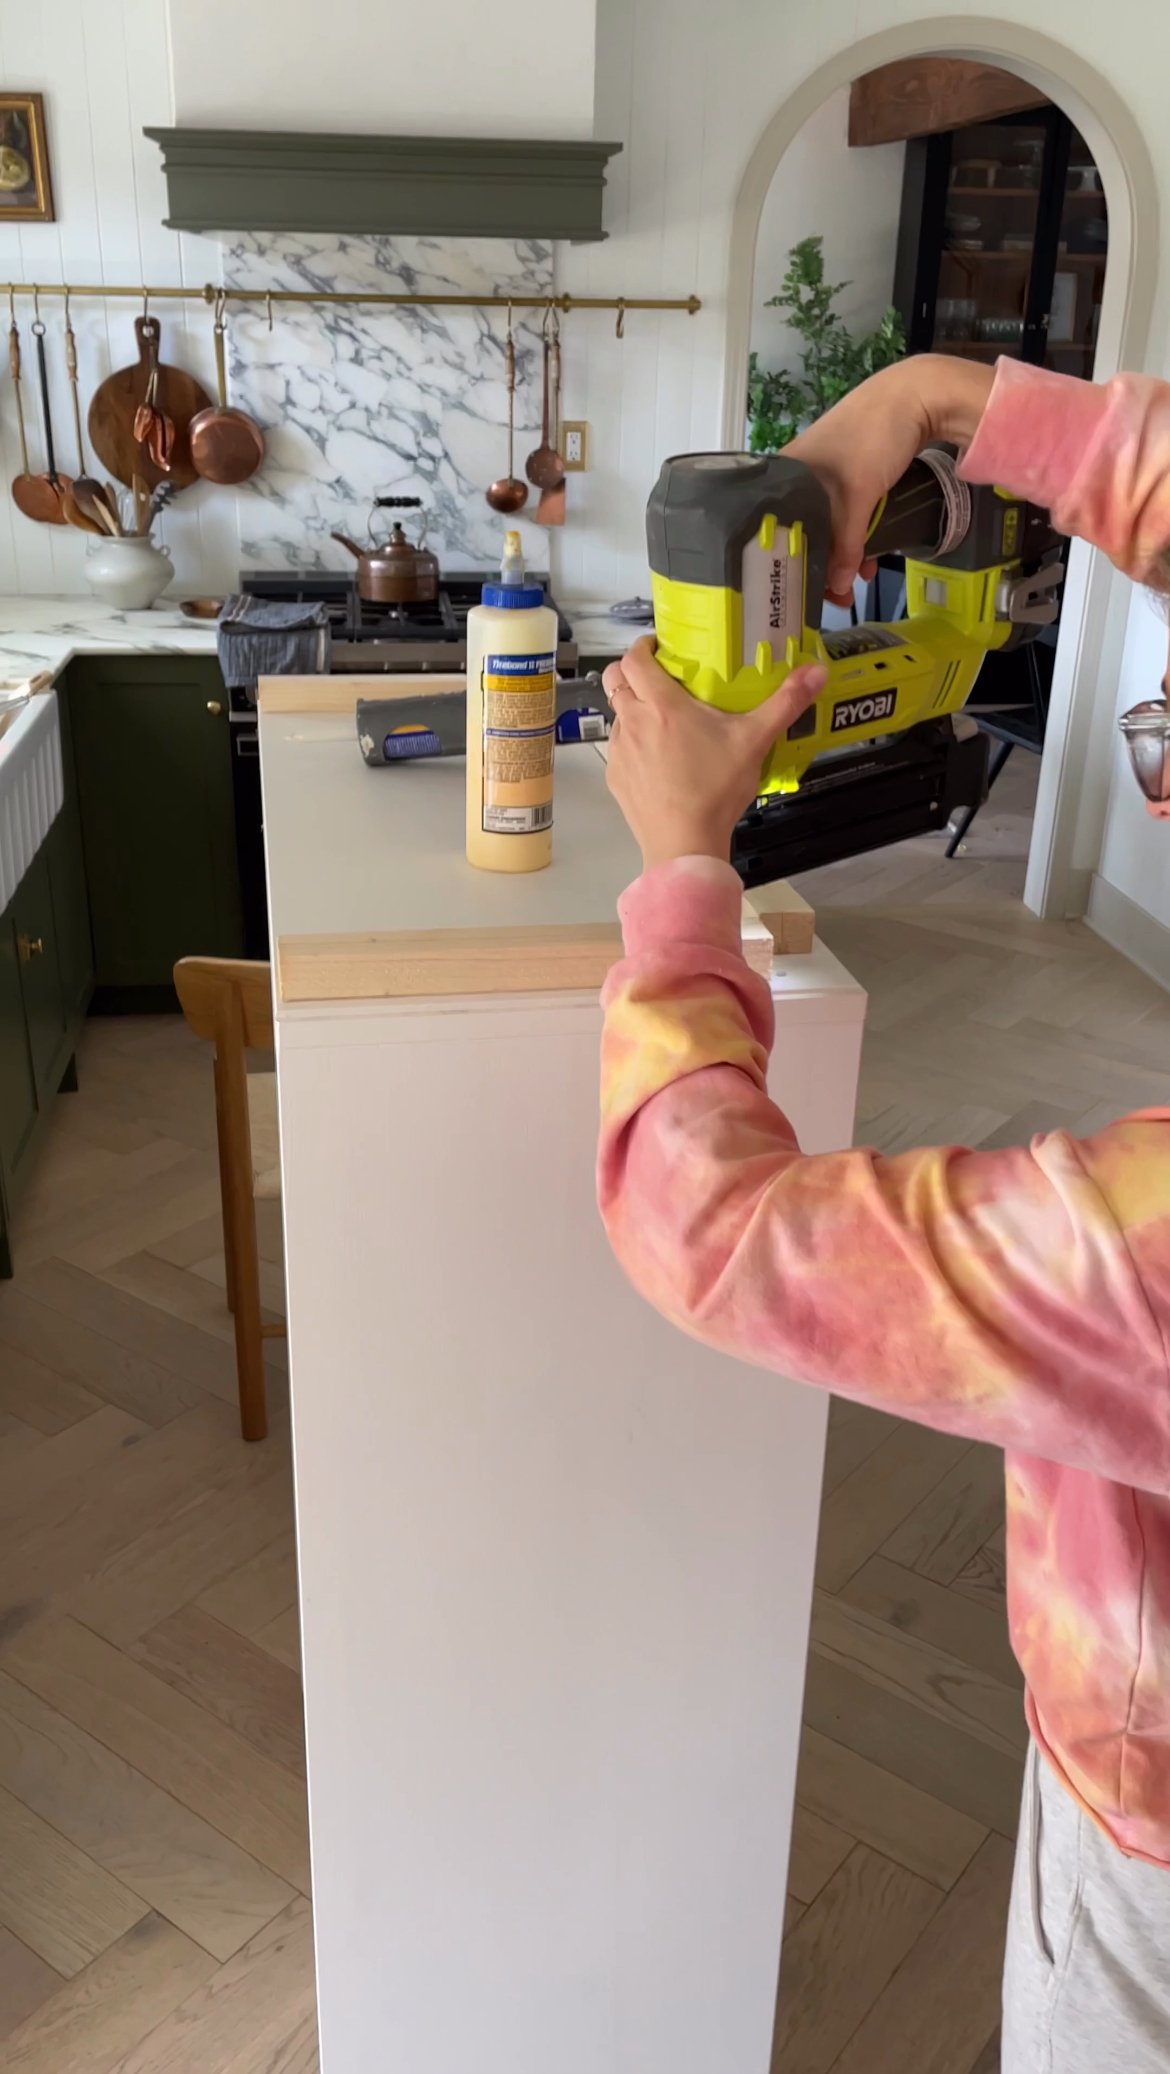
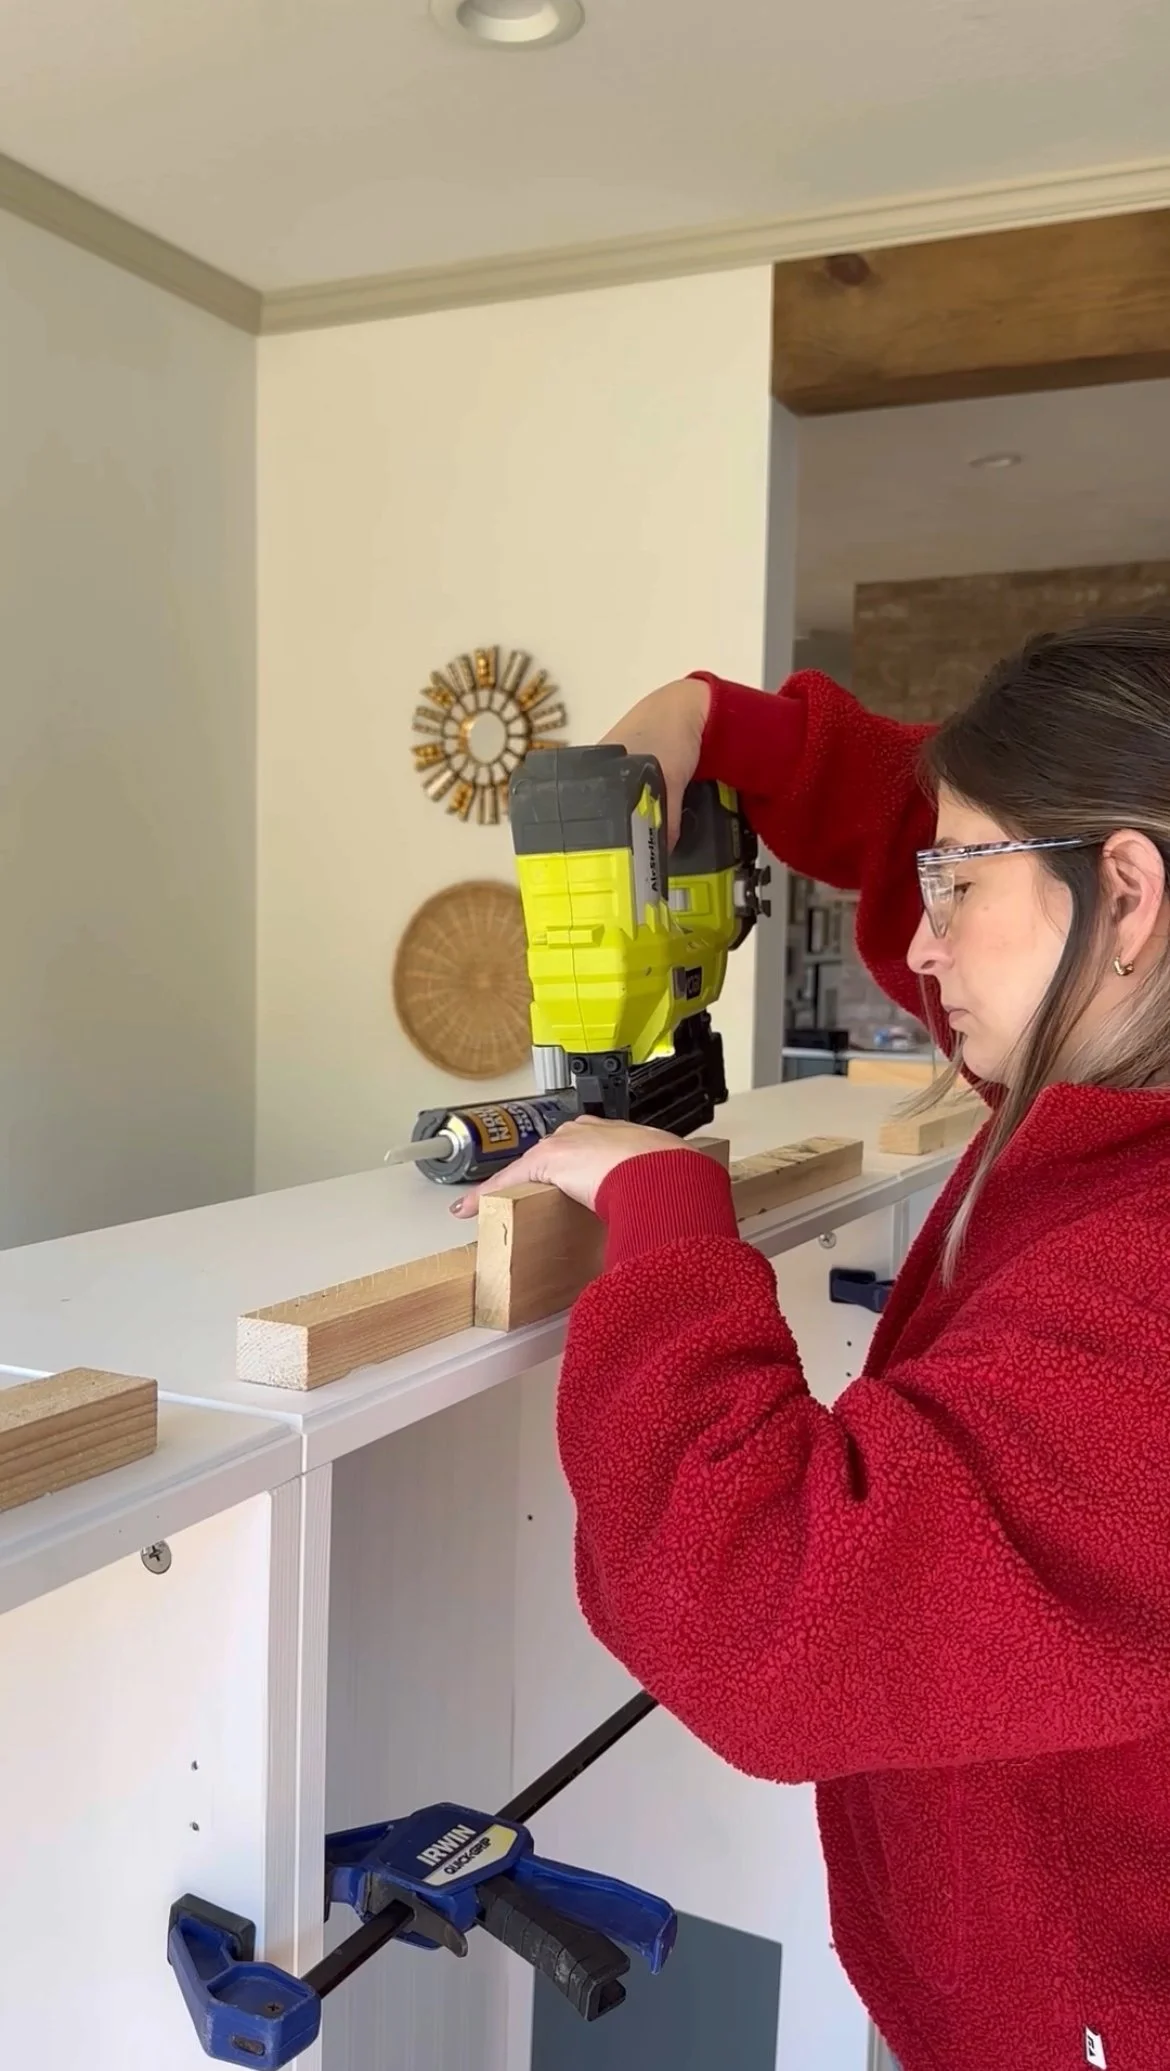
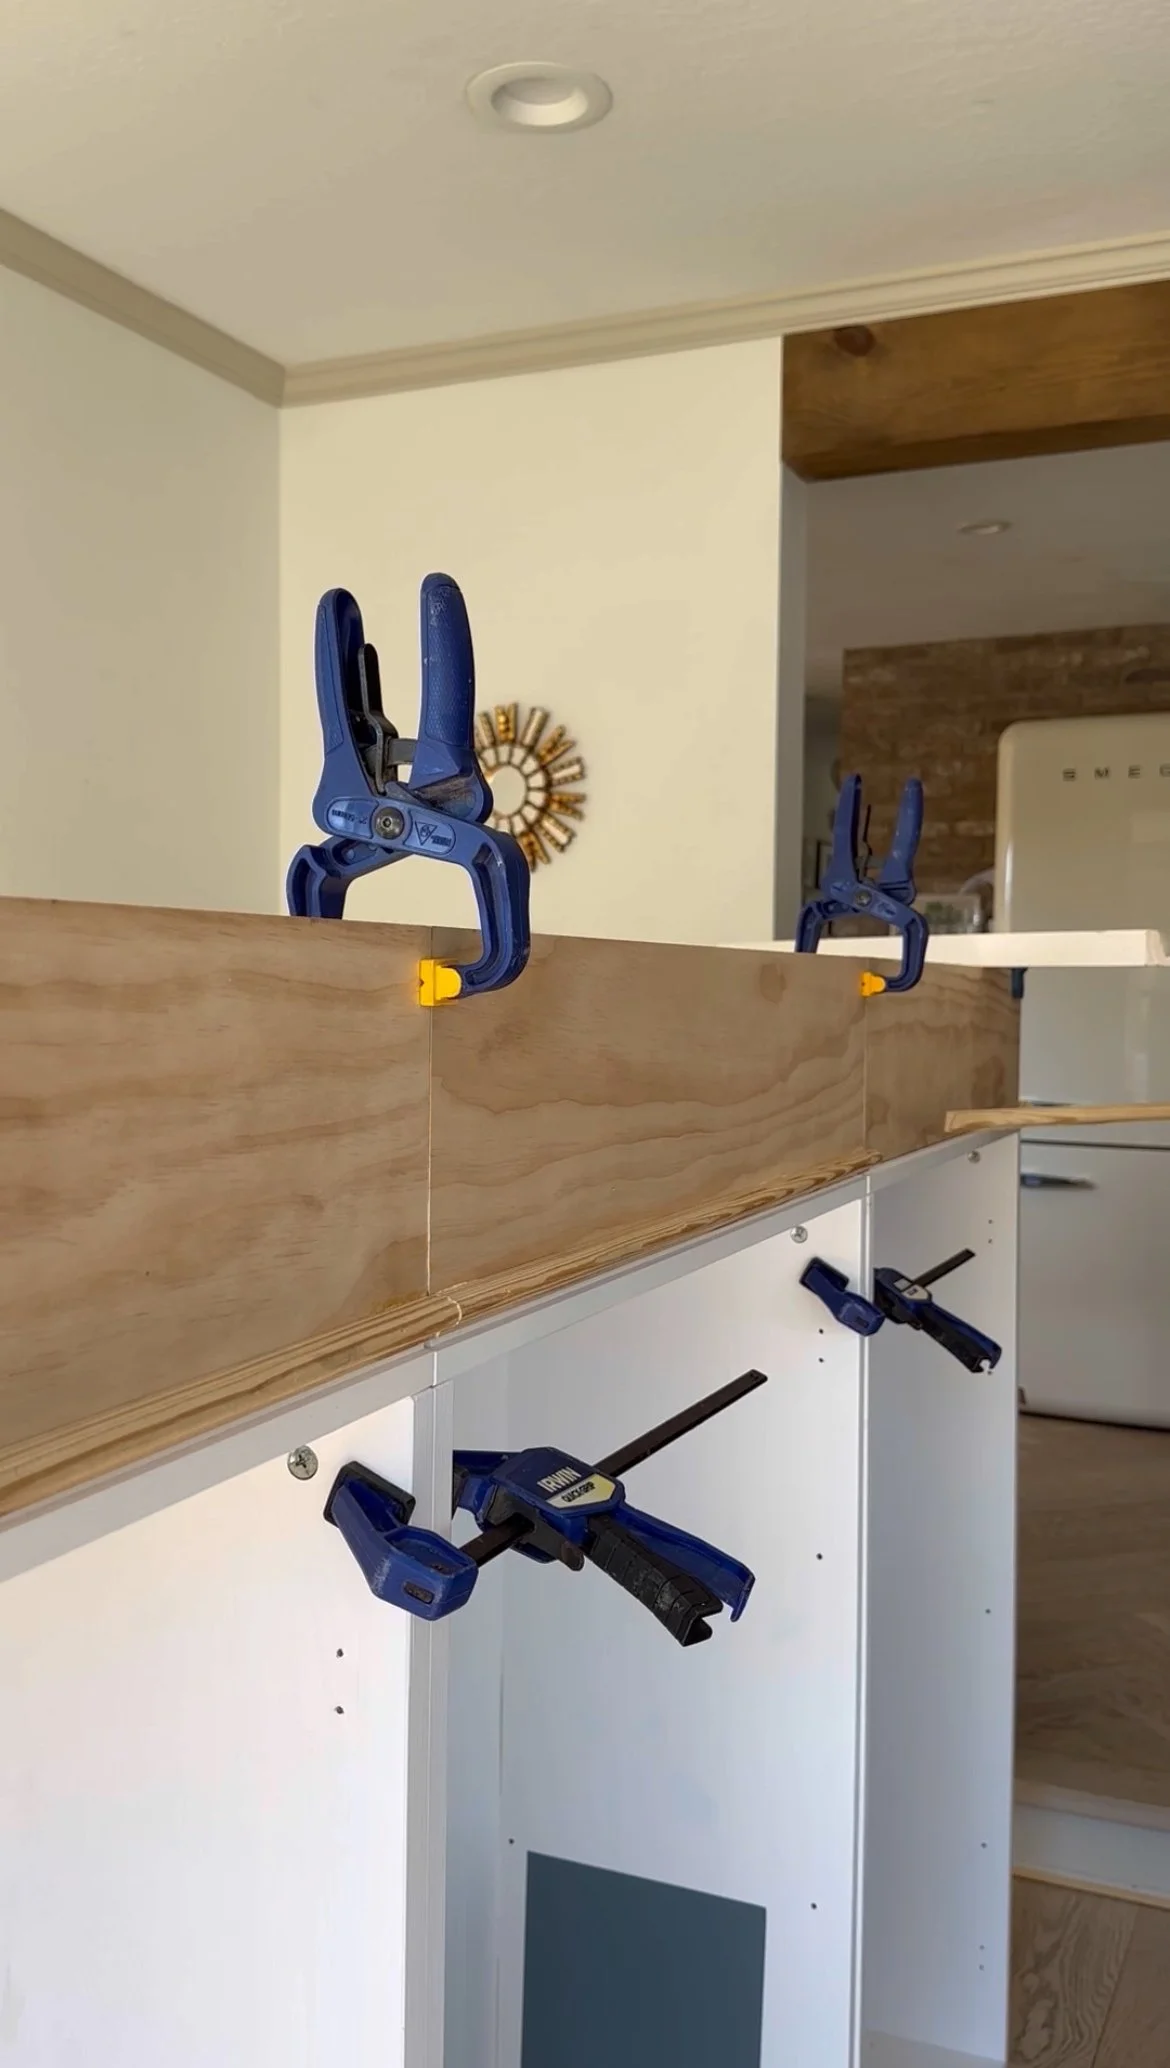
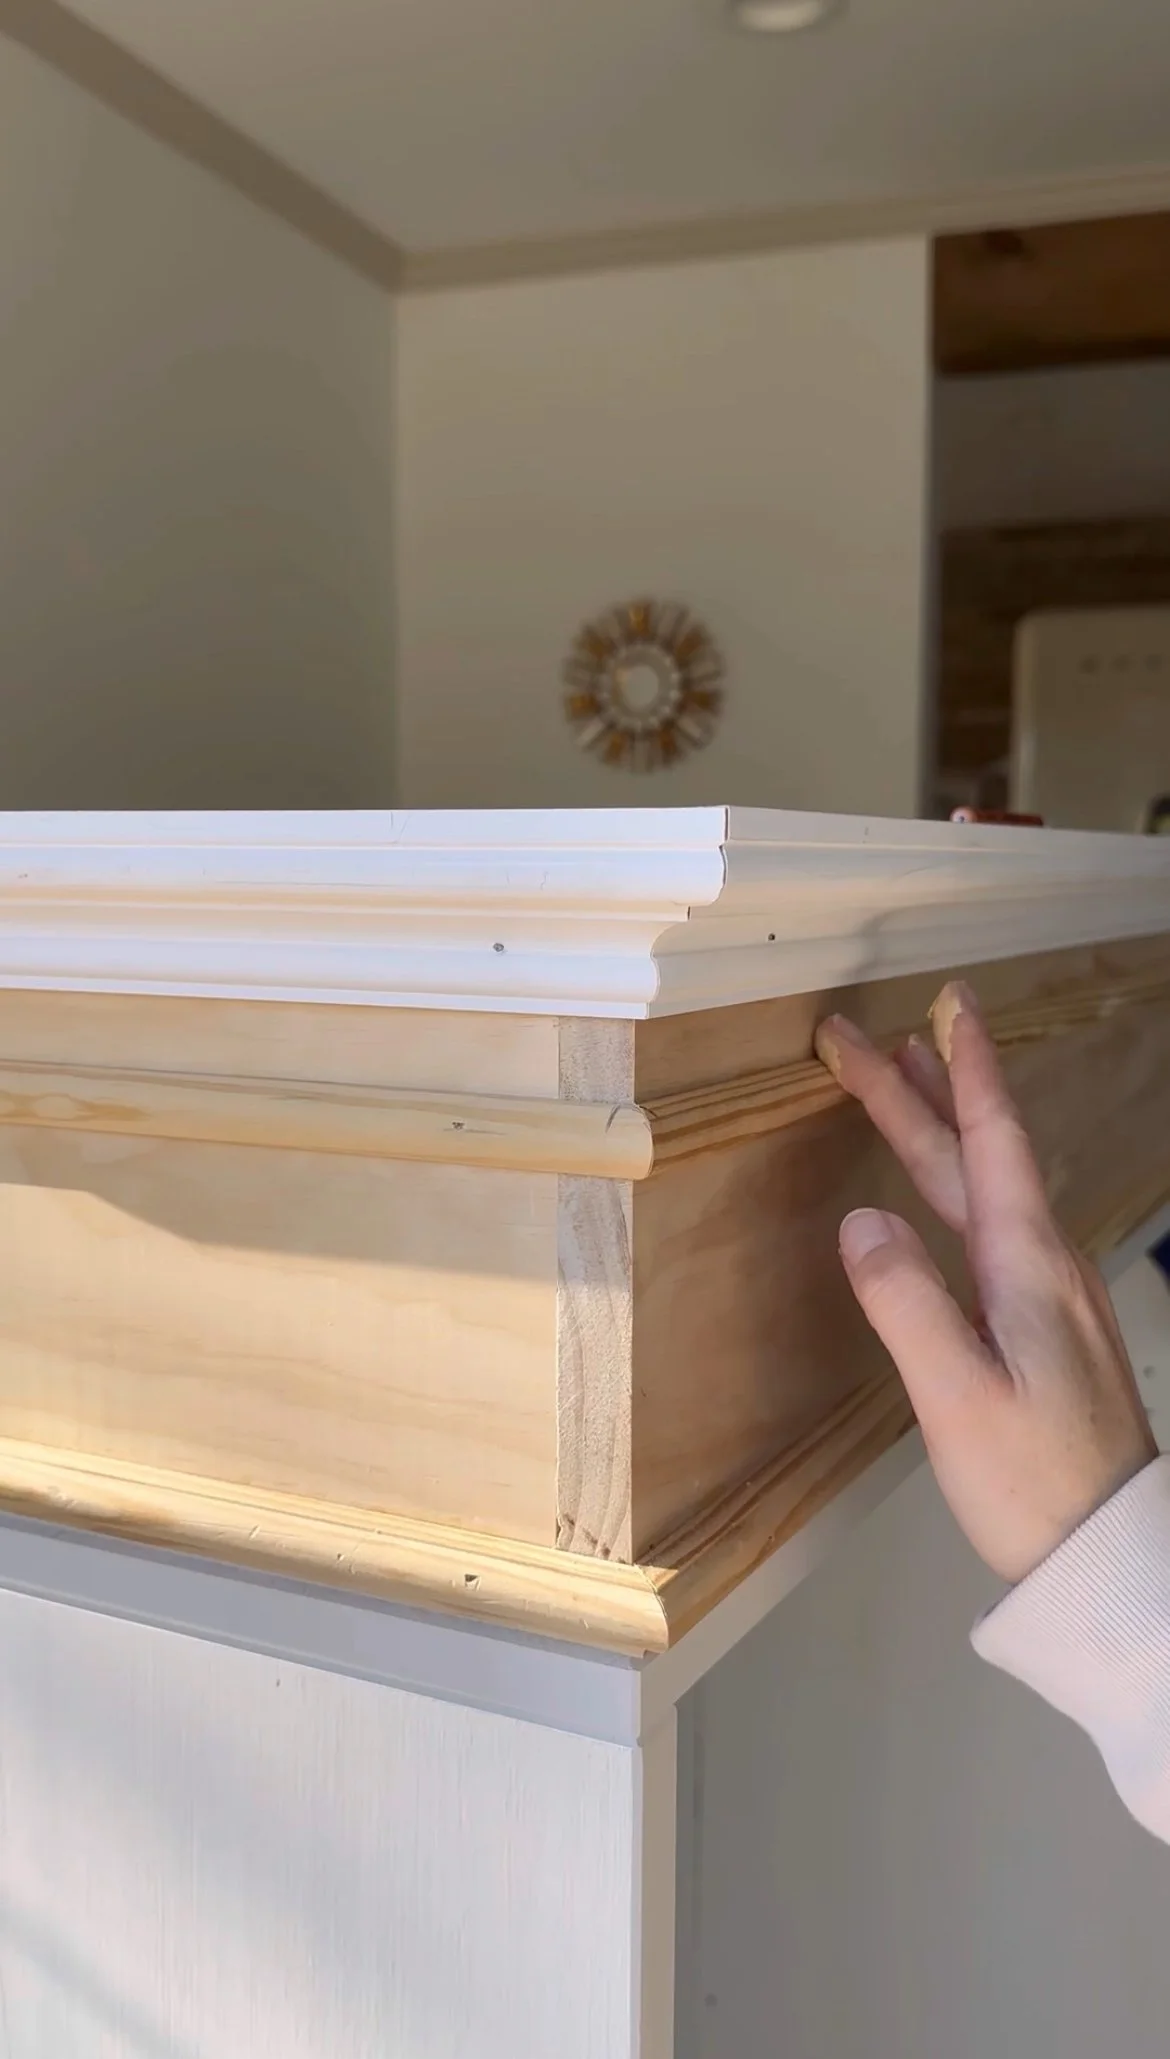
I built a box for the top using wood glue and a my go-to nailer, and recreated the same crown molding detail I used on our kitchen vent hood.
First, I cut scrap pieces of wood I had from previous projects, I secure those in place using construction adhesive and nails, these are the support for the rest of the “box”. Then, I cut plywood pieces to the length I needed to create the upper section, these are about 6 inches tall. Lastly, I added decorative moulding, I used a solid crown molding on the top part and one decorative shoe molding on the bottom.


The Crown molding and base cap I used.
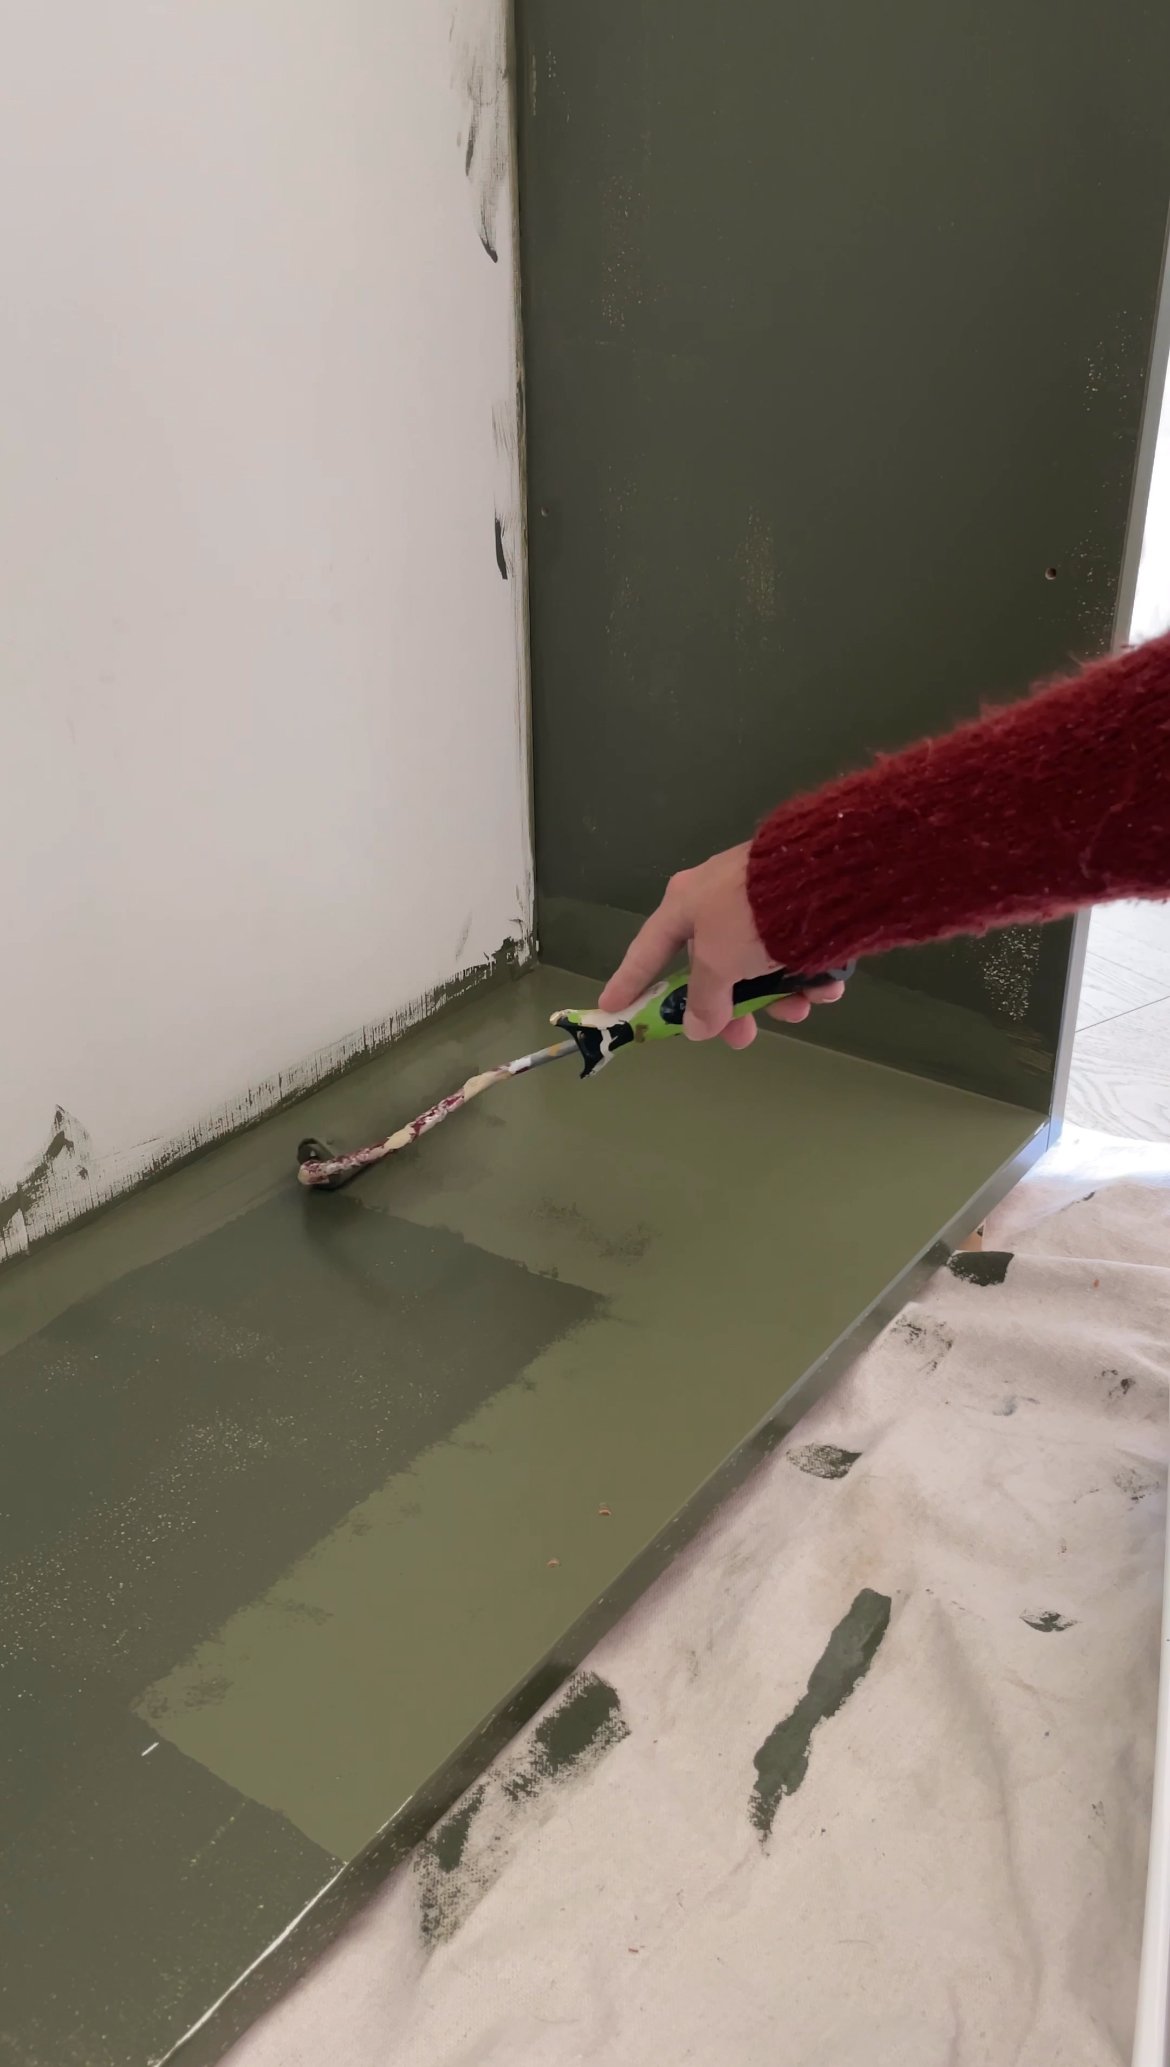
The finish on the original cabinet isn’t completely smooth, it’s matte and has visible wood grain, so I used liquid sandpaper to prep it. I found that to be enough, but if you prefer a more refined finish, you could go ahead and prime it too (though I don’t think it’s necessary).
For paint, I used the same color as our kitchen cabinet doors: Sage Green Light by Sherwin Williams, in their Emerald line with a semi-gloss finish. I love this paint formula for cabinets.
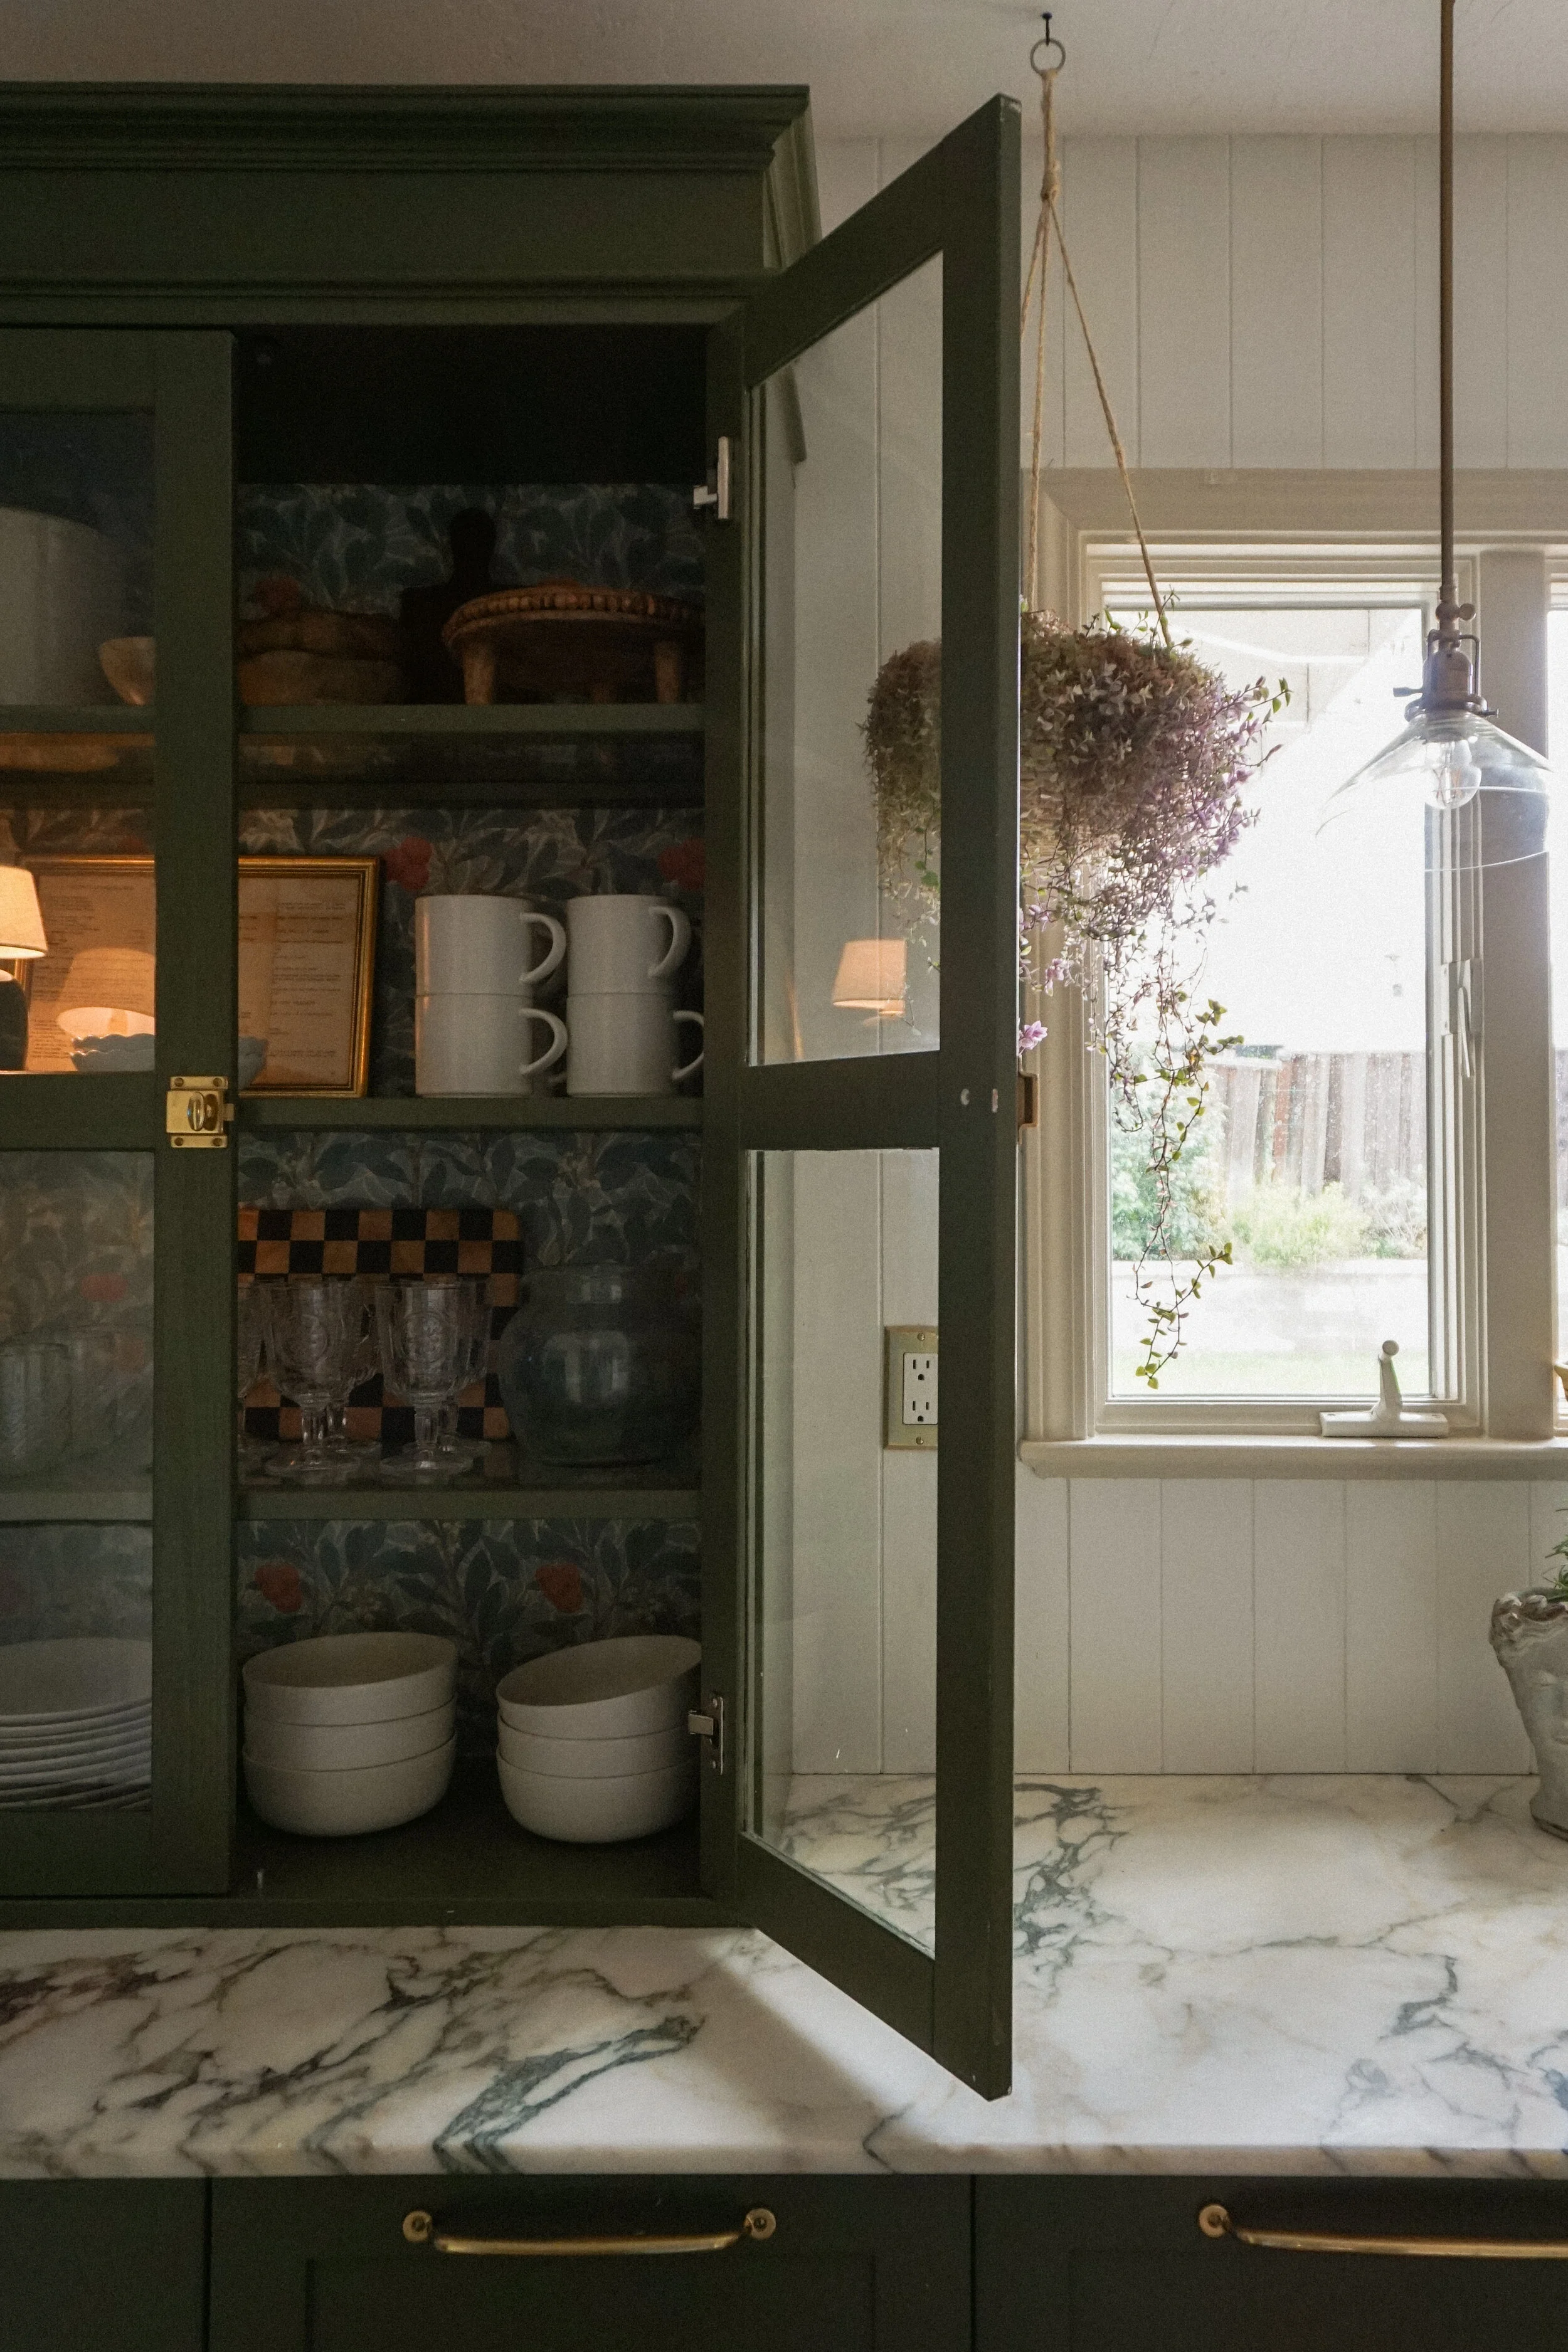
To finish it off, I added a beautiful wallpaper to the back panel and installed my go-to hardware from Rejuvenation. I love how it all came together!
My go-to roller for a smooth finish

The cabinet all ready for wallpaper.
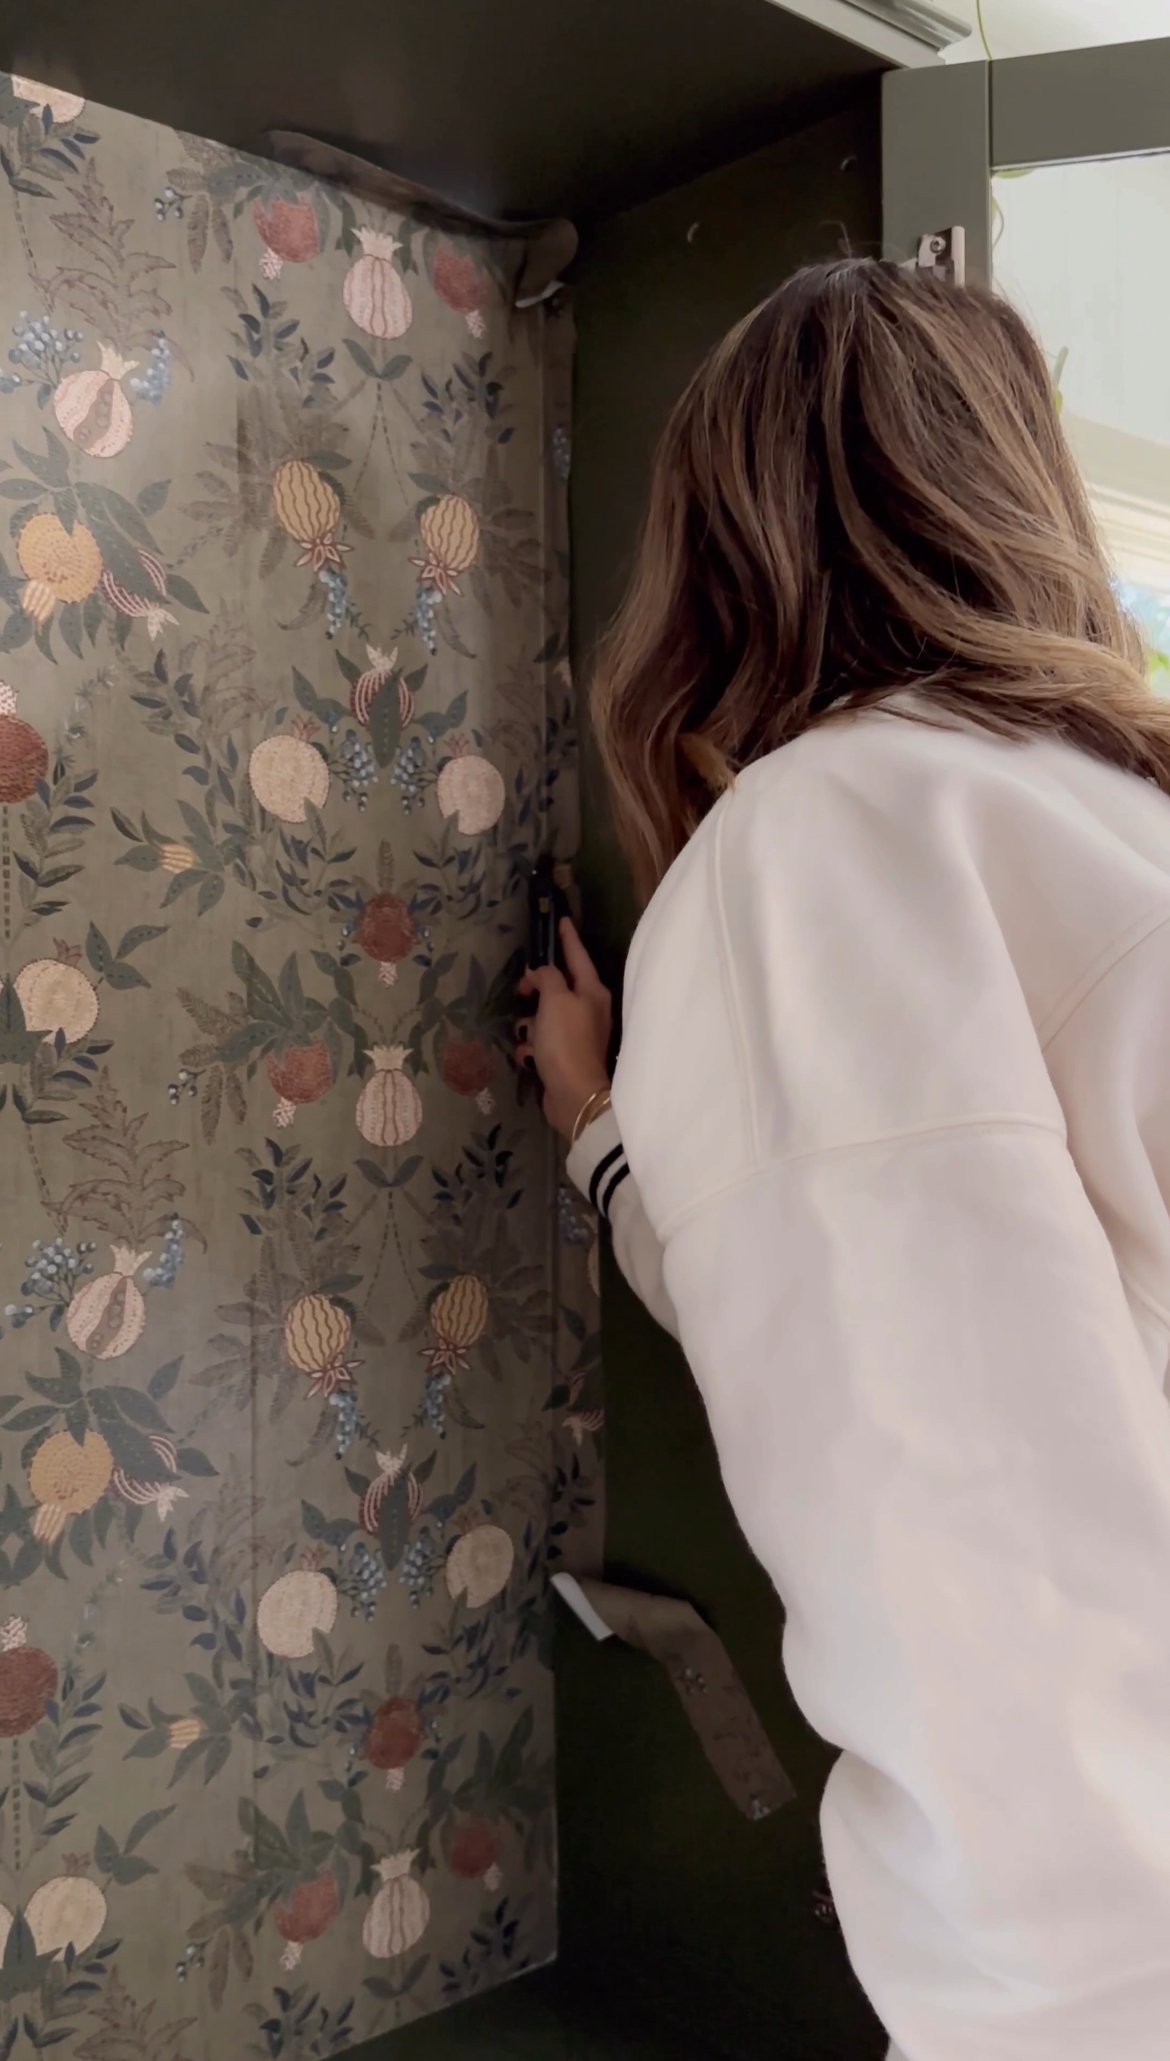
Installing the peel and stick wallpaper
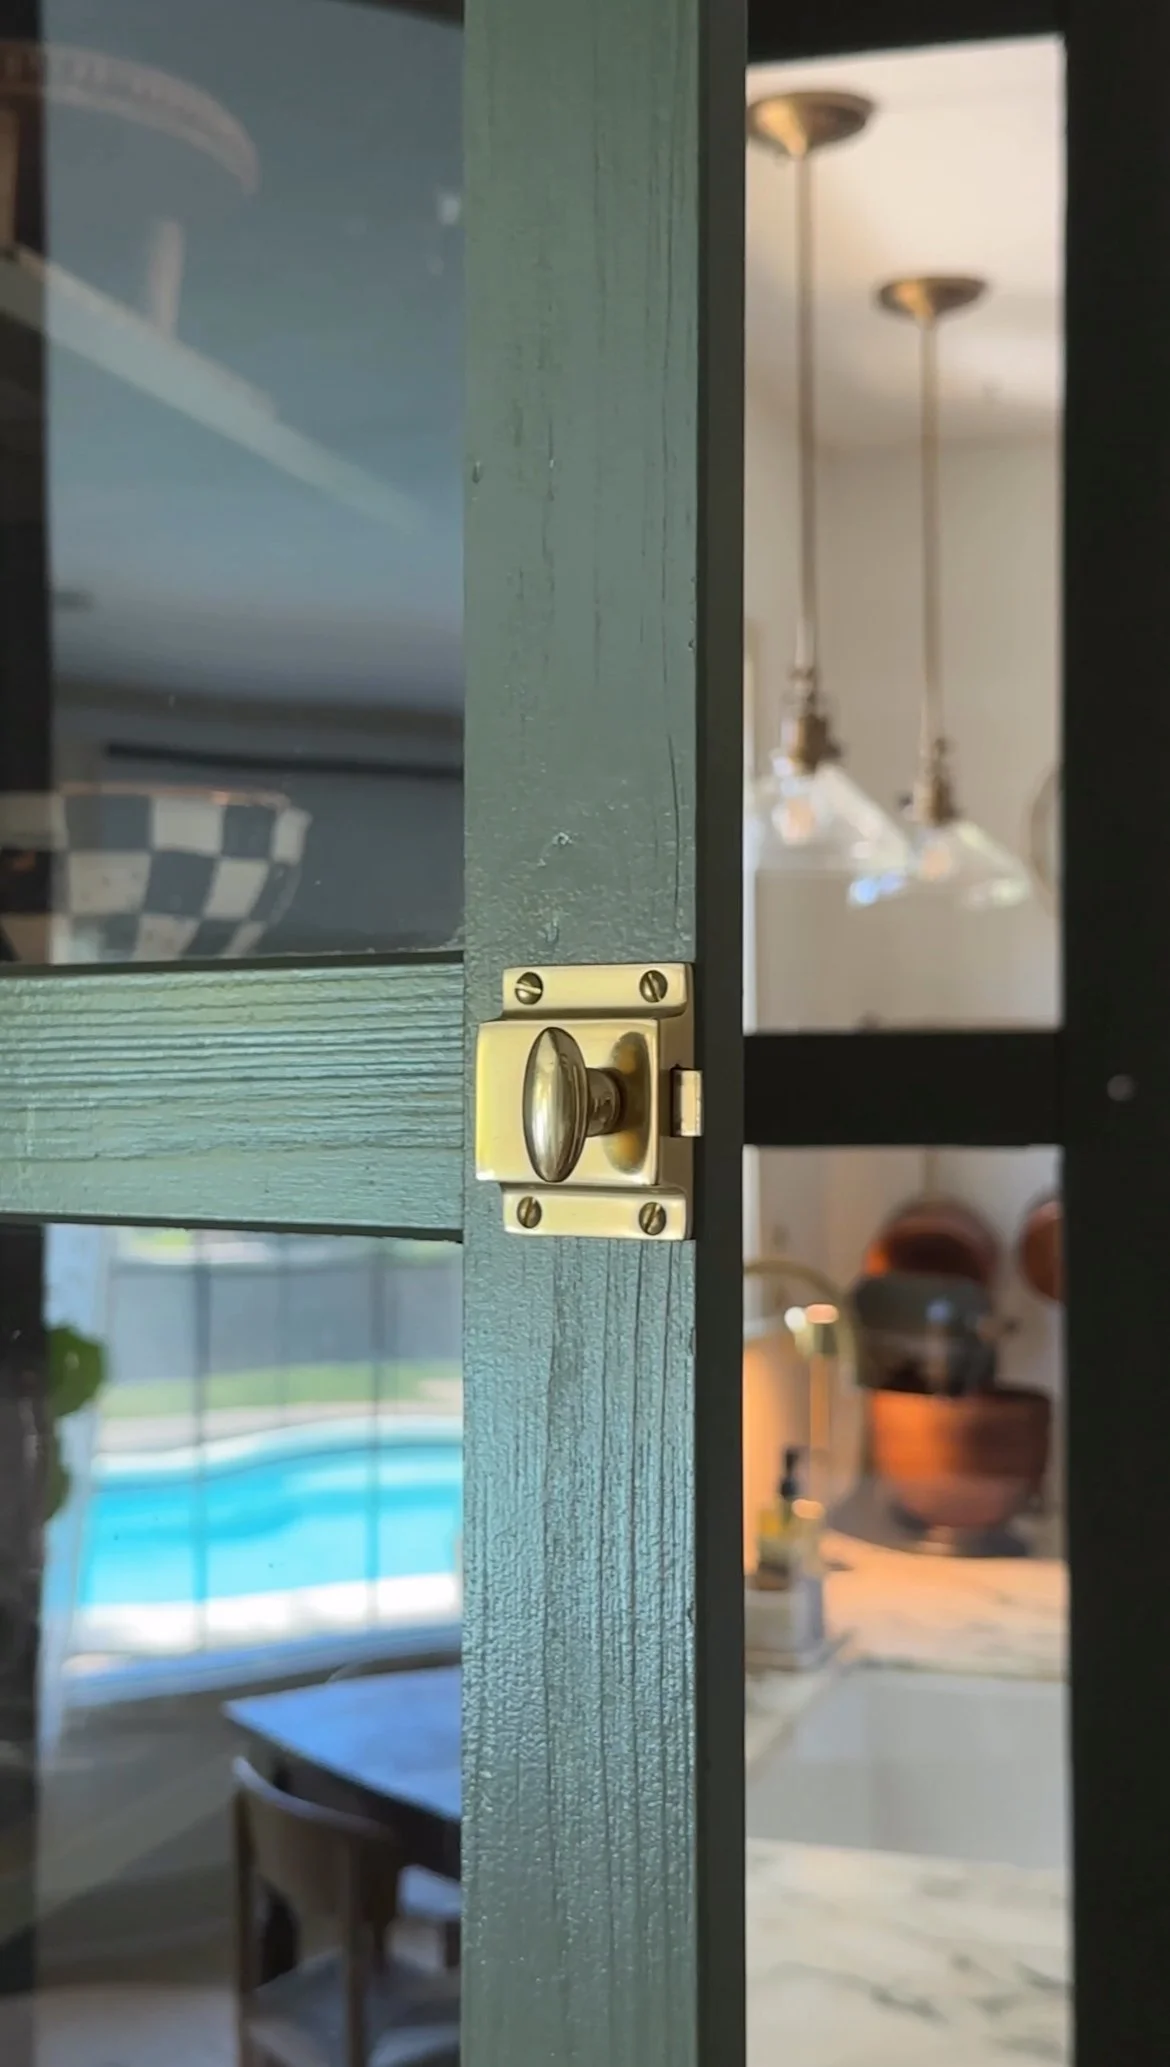
My favorite cupboard latch from Rejuvenation
Surprisingly, this ended up being my most-liked project of 2022! I had low expectations when I started, but it quickly became one of my favorites. A little molding, fresh paint, and new hardware completely transformed this basic white cabinet into a custom, vintage-inspired piece that adds so much charm and functionality to this corner of our kitchen.
Second Project: Giving Soul to a Basic Piece
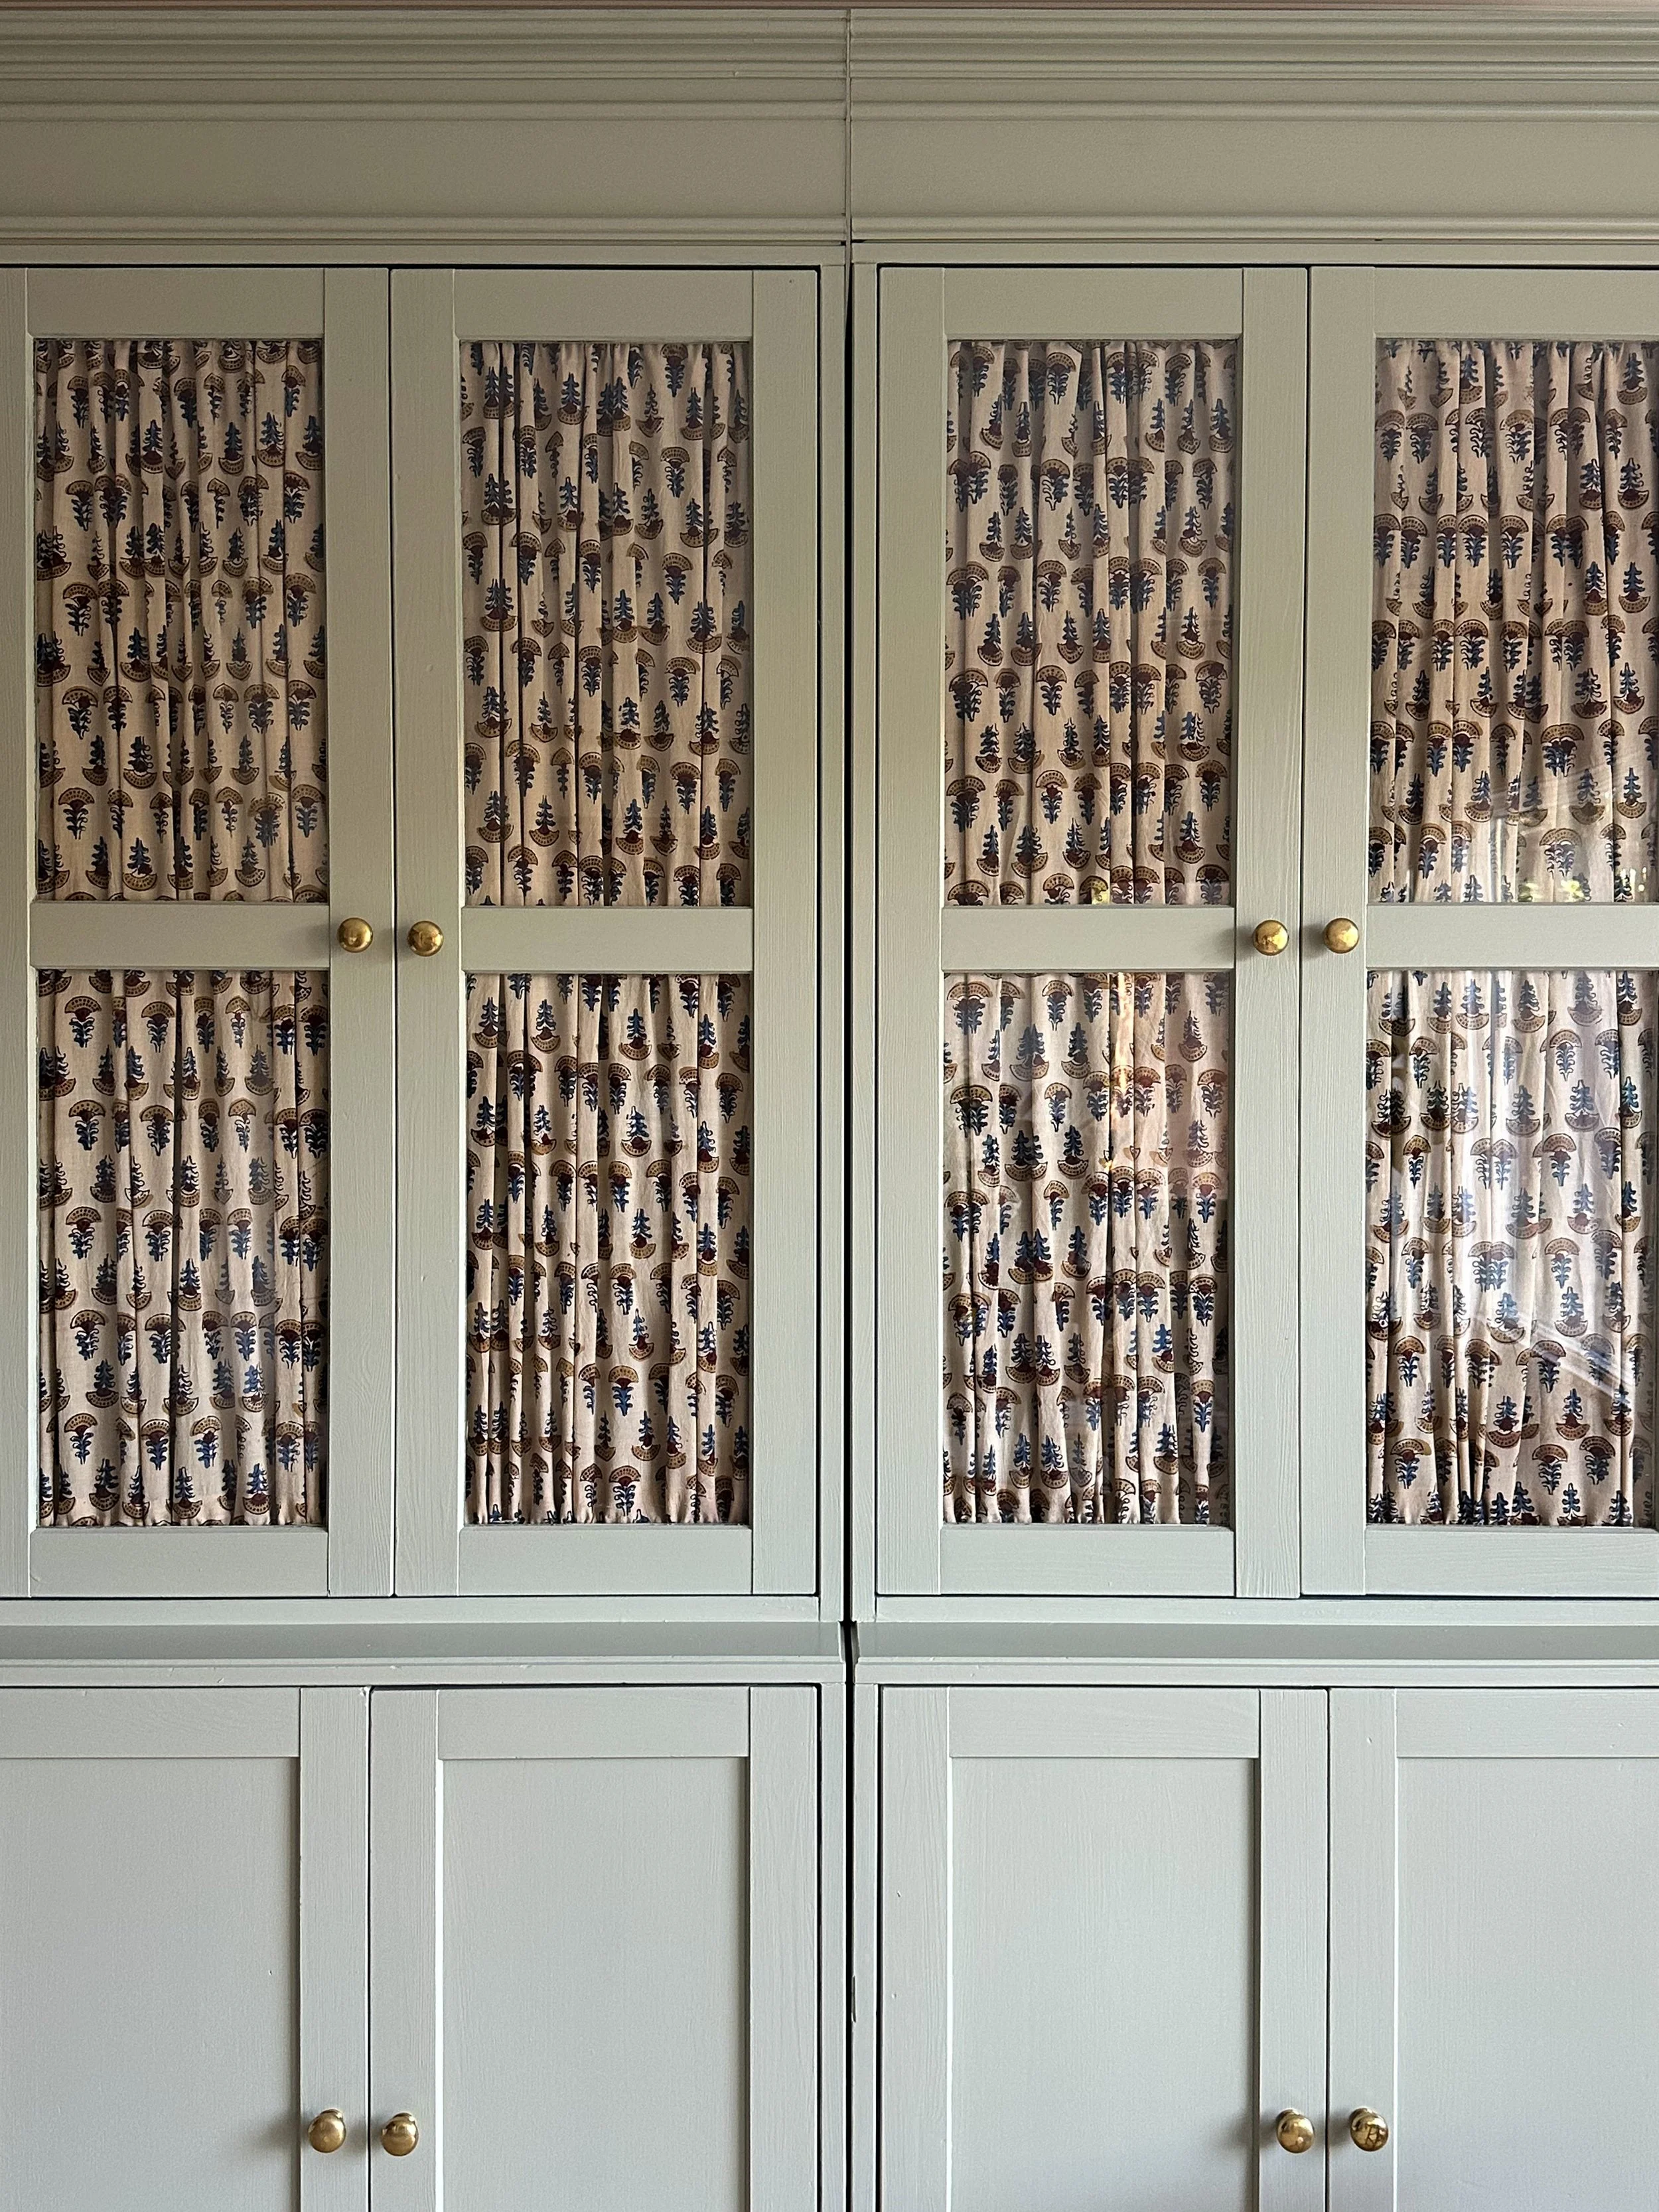
Here goes another IKEA Havsta hack—this time for our bonus room, which doubles as our everyday dining room and playroom. It took a little while to get started on this one since we had already used one Havsta cabinet for the kitchen, and the second one was out of stock forever.
The truth is, I’ve been wanting to transform these cabinets ever since we set them up two years ago. White is nice and clean, but you know me, my heart always leans toward color. It just took a bit of time to land on the right idea and color story. And honestly? I love how they turned out.
Just like the first Havsta project, this started out as a plain IKEA piece. But I wanted it to feel more timeless, something a little more European-inspired. Now it feels like a piece you'd find in an older home: simple, classic, and full of character. It’s such an easy way to give a basic cabinet more presence and soul.
But enough backstory, let’s get into the project.

The IKEA cabinets before.
The plan was similar to what I did in the kitchen: paint, molding to add height and detail, wallpaper, and new hardware.
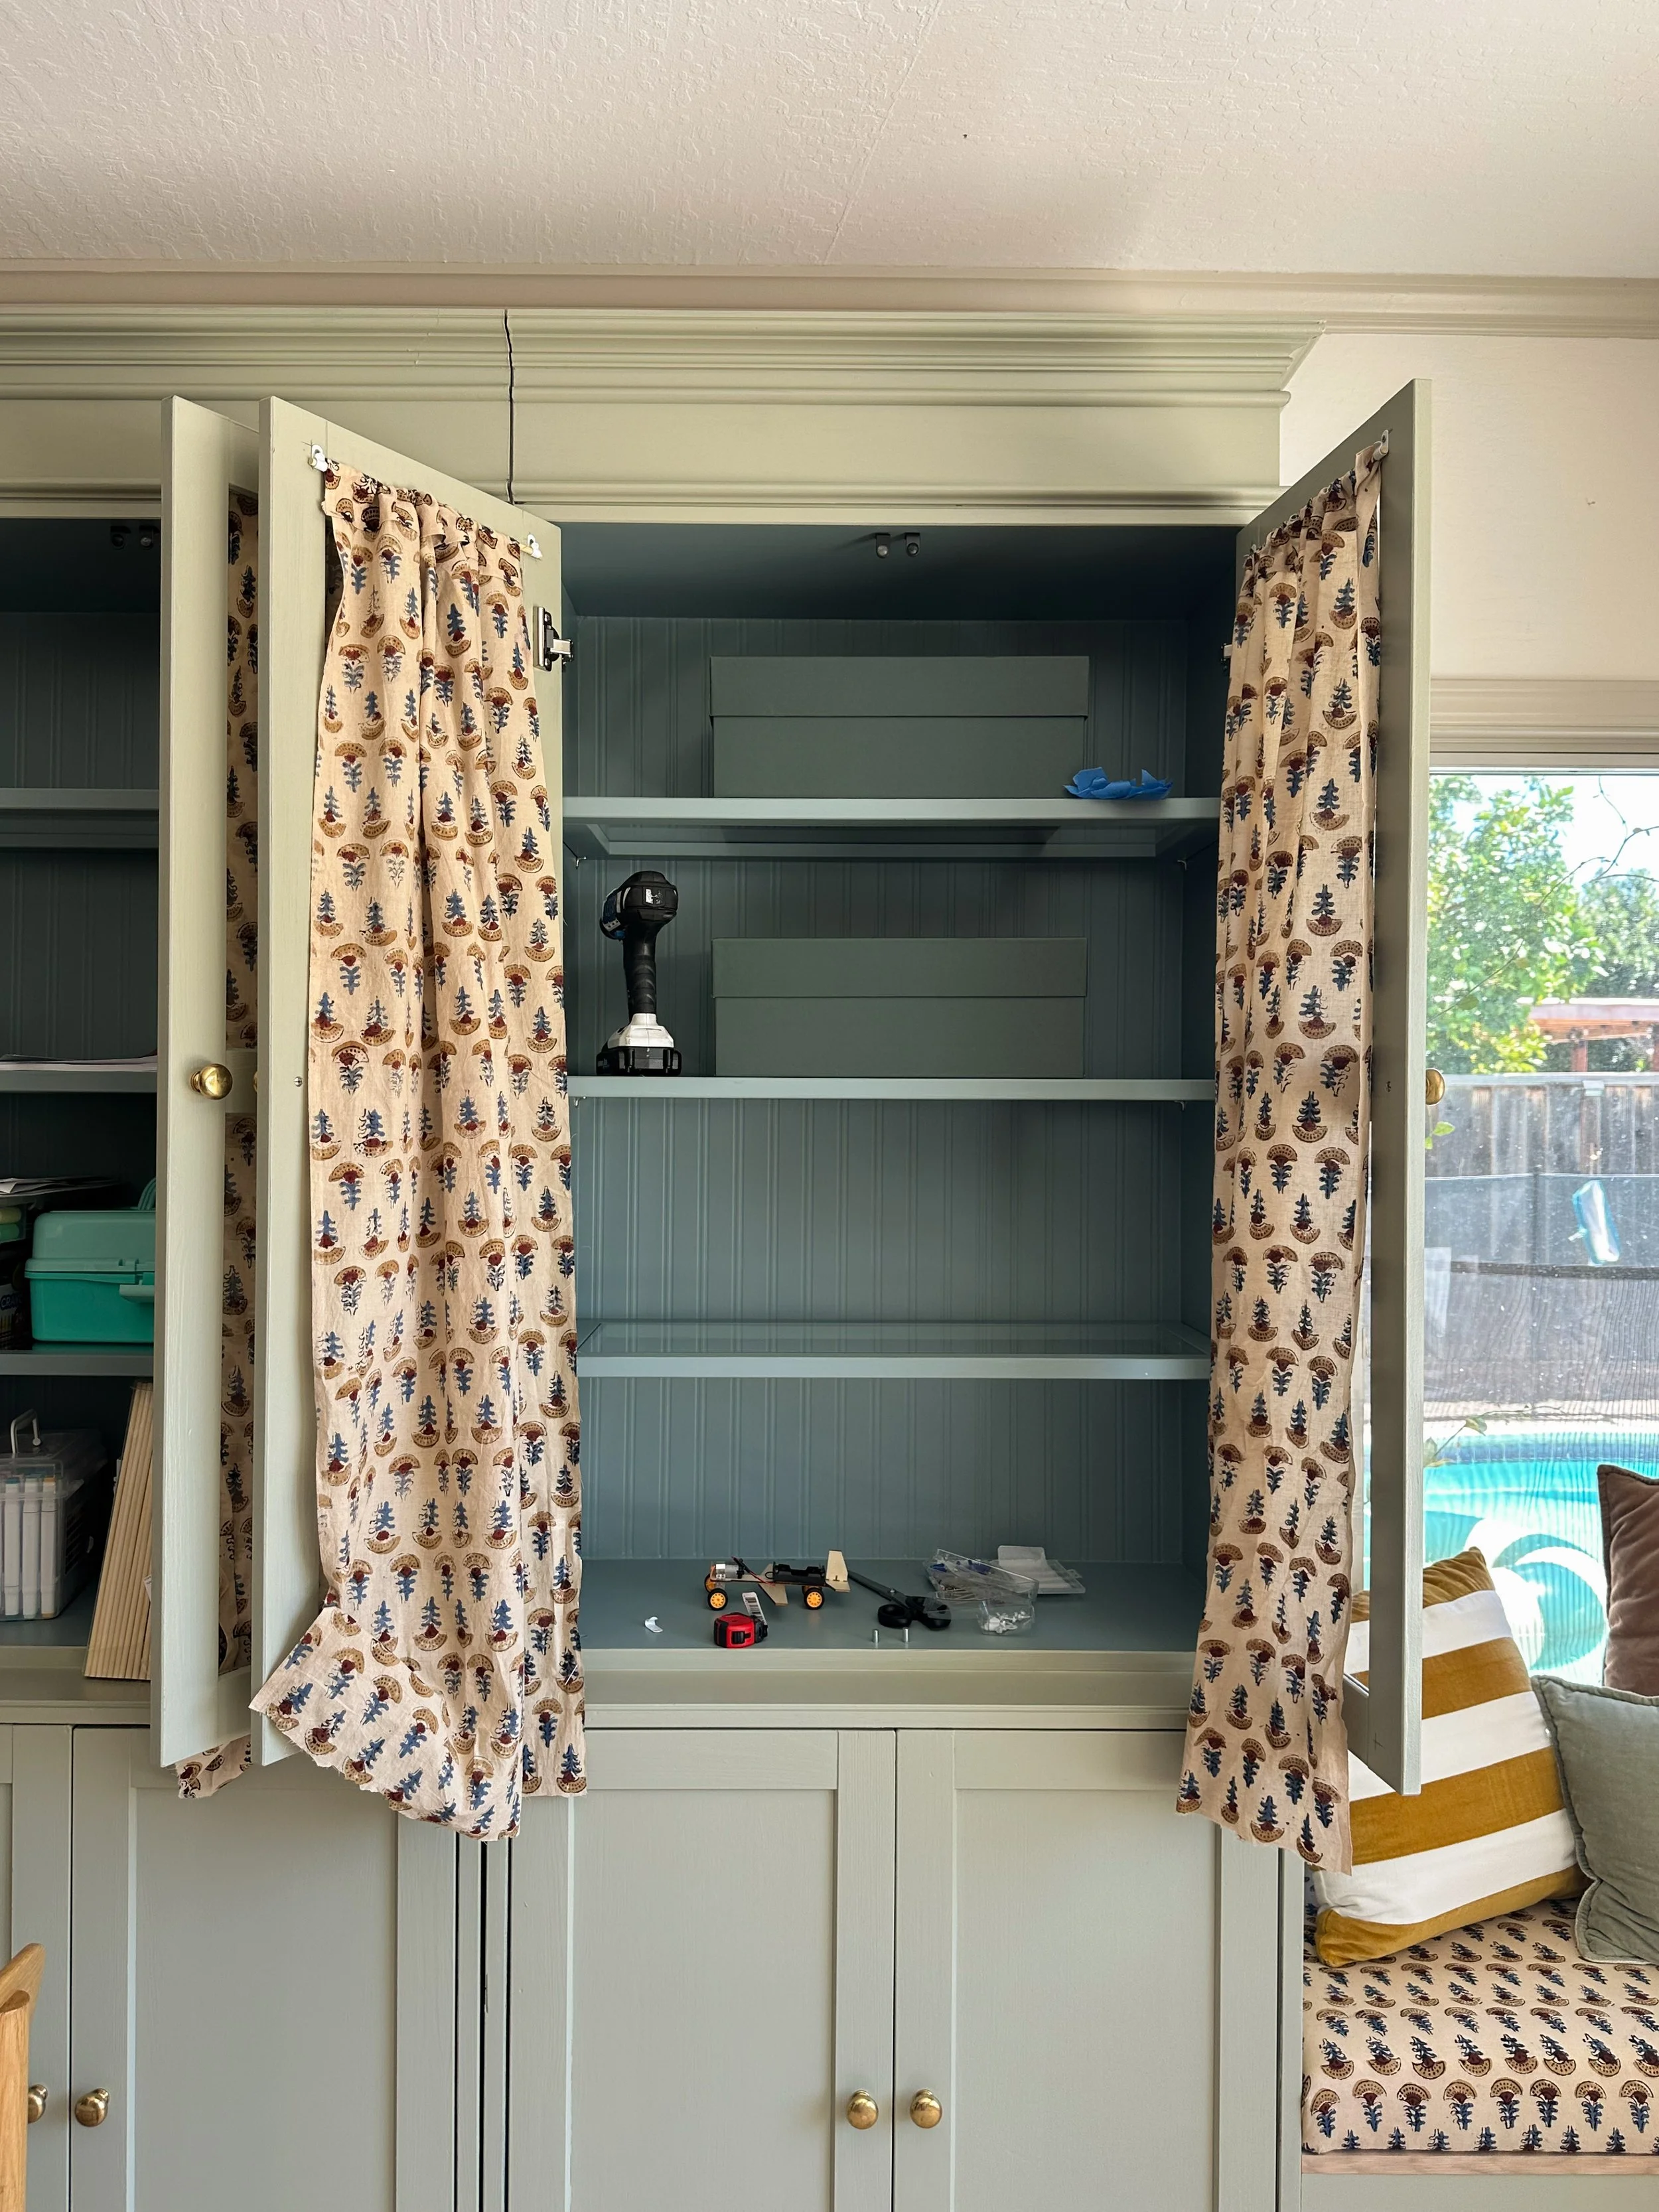
I started with the wallpaper. I used a beadboard-style pre-pasted wallpaper to add texture. It was my first time working with pre-pasted paper, so there were definitely a few hiccups. I just dipped each panel in water and installed it right away, but by Monday, parts of it were already peeling off. So I removed it and reinstalled everything using wallpaper paste. Lesson learned: sometimes you need more glue or maybe I just didn’t follow the instructions properly! This wallpaper looks very realistic! and such an inexpensive way to add texture to this cabinet.


Installing the pre-pasted wallpaper
Next came the molding. I added one section at a time, keeping flexibility in mind. I wanted the cabinets to look like built-ins when placed together but still be easy to move if we ever decide to rearrange the space (spoiler alert: I did). I used scrap wood for the backing (secured with Liquid Nails), then attached the molding using wood glue. Same process as the cabinet in our kitchen. But this time I used an additional piece of molding as you can see in the pictures.
The extra height and detail really elevate the look of these IKEA Havsta cabinets.

Then came paint prep. With this type of IKEA finish, it’s pretty simple: lightly sand or use liquid sandpaper (a deglosser), then prime and paint. My go-to roller for a smooth finish is the Purdy Ultra Finish with Nap Roller Cover. For this project, I also tried something new: Mask & Peel. You brush it onto the glass like paint, and once the paint dries, you peel it off, 10/10 recommend, It acts like a primer for the wood and a paint shield for the glass. Just be sure to apply a thick enough coat so it peels off easily and satisfyingly.
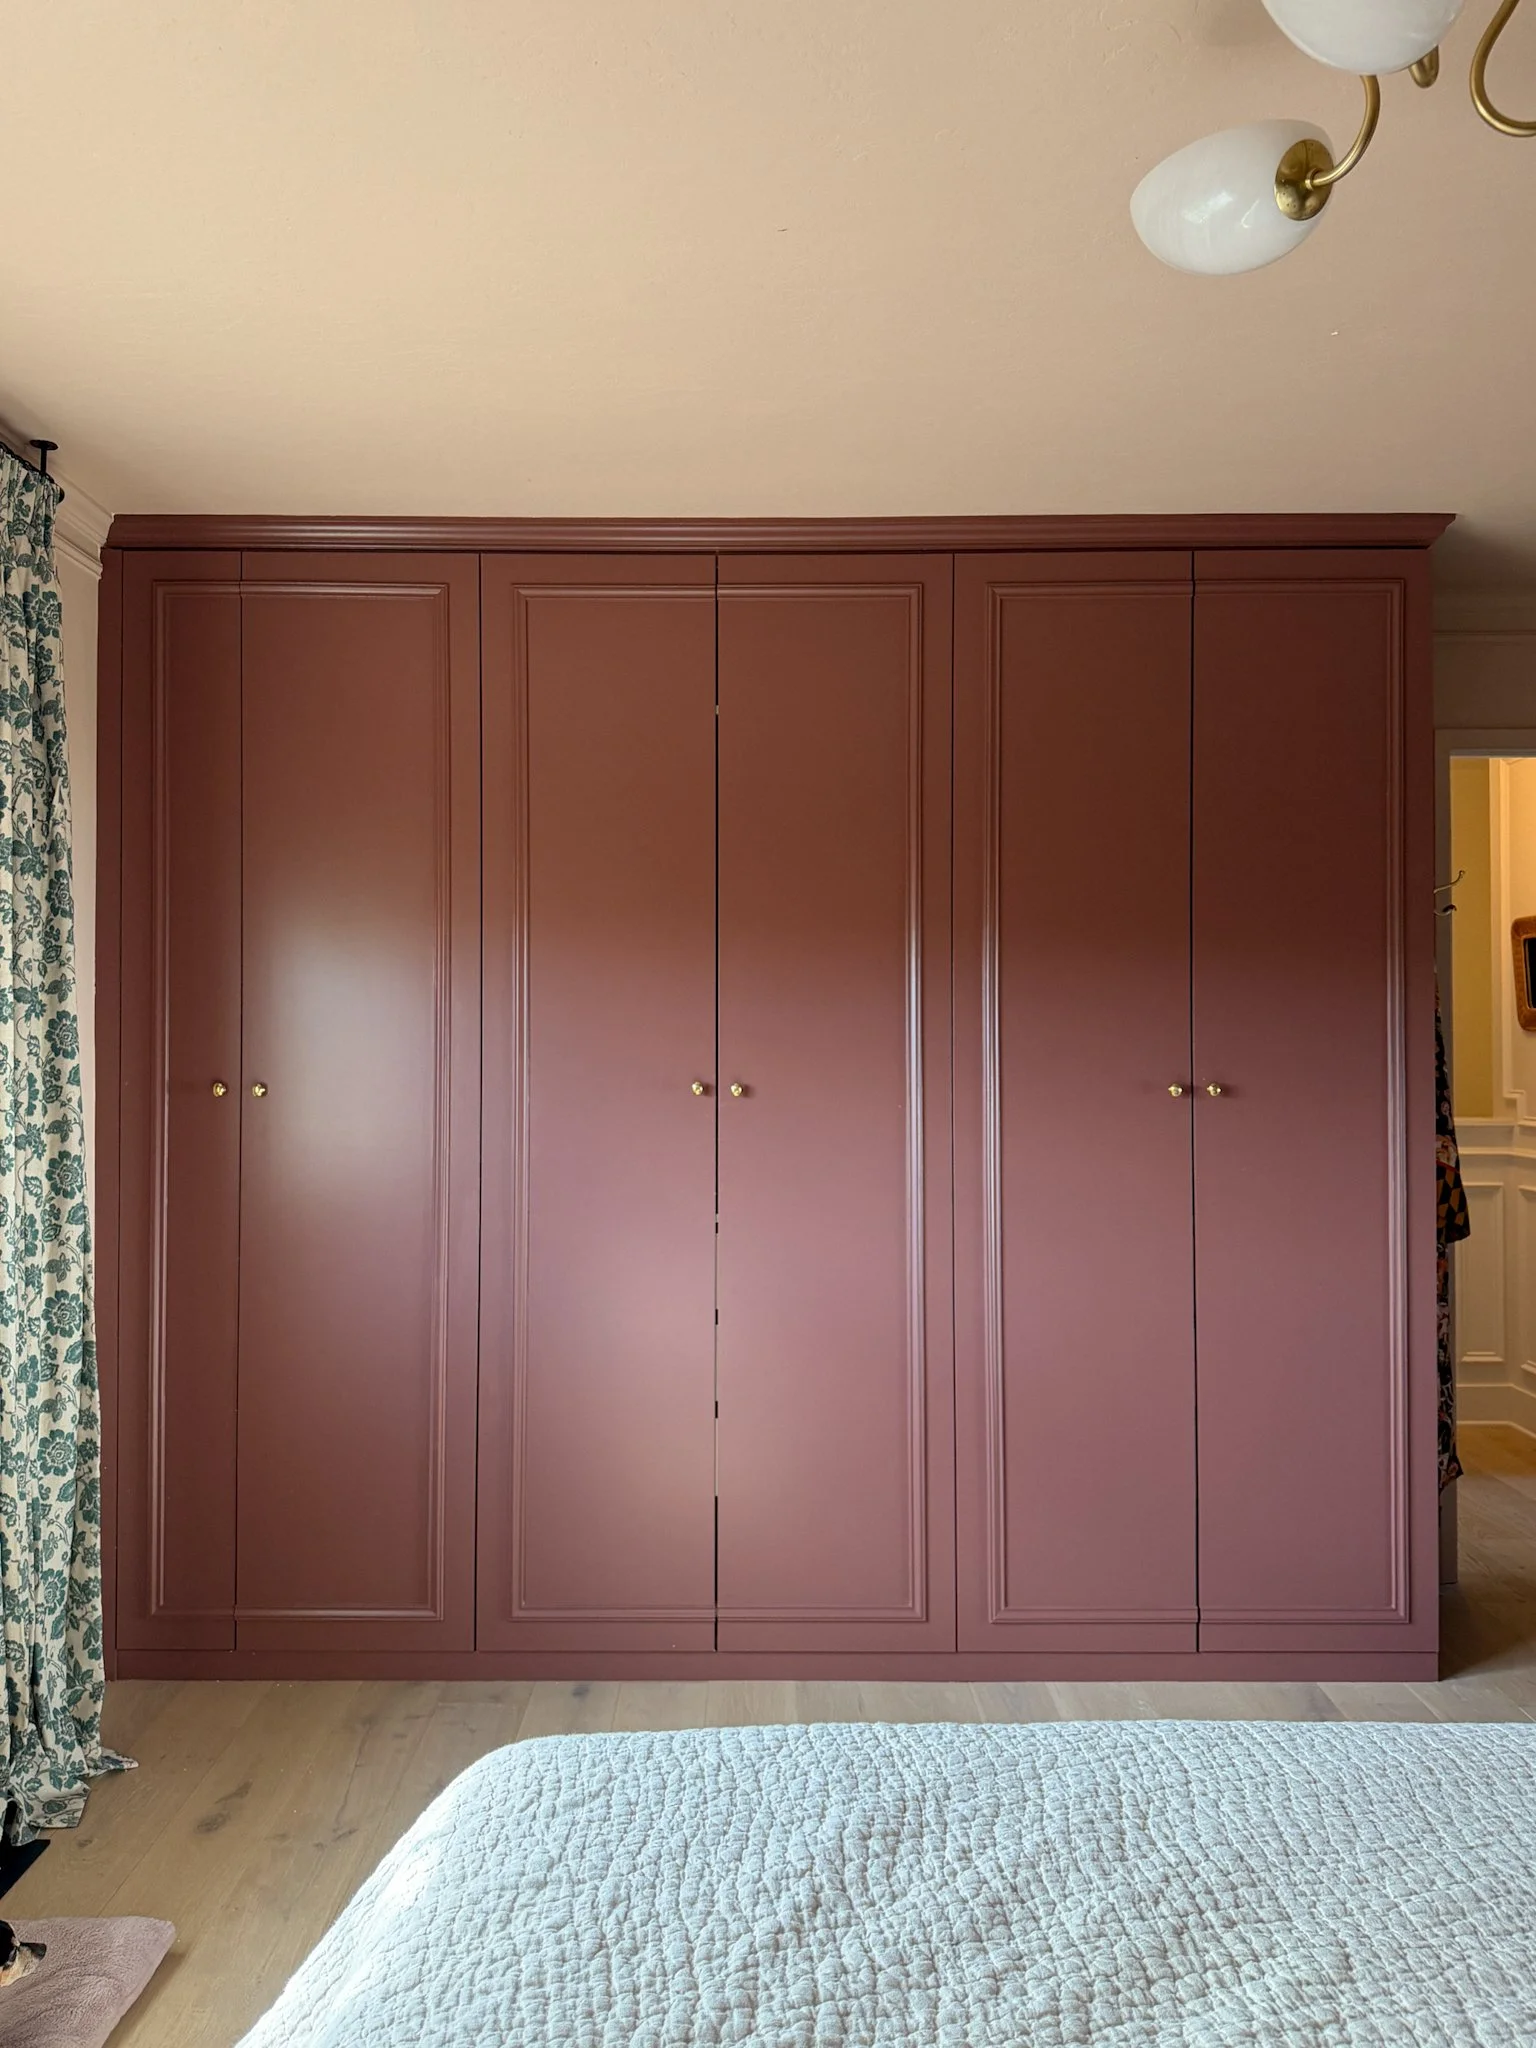
For the colors, I went with something unexpected: Oval Room Blue and London Clay by Farrow & Ball (color-matched with Sherwin-Williams Emerald in Satin). The combo of soft blue and warm brown surprised me in the best way.

The colors I considered: Oval Room Blue with London Clay, and Aegean Teal with Mouse’s Back.


Door knobs by Rejuvenation
The texture, color, and subtle contrast added just the right amount of charm. It doesn’t feel overwhelming, just really balanced in our home. My favorite detail? Seeing that soft blue peek through the glass doors.
Styling the cabinets was a fun little challenge, too. I didn’t want to keep them too neutral, so I added pops of red pulling inspiration from our kitchen island, which sits on the opposite side of the family room.

And now, in true me fashion: it’s two years later, and I’m ready for a change. While working on a spontaneous window seat project, I ended up repainting this cabinet, shocking, I know. I had a leftover gallon of French Gray from when I painted the Murphy bed room, and I couldn’t resist. And guess what? This might be one of my favorite spontaneous projects of the year so far.
The fabric I used to make the curtains.