DIY Project: Building a Budget-Friendly Faux Fireplace
This is the first space you see when you walk into our home, and although it has evolved so much since we moved in almost 5 years ago, I’ve always felt like it was missing something.
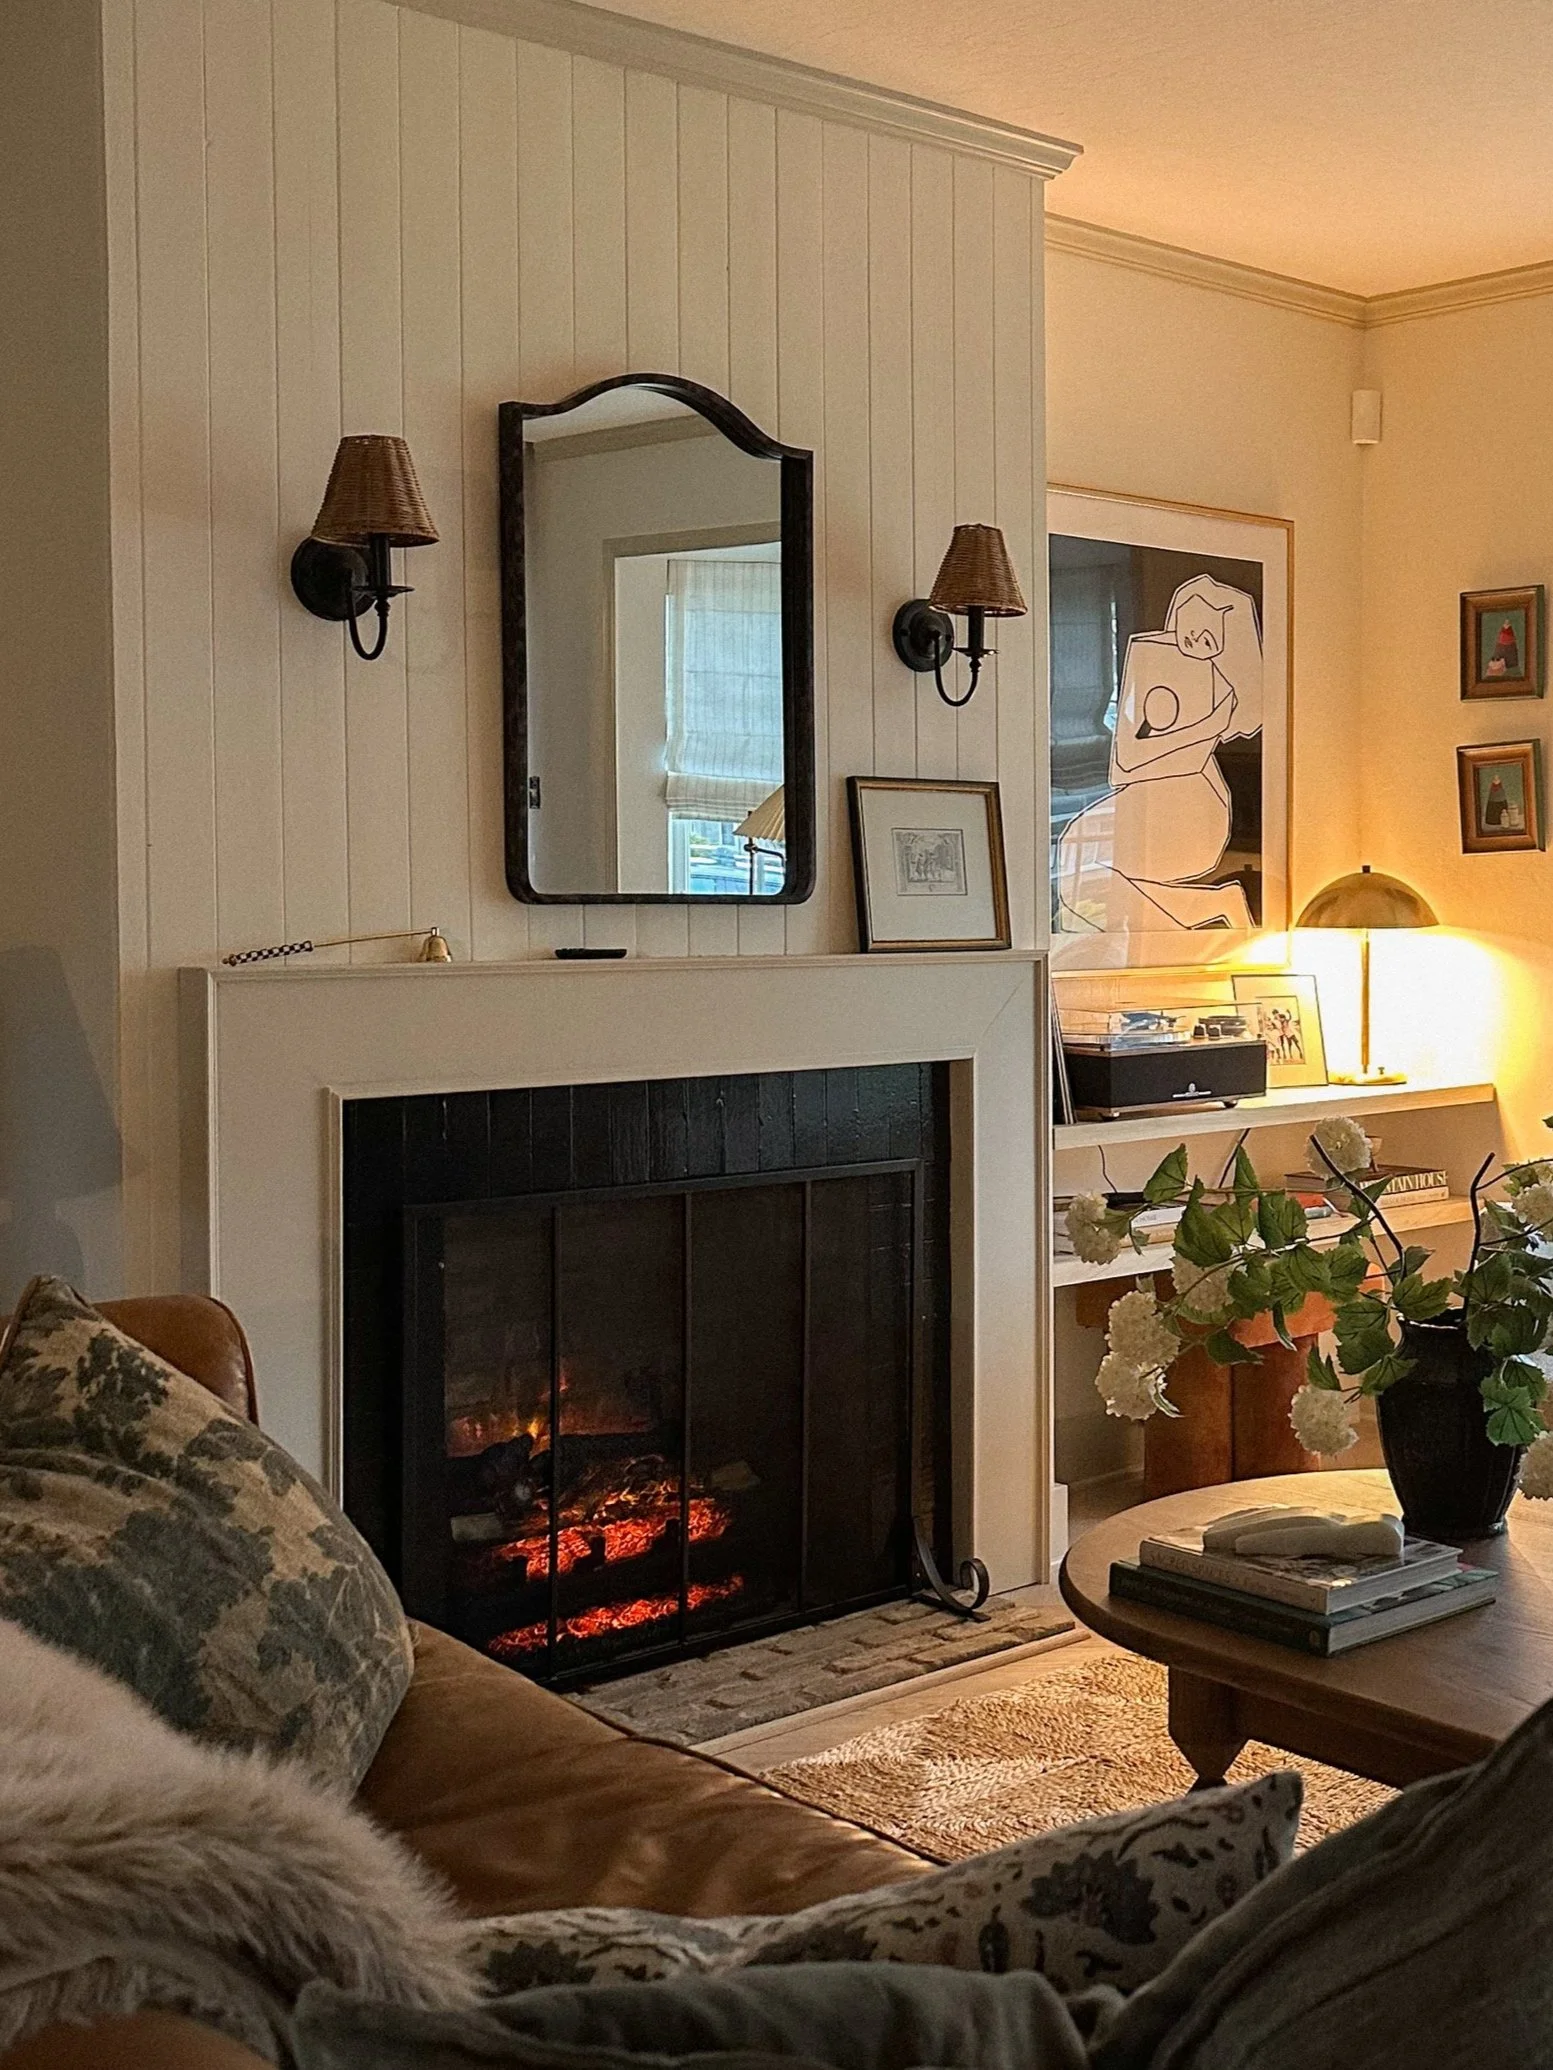
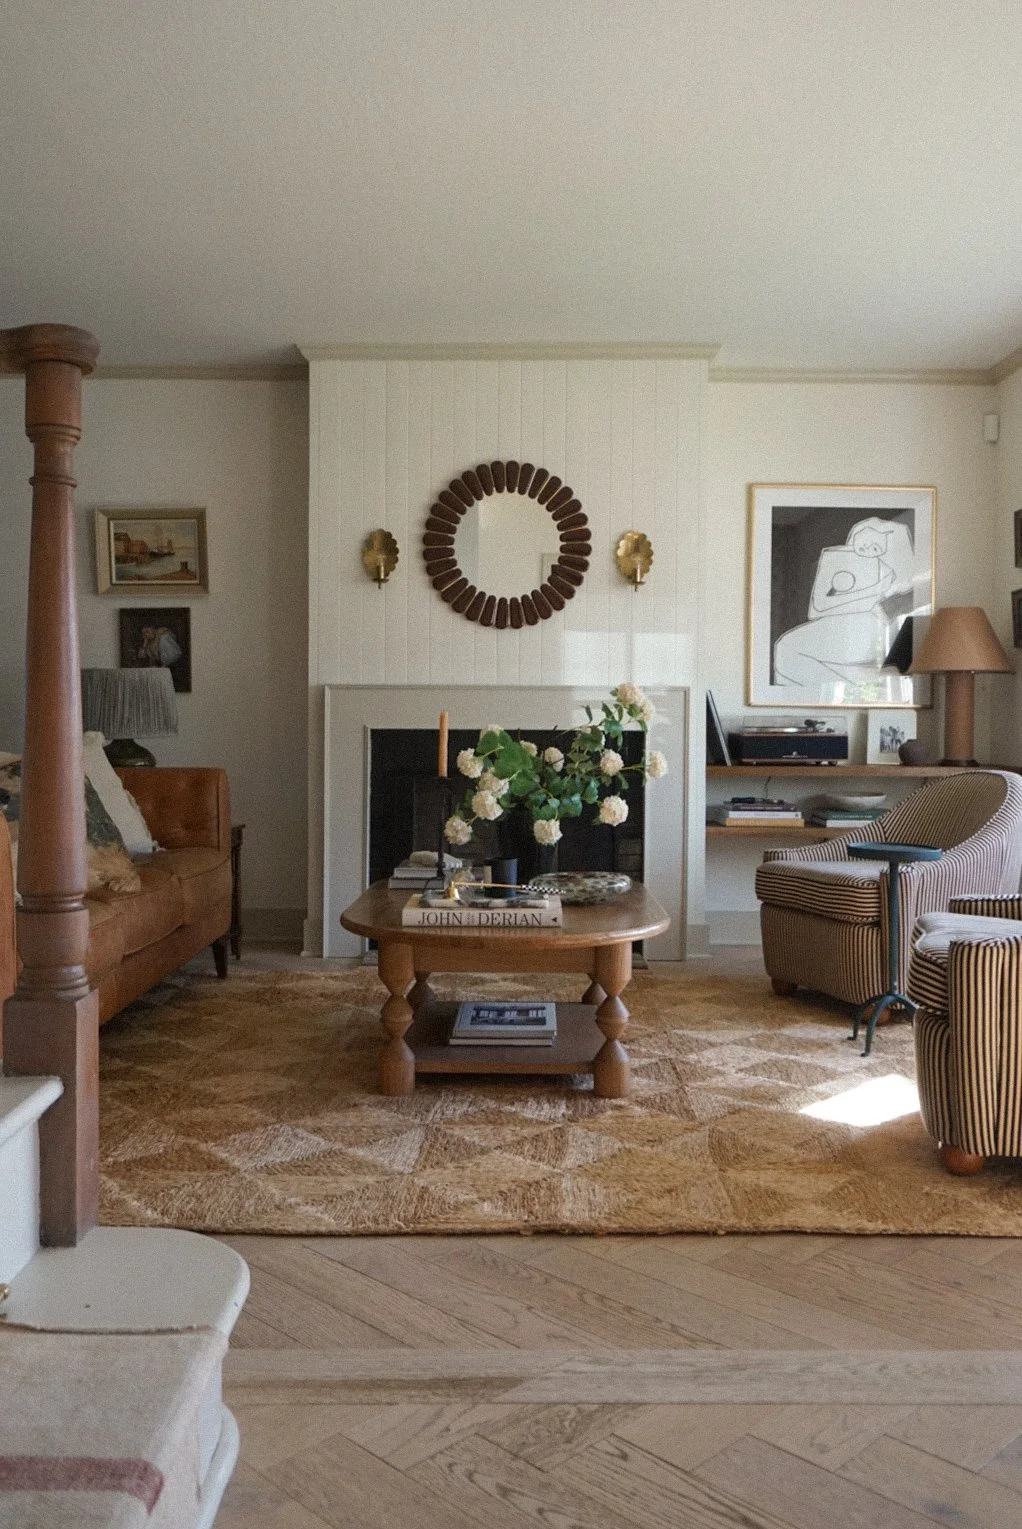
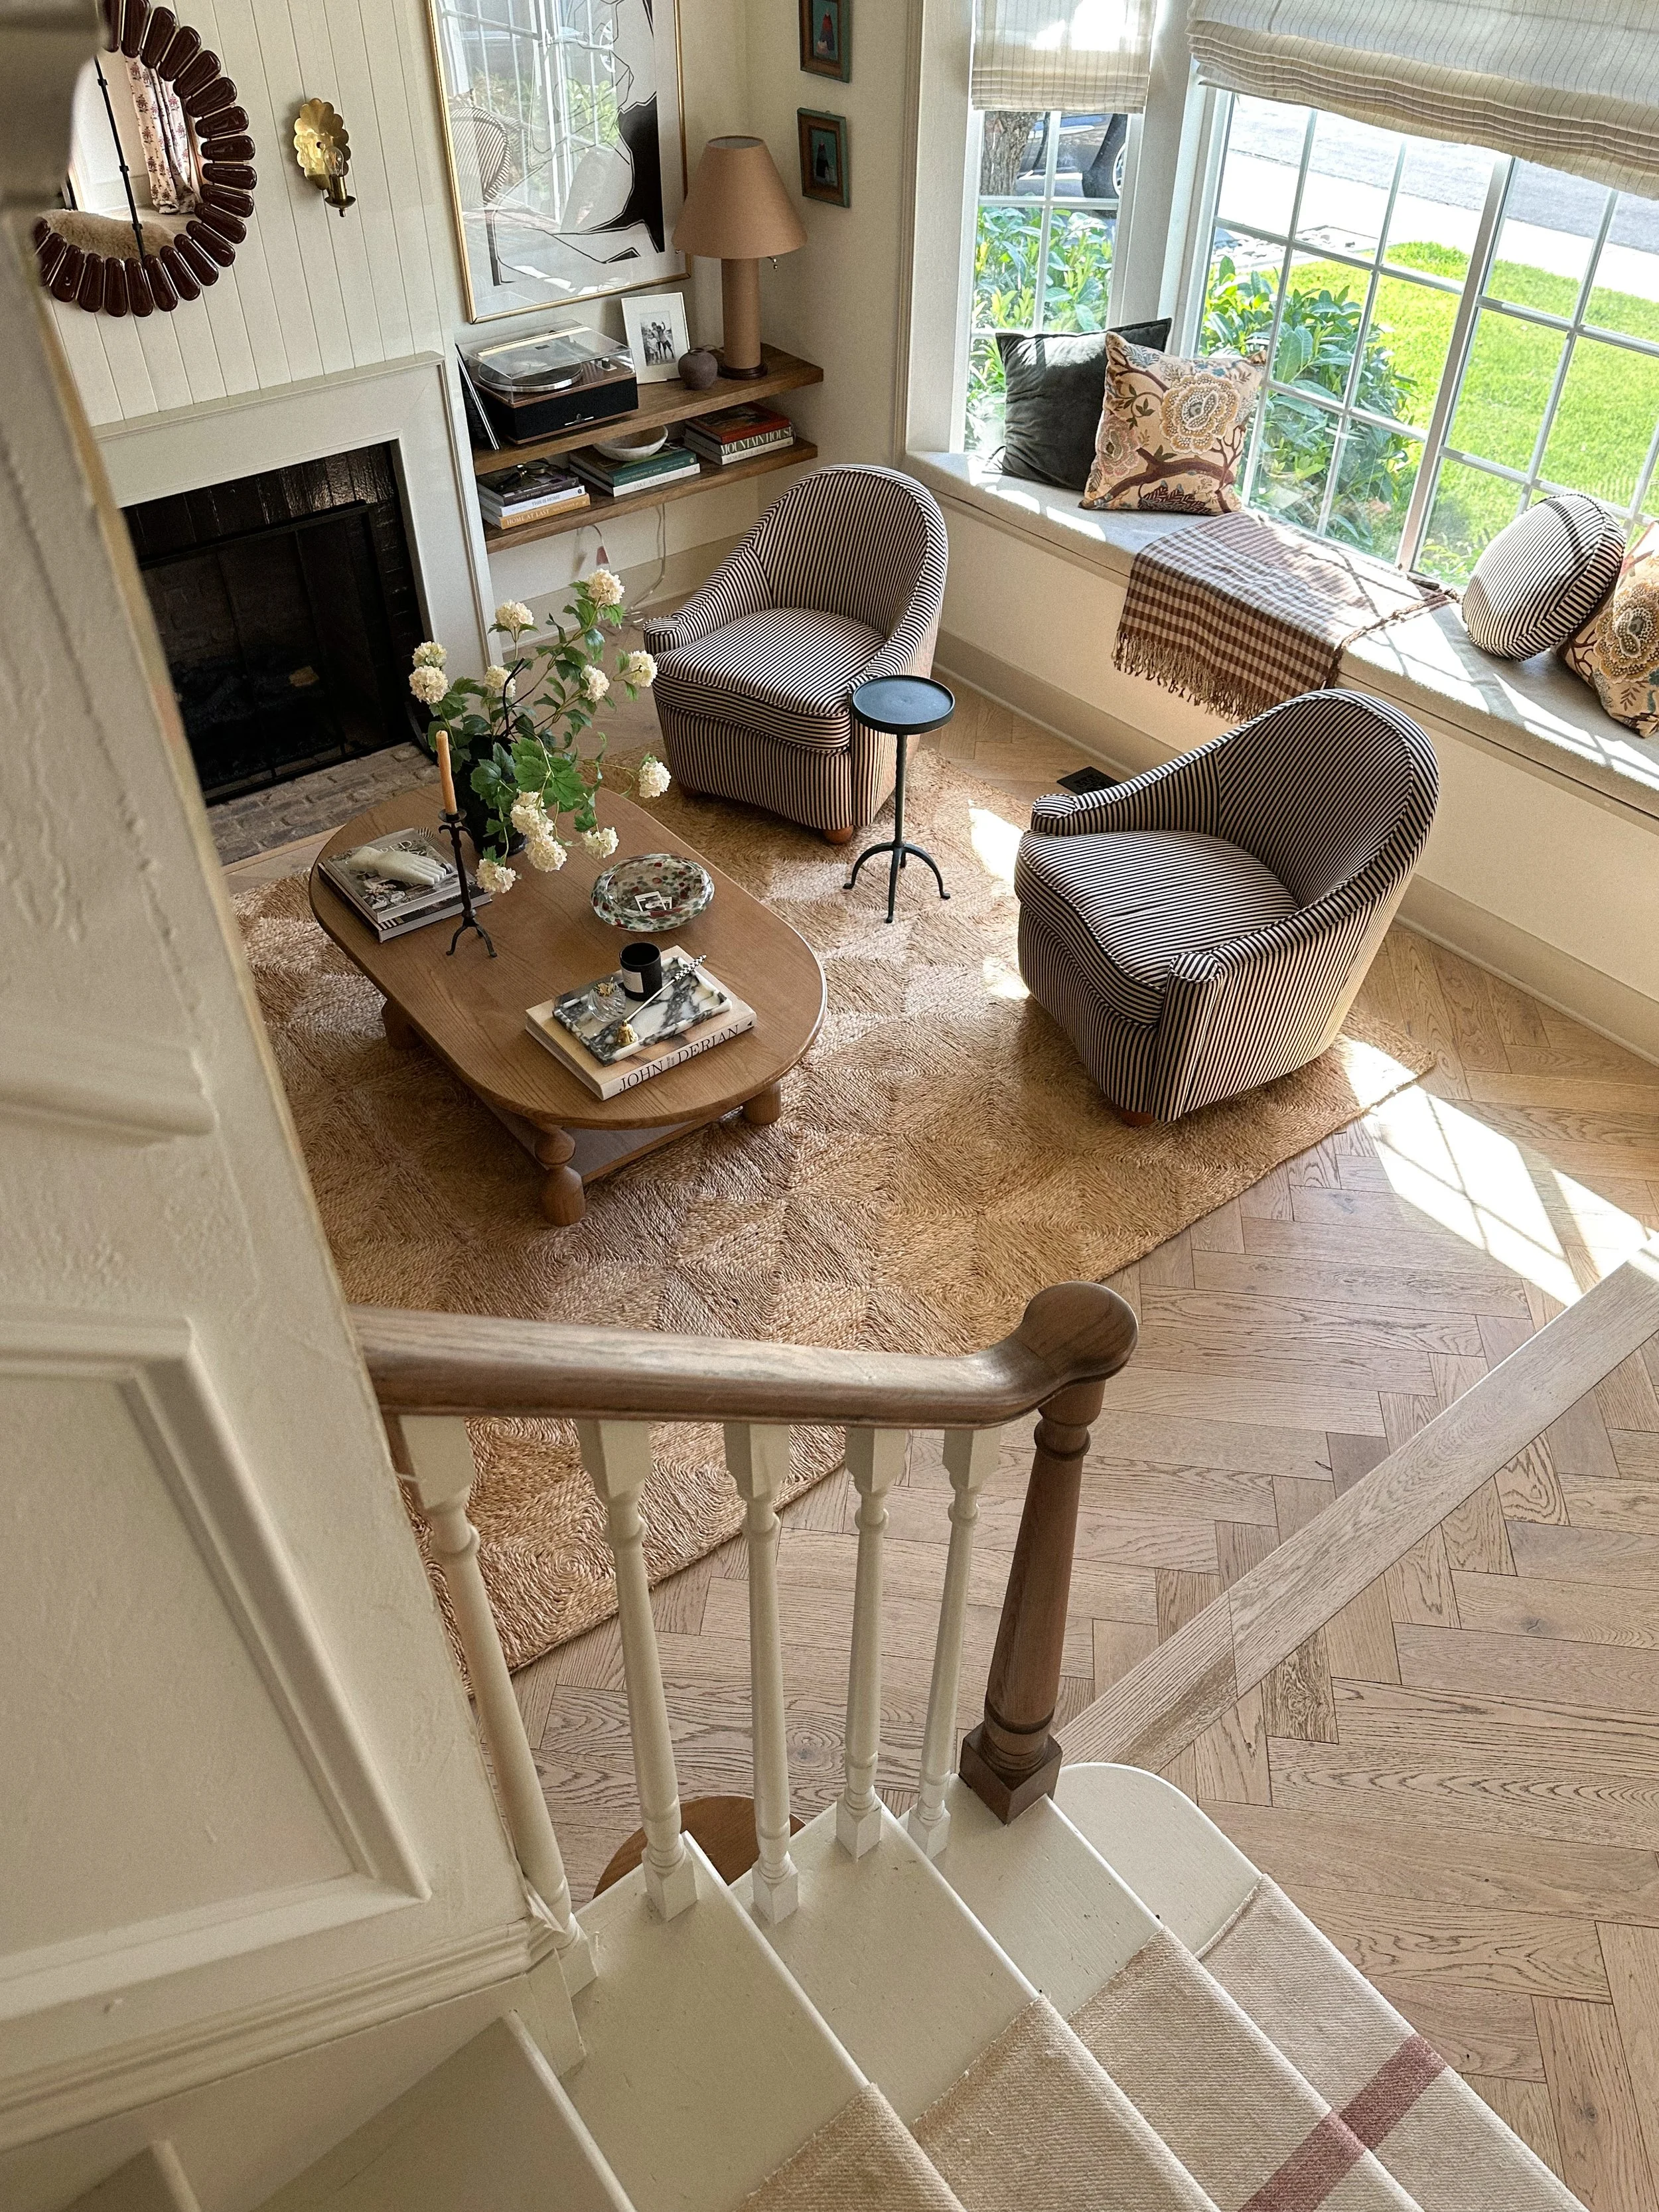
Adding the fireplace completely transformed the vibe of the room—it’s hard to believe it wasn’t always there. The brick we chose brought so much warmth and character to the space, and having a proper focal point finally brought the living and dining areas together. I love how the mantel, sconces, and subtle finishing details make the room feel cozy and inviting. It truly feels like the space is now telling the story I always wanted it to tell. In this post, I’ll walk you through everything we did.


Since we moved in, in 2020, we’ve removed the blue carpet, stripped the wallpaper, painted the walls white, and installed gorgeous herringbone floors. Over time, I moved things around, hung and swapped art pieces, and rearranged furniture—and while it looked great, it always felt incomplete.
For a while, I considered adding some kind of wall molding or wainscoting, but I was never 100% sold on the idea, and I didn’t want to rush any changes in this space. Then, last year—right around Christmas—it clicked: this room needed a fireplace. A fireplace would help define the living and dining areas in this long, rectangular room.

View sources. How it looked before we decided to add the fireplace.

Part 1: Building the Fireplace
As with every project, I started by making a rough sketch. My dad was visiting from Peru, so he and my husband Paul, worked on the framing while I began planning the design. I was clear that I wanted something modern, traditional, and timeless.
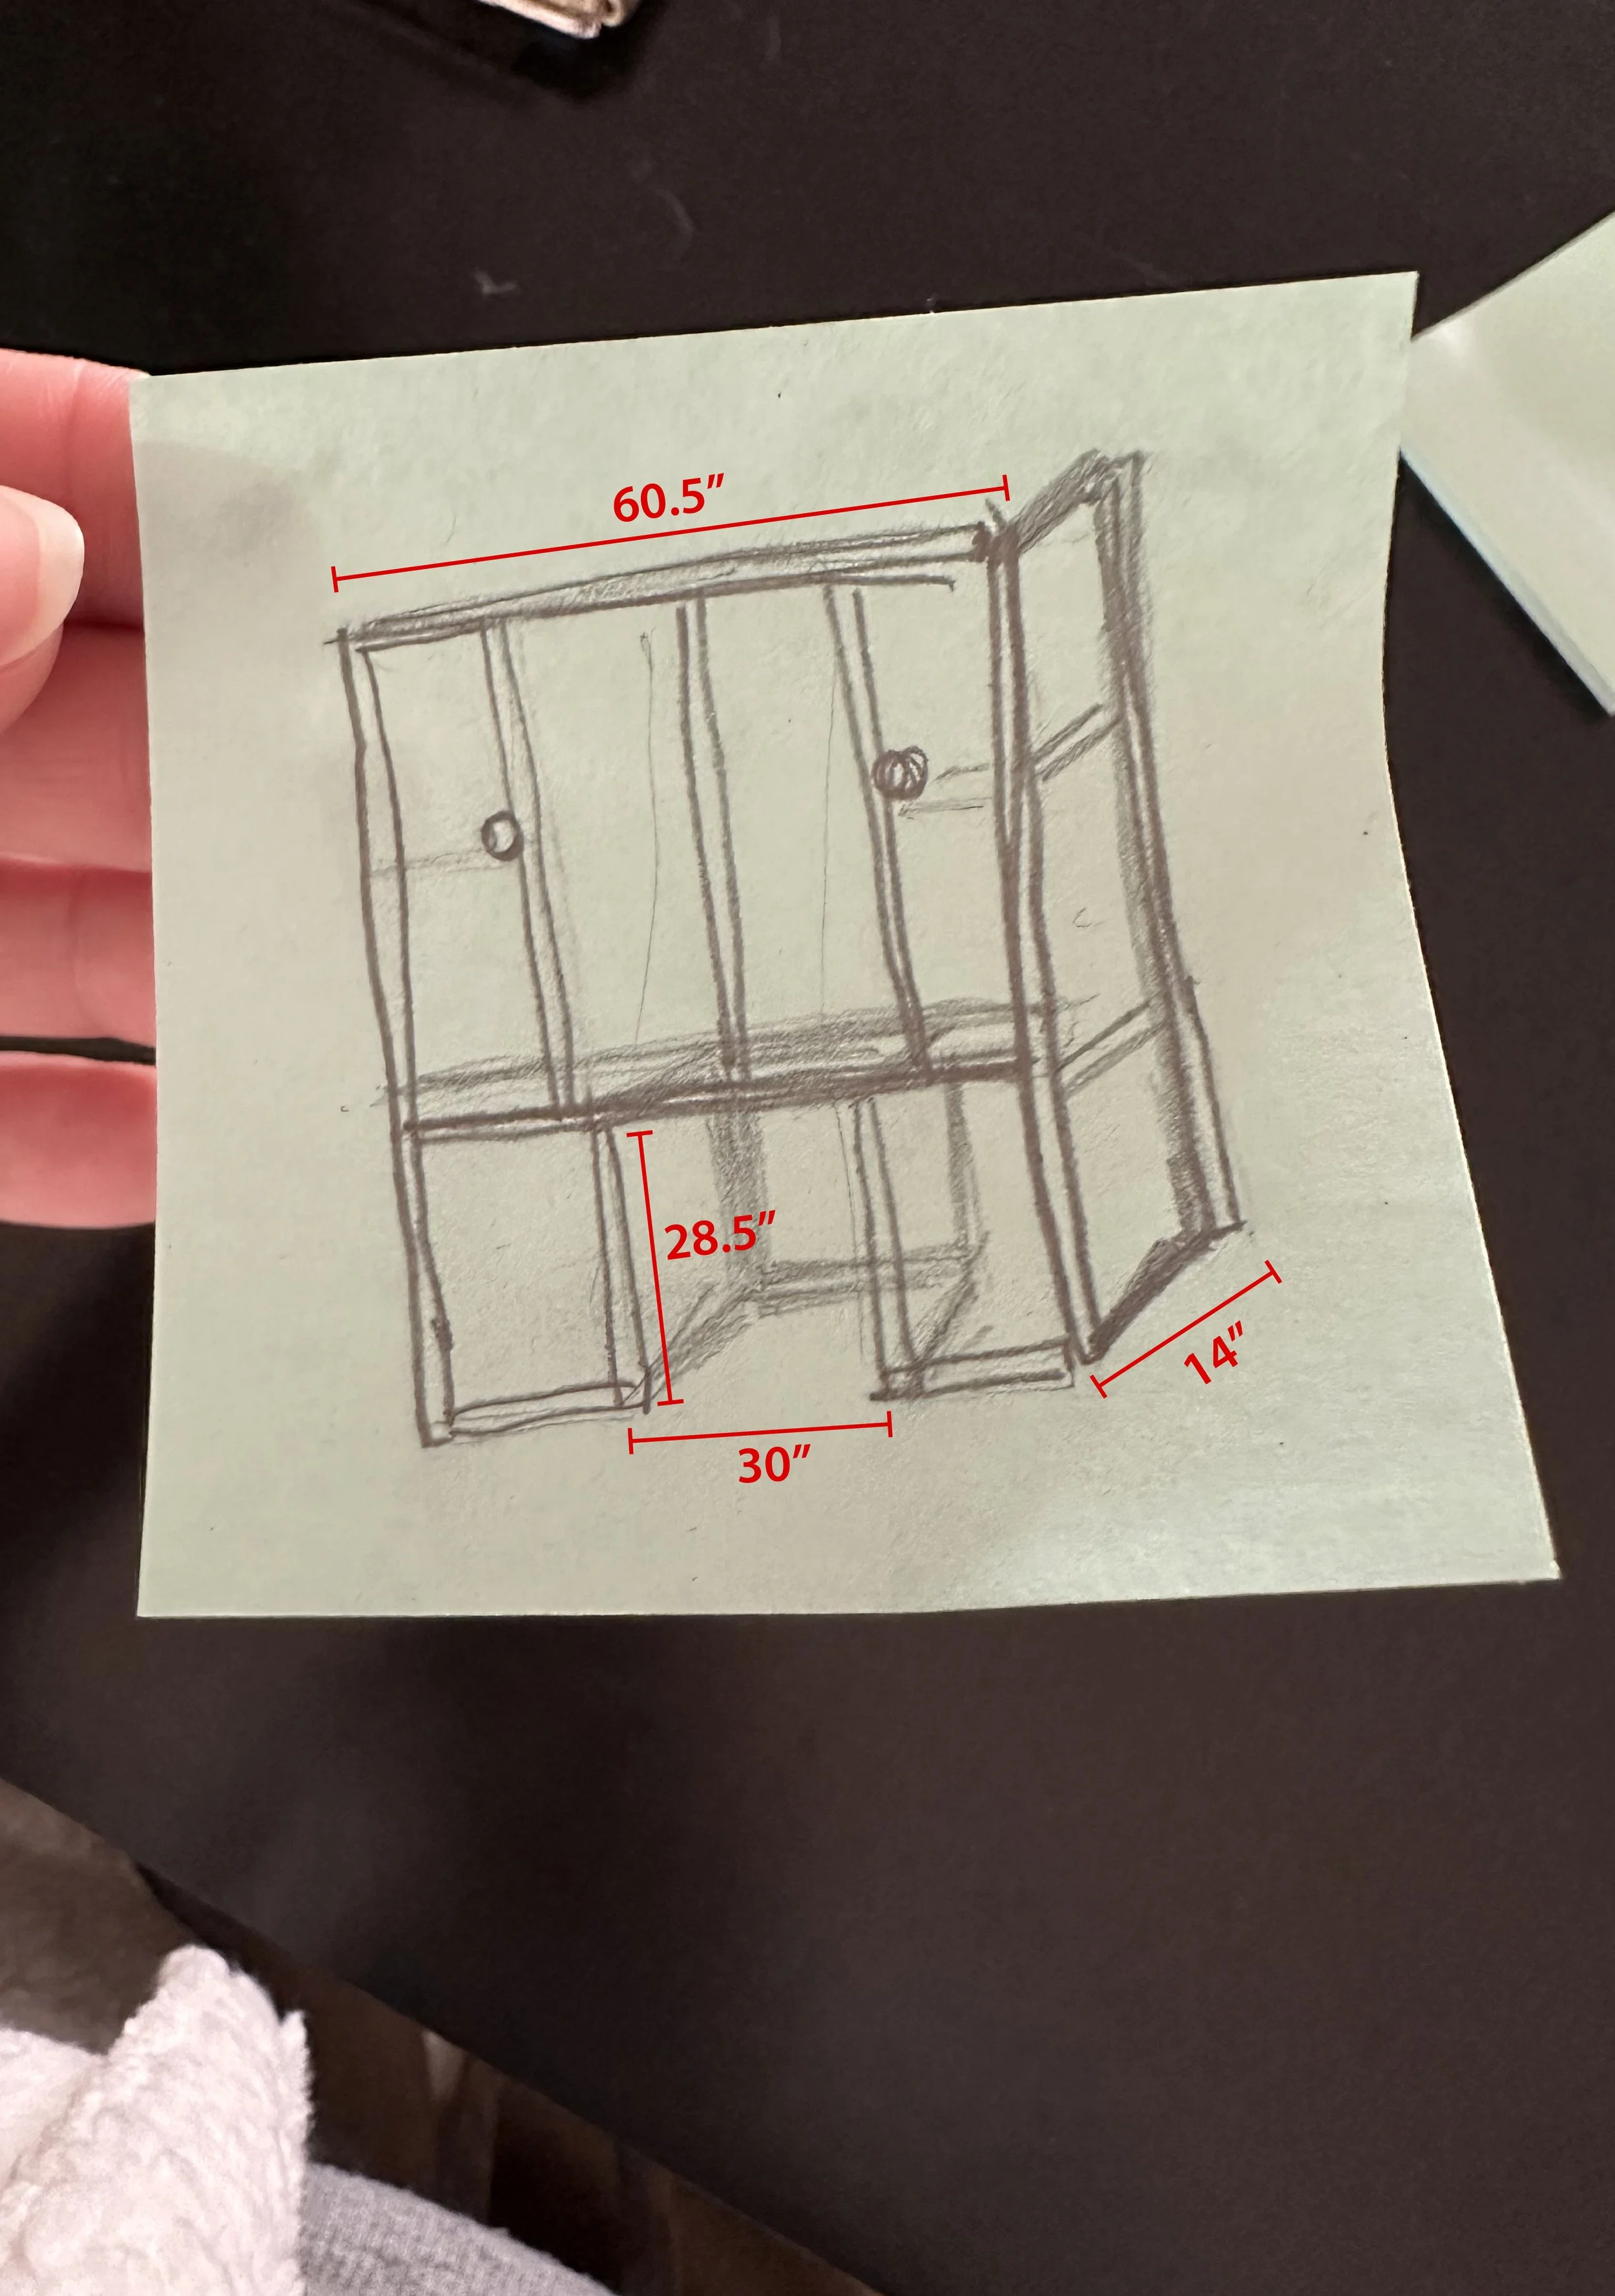
We ended up deciding on this size: 60.5'' total width, 14'' depth, and a 28.5'' tall by 30'' wide opening.
The Measurements:


The Build:

Taping the walls for scale


Once that was done, we added wood planking to the structure for extra character and installed DensShield in the areas where I planned to incorporate brick accents. It is just an affordable cedar tongue-and-groove that we always use for our home projects. We used the primed pine in two different widths: 6’’ and 3’’ on the sides, and 2x4’ as the base/spacer.
Honestly, it didn’t look great with our floors, so it’s getting painted as planned. I then built a simple mantel to frame the fireplace, aiming for a design that felt both traditional and slightly modern.
Finally, I added decorative molding for extra detail and to help everything blend seamlessly with the wall.

Building the fireplace mantel and using 2×4” as spacers.


Painting the trim SW Accessible Beige
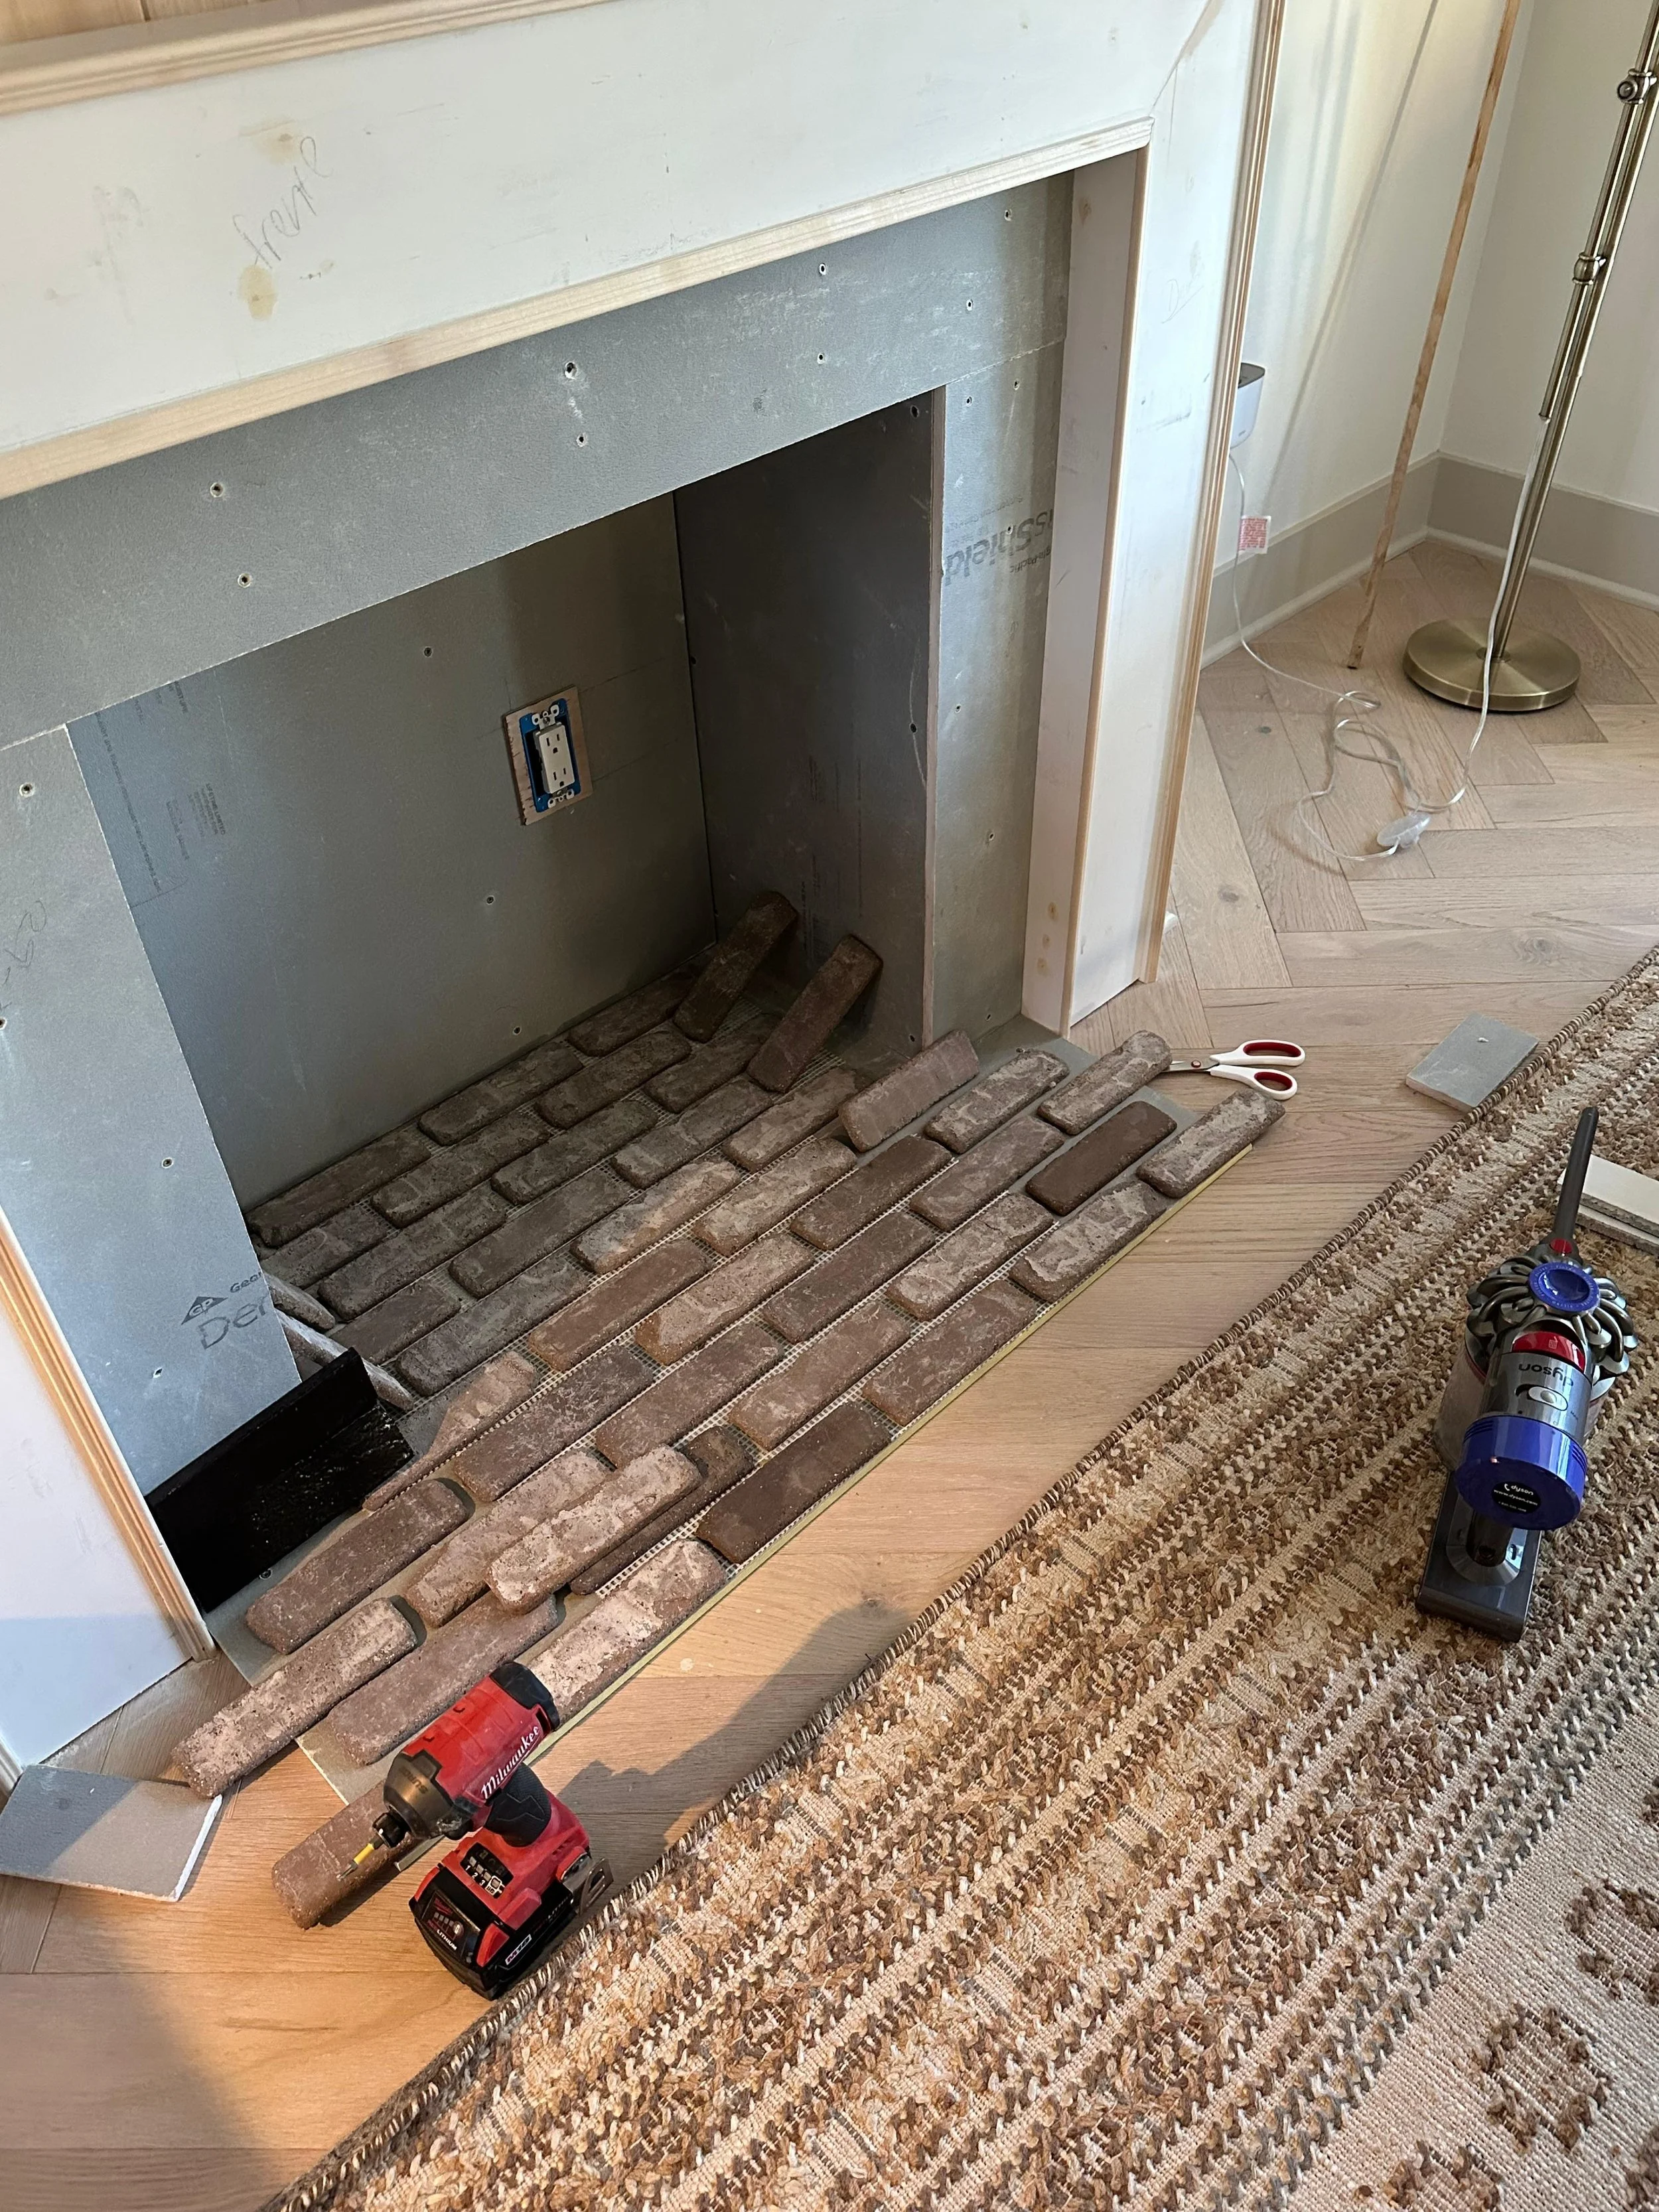
Part 2: Installing Brick
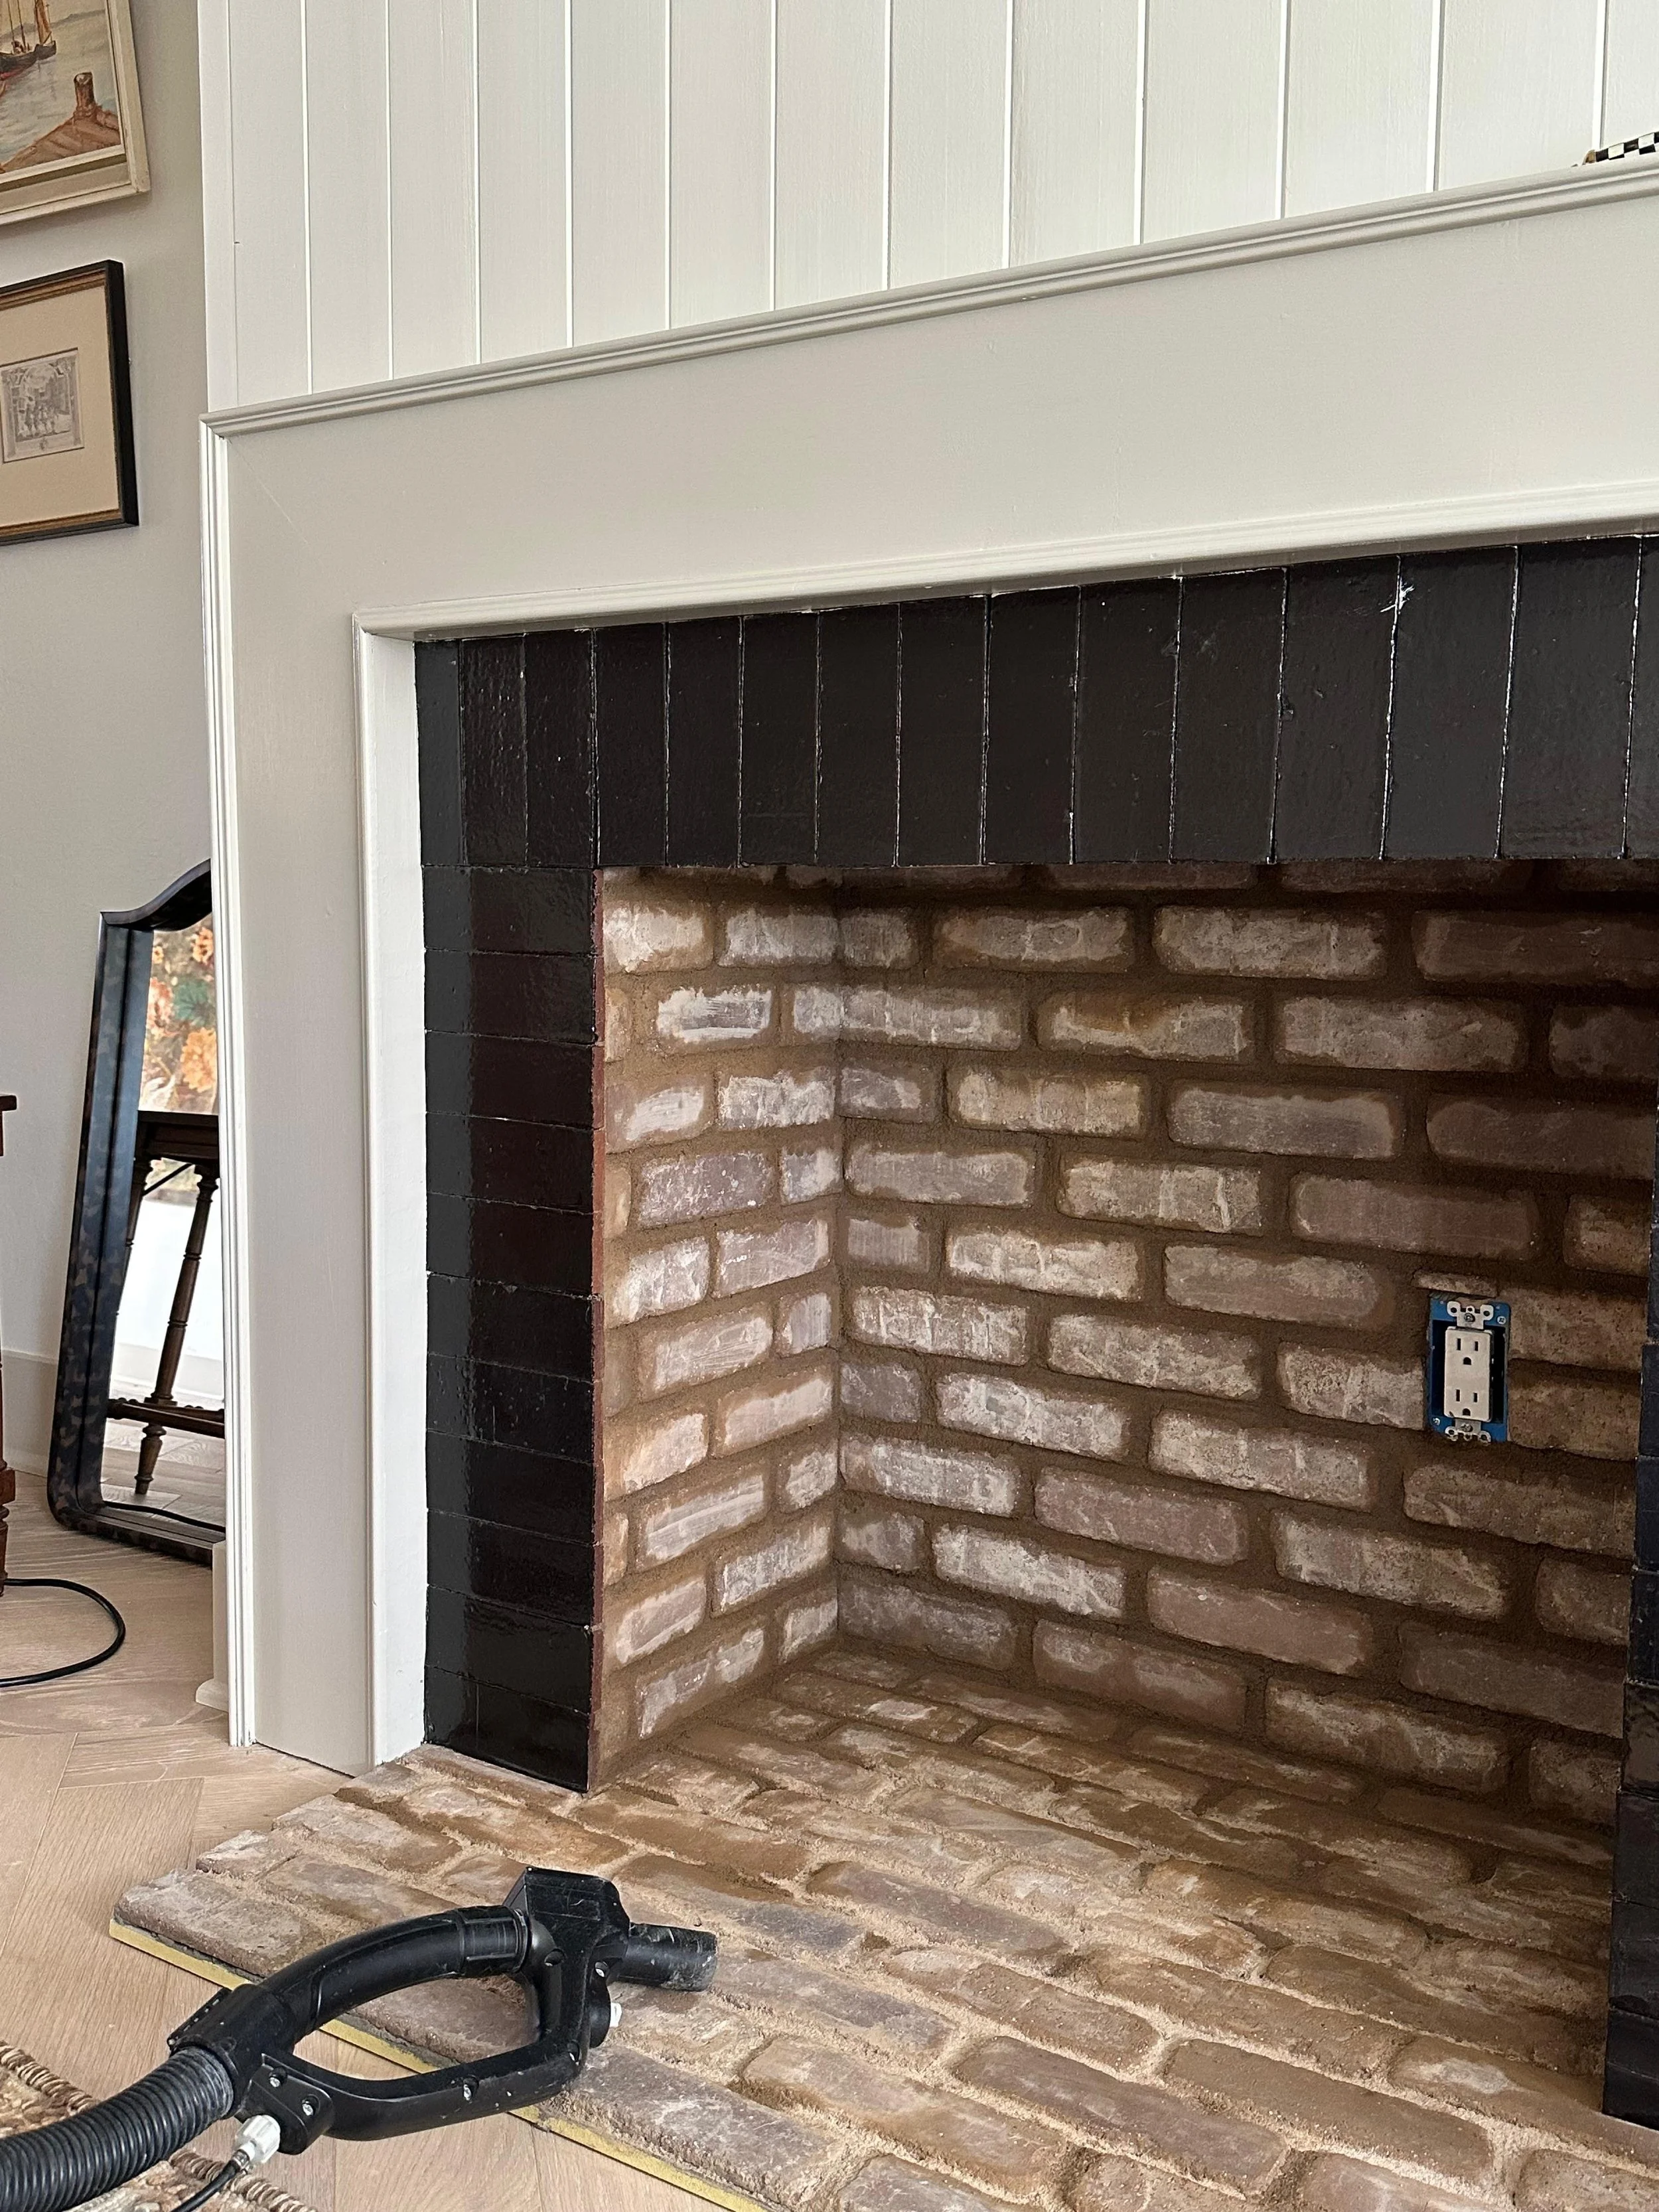
For the brick, I decided to use what I already had—leftover brick from our kitchen. This part was simple and easy, though definitely messy. The sheets of brick are super straightforward to install—you just follow the manufacturer’s instructions and cut the bricks to size if needed. It’s like a puzzle, and I love puzzles!
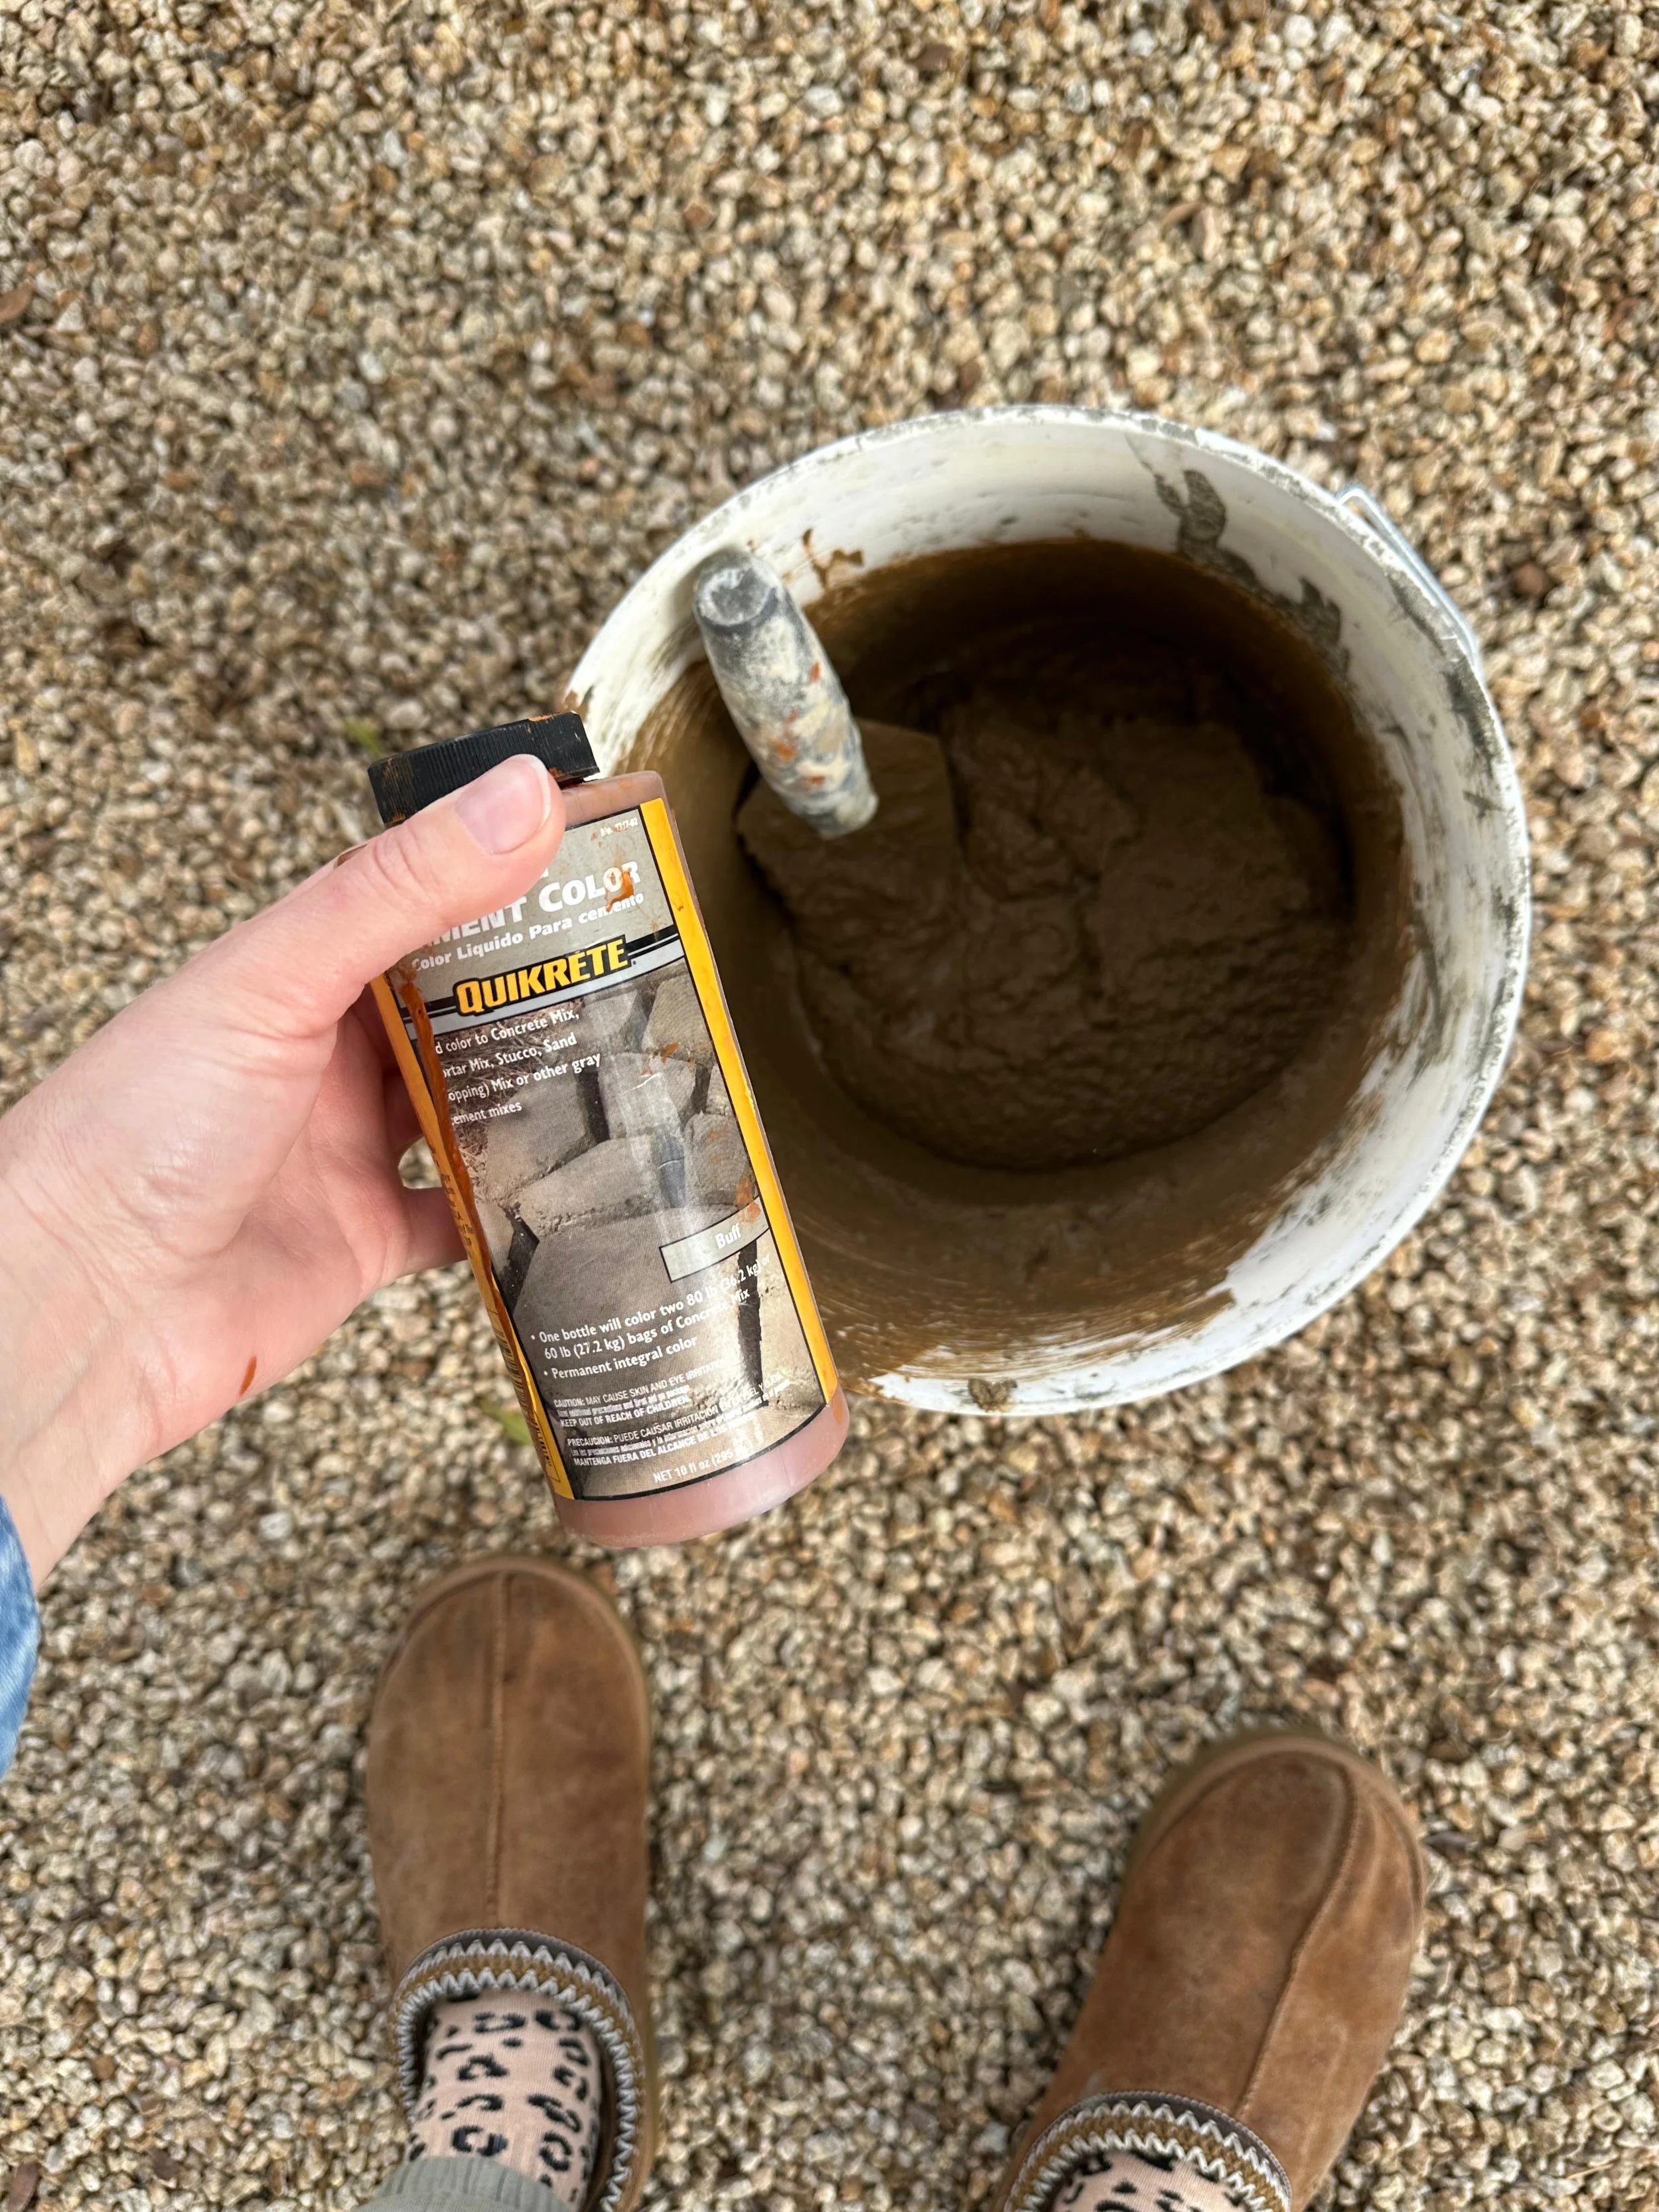
I saved grouting the brick for the very end because, let’s be honest, it’s messy, and I wasn’t exactly looking forward to it. To achieve that soft color, I used a tint that turned the gray mortar into a lovely, muted brown. The color, once dry, looks nothing like the weird, muddy brown it appears when wet—so you just have to trust the process.
Once the brick was in place, it was time to add the finishing details to the fireplace surround. I wanted to use a different material for this part. My dream was to use soapstone, but that option wasn’t within our budget. Because I’m a firm believer that every room needs a pop of black, we used a gorgeous glazed brick I found while thrifting almost three years ago. I’m so glad to have finally found the perfect spot for it! The texture and shiny glaze are absolutely gorgeous.


The gorgeous black glazed brick I thrifted 3 years ago finally found its place.
Part 3: Painting
In my mind, a green mantel would look stunning with the black brick, so I decided to use the same green we have in our kitchen cabinets. But as I started painting, I quickly realized it didn’t look as good in person as I had imagined. As much as I wanted it to work, I ended up repainting it with this beautiful beige color we use on all the trim around our home. Sometimes less is more, and it made the stunning brick stand out as the focal point.
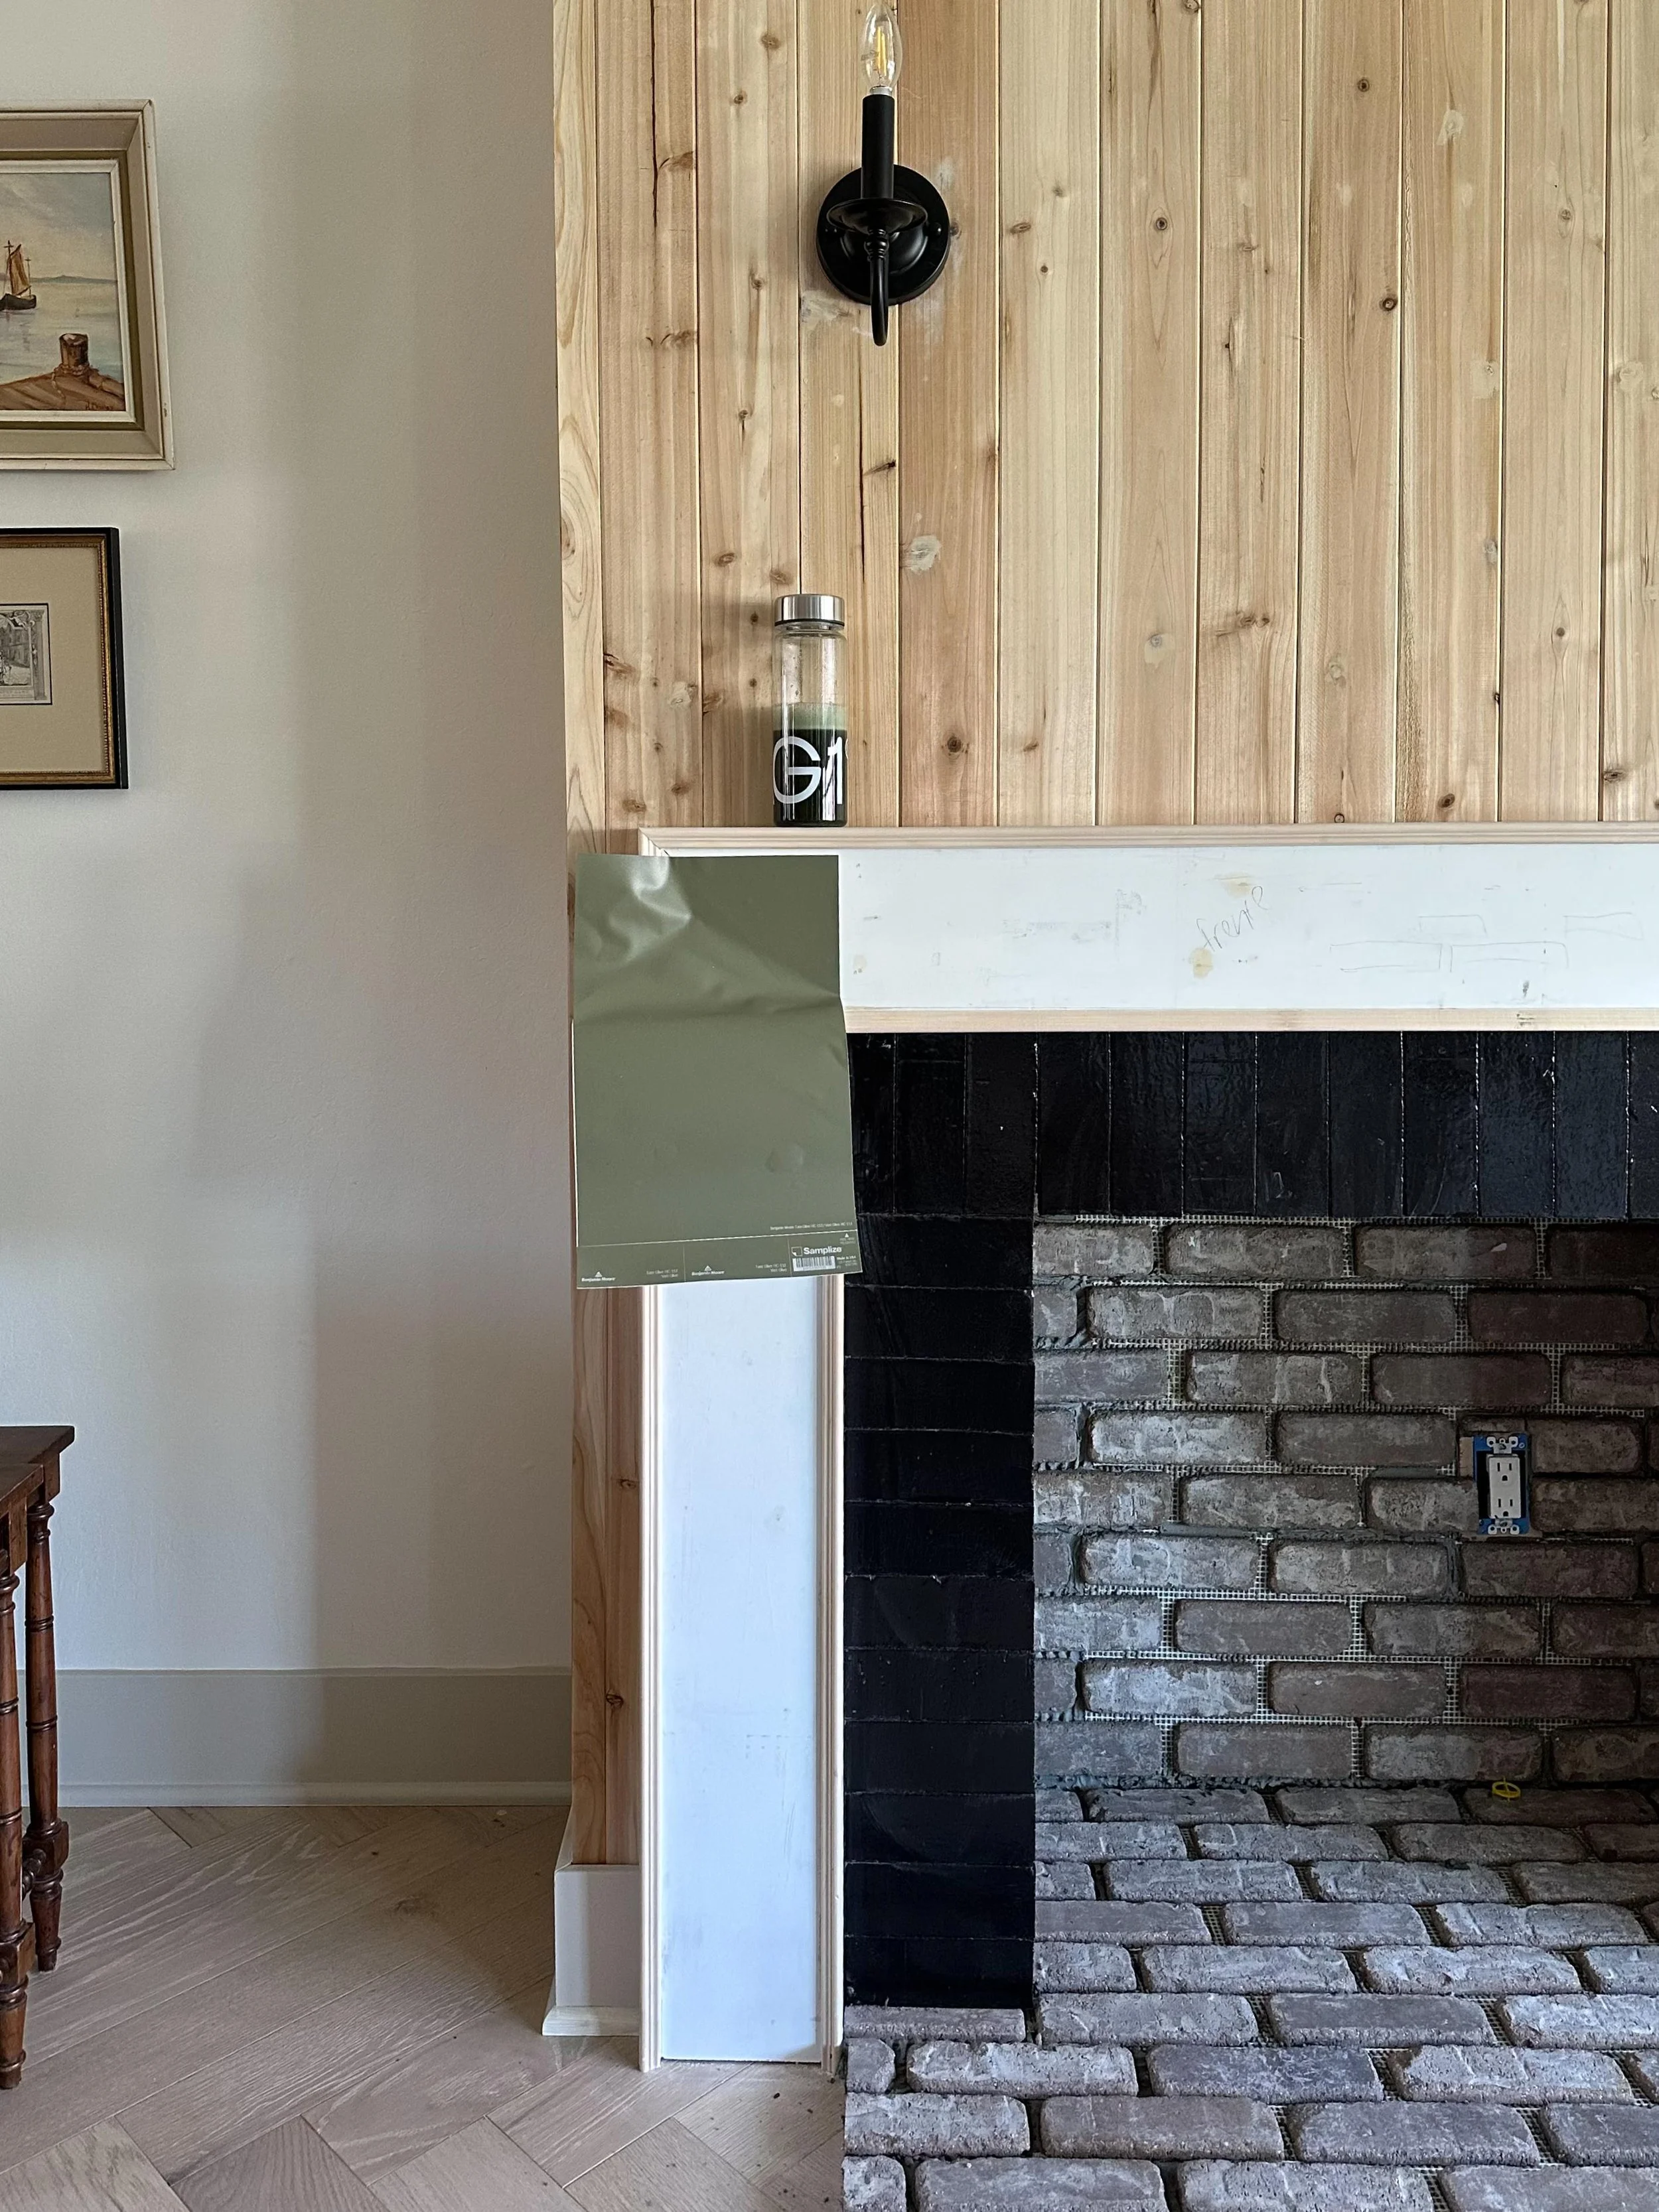
Color: Sage Green Light by Sherwin Williams.

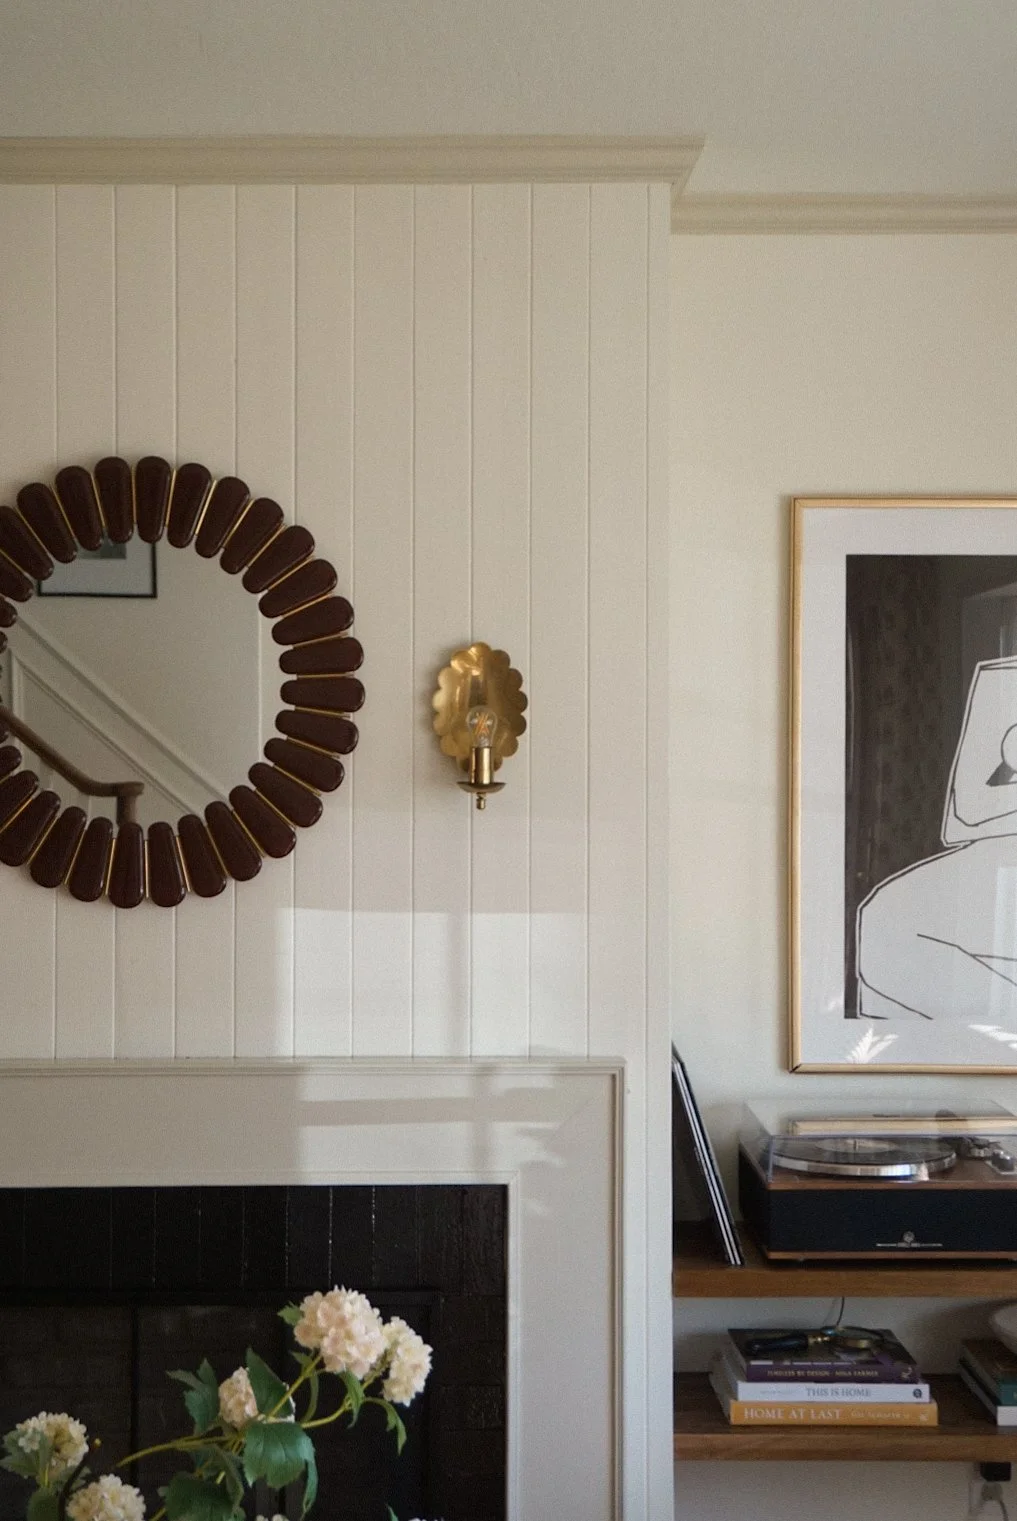
Paint color is SW Accessible Beige.
Part 4: Final Details
Then it was time to add my favorite part: sconces. At first, I installed the ones I already had from Amazon—which I think look so good and are very affordable! But then I got a stroke of luck and found my dream Nickey Kehoe sconces on Facebook Marketplace. They were still a splurge, but I paid half the price, so I still can’t believe my luck. They were the perfect addition, I love the mix of mid century/modern cottage happening in this room now.
Shop all sources from this view here.
Alright, now for the heart of this project—because what’s a fireplace without fire? (Well… faux fire, in this case.) We ultimately decided not to install an electric insert since I couldn’t find one that looked good without being ridiculously expensive. Instead, I opted for plug-in logs, and honestly, they look surprisingly convincing. With a screen in front and the lights on at night, they give off the perfect cozy vibe.
The living room view before creating the spot for our record player. This is the electric log insert we used.
So, once we finished building the fireplace and started enjoying cozy nights in our new favorite “adult spot” in the house (parents will understand!), we realized we needed a place for a record player. We could picture ourselves by the light of the fireplace, sipping a glass of wine and listening to Billy Joel crackle through the unmistakable sound of vinyl. It was a simple DIY, but it was going to complete the room.
The shelves were so easy to build—I'll be sharing a blog post with all the details soon.
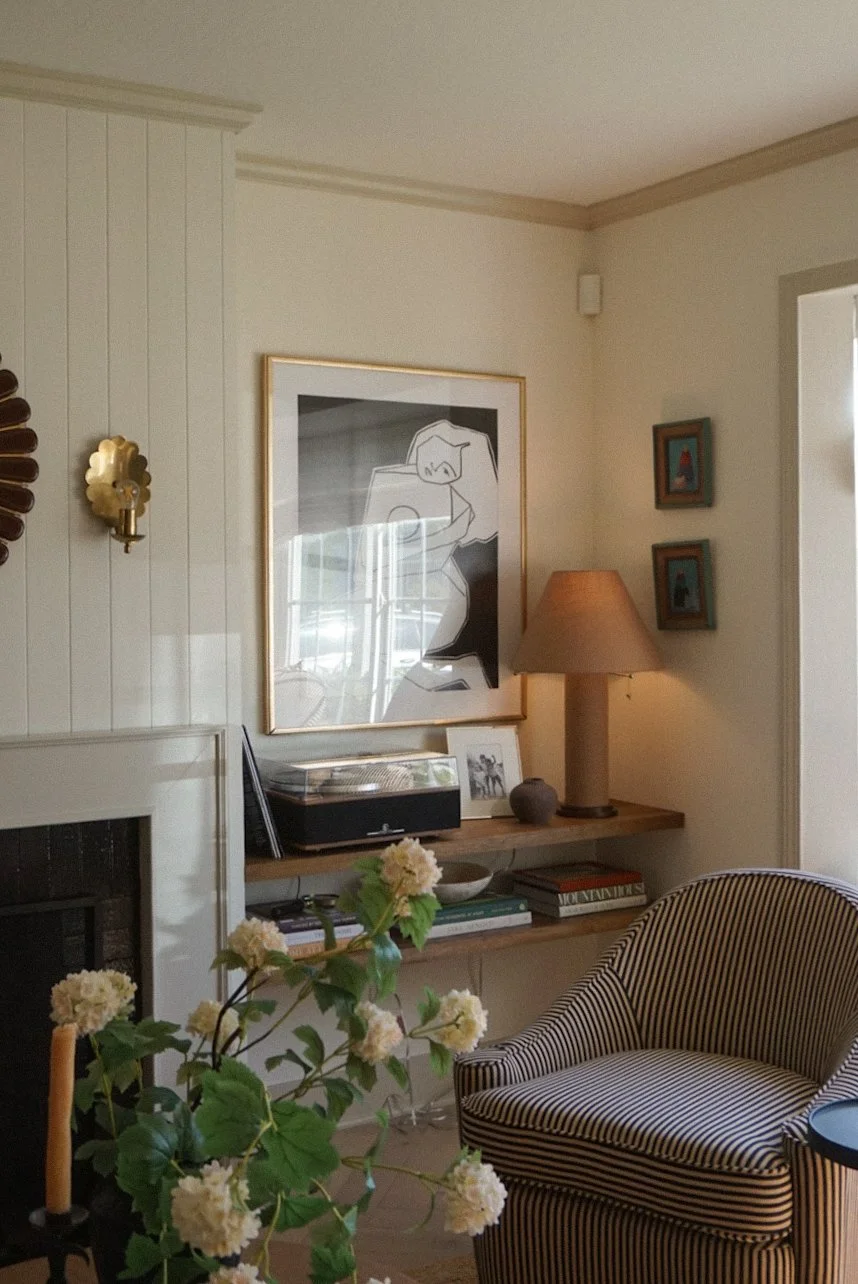

The cutest chair and side table.

I’m not done with this room yet, but I’m not in any rush to finish everything. Slowly, over time, is the way to go because a home really does take time to perfect.
Shop this post: