
Under $600 Kitchen -bandaid- remodel
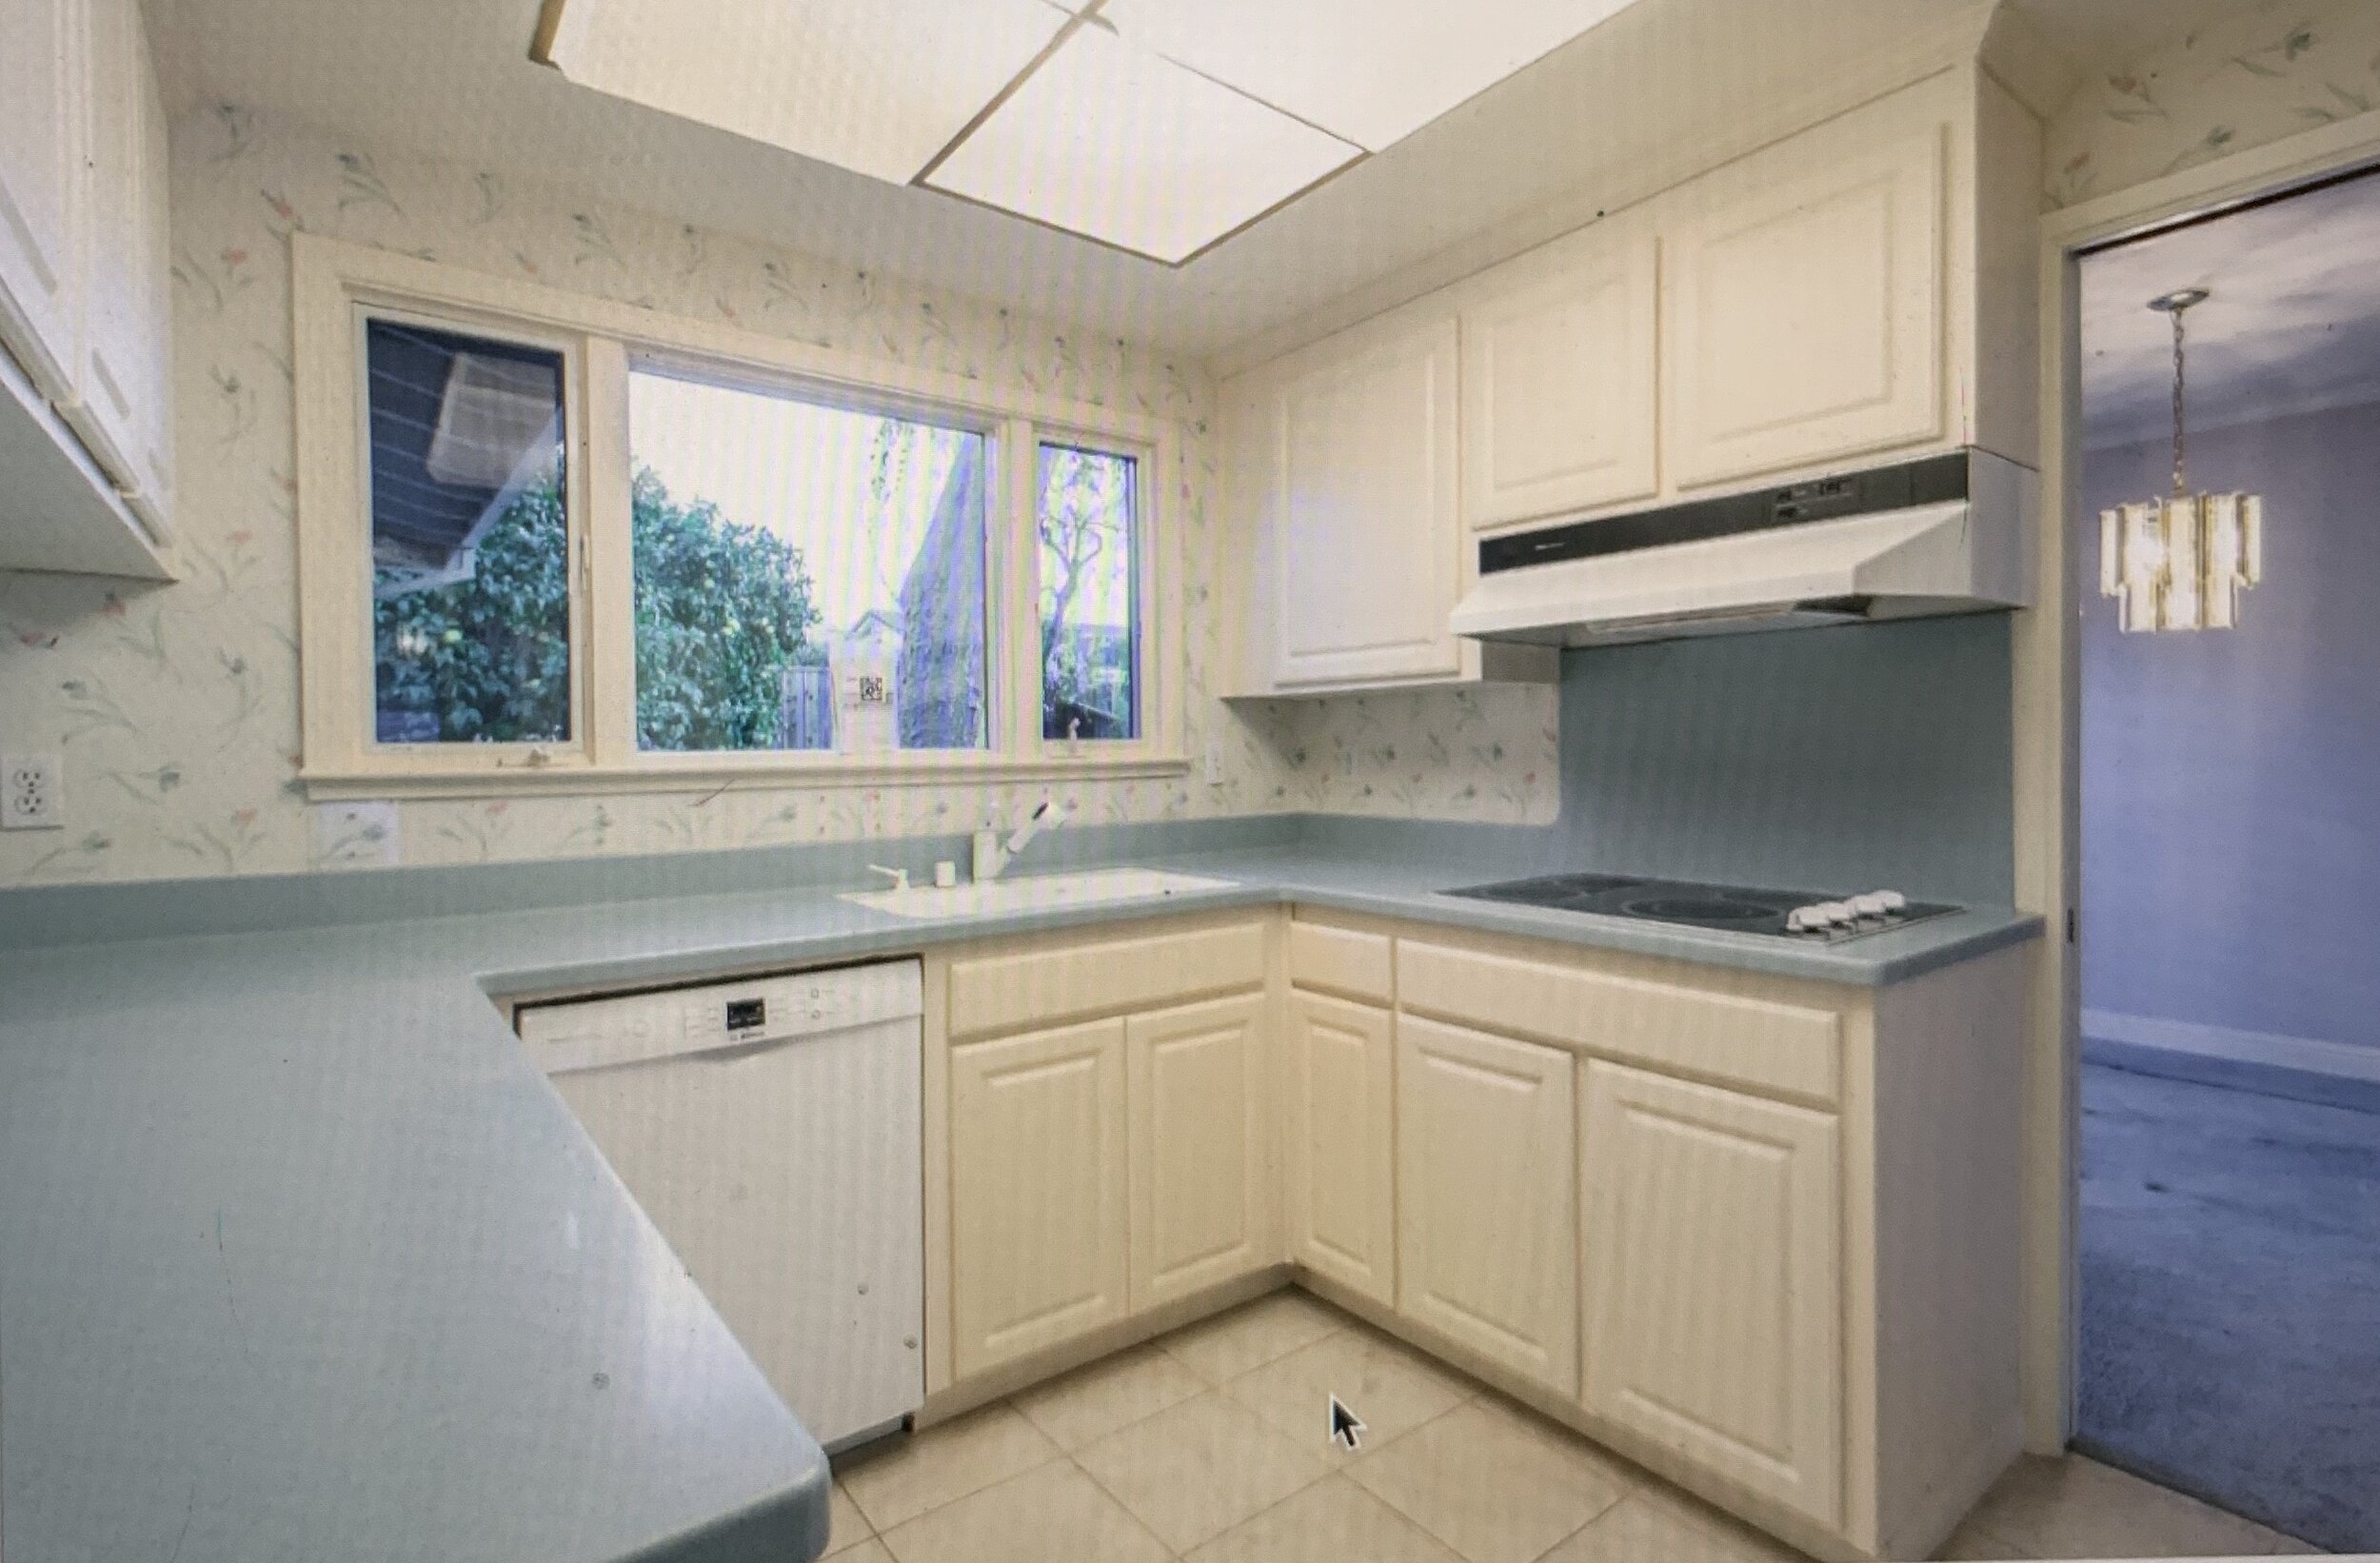
When we moved into this new house, we knew that there were going to be many projects that we would not be able to do right away the way we wanted. That includes this kitchen and master bathroom, both are total gut job projects and we are not financially ready to do them yet.
But, at the same time, I knew I couldn't live with blue countertops and wallpaper for long! I had to do something about it and stay on budget. I love a good challenge like that! when there is a will there is a way, right?
Now that this kitchen is finished, I am thinking, if I add new -real- countertops this kitchen could be staying like this for long! I really love how it turned out. Maybe it can be a great idea for one of you looking for a budget friendly kitchen renovation.

The original plan was to paint the laminate cabinets ( I shared the process on my stories highlights) add pulls to the doors and drawers, add contact paper to cover the blue countertops, open shelves over the peninsula and new faucet. But then once we started, we noticed that removing the wallpaper was going to be harder than we thought so we decided to cover it with vertical shiplap.

Removing the top cabinet over the peninsula did so much to open up the kitchen and made it feel bigger than it is, it even added more natural light to the space.
(You can see all the behind the scenes of this project on my stories highlights)

We almost didn’t do the paneling on the ceiling! so glad we decided to go for it because it is now my favorite part of this bandaid renovation. It added so much character to the kitchen and made the recessed ceiling look like meant to be, it is now a great feature.

I wanted open shelves for so long! so I knew that I needed to add some over the peninsula. I couldn't find anything online that was on budget and that were the style I wanted. So, I ordered those four wood shelf brackets from amazon and got one piece of pine wood and made my own. They turned out so cute!


Decor meets function!
These shelves add the extra storage we needed for cups and mugs we use daily and also they are a great little space to have fun styling.


Paint and new cabinet pulls made the biggest difference to this old cabinets. Never underestimate the power of paint!
I did two kinds of cabinet hardware, simple wood pulls for the doors, that I painted the same cabinet color and brass pulls for the drawers. Simple and timeless.
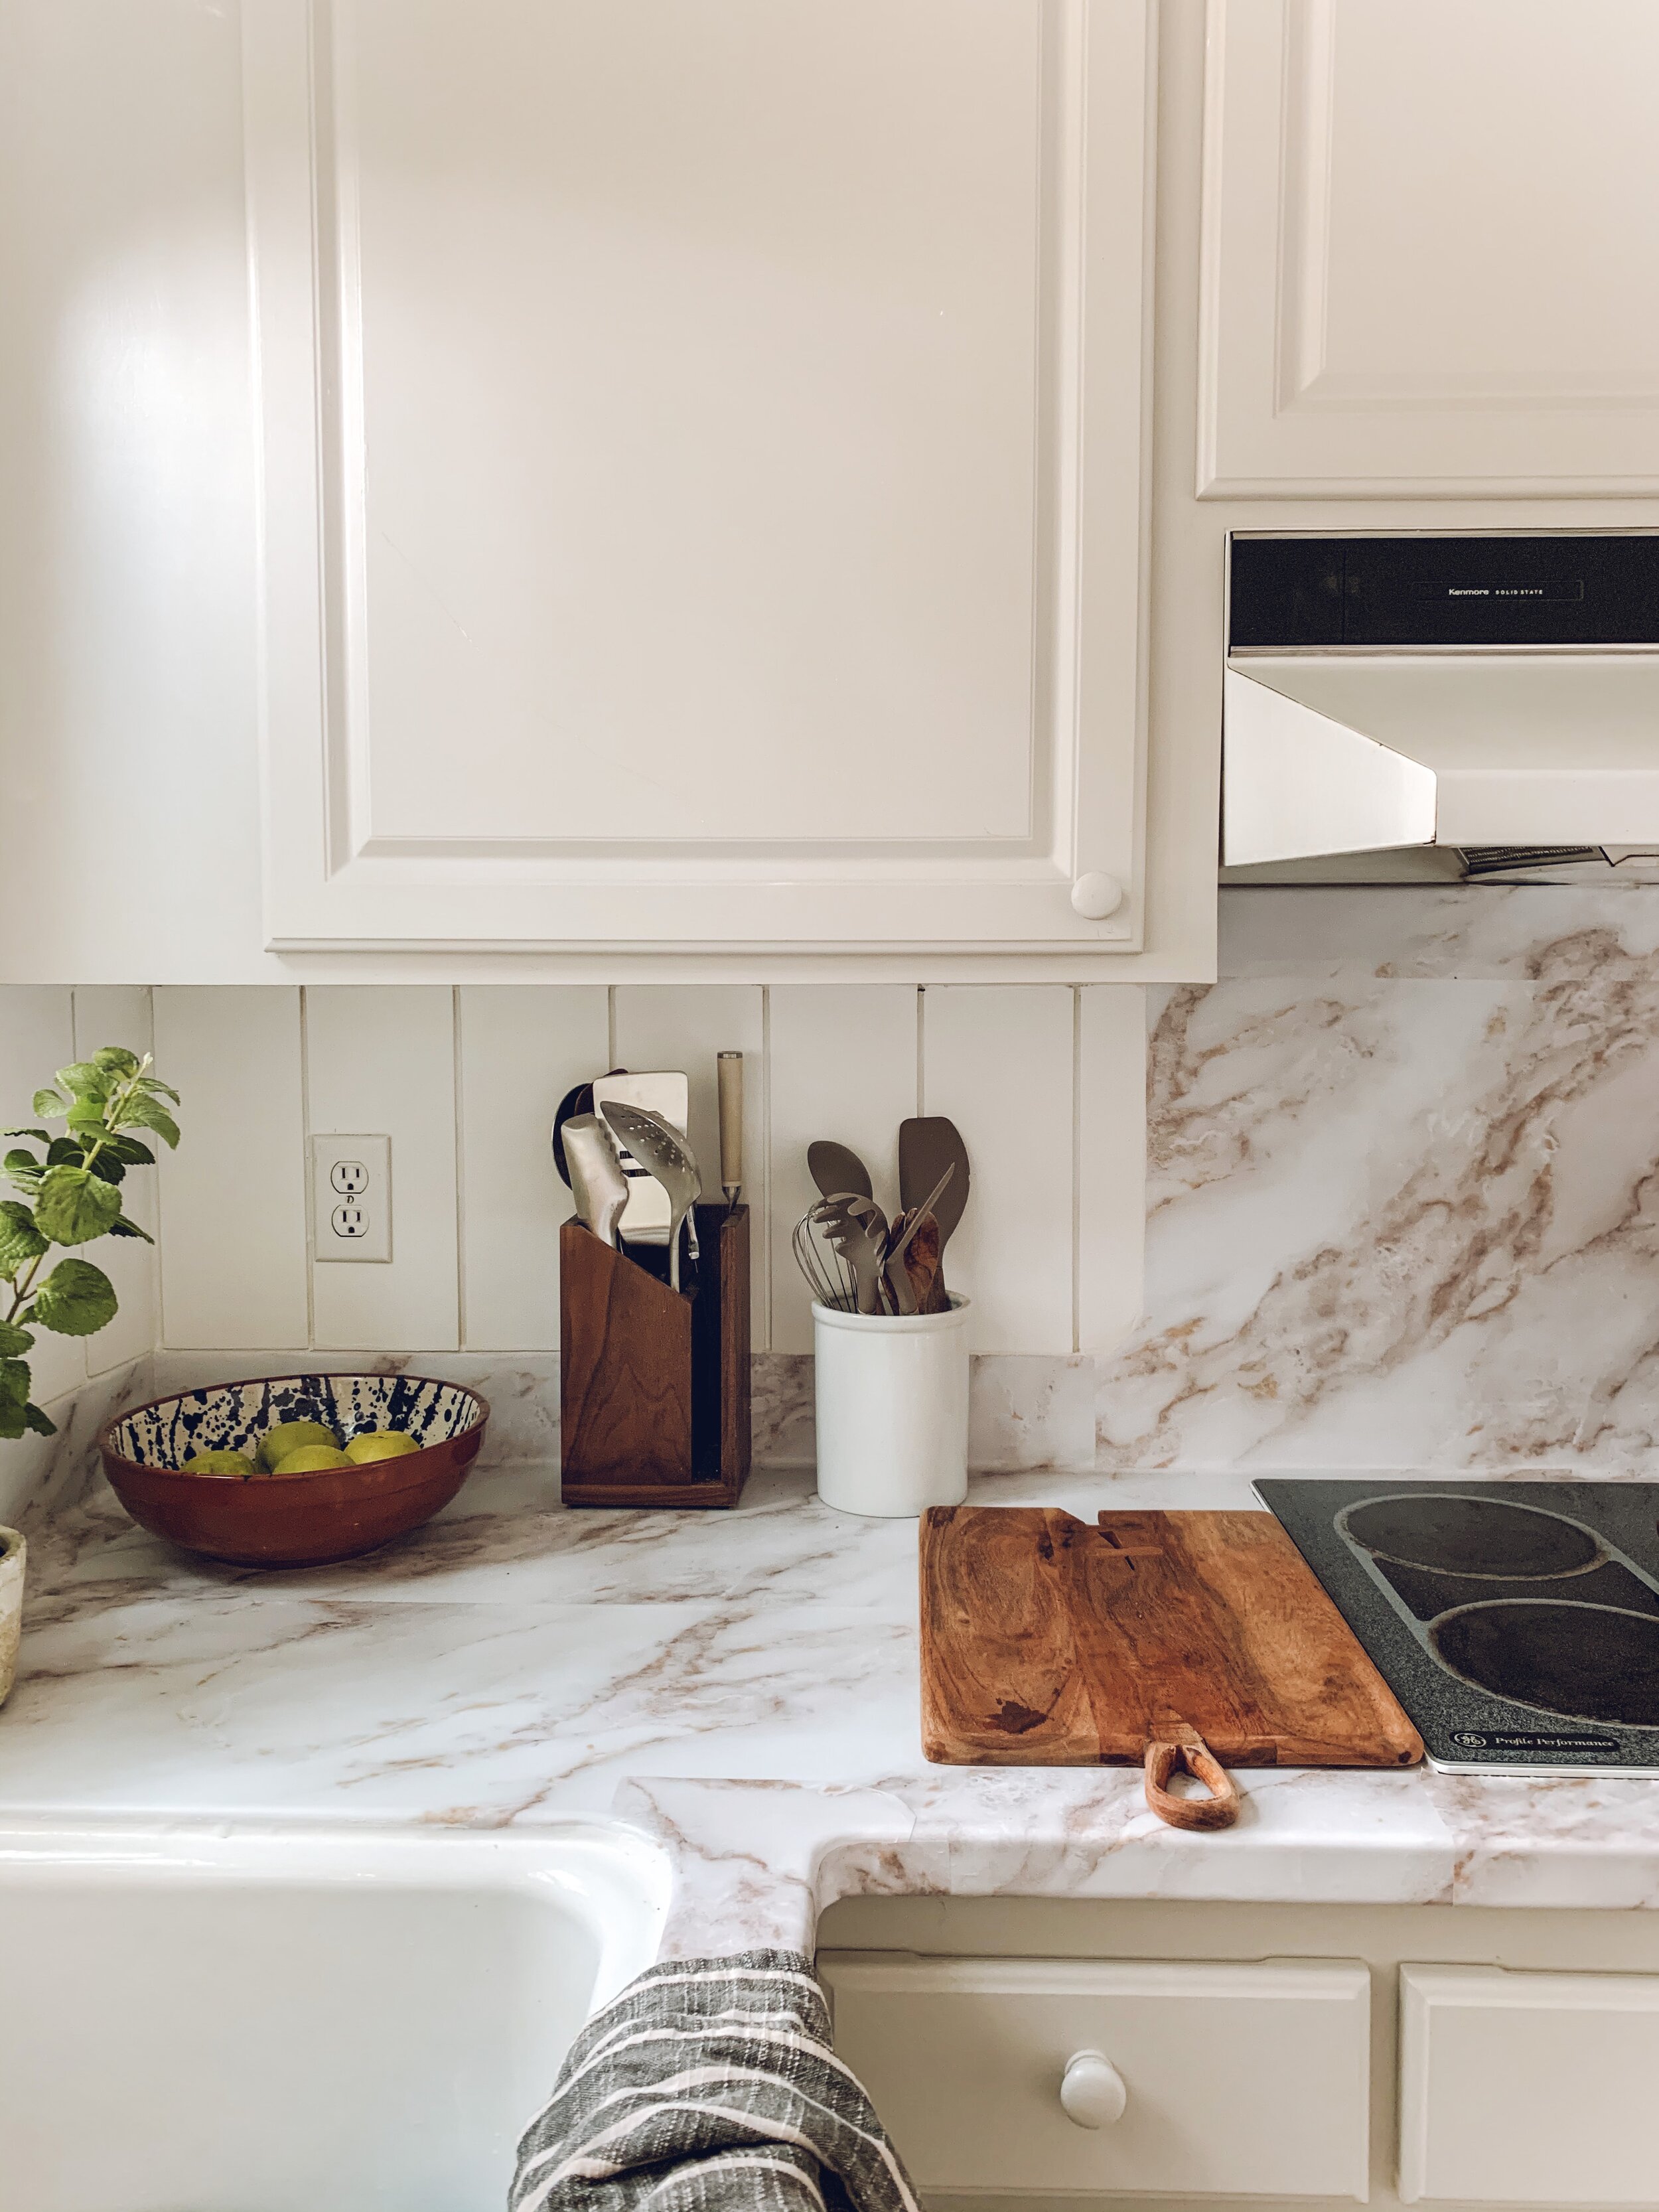
So much better right? It looks and feels like a brand new space without the brand new price tag.
Paint colors:
Walls and Ceiling: Pure white by Sherwin Williams in Eggshell finish
Cabinet paint: Into the gloaming by Sherwin Williams in Satin finish
This is the List of products we used with links.
Contact paper got 7 rolls $90, the large size was sold out when I purchased the materials.
Silicone Caulk $7 to seal the contact paper around the sink.
Faucet $100
wood for shelves $20
shelf brakets got 4! $38
wooden pulls $15 for 30 pcs!
brass pulls $32 for 10 pack
Shiplap 3 boxes $180
white paint, same used for the other spaces in the house
Cabinet paint, same used on doors and trim in the house
Total: $556
This is the Nailer we used to install the shiplap, I love it!
I didn’t included paint brushes, paint rollers and paint into the kitchen Reno cost since we purchased those things for the whole house renovation.
Now onto the next house project!
Thank you for reading,
Valeria