
How to improve the look of hollow core doors.
This project was one of the easiest and made the biggest difference in our upstairs hallway. From cheap looking hollow core doors to beautiful and expensive looking custom doors, all it took was some PVC molding and black paint.
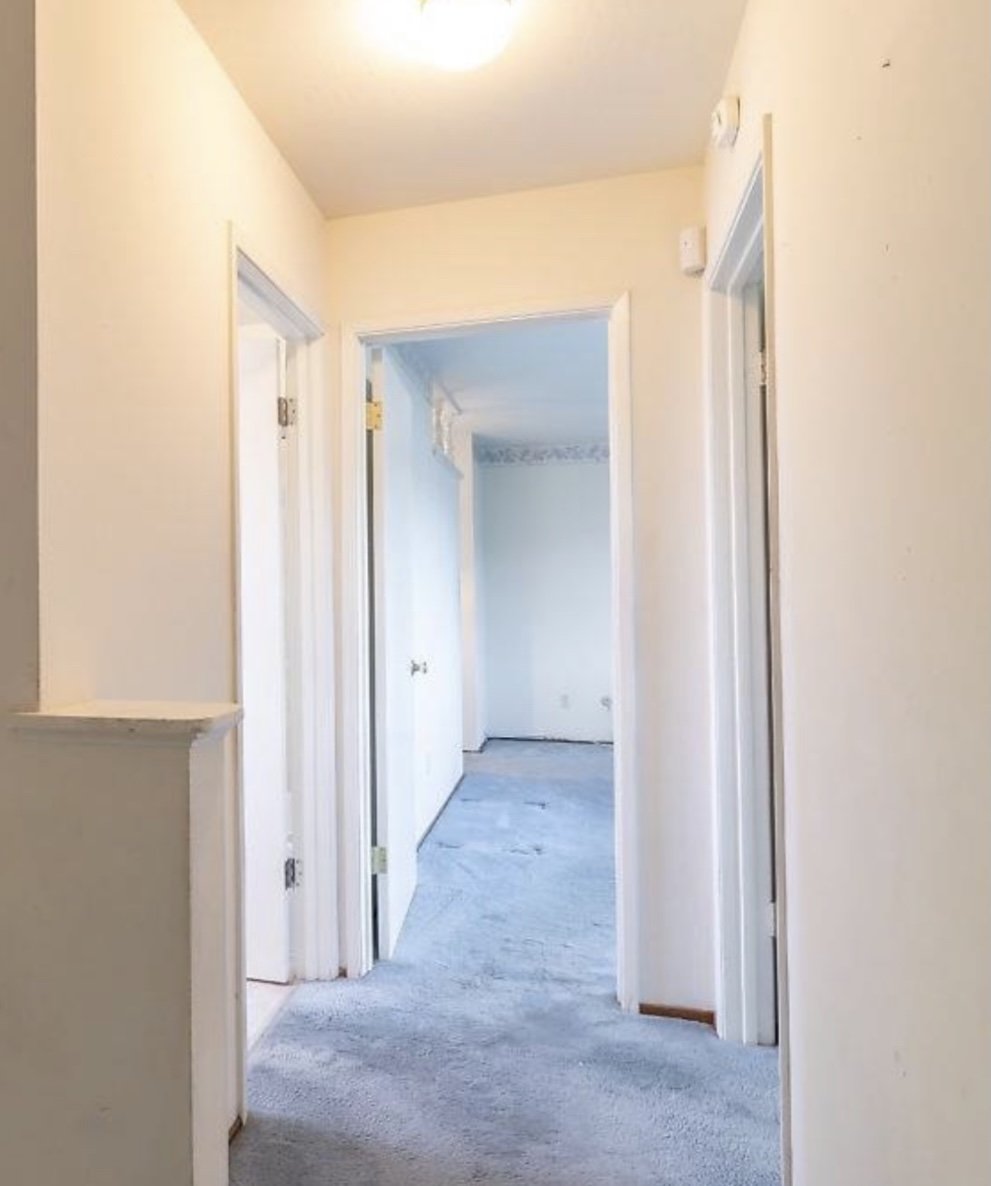
Let’s start with the MLS picture of our upstairs hallway as the before picture.
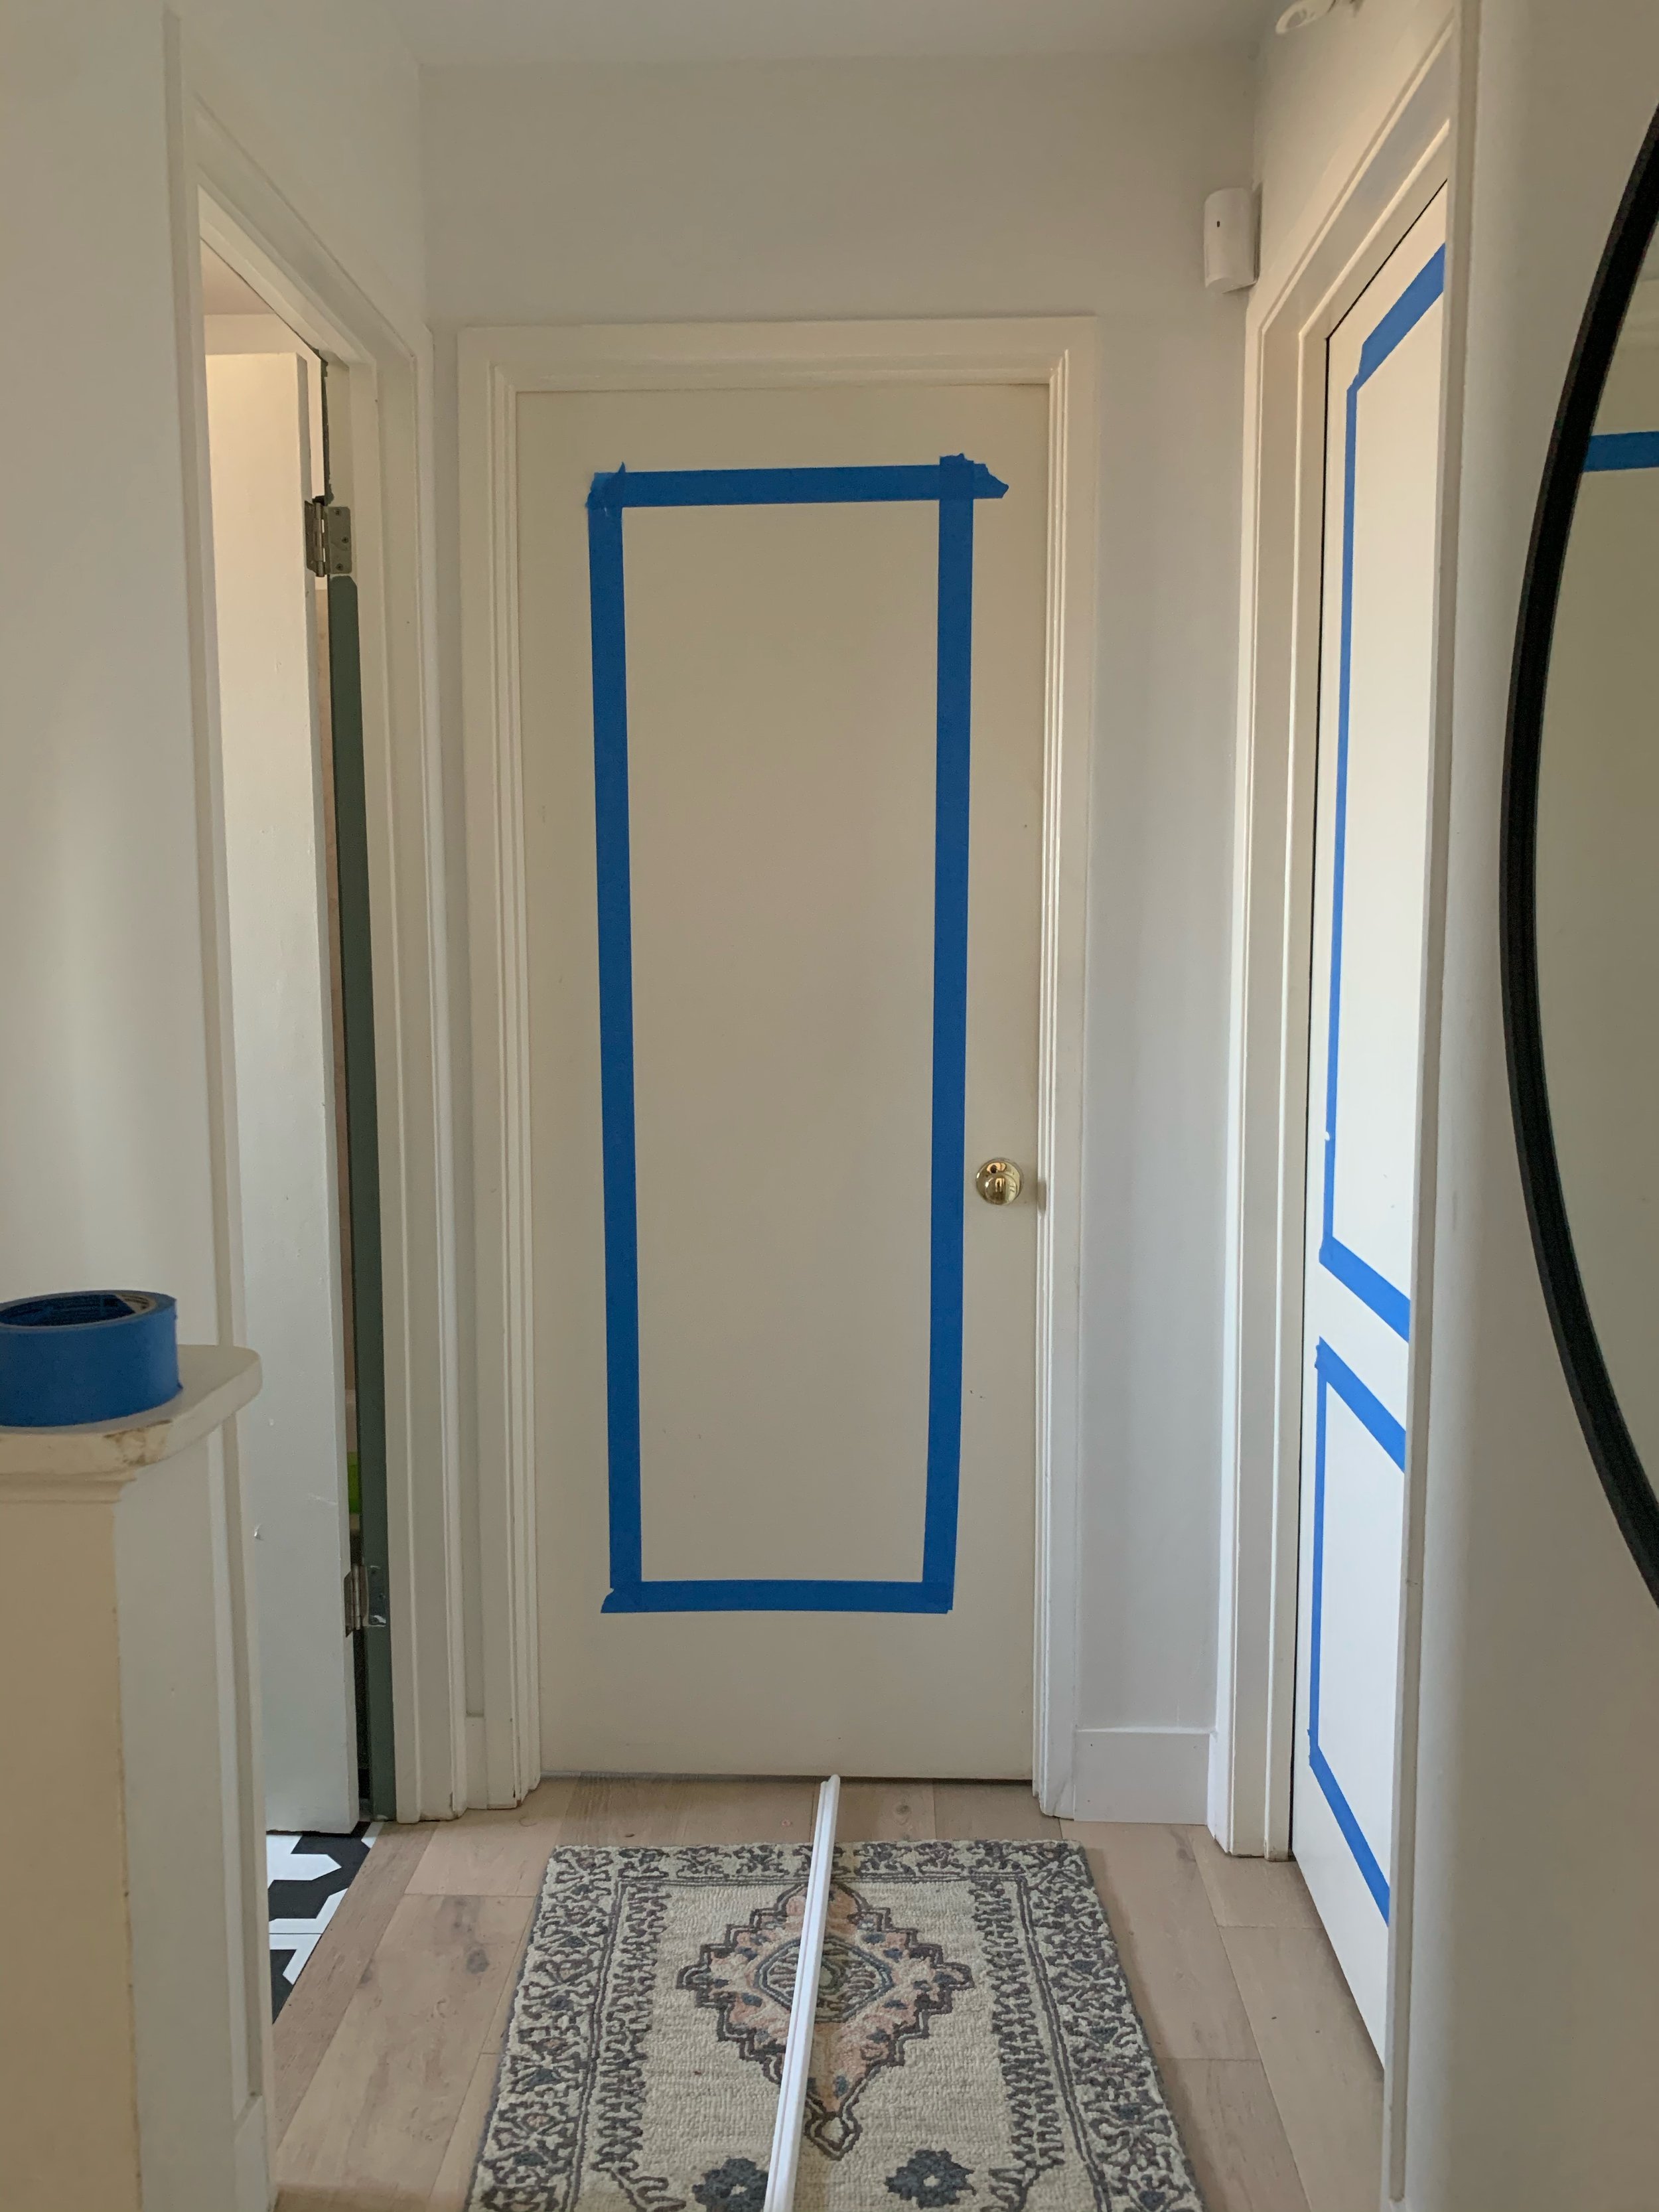
Upstairs hallway view to our primary bedroom.
The first step was to decide if we would do one of two panels on the doors. We decided to go with two panels as we felt it would make our doors appear taller and overall make our tiny hallways appear larger. I used blue tape to map out the doors for a better visual on panel spacing and size. For me the important part that I wanted to get just right was the spacing in between each panel and spacing from the panel to the door edge, I wanted these doors to look as they were this way all along and not like a DIY.
Once that first part was figured out we started cutting all our pieces of molding for each door.
-You can watch this project from start to finish here-
For this project we used this PVC molding because it was much more affordable than wood and it is very smooth compared to wood which gave us a better paint result. At the end once it was all painted you can't tell the difference between PVC and wood so to us it wasn't worth expending more on wood for this type of project.

Pvc molding cut in 45 angle.
For spacing we went with 5” top and sides, 4” in between each box and 6 ¾” at the bottom, for reference we have non-standard size doors and 8' foot ceilings. For example our bathroom door is narrower so we had to take that into consideration when cutting the molding pieces, but we did the same spacing on all doors.

This is a project that can be done by one person by if you can have an extra set of hands to help even better!


Molding spacing measurements.
Once all molding was glued to the door using liquid nails and all nailed with brad nails I started caulking all the seams. After caulk was dry and that part was done I used a de-glosser on the doors to remove the shine and make the doors ready for paint, a de-glosser or liquid sandpaper is a step you can do instead of sanding the doors. Then it was time for primer and then paint.
* To be honest, I skipped the primer when I painted the doors the first time and the paint started to chip off in the next couple of months so when we hired a painter to do our downstairs trim we asked him to re-paint our doors the right way. He sanded, primed and then sprayed the black paint. Lesson learned, don’t skip primer!
The color we used is called Tricorn Black by Sherwin Williams, to me this is the perfect true black paint color.

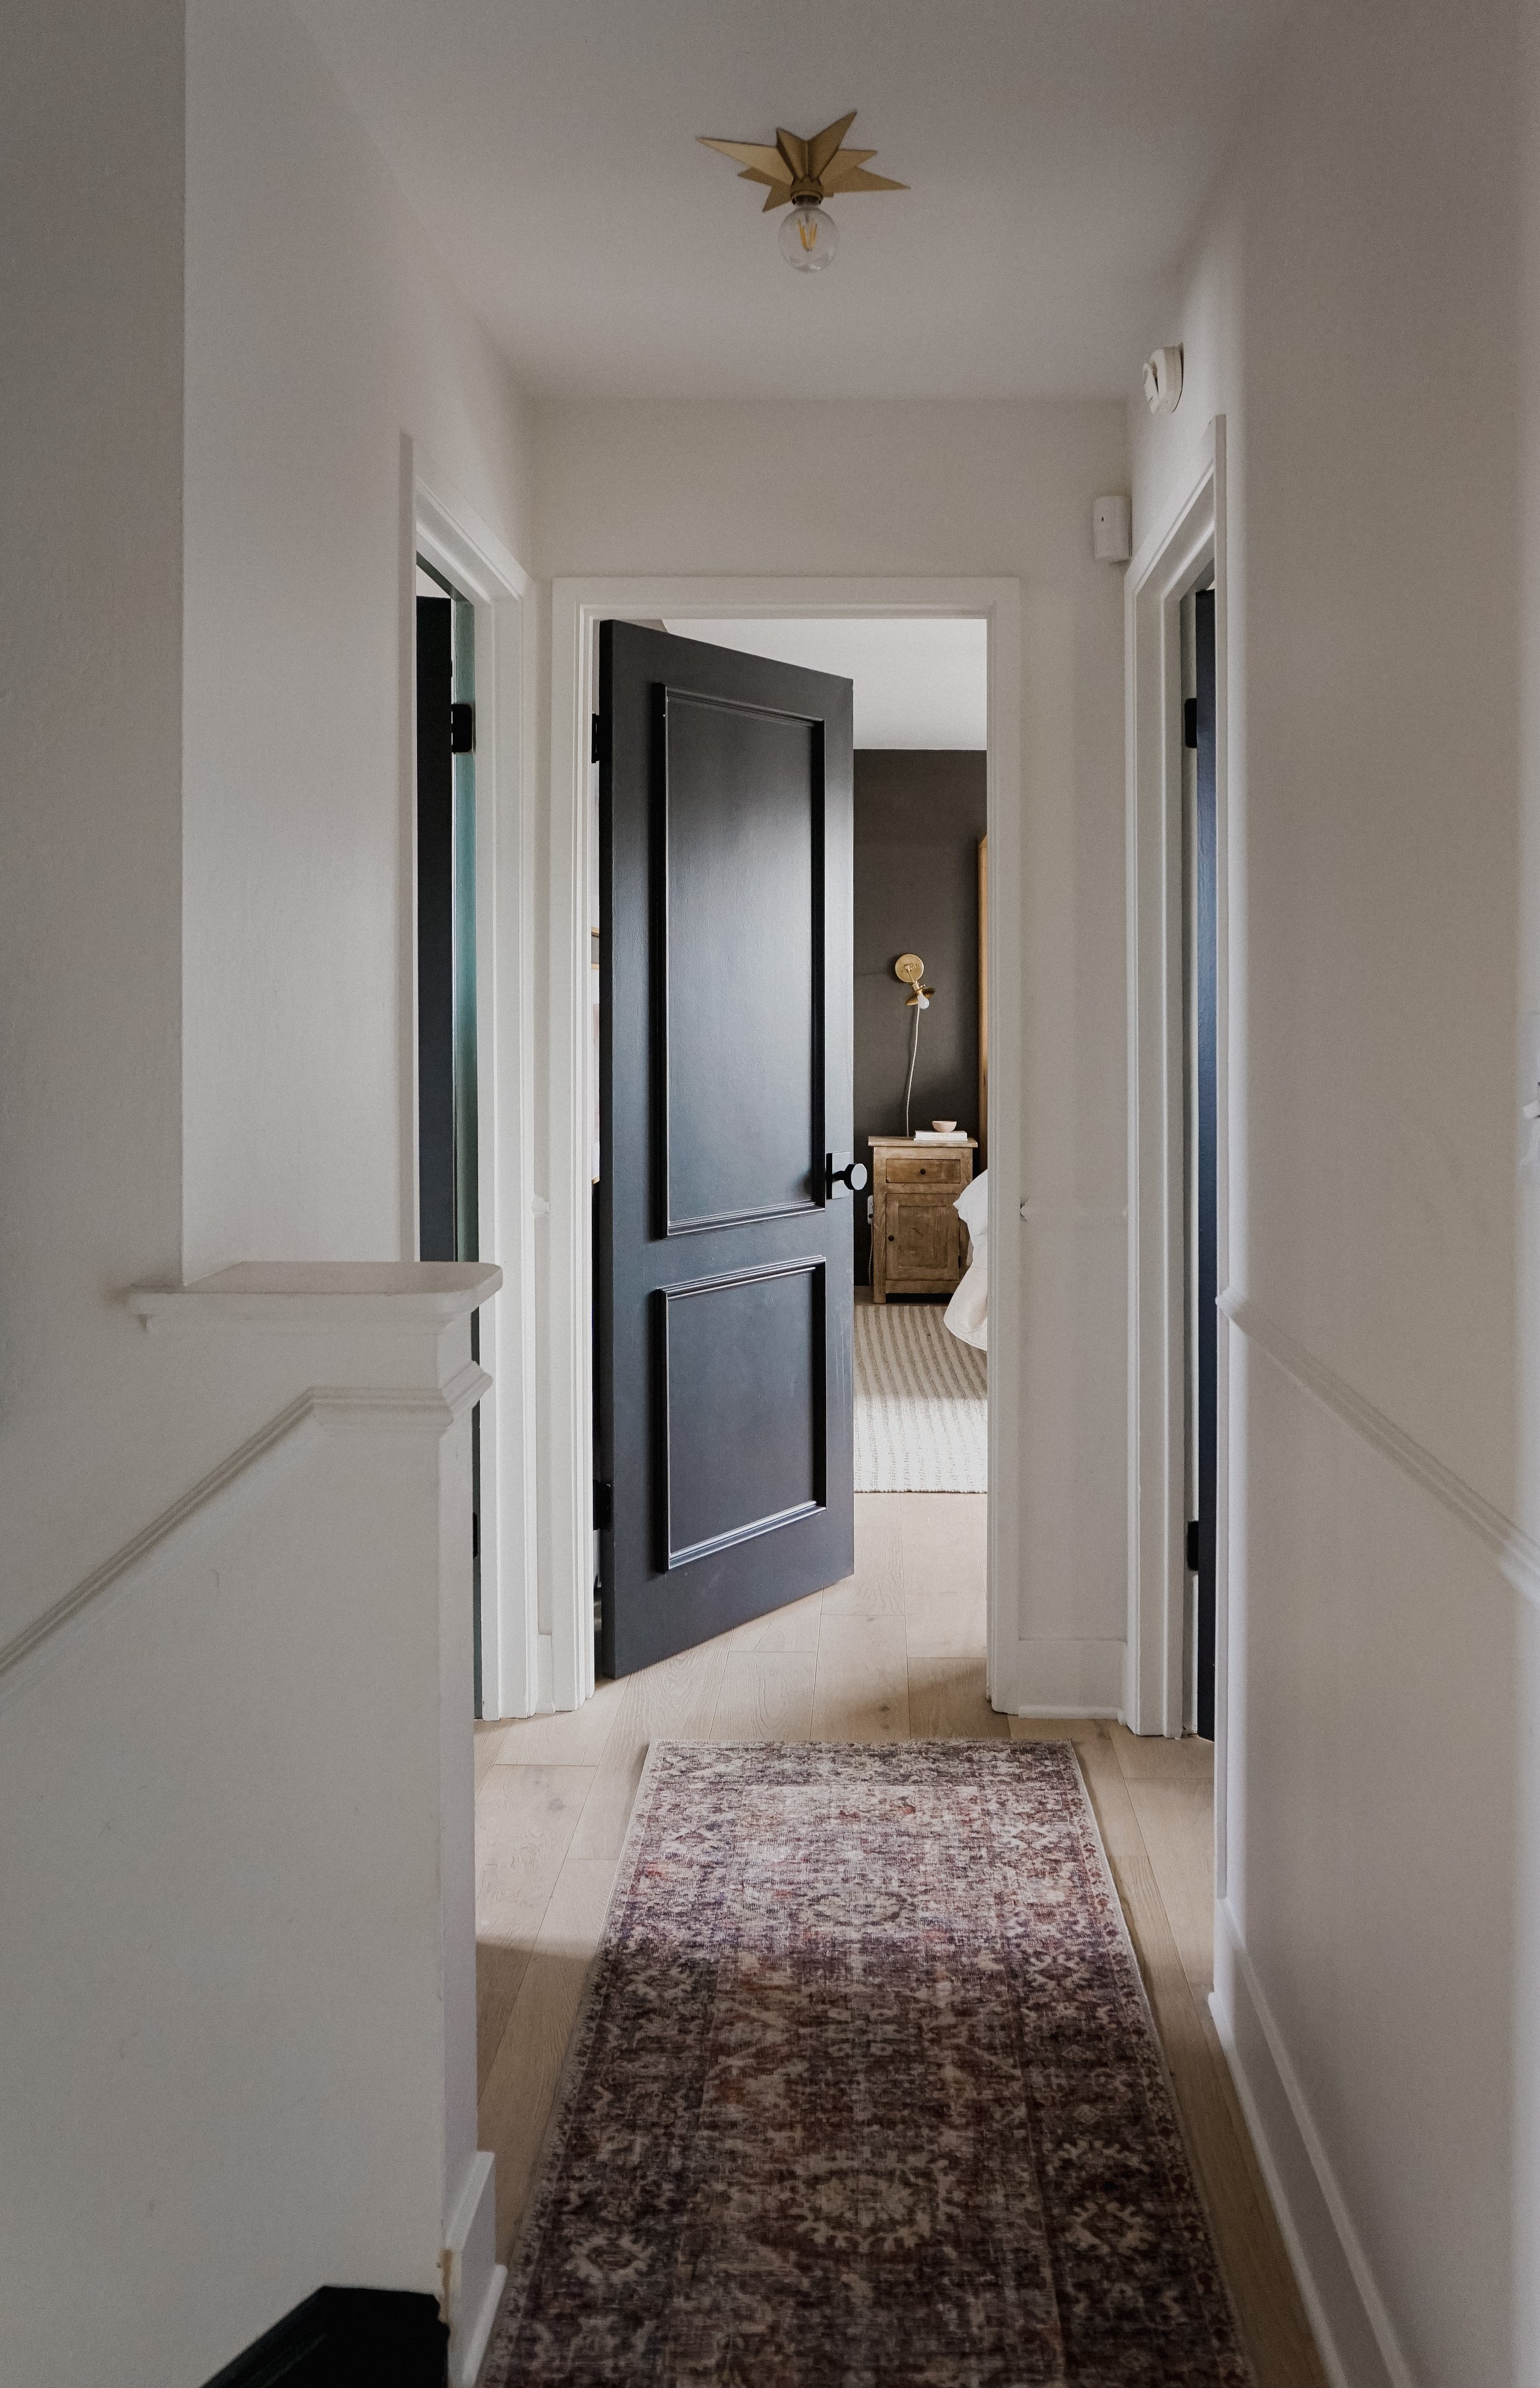
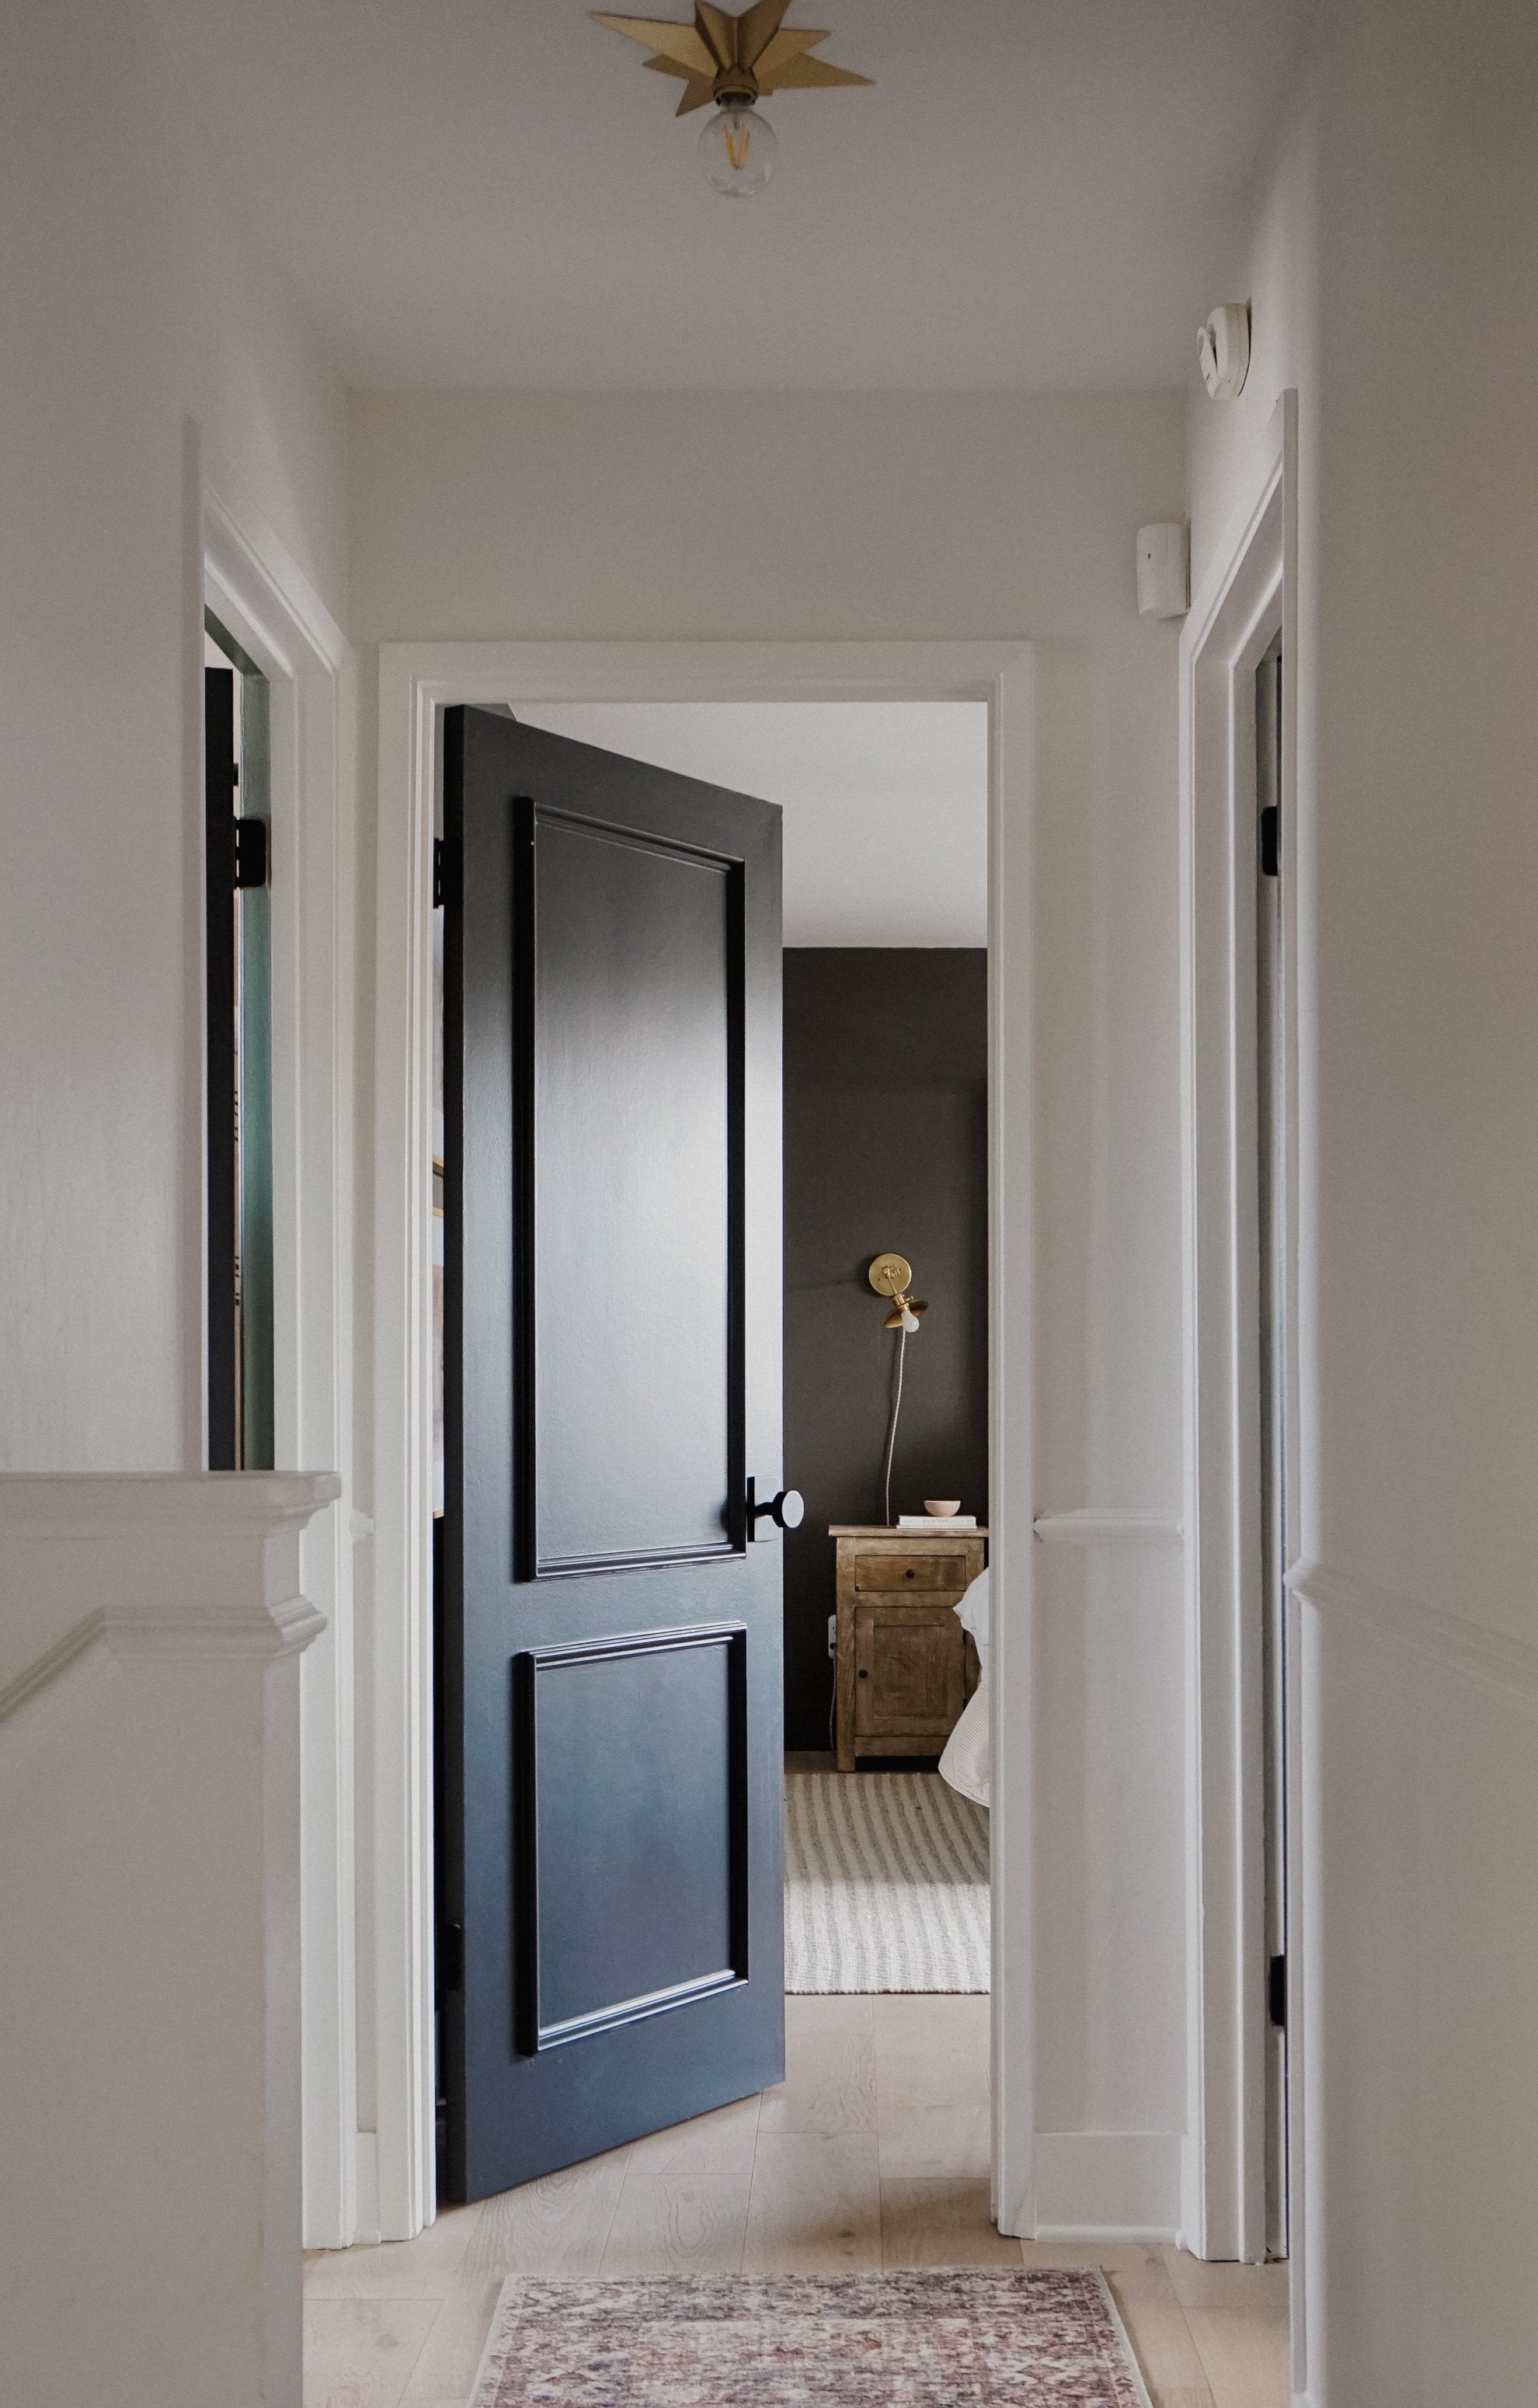
Hallway view into the boys bedroom.

One last update we did was to swap all our door hardware for these beautiful matte black door knobs and hinges from Emtek. These elevated the look of our doors so much! Here is an affordable similar option as well.
Overall this hallway feels brand new! Proof that you don’t need to replace your doors to make them look so much better in your space. We might not replace our doors anymore, I really like how these turned out. What do you think?
Love,
Valeria
Shop this post!


