
Custom Pin Board DIY (An Easy, Budget-Friendly Project for Kids’ Art)
I have an artist at home.
She loves coloring, drawing, painting. Creating something new almost every single day. It’s her favorite thing to do, even right before bedtime. Which also means… I had a massive collection of papers all over the house. Every surface was becoming a creative station.
So I knew she needed a dedicated space.
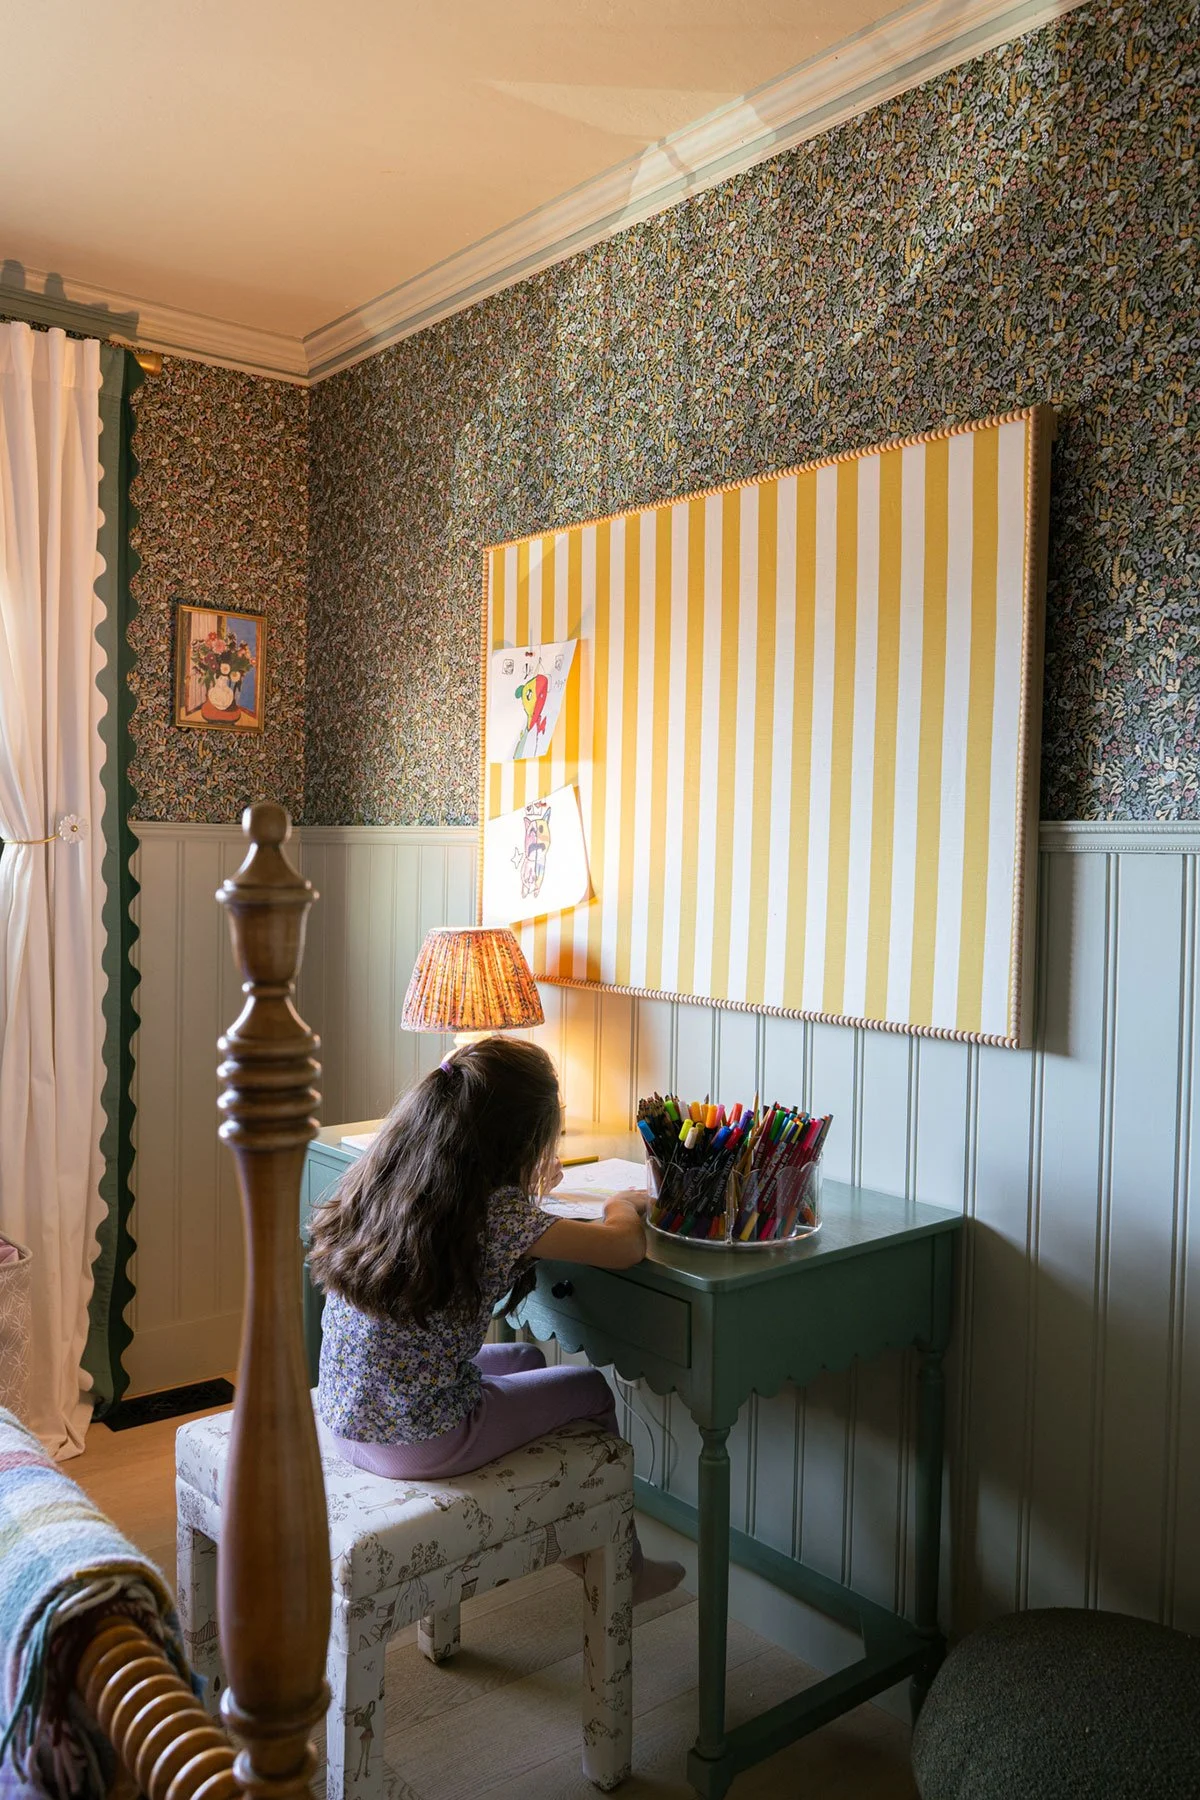
I moved furniture around in Ella’s room to create a little desk area. A spot where she could keep her supplies, papers, colors, and markers organized. A place that feels completely hers. And then the idea sparked: How are we going to display her art?
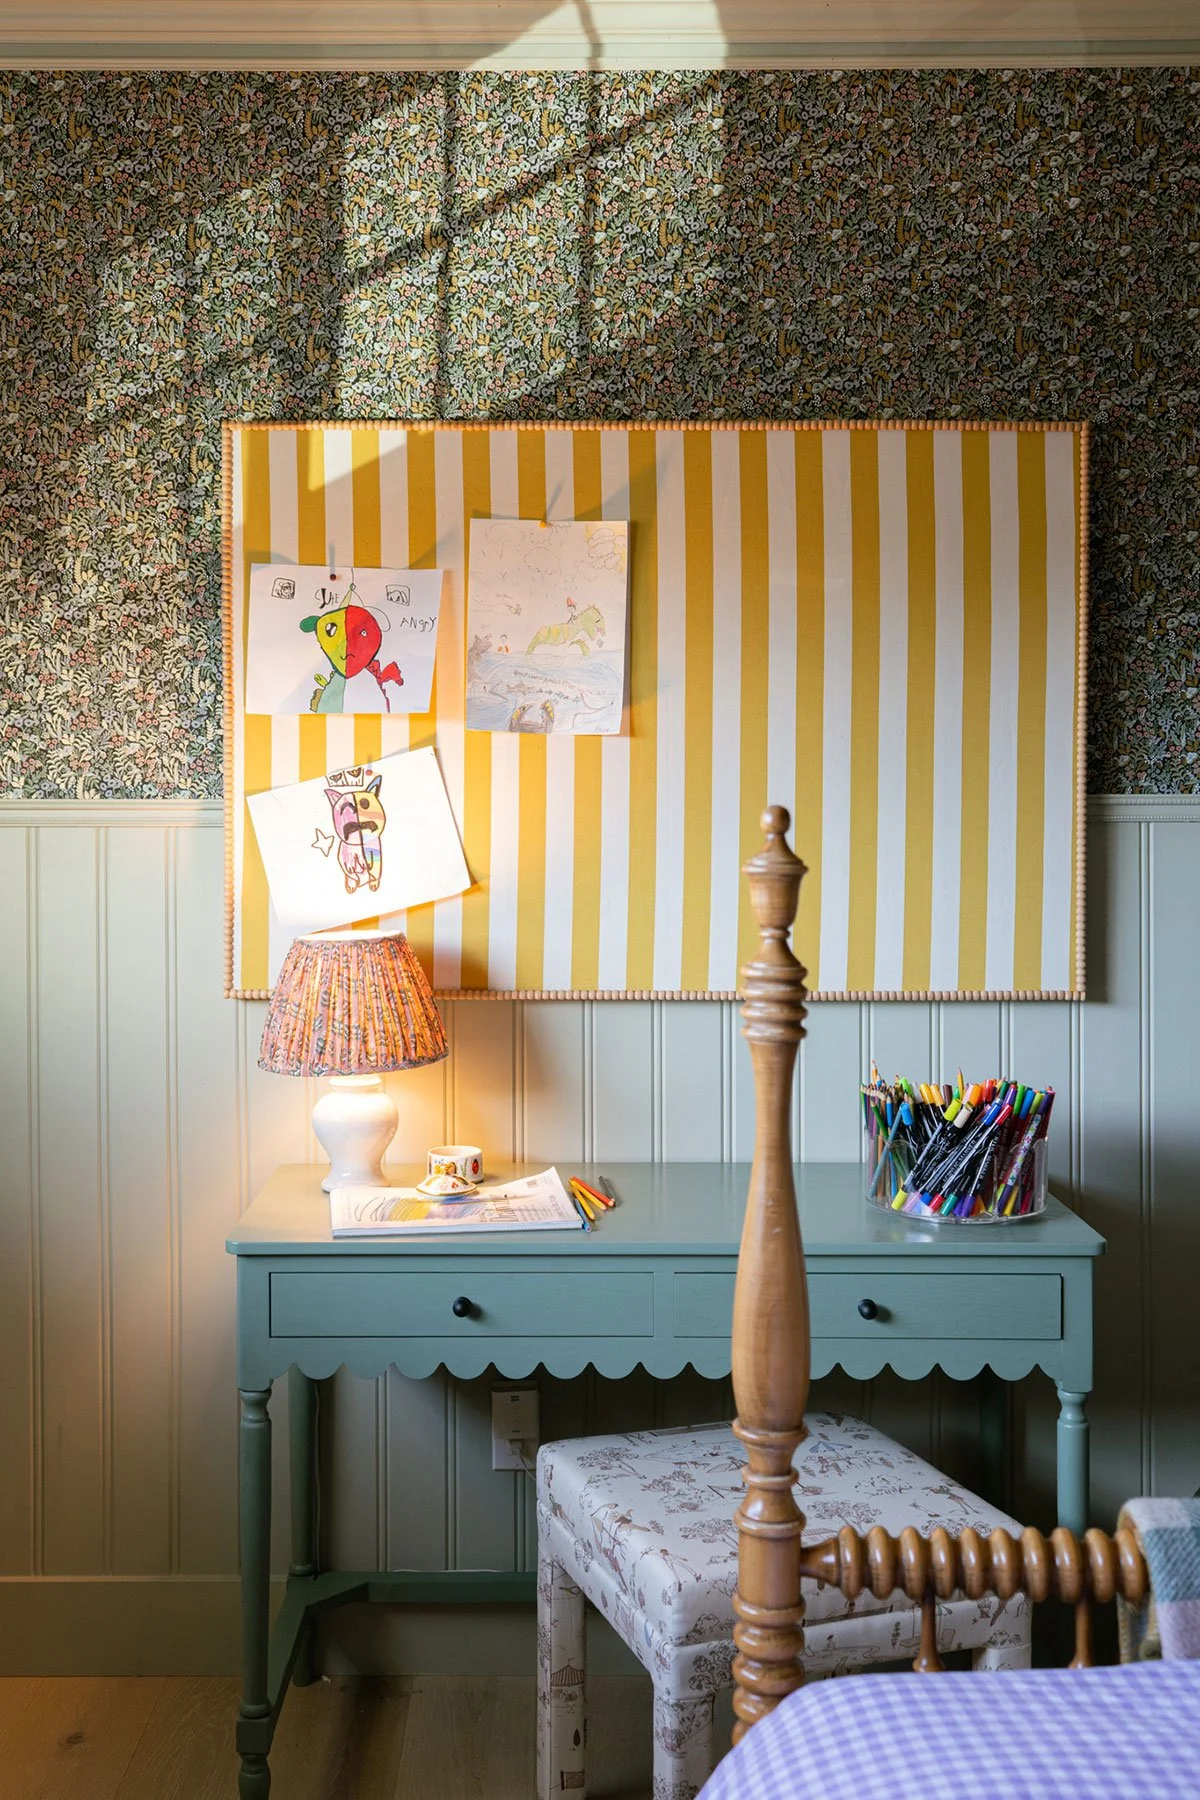
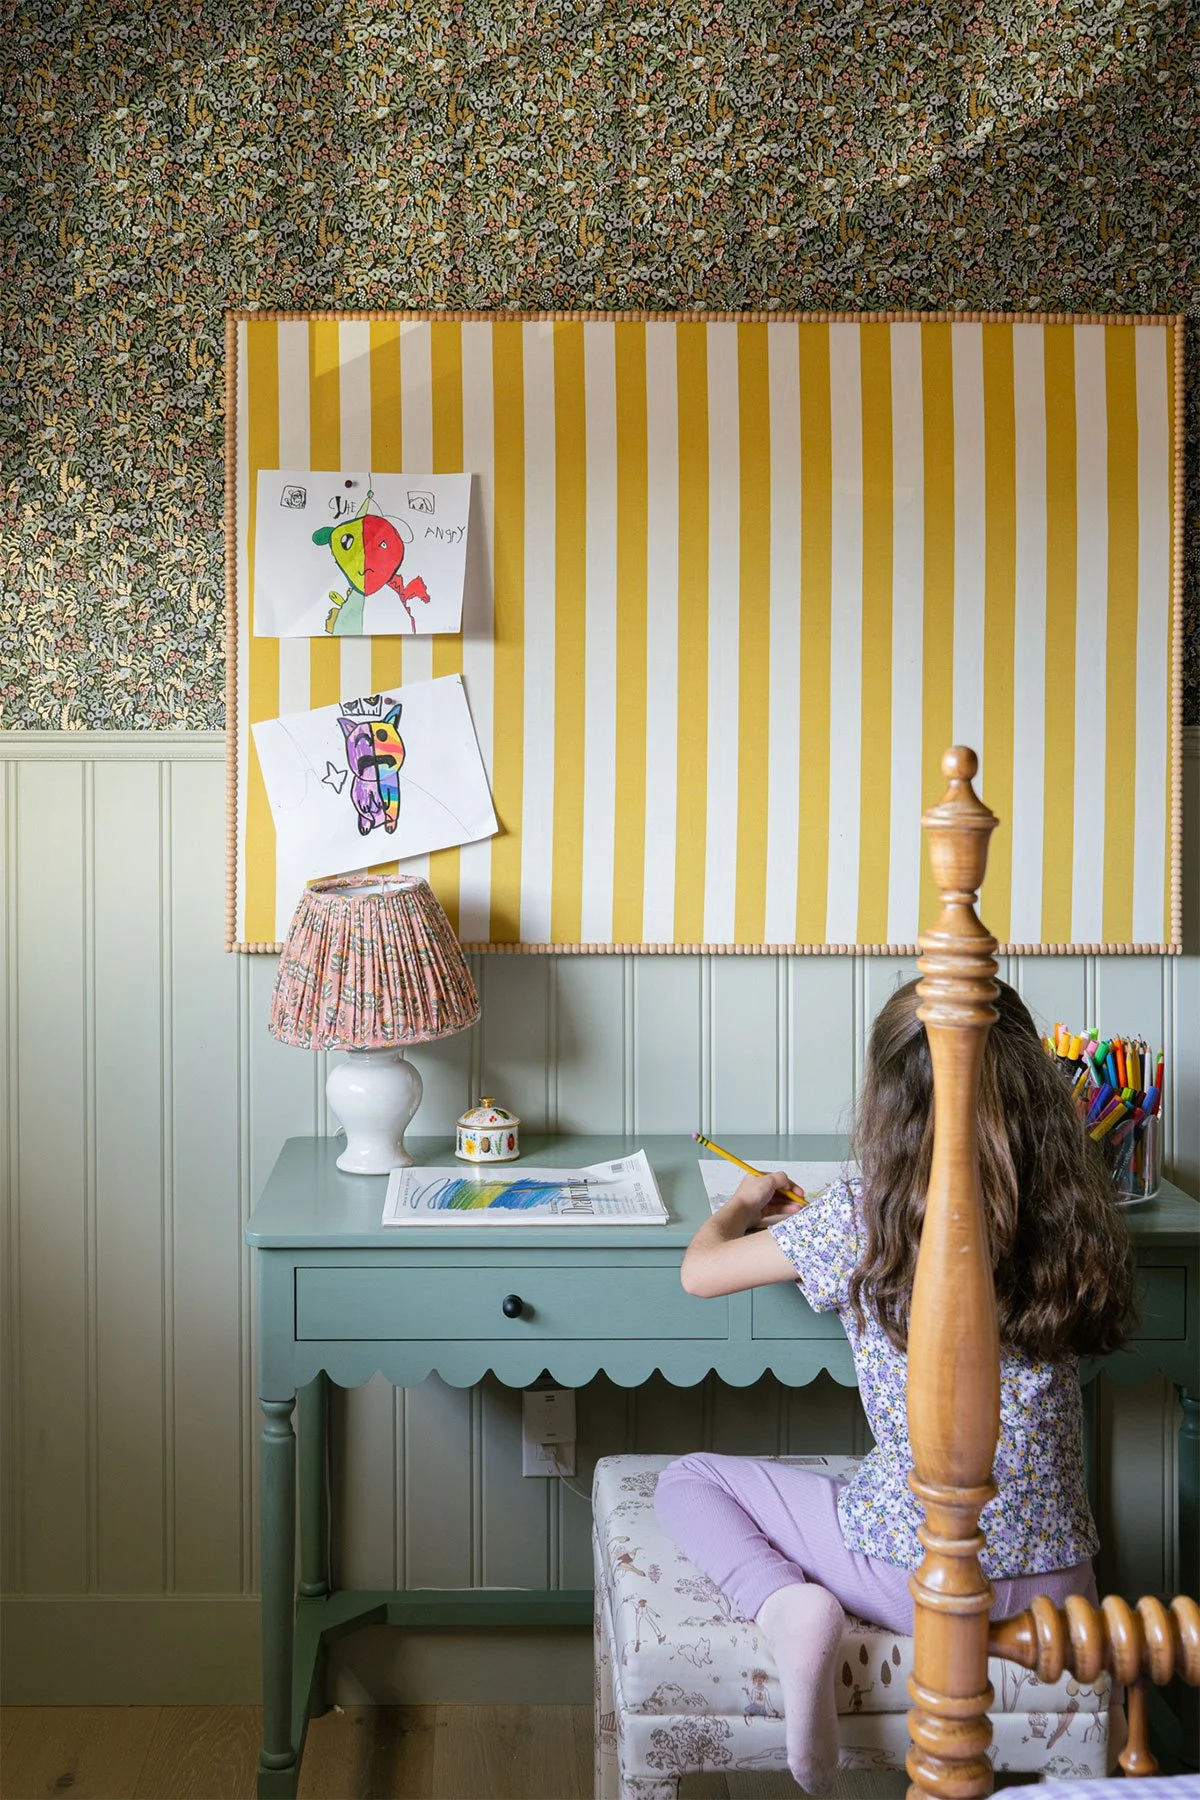
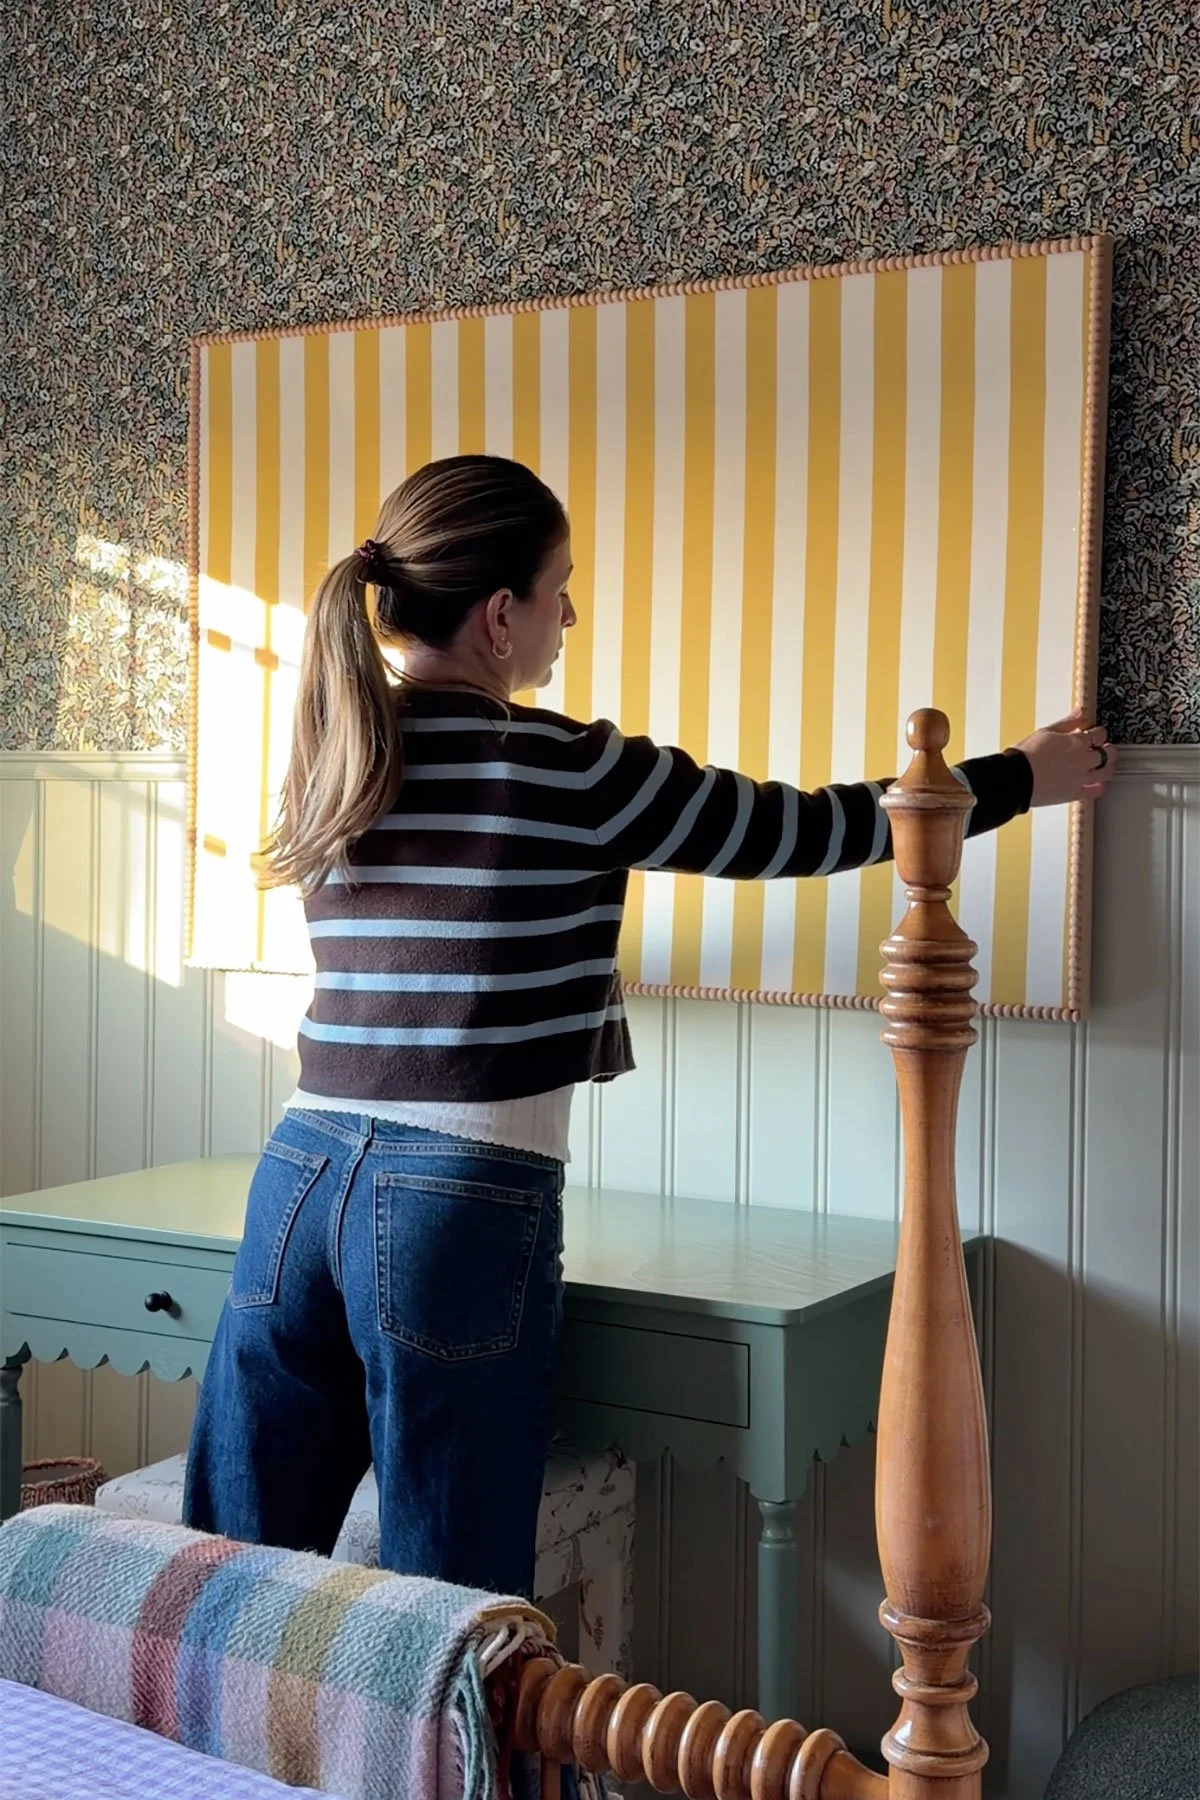
A pin board felt like the perfect solution.
After searching for ready-made options, I quickly realized most boards were either too small, too expensive in larger sizes, or just not very cute for a kid’s room. So I decided to DIY one myself. But I wanted it to feel approachable. Minimal tools. Minimal effort.
No saw? No problem.
What You’ll Need
Stapler (optional — glue works too)
Fabric of your choice (a sheet or tablecloth works great!)
Decorative trim (I used bobbin trim)
Hanging hardware (D-rings or sawtooth hangers)
Approximate cost: about $60 in materials for a 3’ x 4’ board (if you already have the tools).
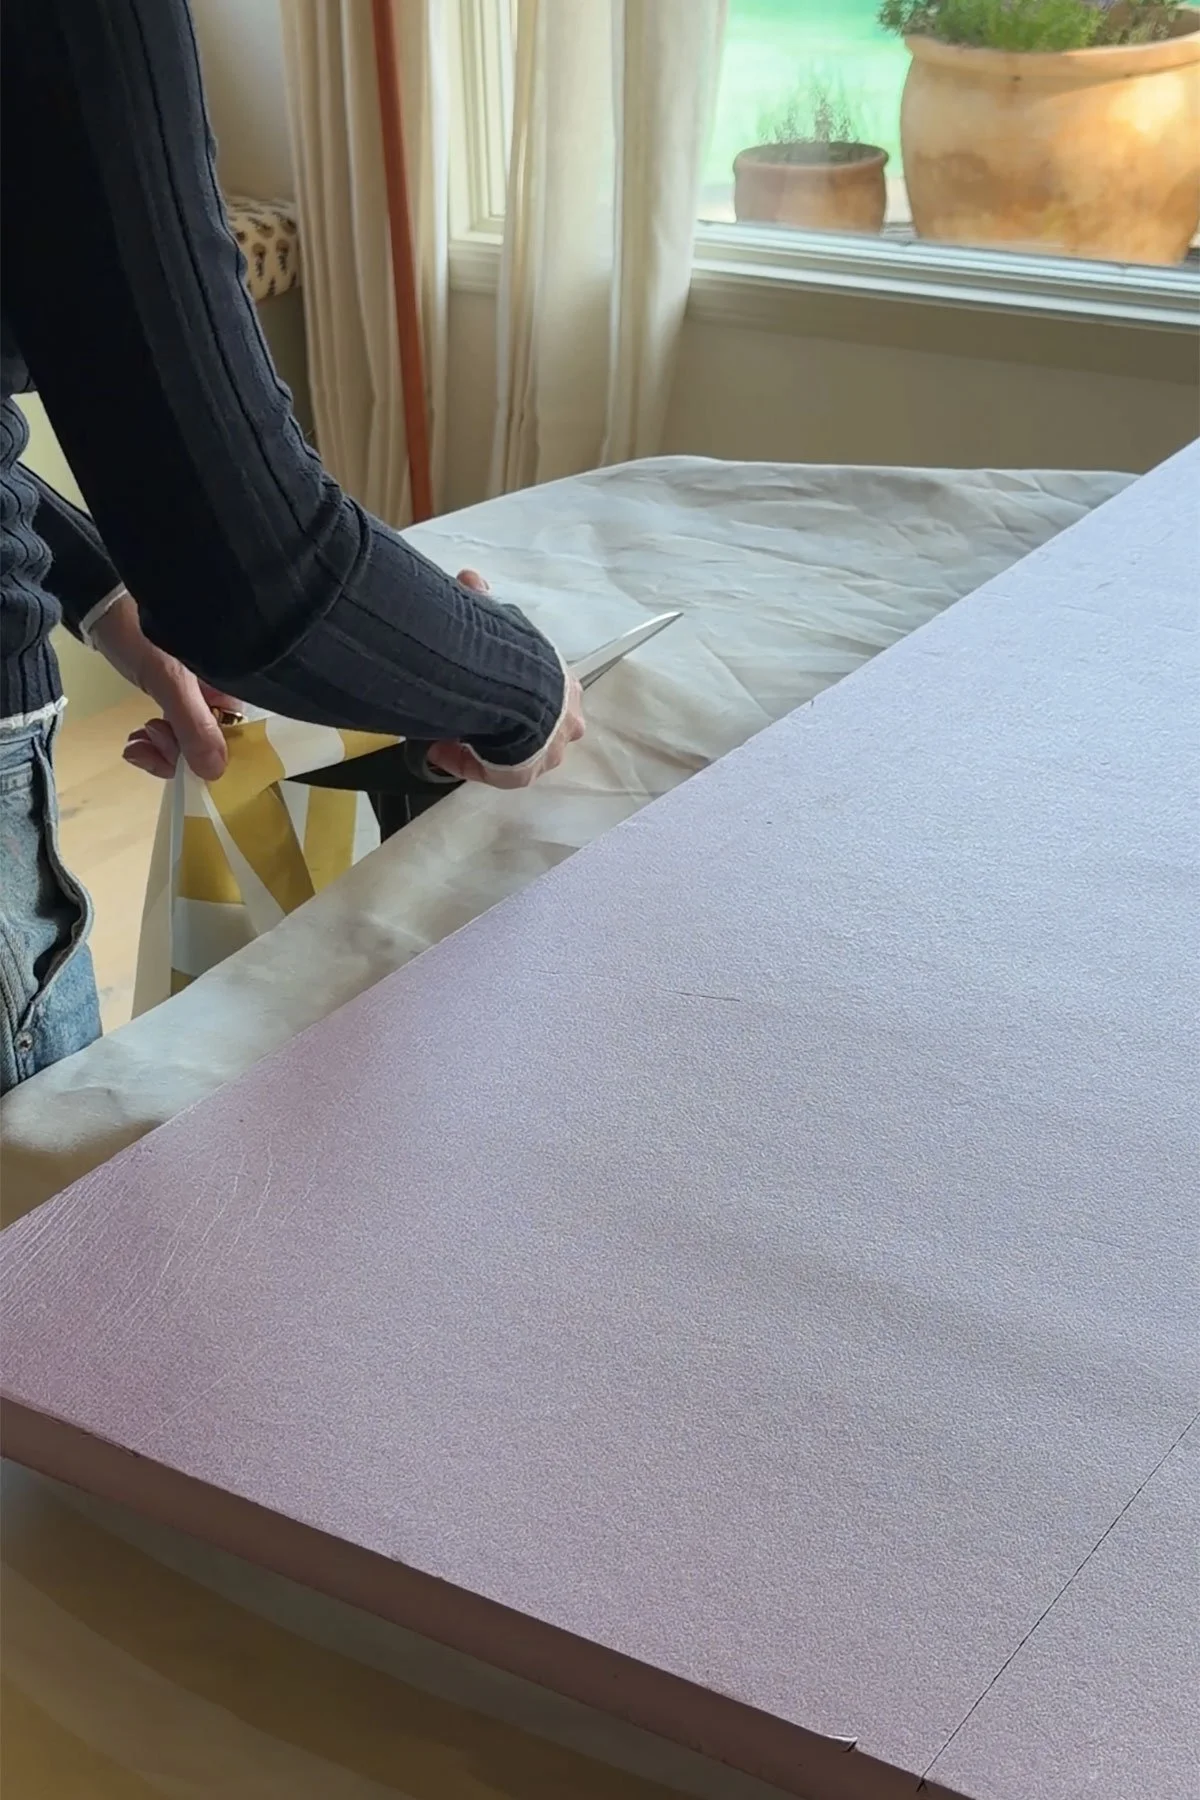
We purchased a large 4’ x 8’ sheet of insulation foam and cut it down to size (it fit in the car once cut in half). The bonus? We now have enough material to make two more pin boards. They do sell smaller 2’ x 2’ boards, but buying the larger size makes much more sense price-wise.
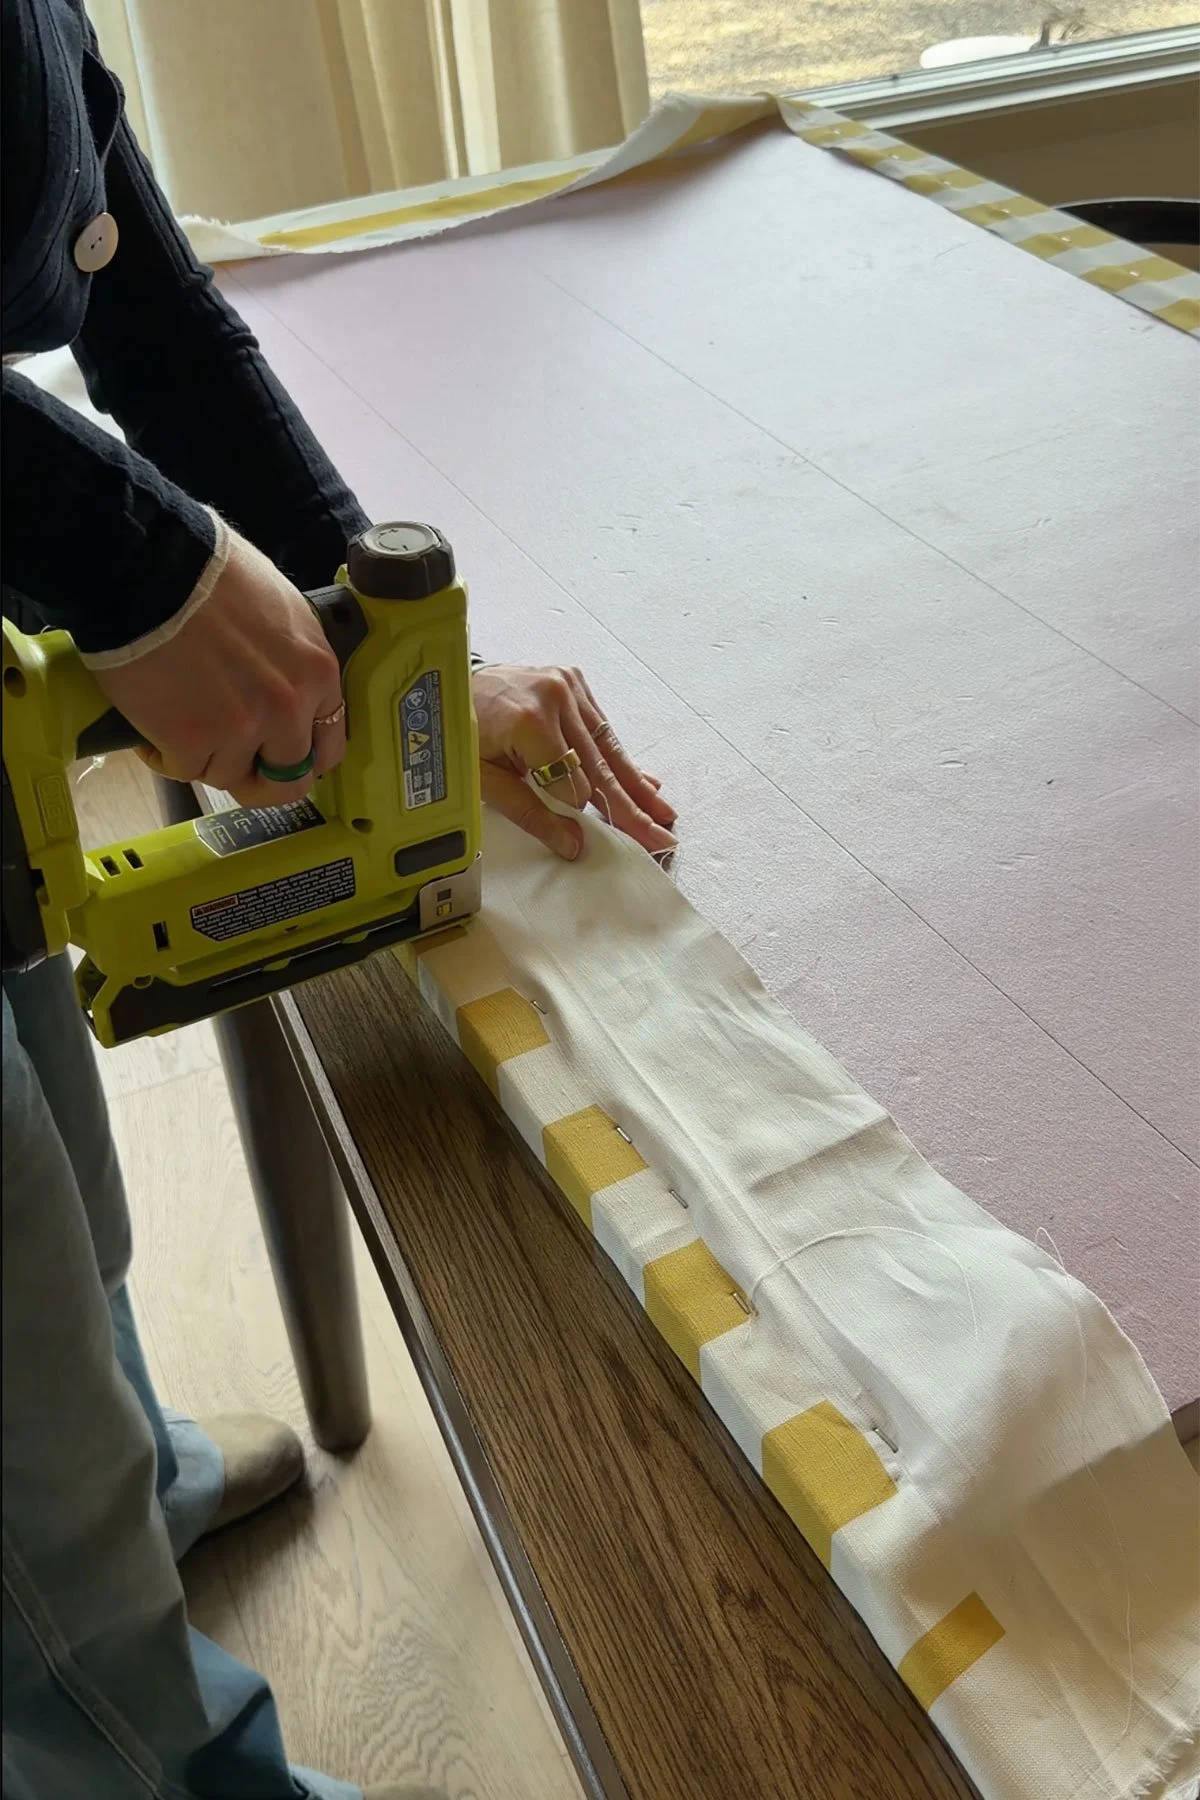
Step 1: Wrap the Board
Lay your fabric face down on a flat surface.
Place the foam board on top, then pull the fabric tightly and staple it in place. Think of it like wrapping a present. You want it nice and smooth.
The staples act like temporary pins to secure everything. If you prefer not to use staples, you can skip them and just use glue. After stapling, I added hot glue over the excess fabric to make sure everything stayed secure.

Step 2: Add the Frame
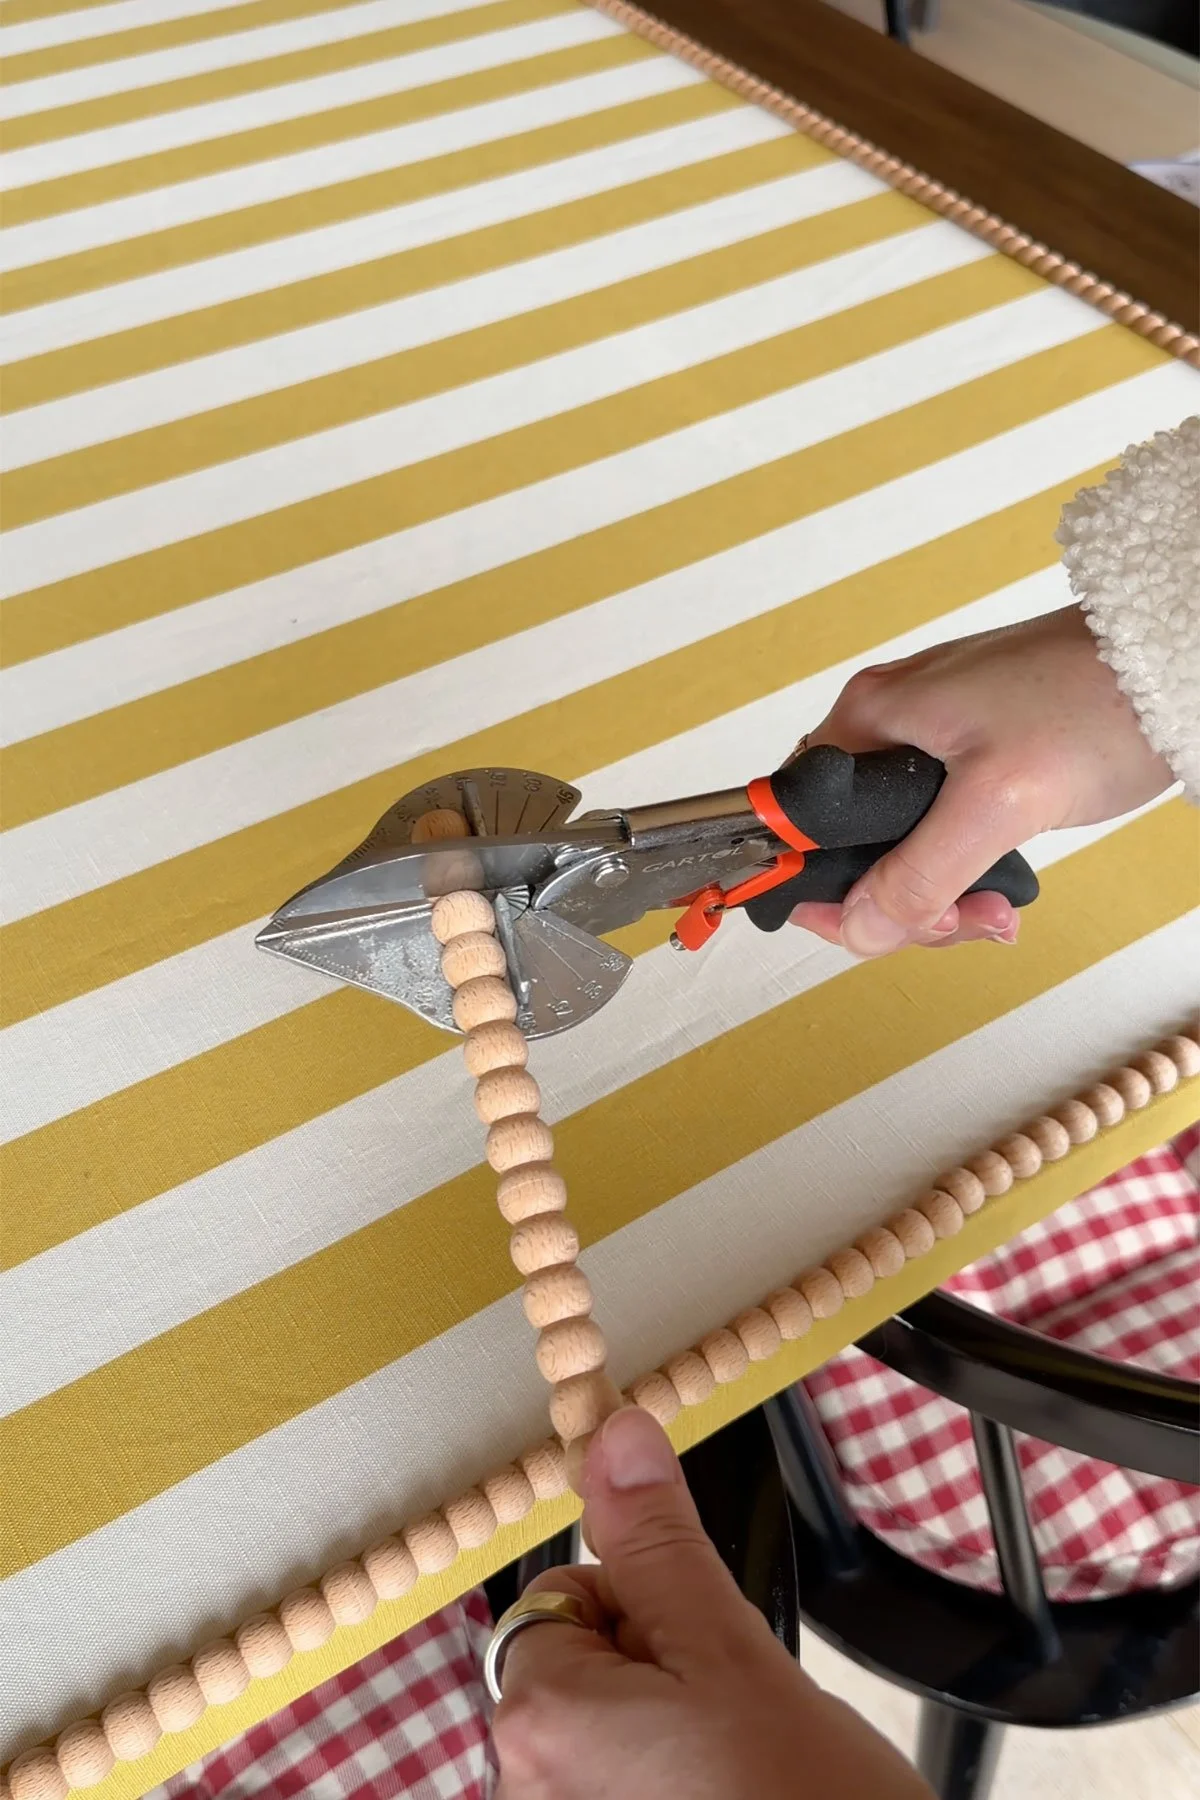
Cut your lattice trim to size using the miter shears.
Then use hot glue to attach the trim around the edges of the board, creating a simple frame.
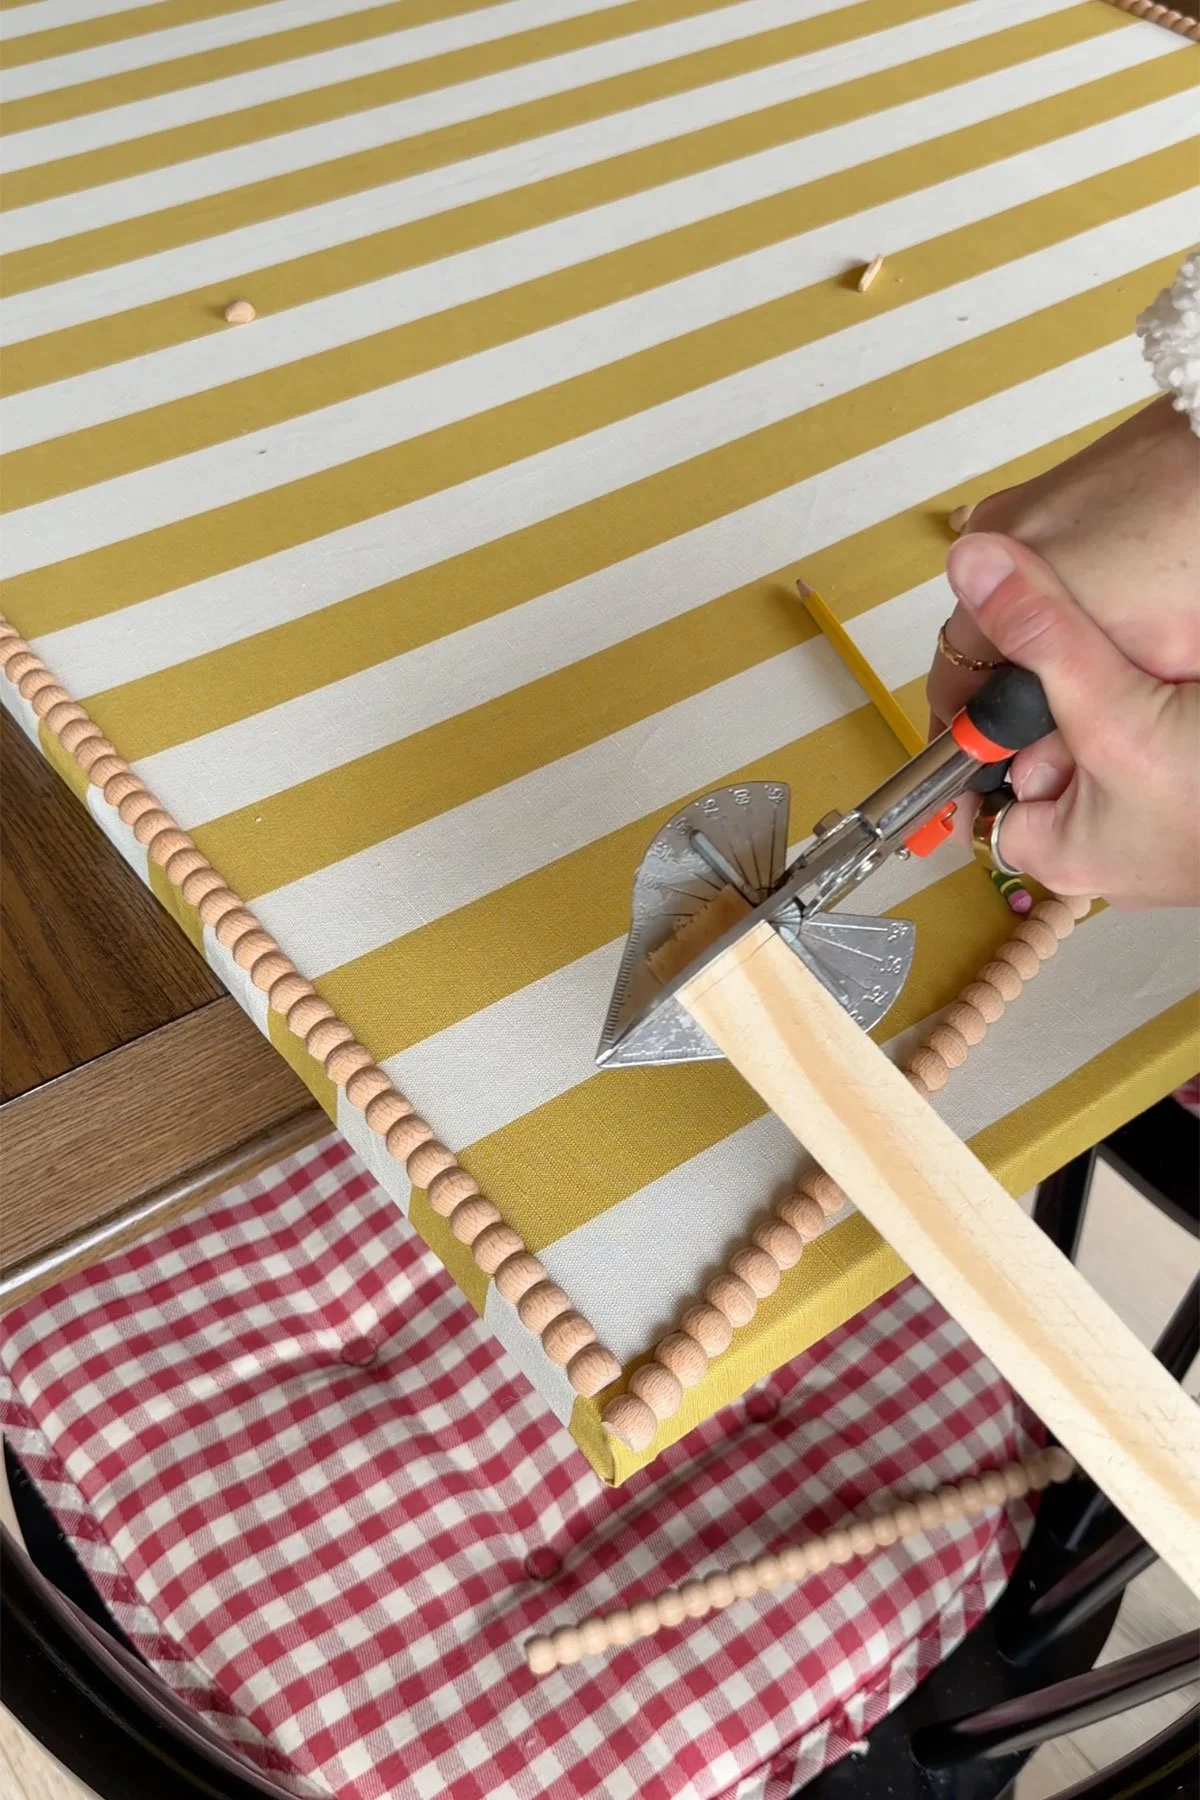
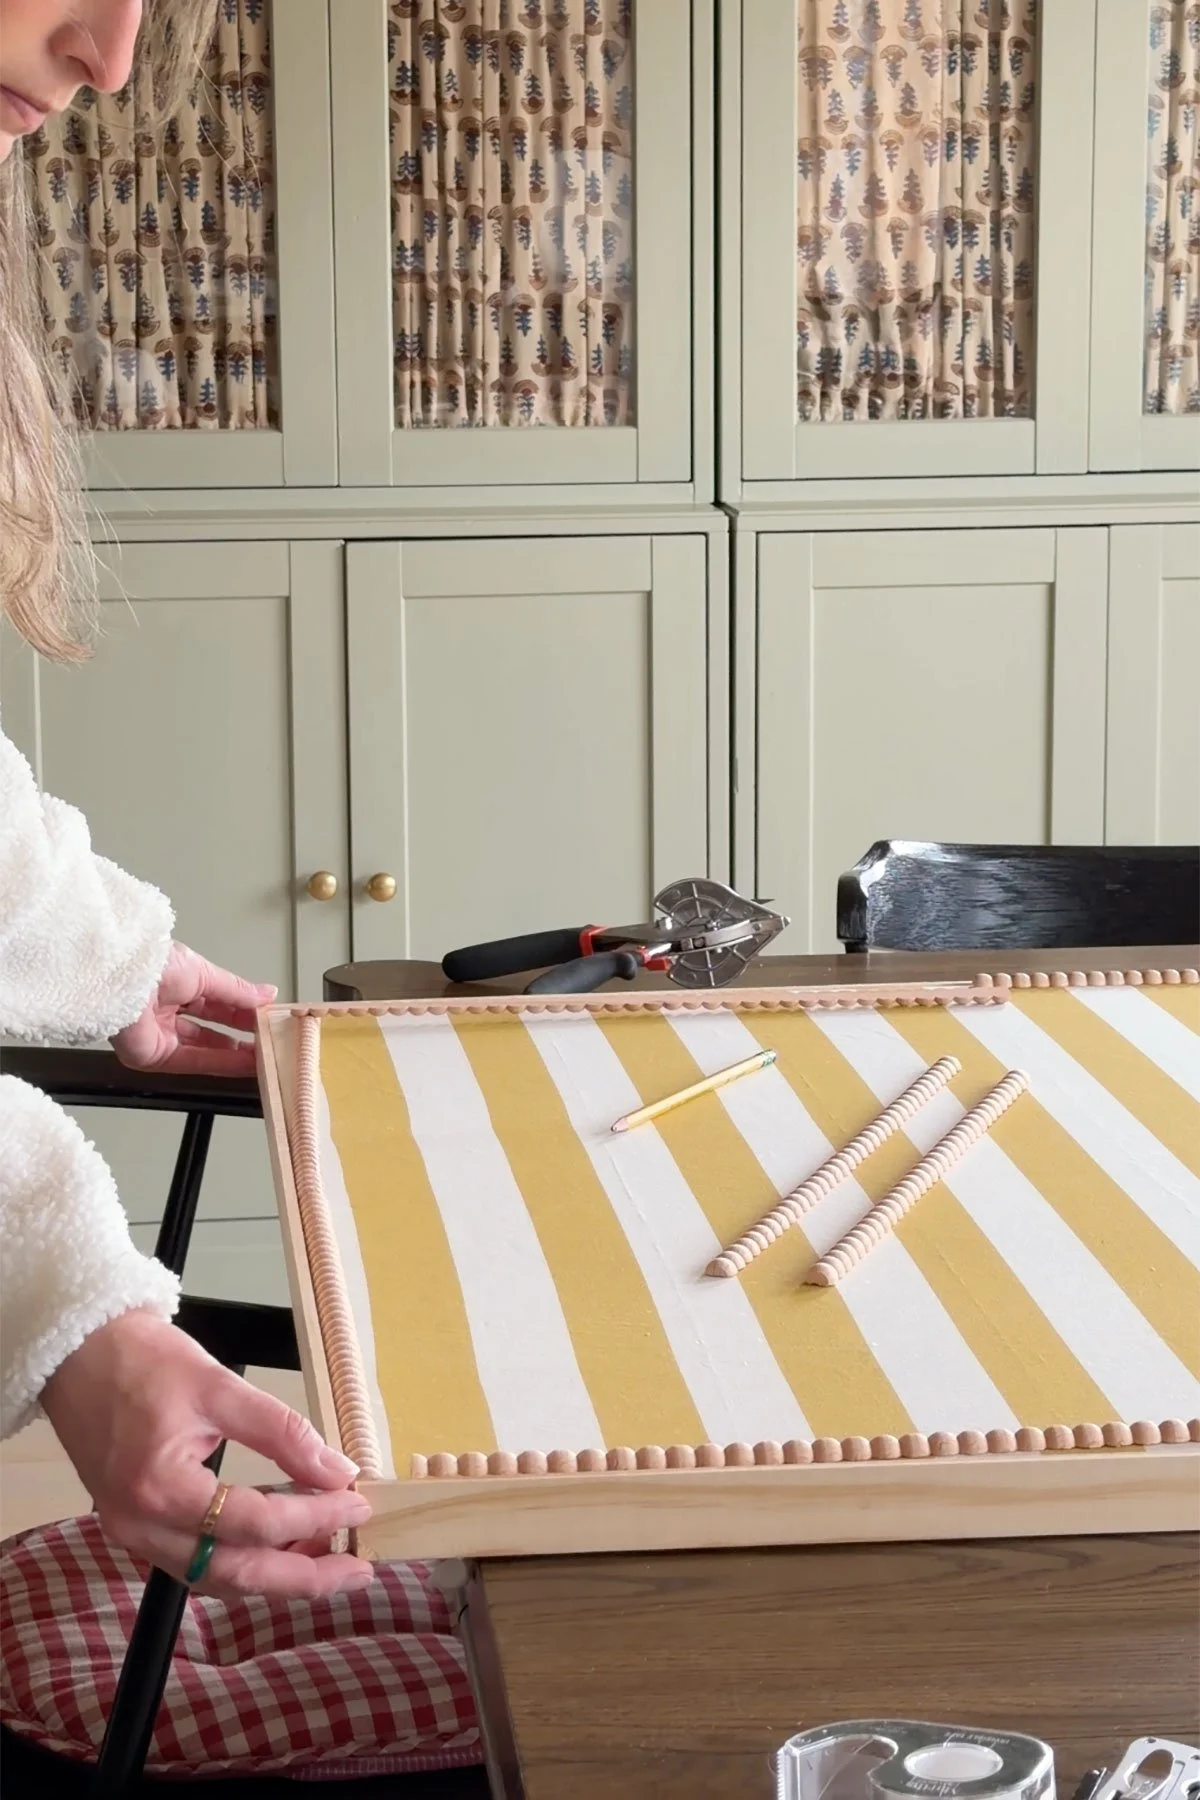
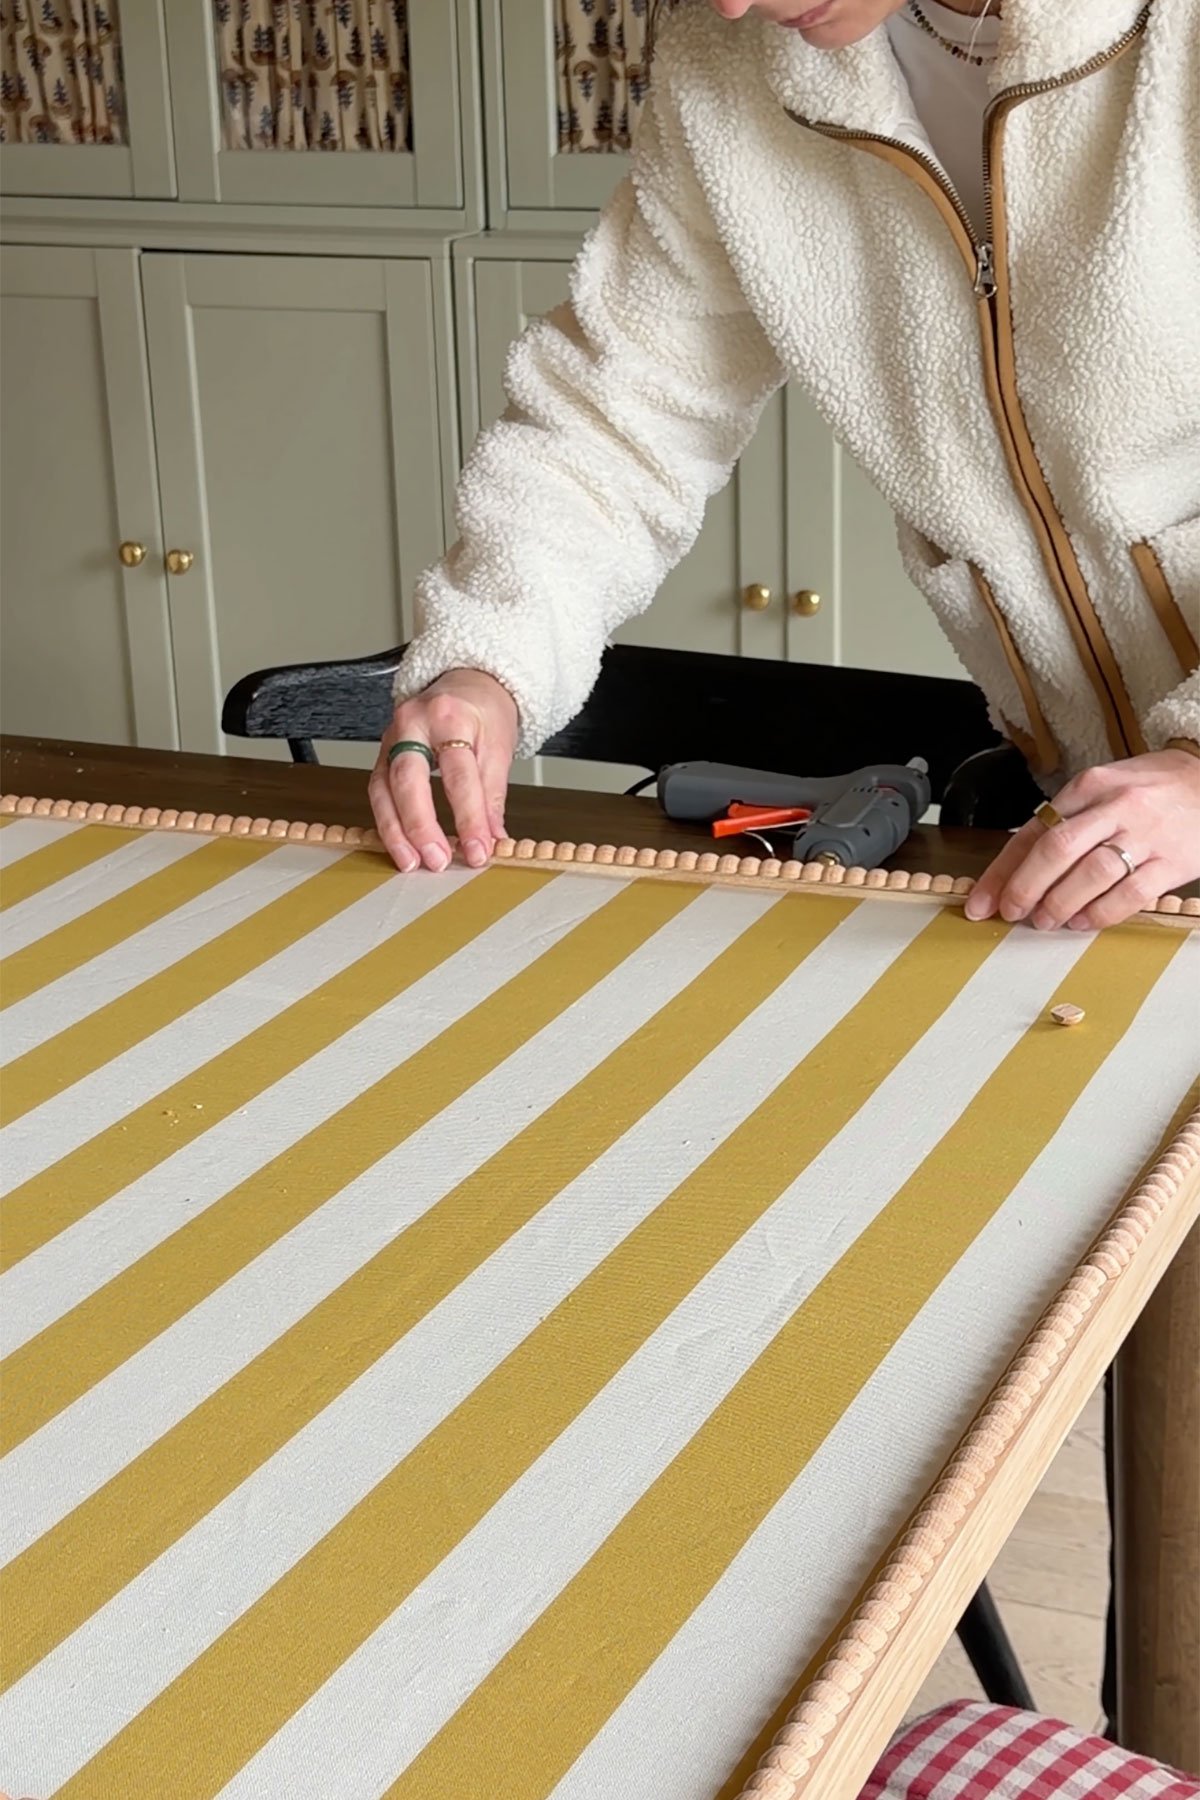
Step 3: Add Decorative Trim
Glue decorative trim over the lattice to elevate the look. I used an adorable bobbin trim and had just enough to frame the entire board.
I originally planned to paint the trim but ended up loving the natural wood tone against the fabric. If you decide to paint yours, I recommend painting before installation.
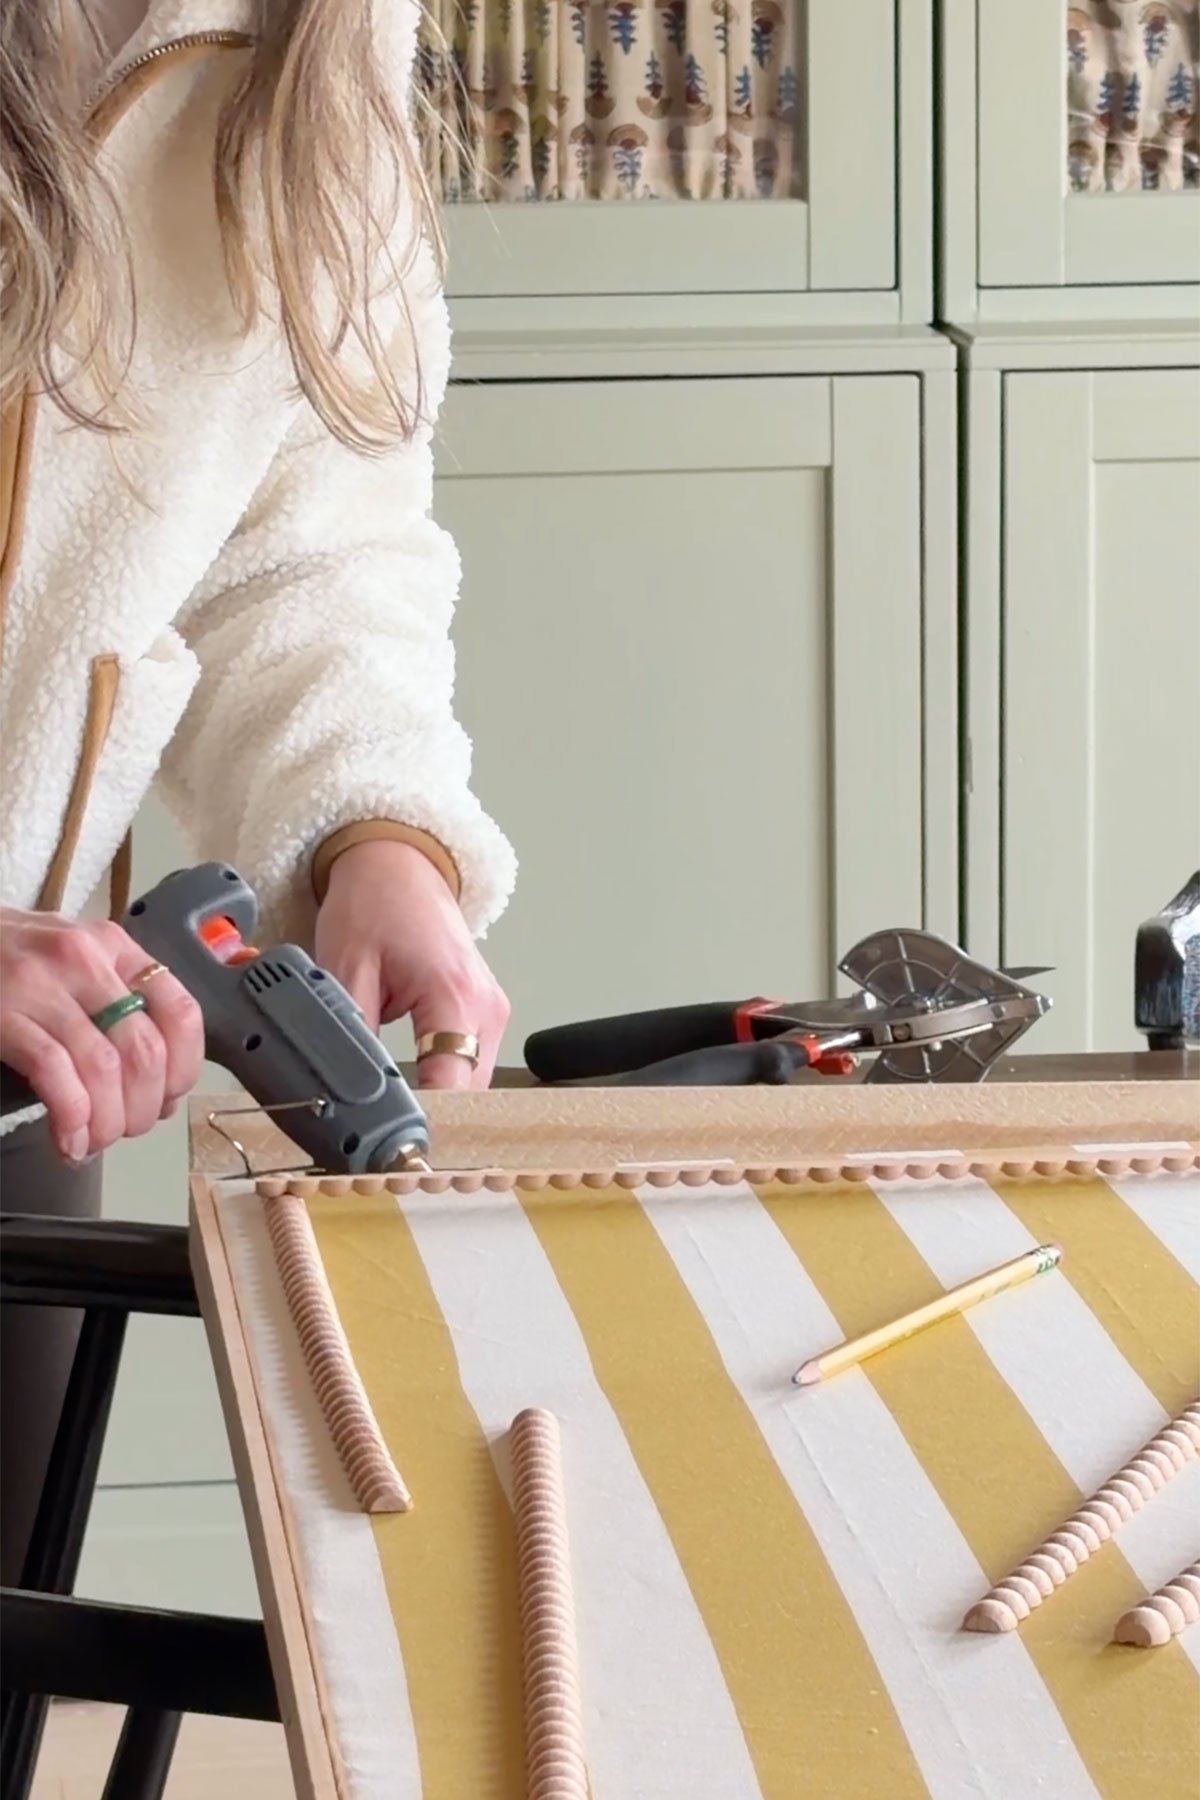
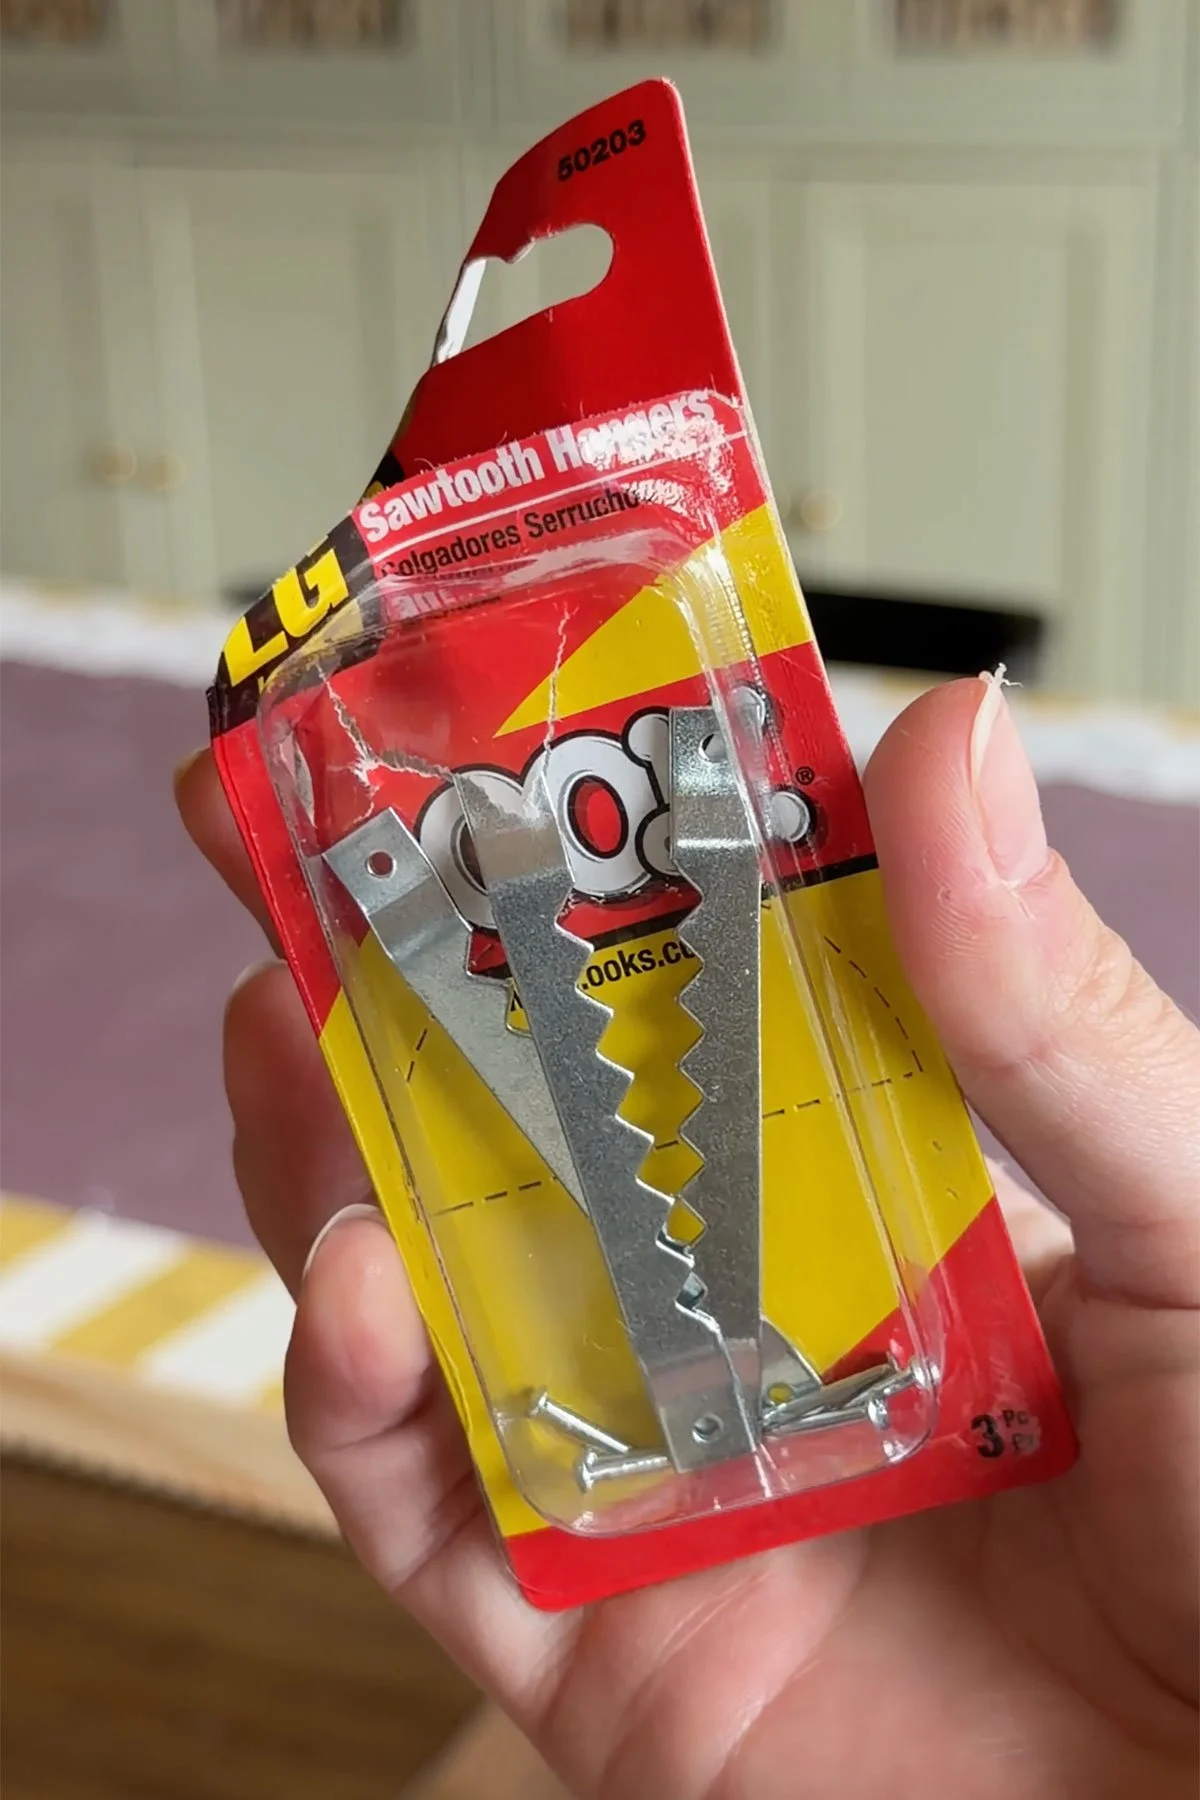
Step 4: Add Hanging Hardware
Attach hanging hardware (like D-rings or a sawtooth hanger) securely to the frame. I recommend screwing these into the trim rather than relying only on glue for long-term durability.
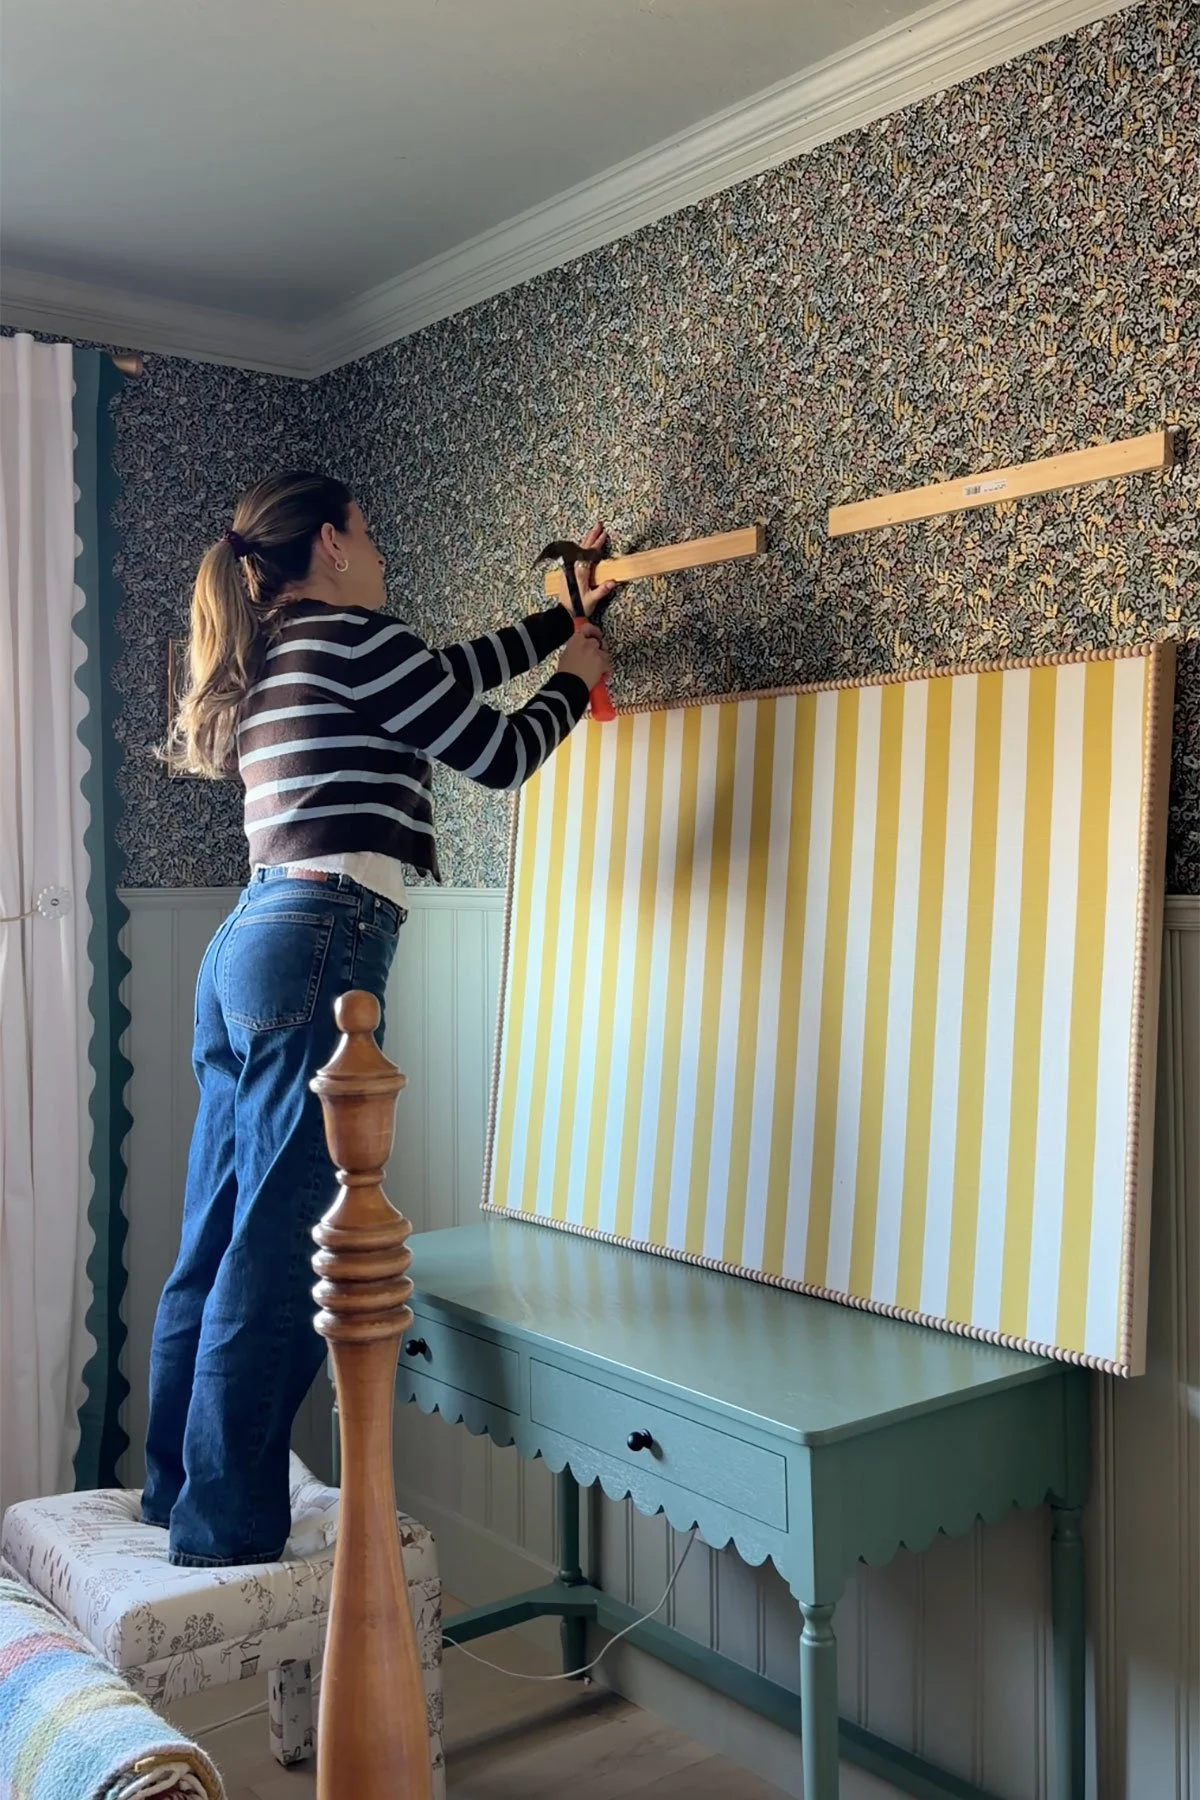
Installing the Pin Board
I used small wood scrap pieces as spacers to install the pin board because the beadboard has a strip of trim that sticks out, so the board sits nicely flush against the wall.
And that’s it.
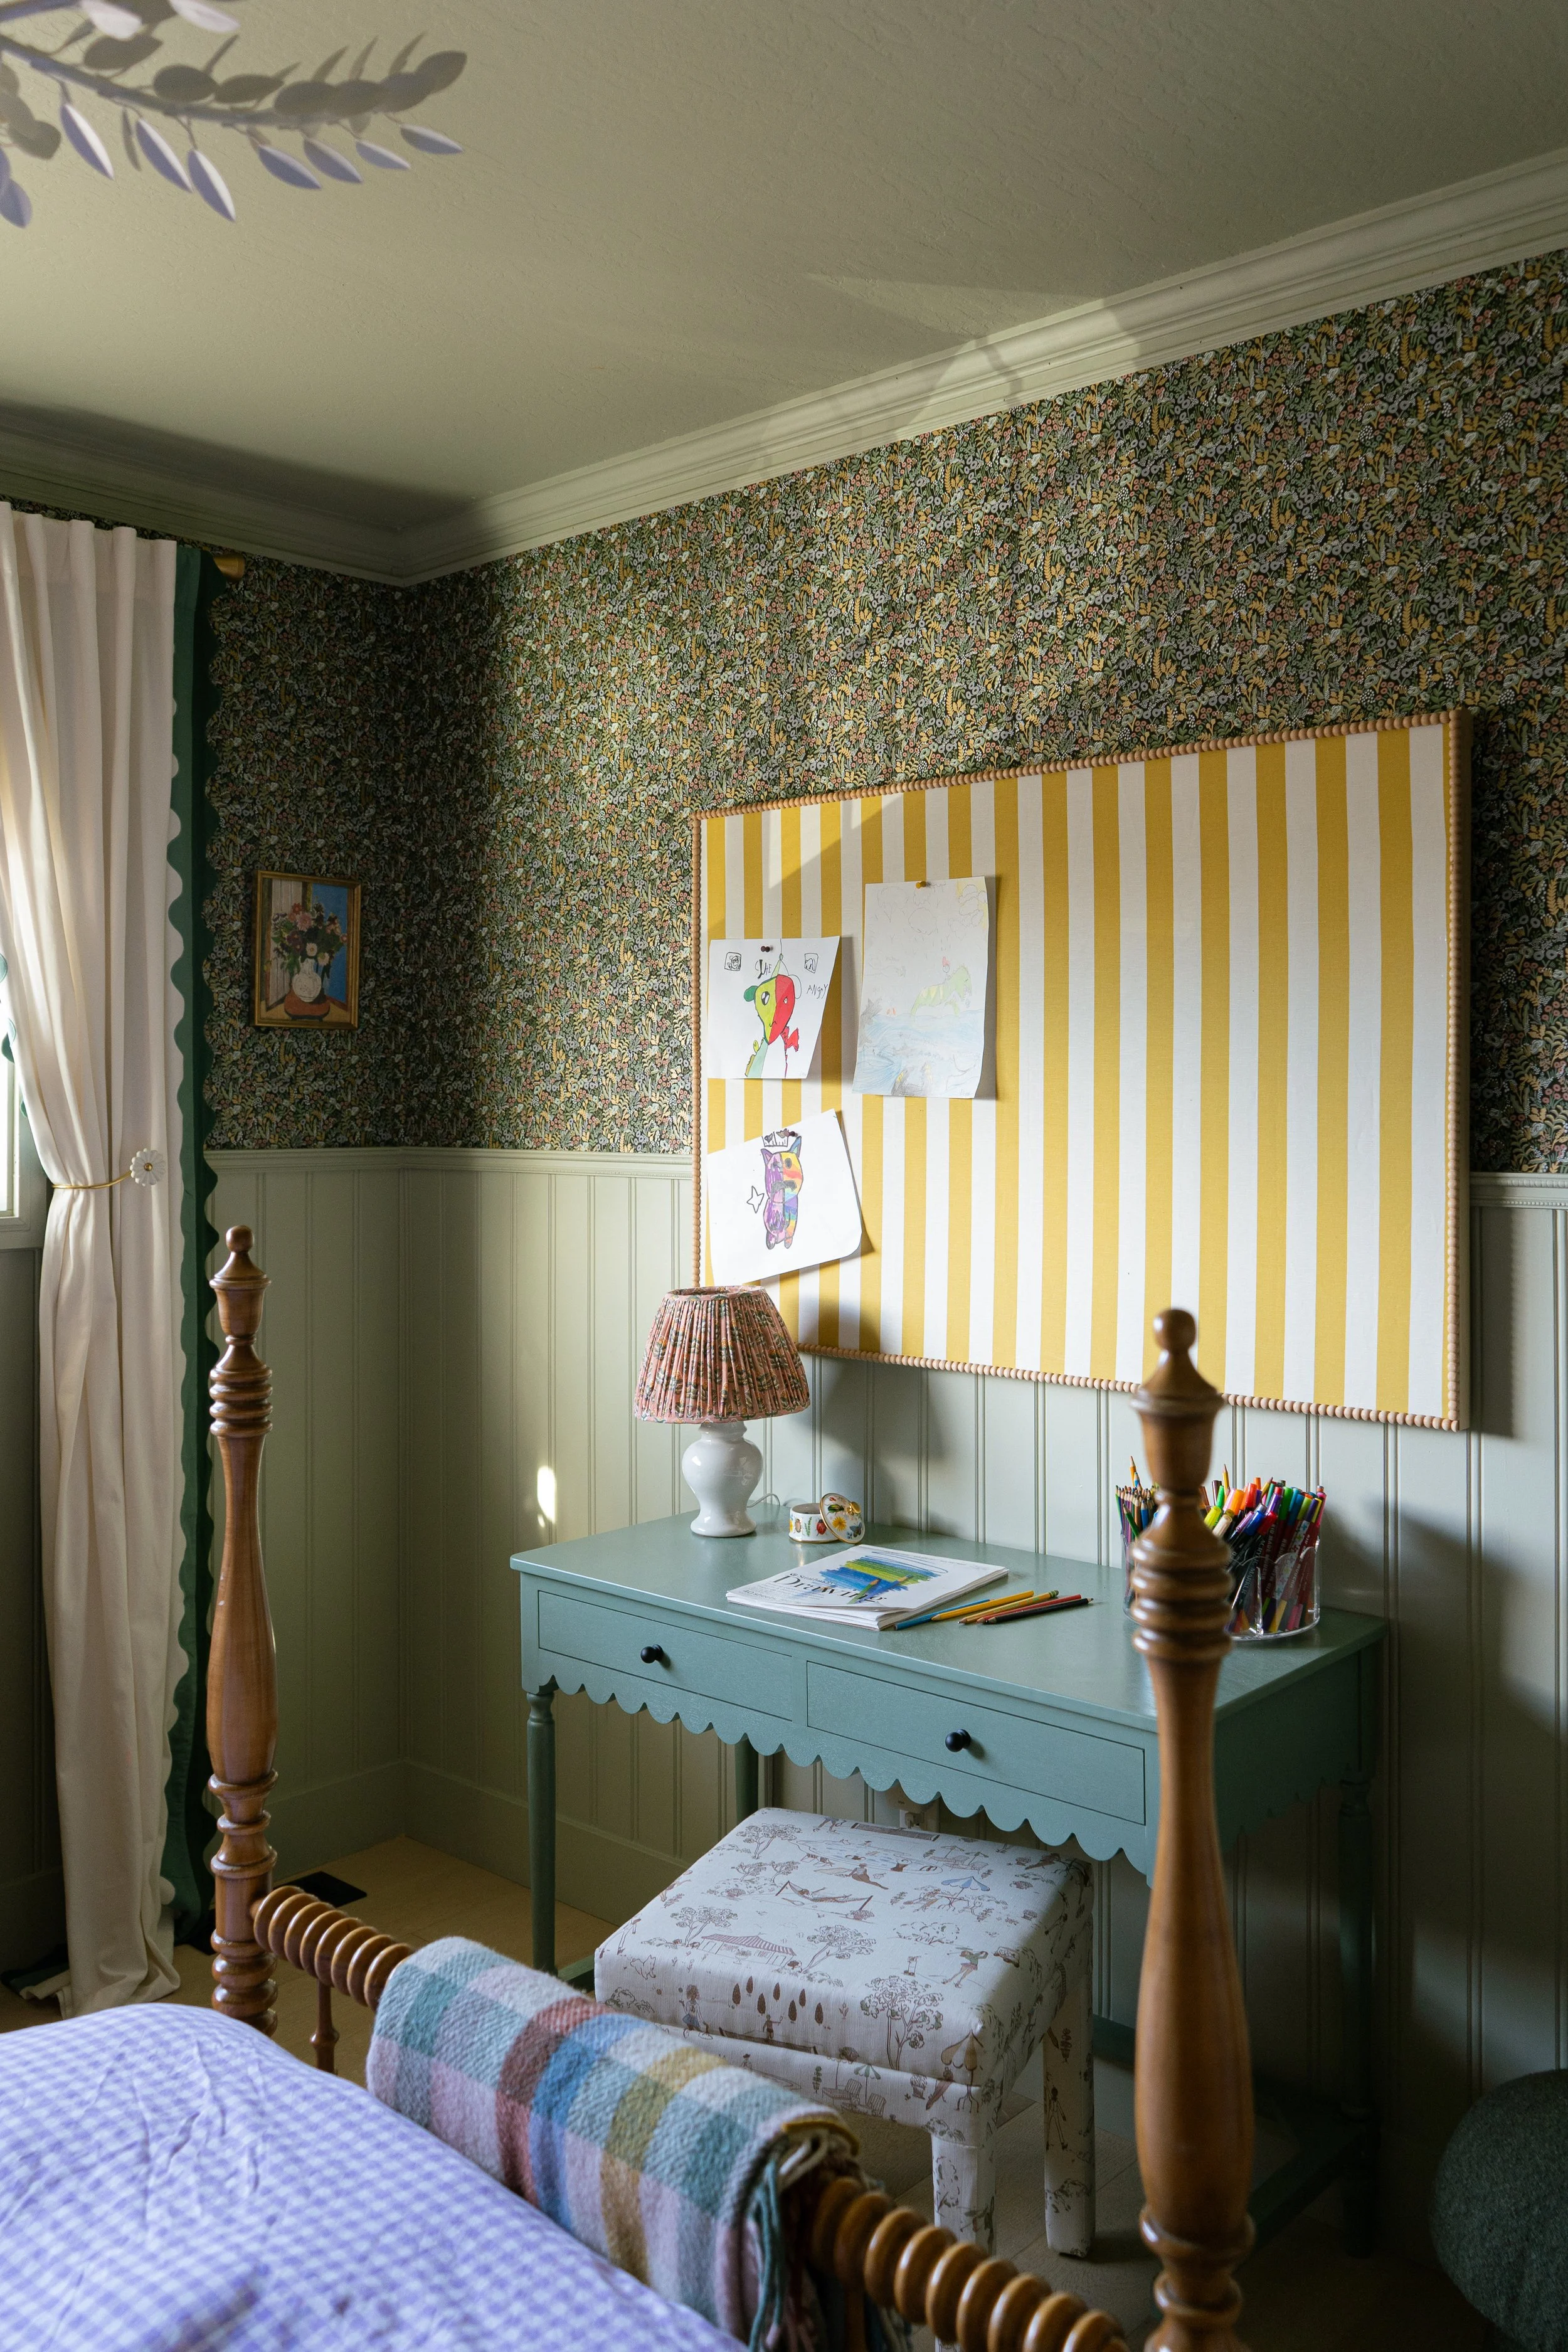
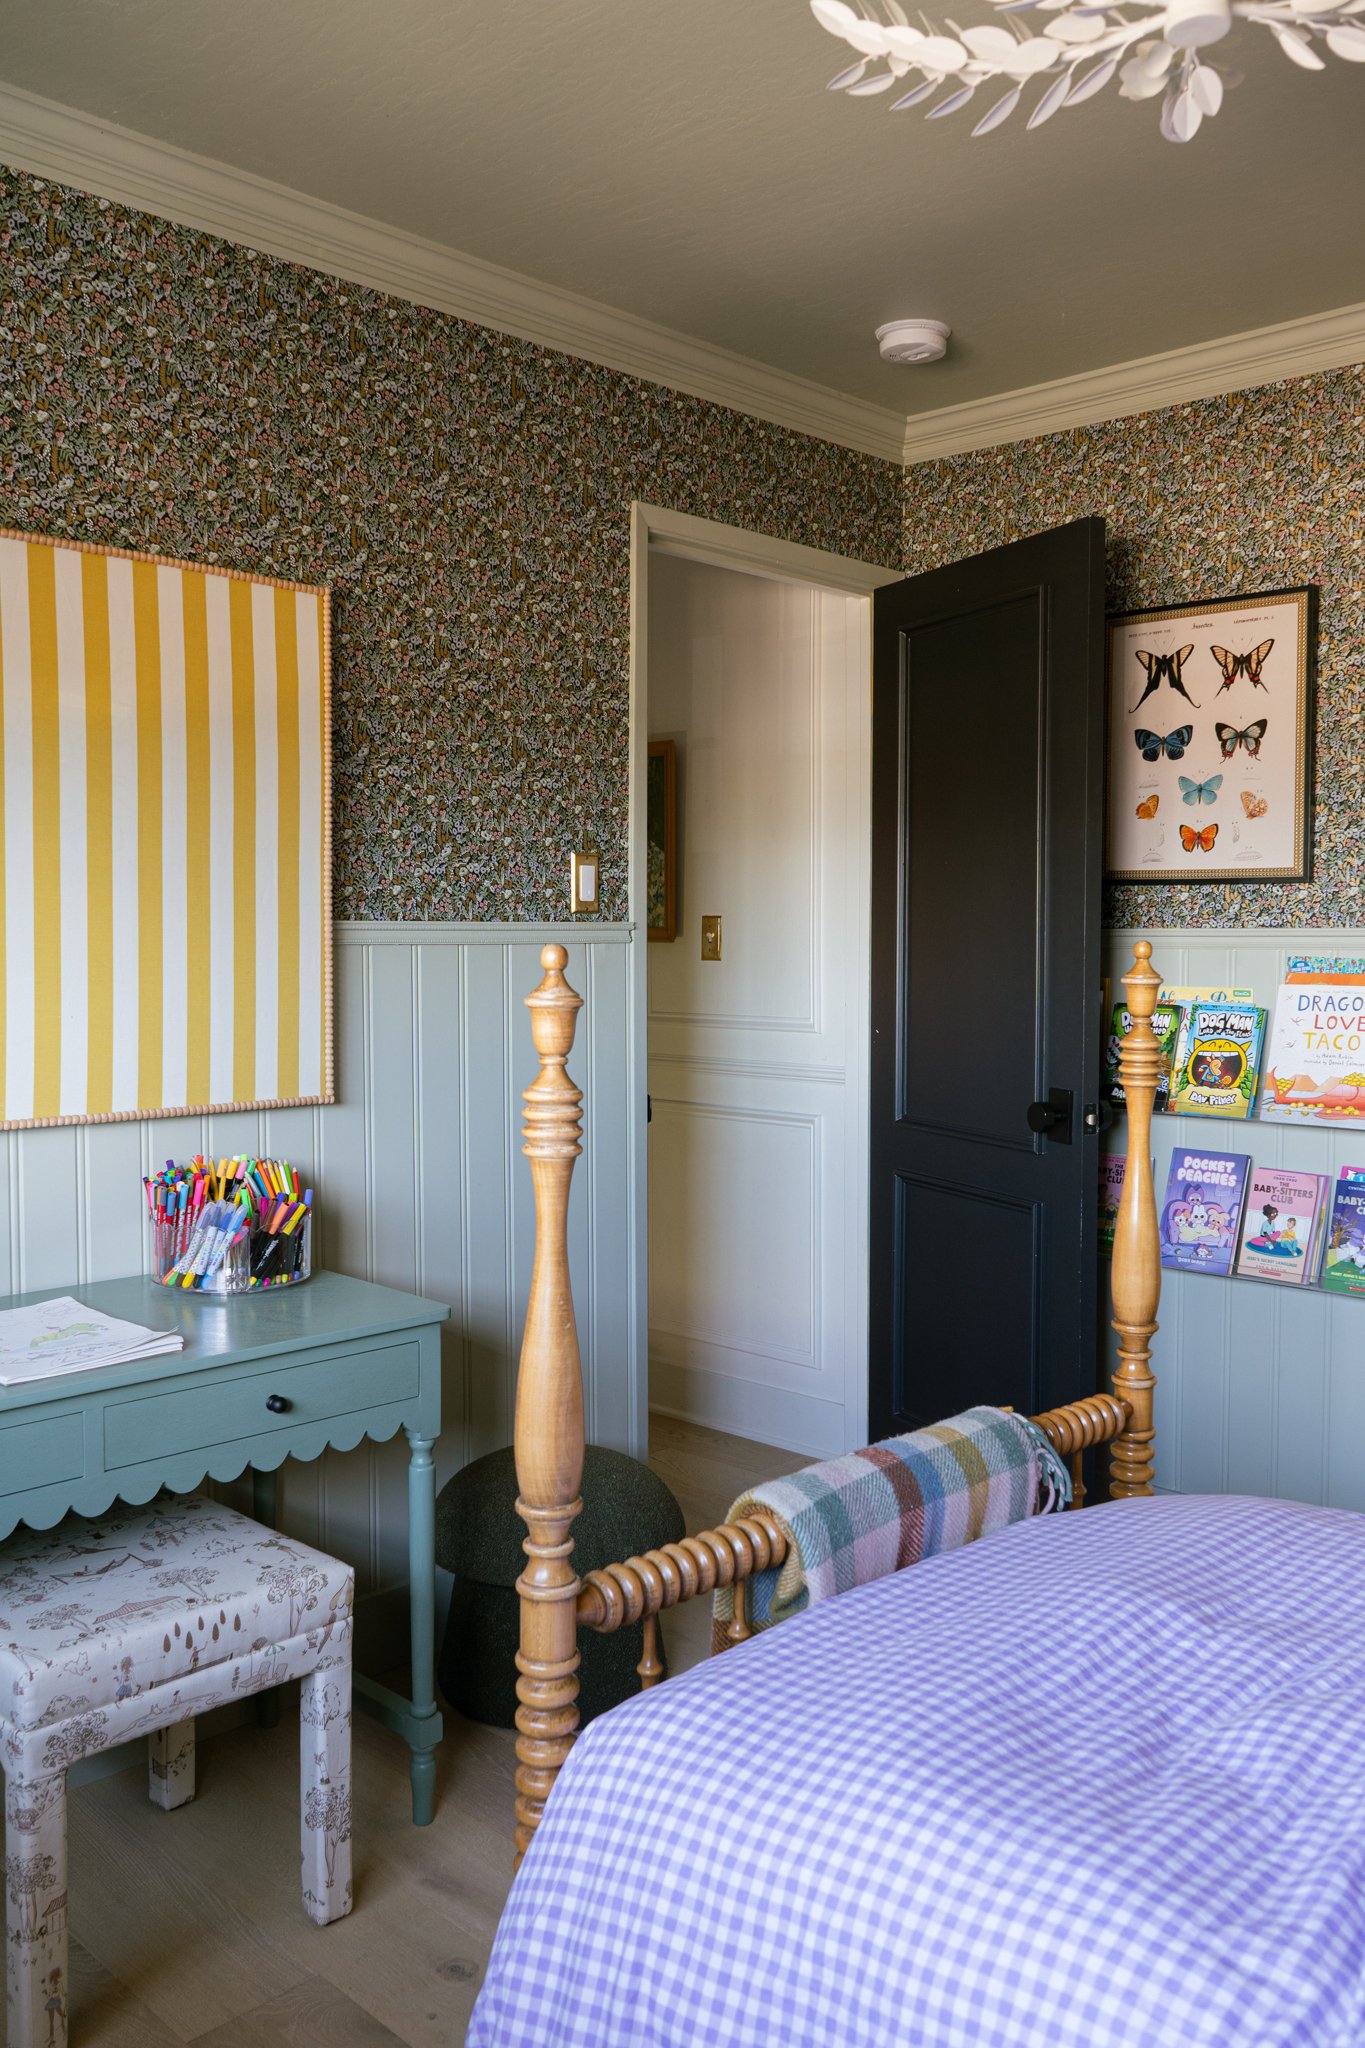
When Ella came home from school and saw her new desk area, she immediately sat down and started coloring. Pure joy. And now her artwork has a place to shine instead of living in random stacks around the house.
Sometimes the simplest projects are the ones that make the biggest impact.

Shop this post:
