
Small Bathroom Renovation on a Budget: My “Band-Aid 2.0” Update That Made a Big Impact
Let’s talk about this bathroom.
I’ve gotten quite a few messages saying I shouldn’t call this “not a full renovation” because it looks like one. And I get it.
But when I think of a full renovation for this space, I picture something completely different. To me, a full renovation would mean starting from scratch. Taking everything down to the studs, reworking the layout, moving plumbing, removing the wall between the tiny shower and toilet area, adding skylights for natural light…really transforming the way this room functions. That’s the dream!
But the reality is, in this season of life, it’s just not the priority. Between other projects (hello, backyard) and being mindful of our budget, it didn’t make sense for us right now. And honestly…this bathroom had been feeling a little forgotten.

The First “Band-Aid” (That Didn’t Age Well)
My first attempt at refreshing this bathroom was very much a spur-of-the-moment situation.
I ripped out the old carpet (which, to be fair, needed to go immediately), and in a very 2020 DIY moment… I painted the subfloors. At the time, it felt like a win. Over time? Not so much. It started to wear down and eventually became more of a hazard than a solution.
the painted subfloors
Then I painted everything: the vanity, the vanity top…basically every surface except the shower.
If you were on Instagram back then, you probably remember the appliance paint countertop trend. I tried the spray version in a small, closed bathroom and let me just say…terrible idea. The fumes alone were enough to never do that again. I followed advice from an influencer at the time (no names lol), but I would not recommend it.
There are definitely better options now, but the lesson here is: not every viral DIY is worth it.
Visually, it also didn’t help that the bright white countertop against the black cabinets felt very stark and… very 2020. And because it was always meant to be temporary, it didn’t hold up. Everything started chipping, and the space slowly began to feel neglected—even when it was clean.
It wasn’t exactly the kind of space you want to walk into first thing in the morning.
After the first “band-aid” renovation
The Goal This Time
This time around, I wanted to approach things differently.
I kept calling it a “band-aid renovation 2.0,” but to be honest…with current prices, I’m not even sure that label fits anymore. We did spend a couple thousand dollars on this update. But compared to a full renovation, it still feels like a very doable, more accessible option. And one that made a huge difference in our everyday life.
The goal wasn’t to completely transform the space. It was to create a more elevated version of what was already there.
What We Changed (And What We Didn’t)
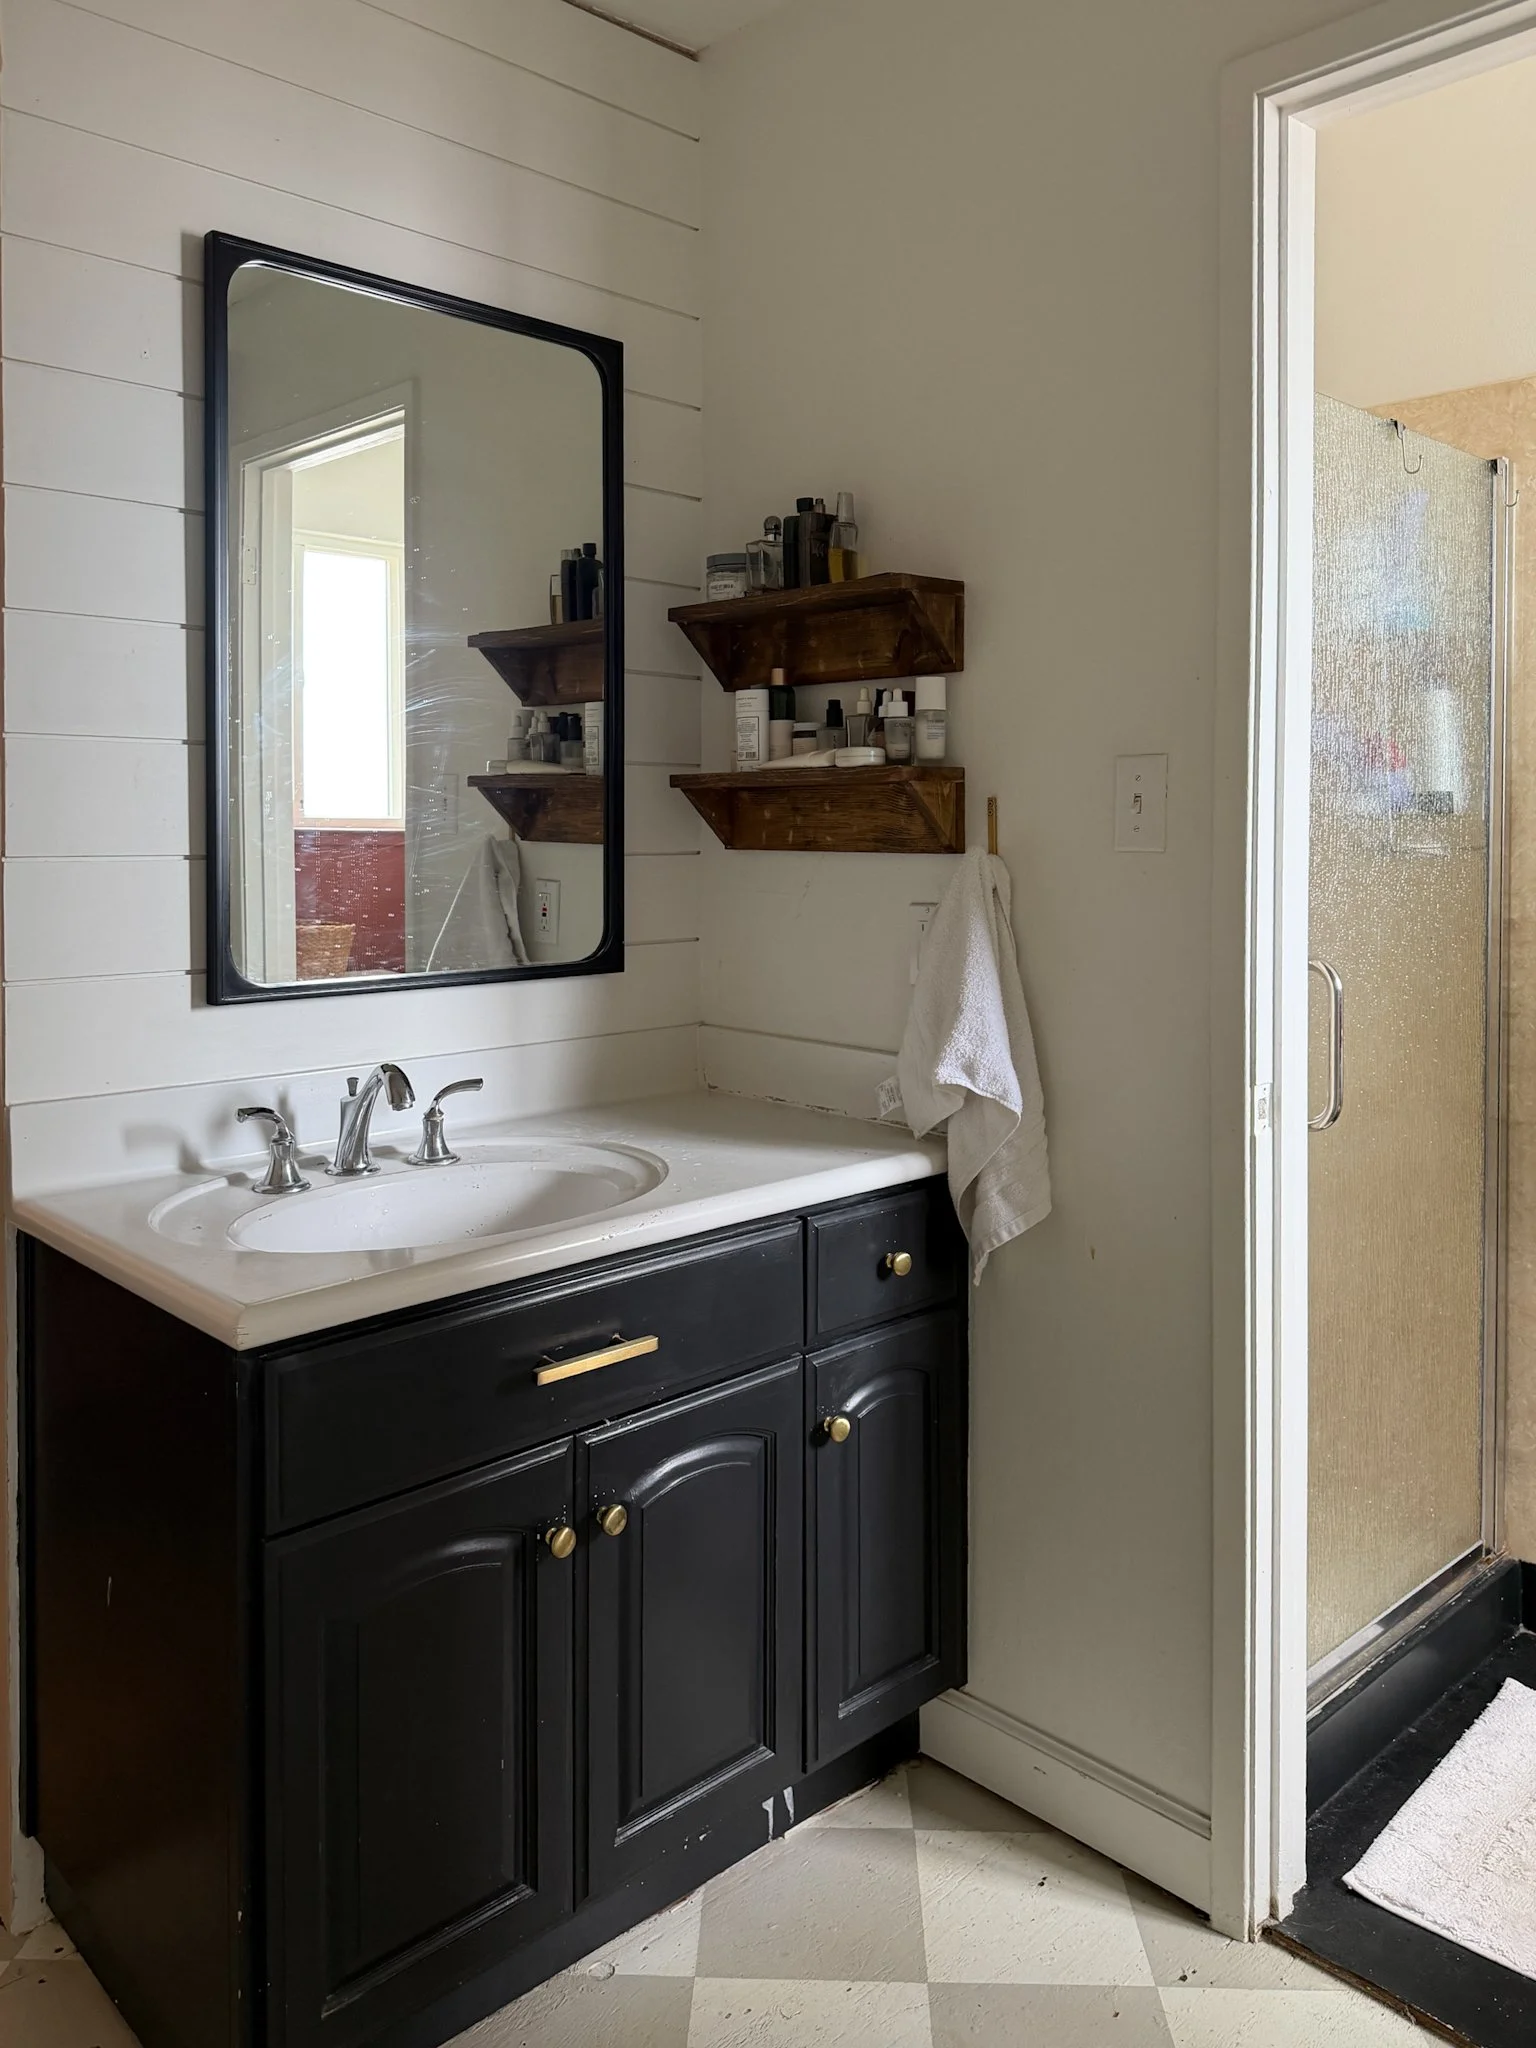
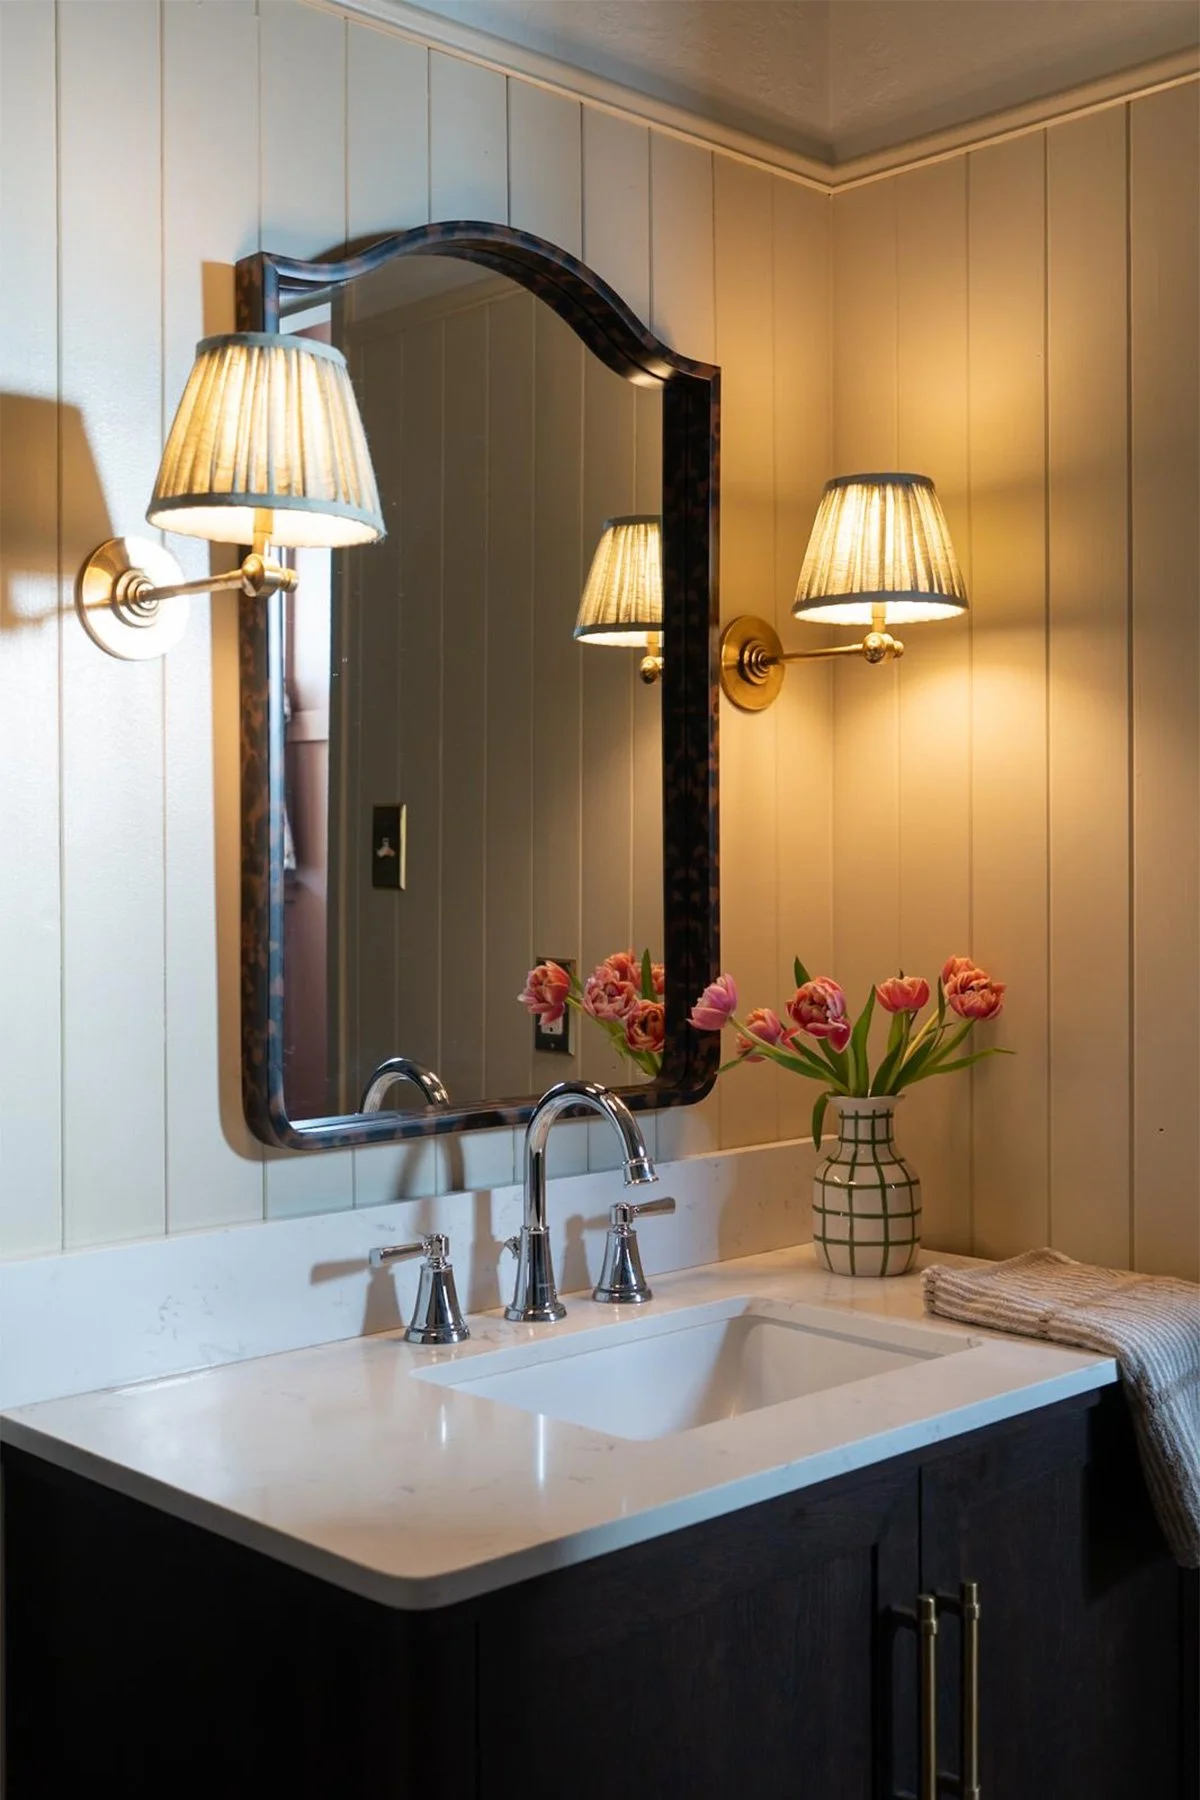
One of the biggest upgrades, and the one that makes me the happiest every single day, was updating the vanity.
Not having to look at that chipped, stained, stark white sink anymore? Immediate mood boost. I love the dark walnut color, it feels elevated and timeless.
Beyond that, a lot actually stayed the same:
Same layout
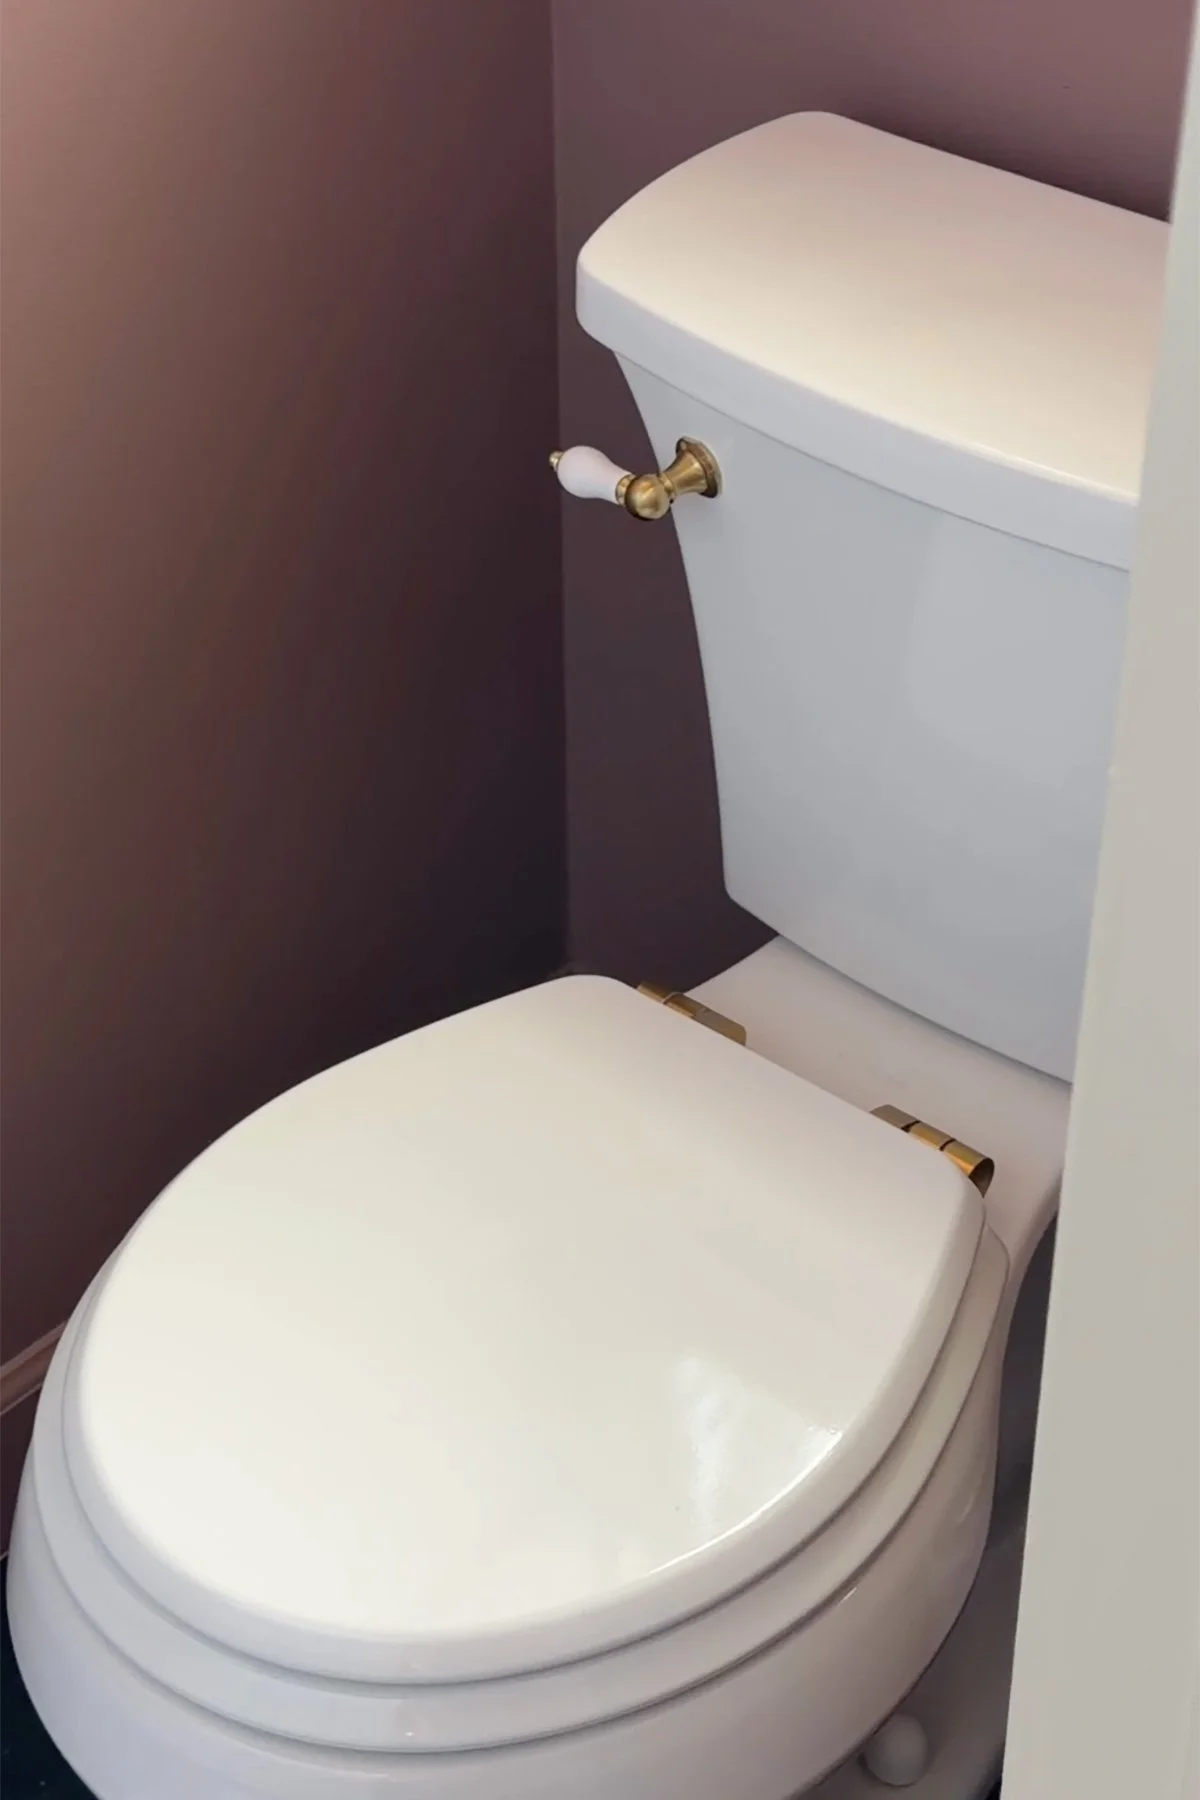
Same toilet. Just a small upgrade (more on that below)
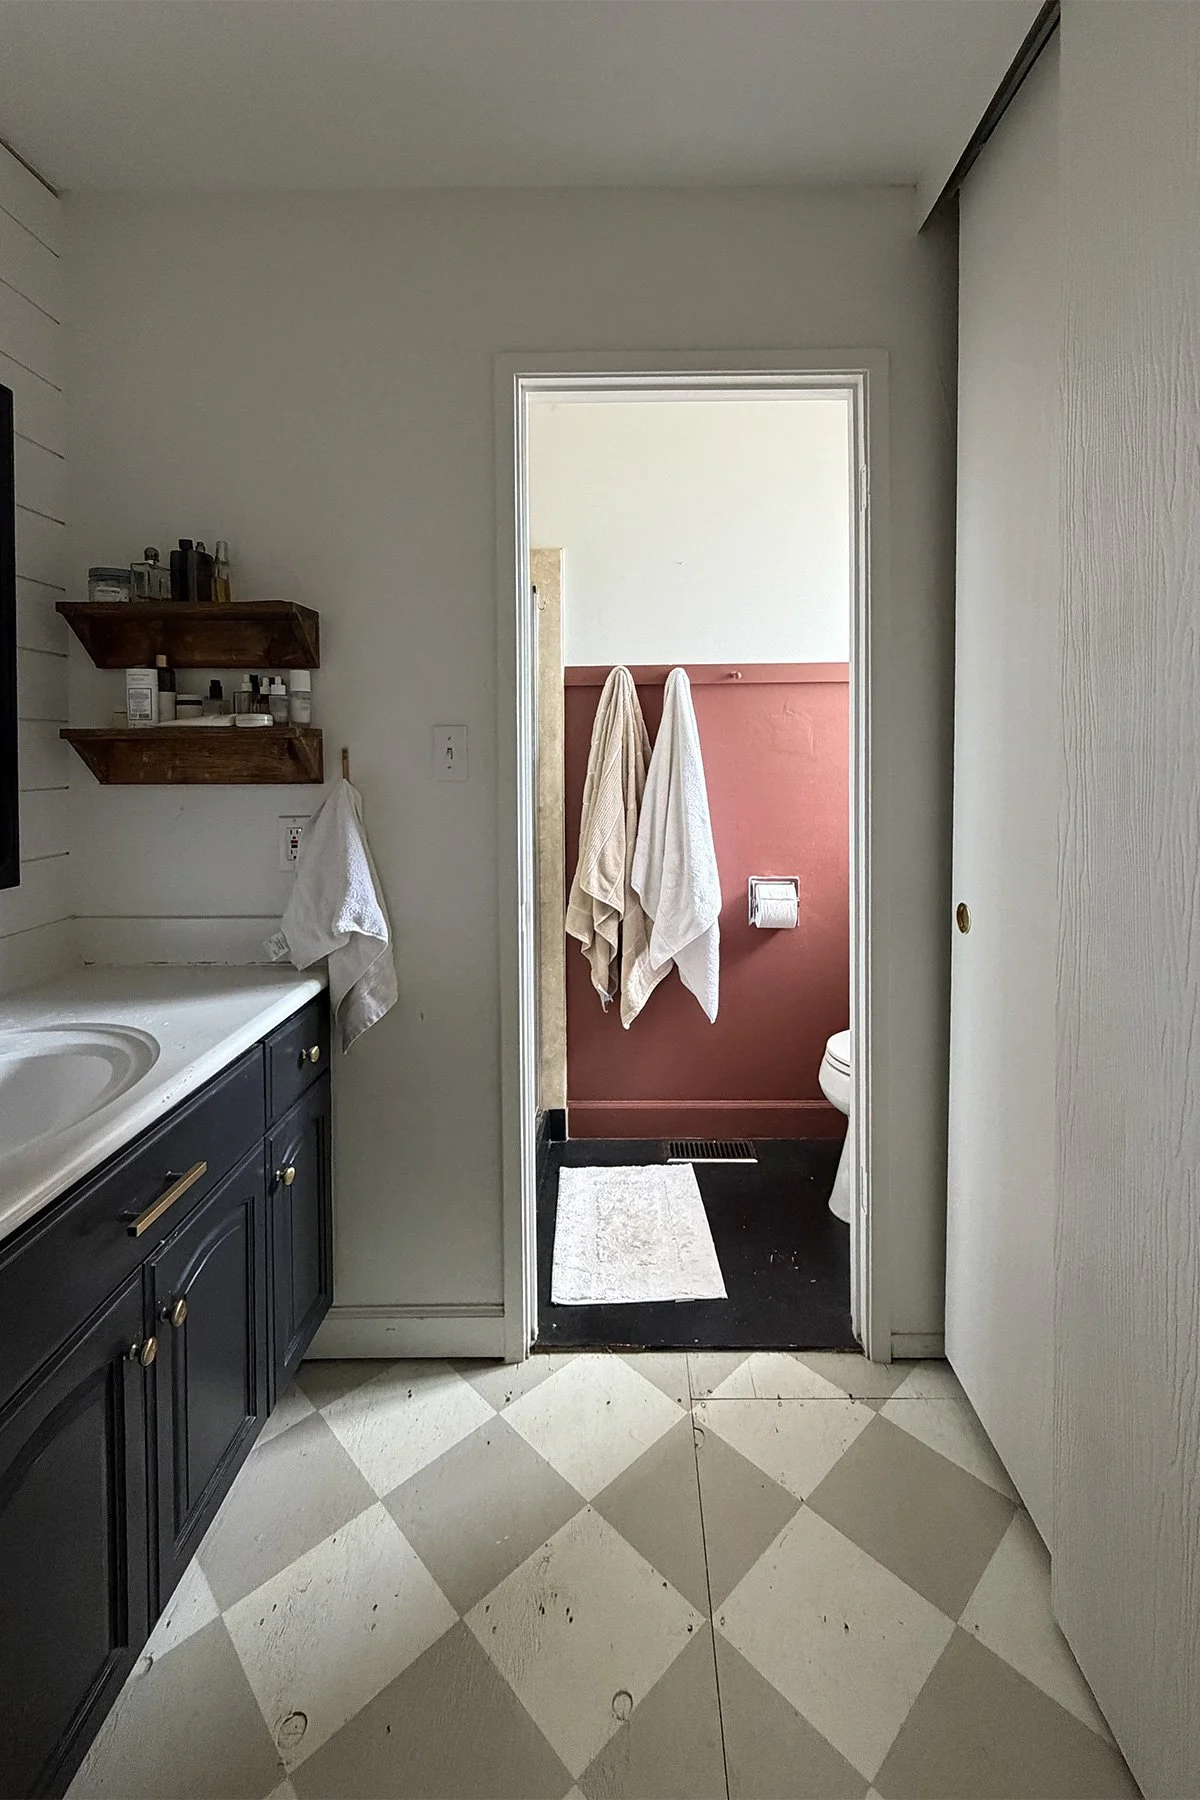
Same shower (yes, still outdated with the glass door)
And I think that’s what makes this transformation feel realistic.
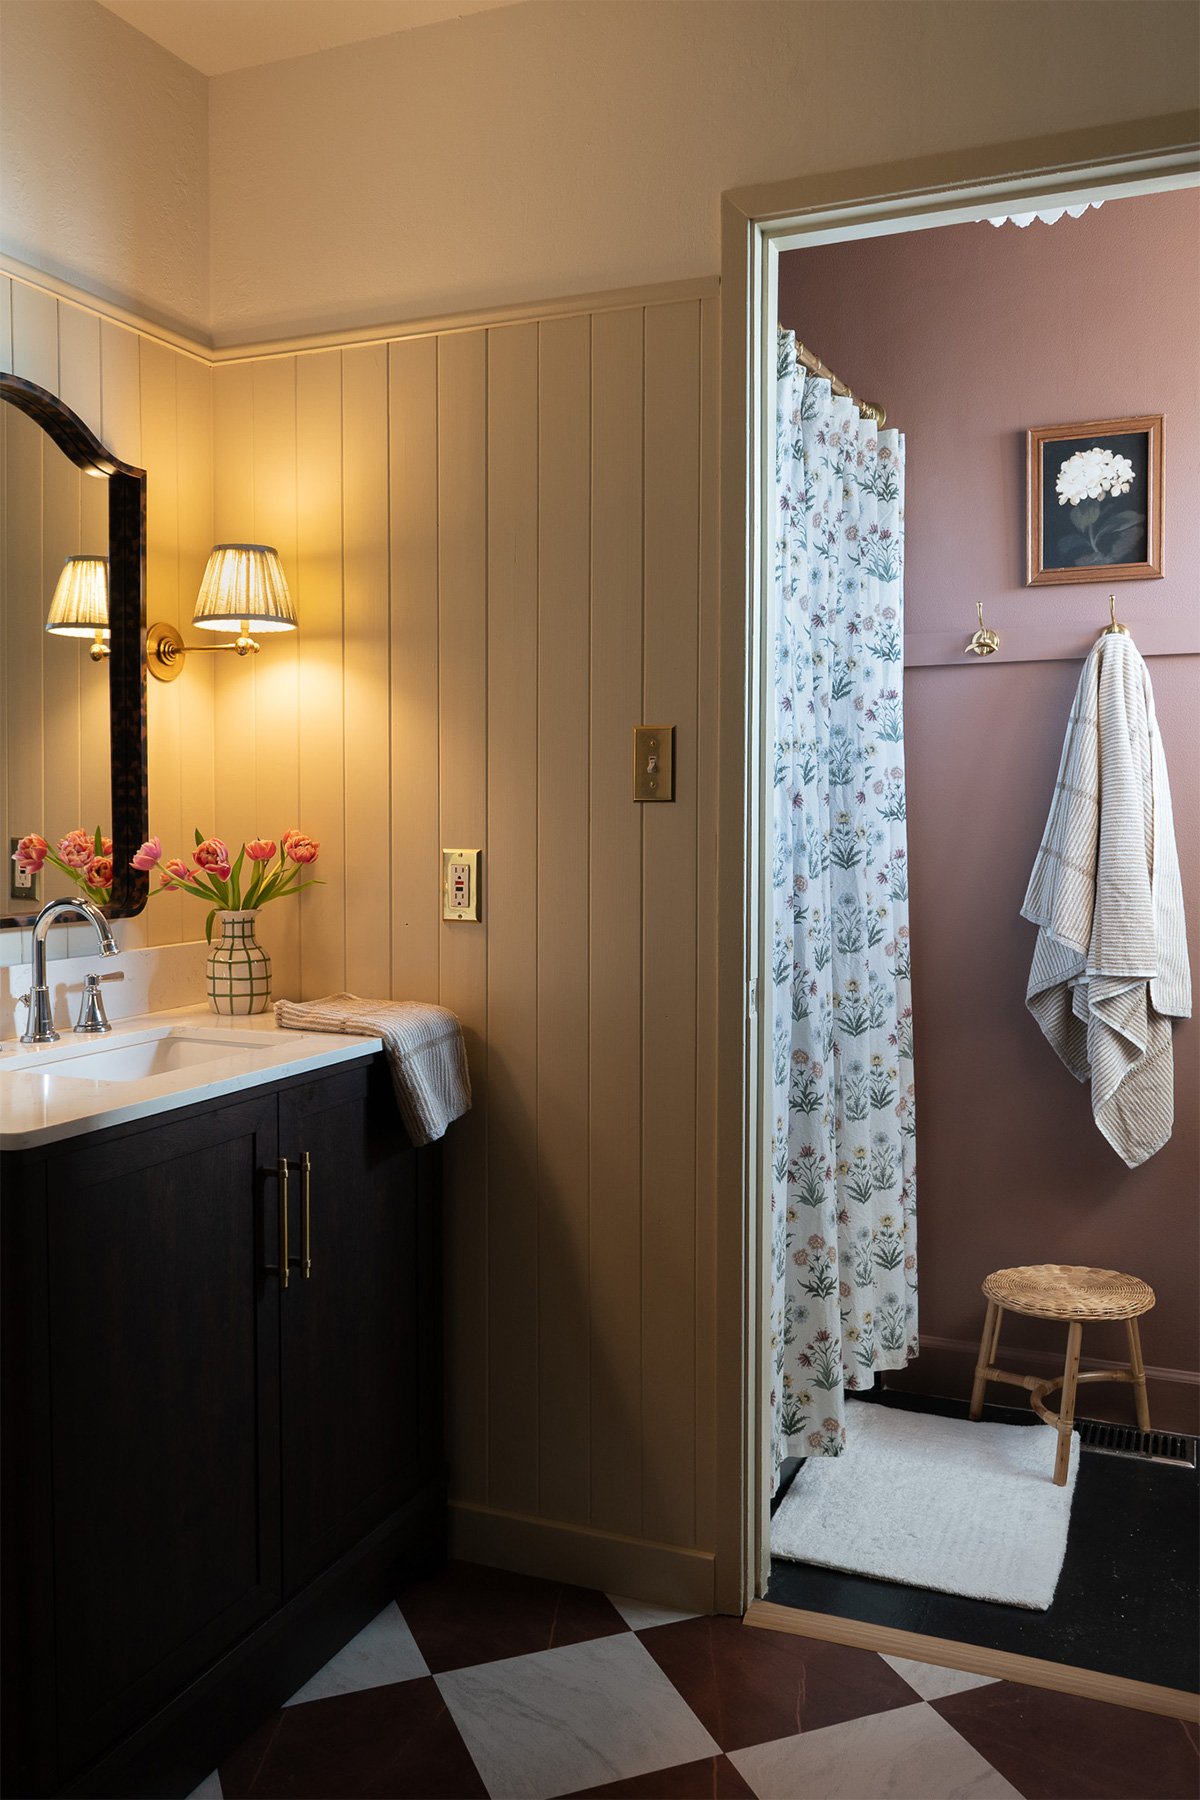
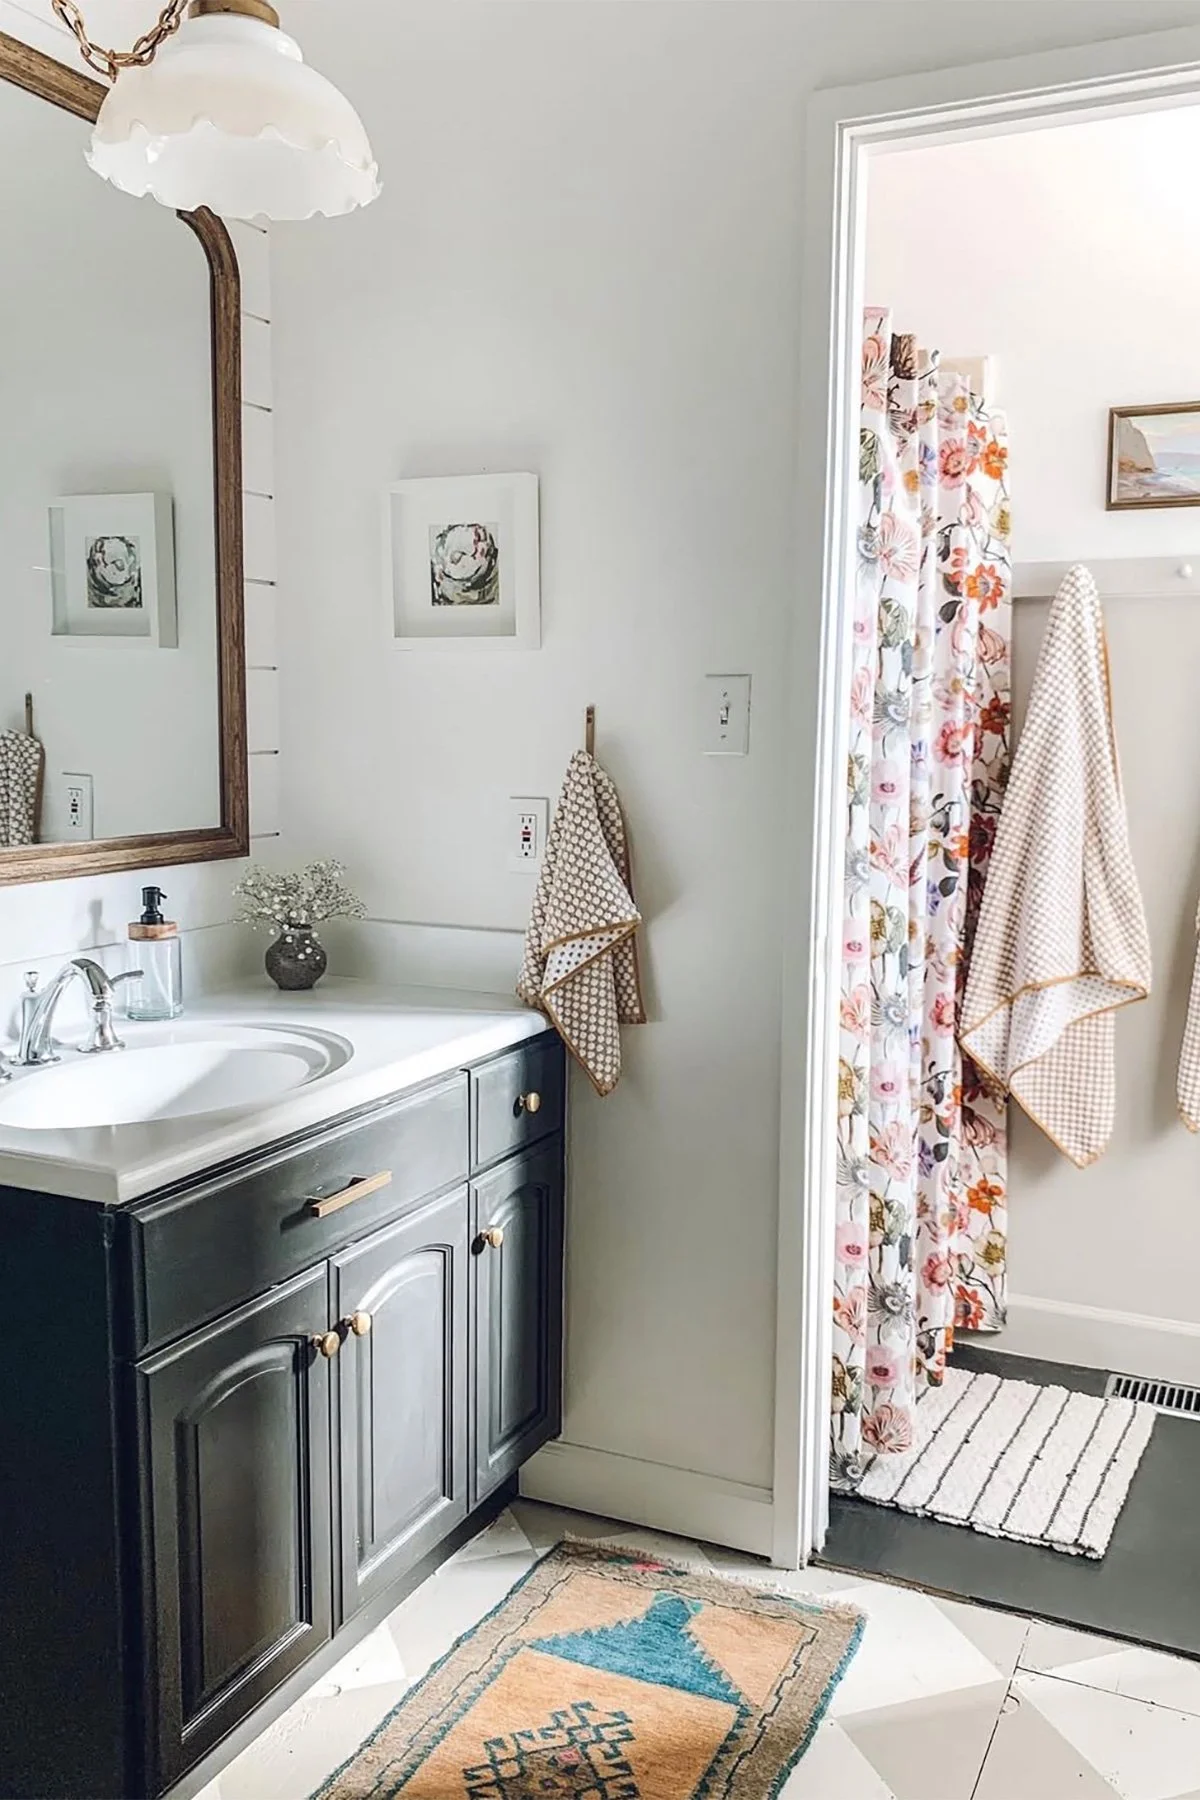
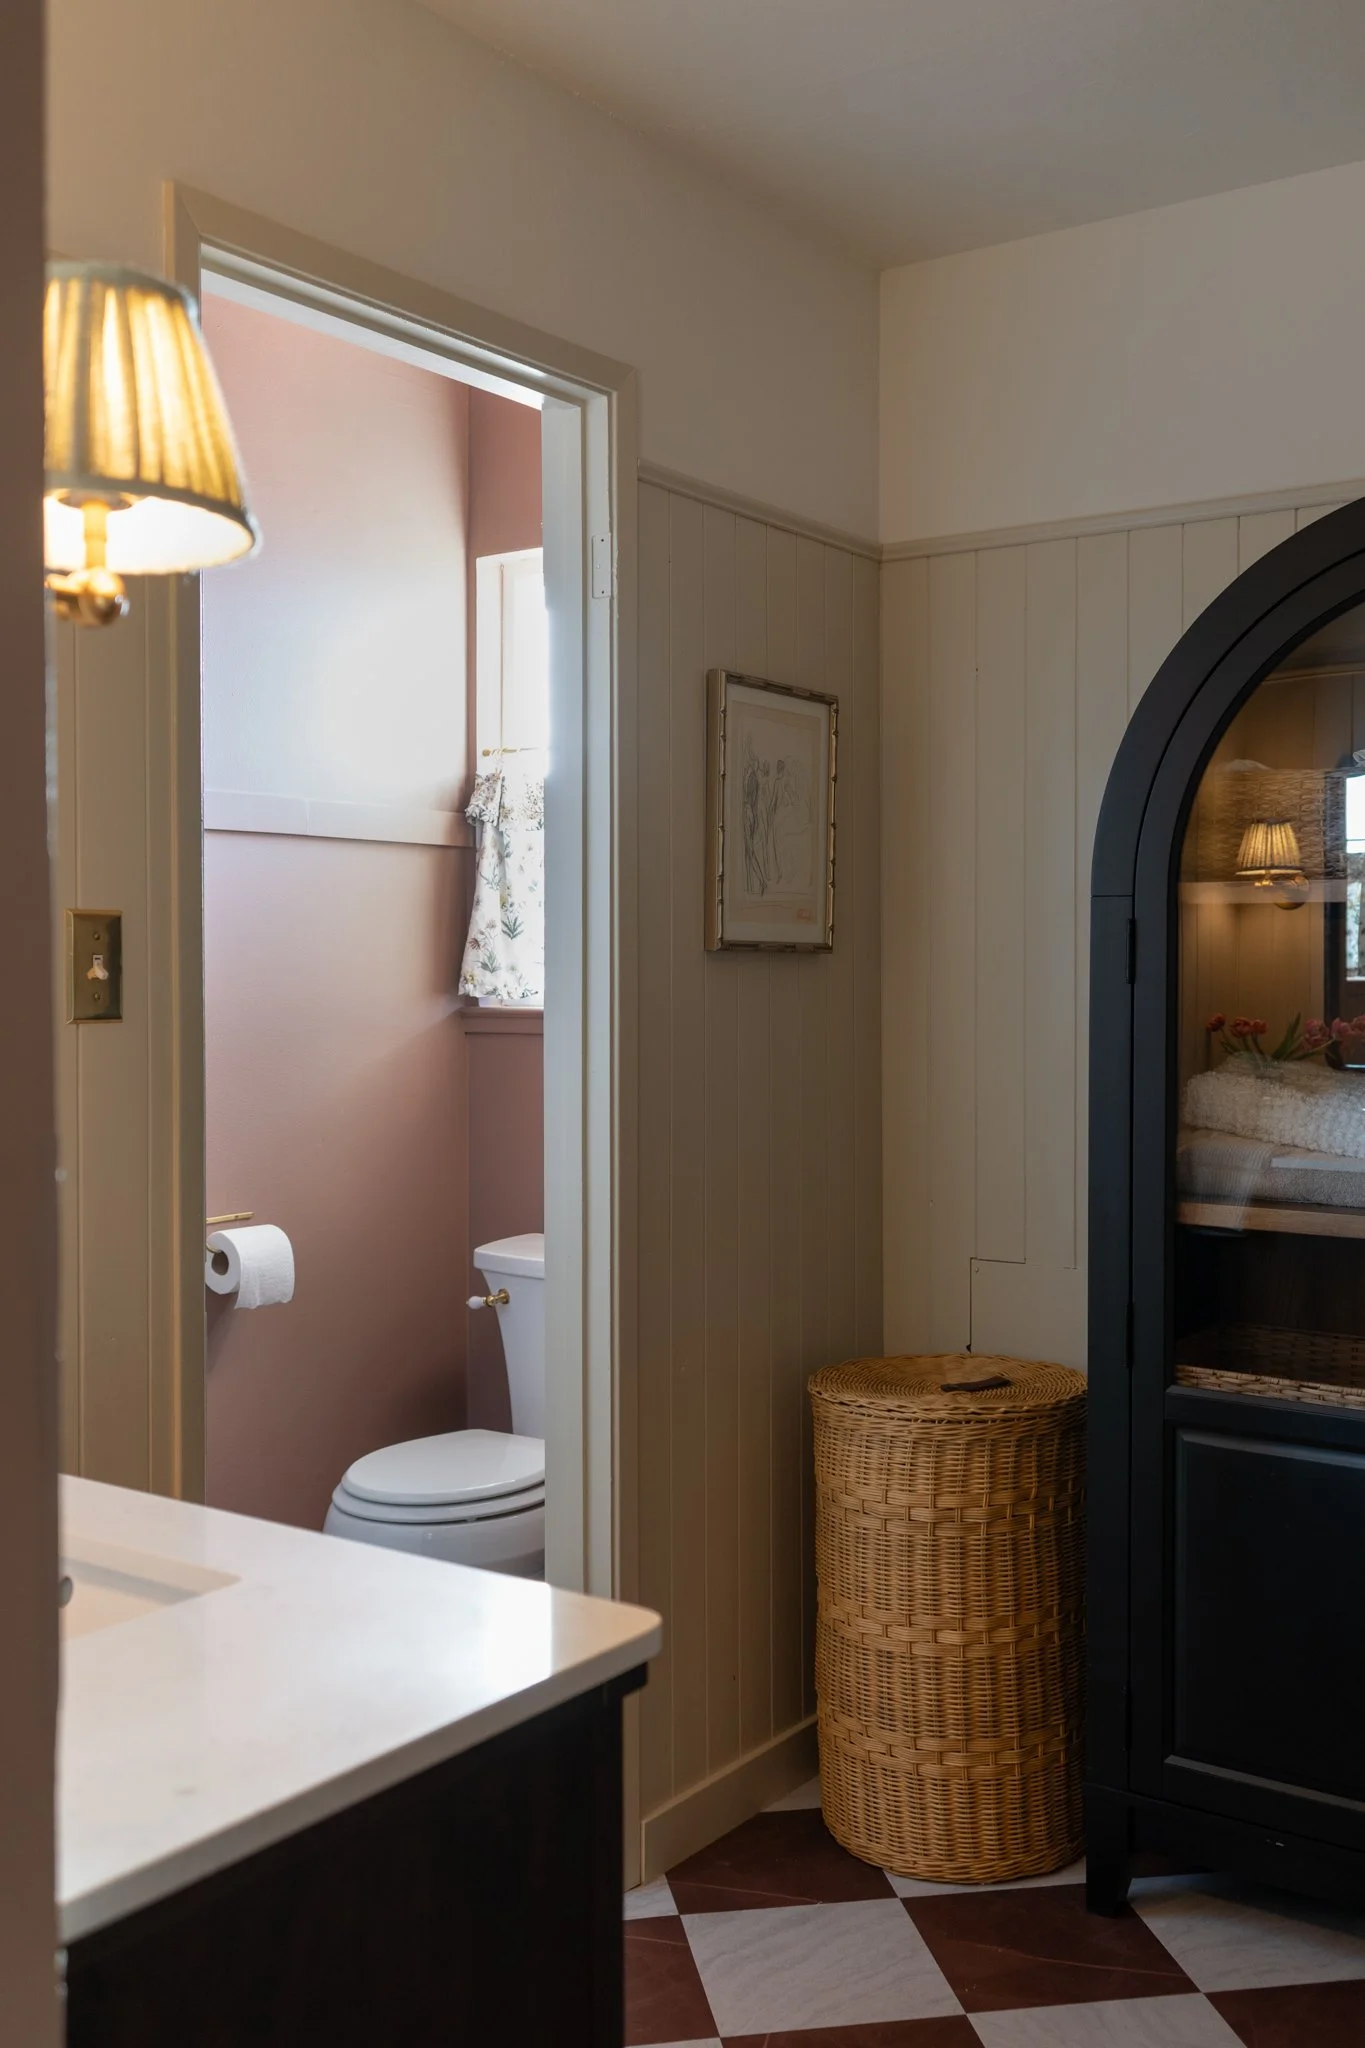
Another major change was removing the old closet and replacing it with a cabinet we already owned from our family room. We repurposed it as a linen cabinet, and somehow that one swap made the bathroom feel so much bigger and more open.

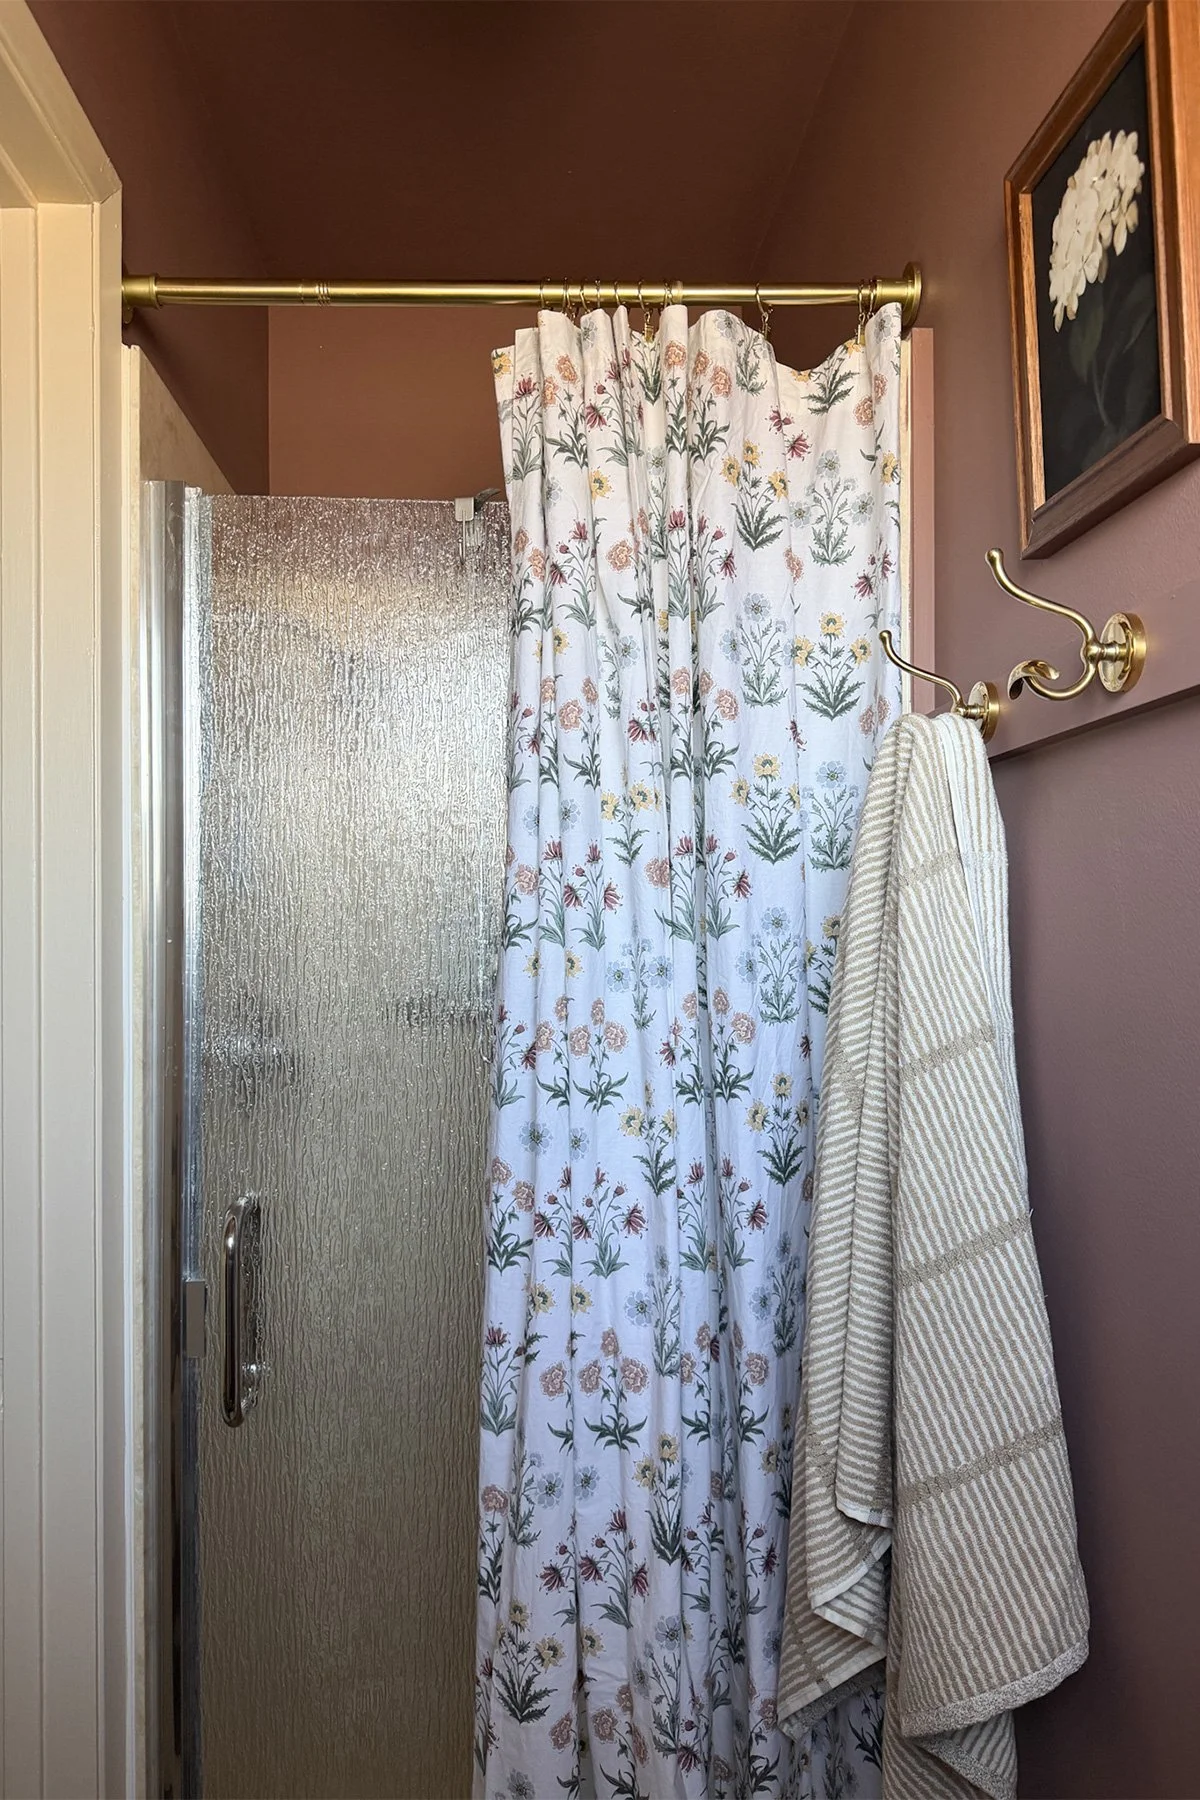
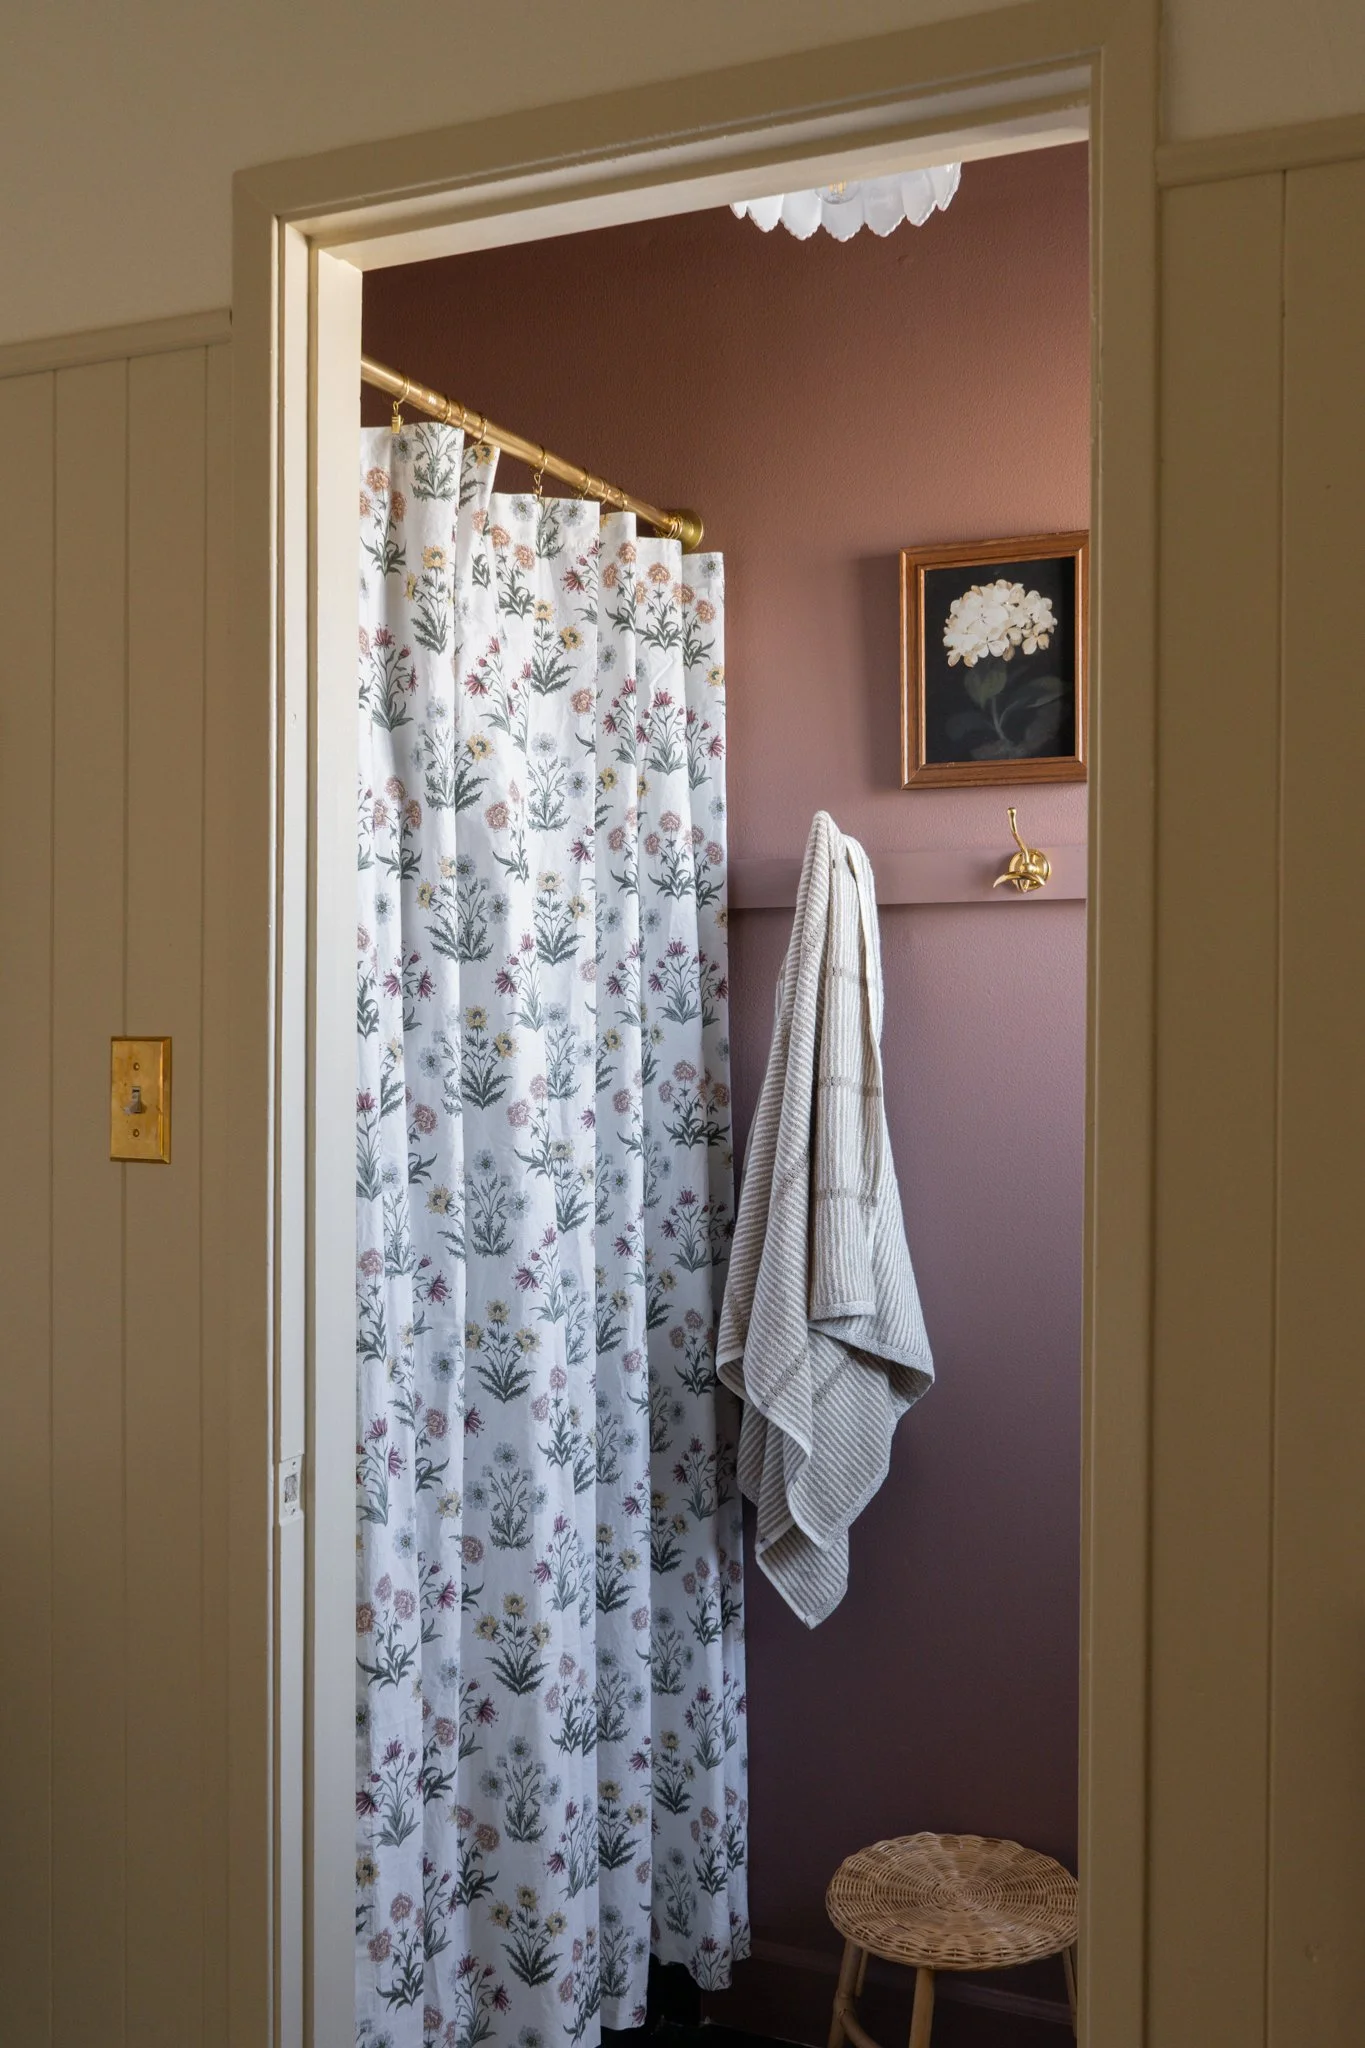
curtain rod and shower curtain, for a shower curtain hack to hide the outdated glass shower door.

View sources Adding textures with elements that we use often like the Lundy hamper.
The Layers That Made the Difference
I really focused on adding layers here. Small changes that together shift how the room feels.
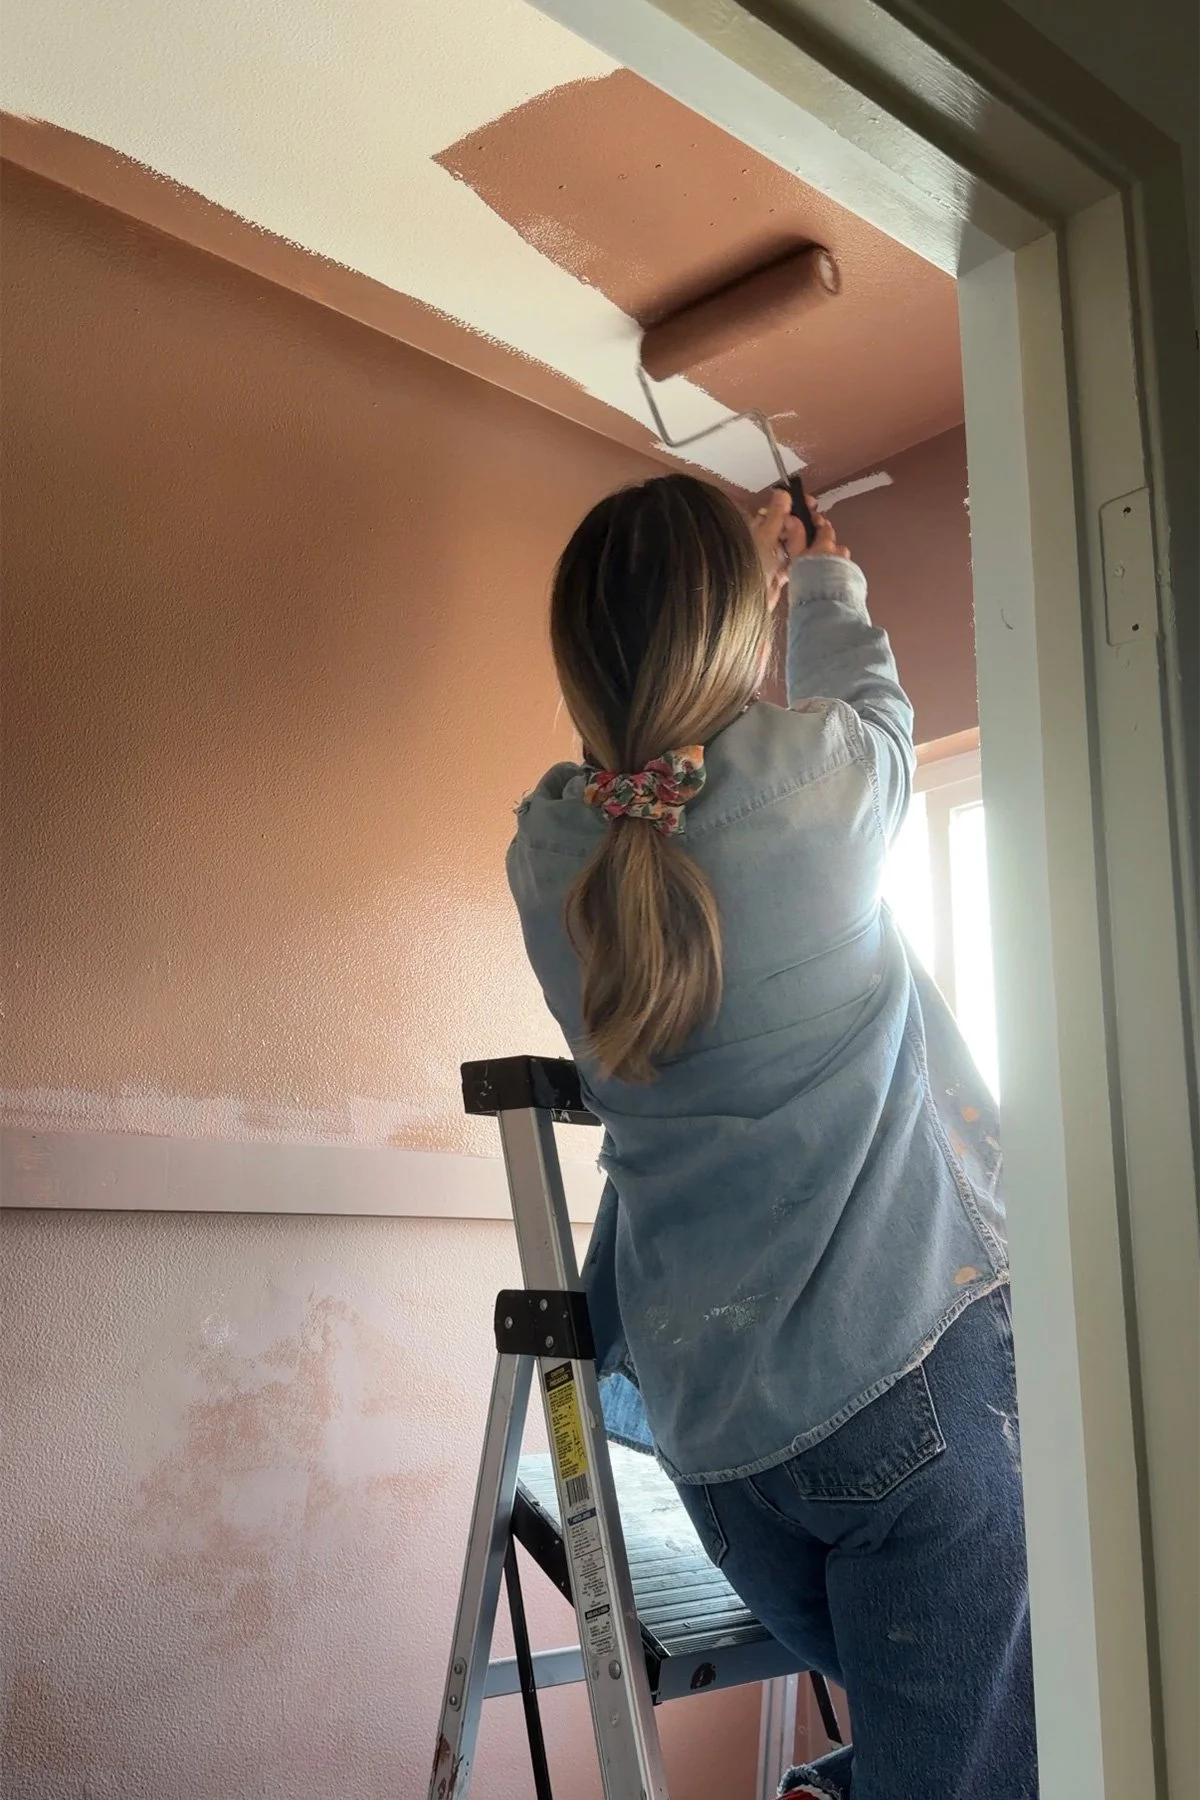
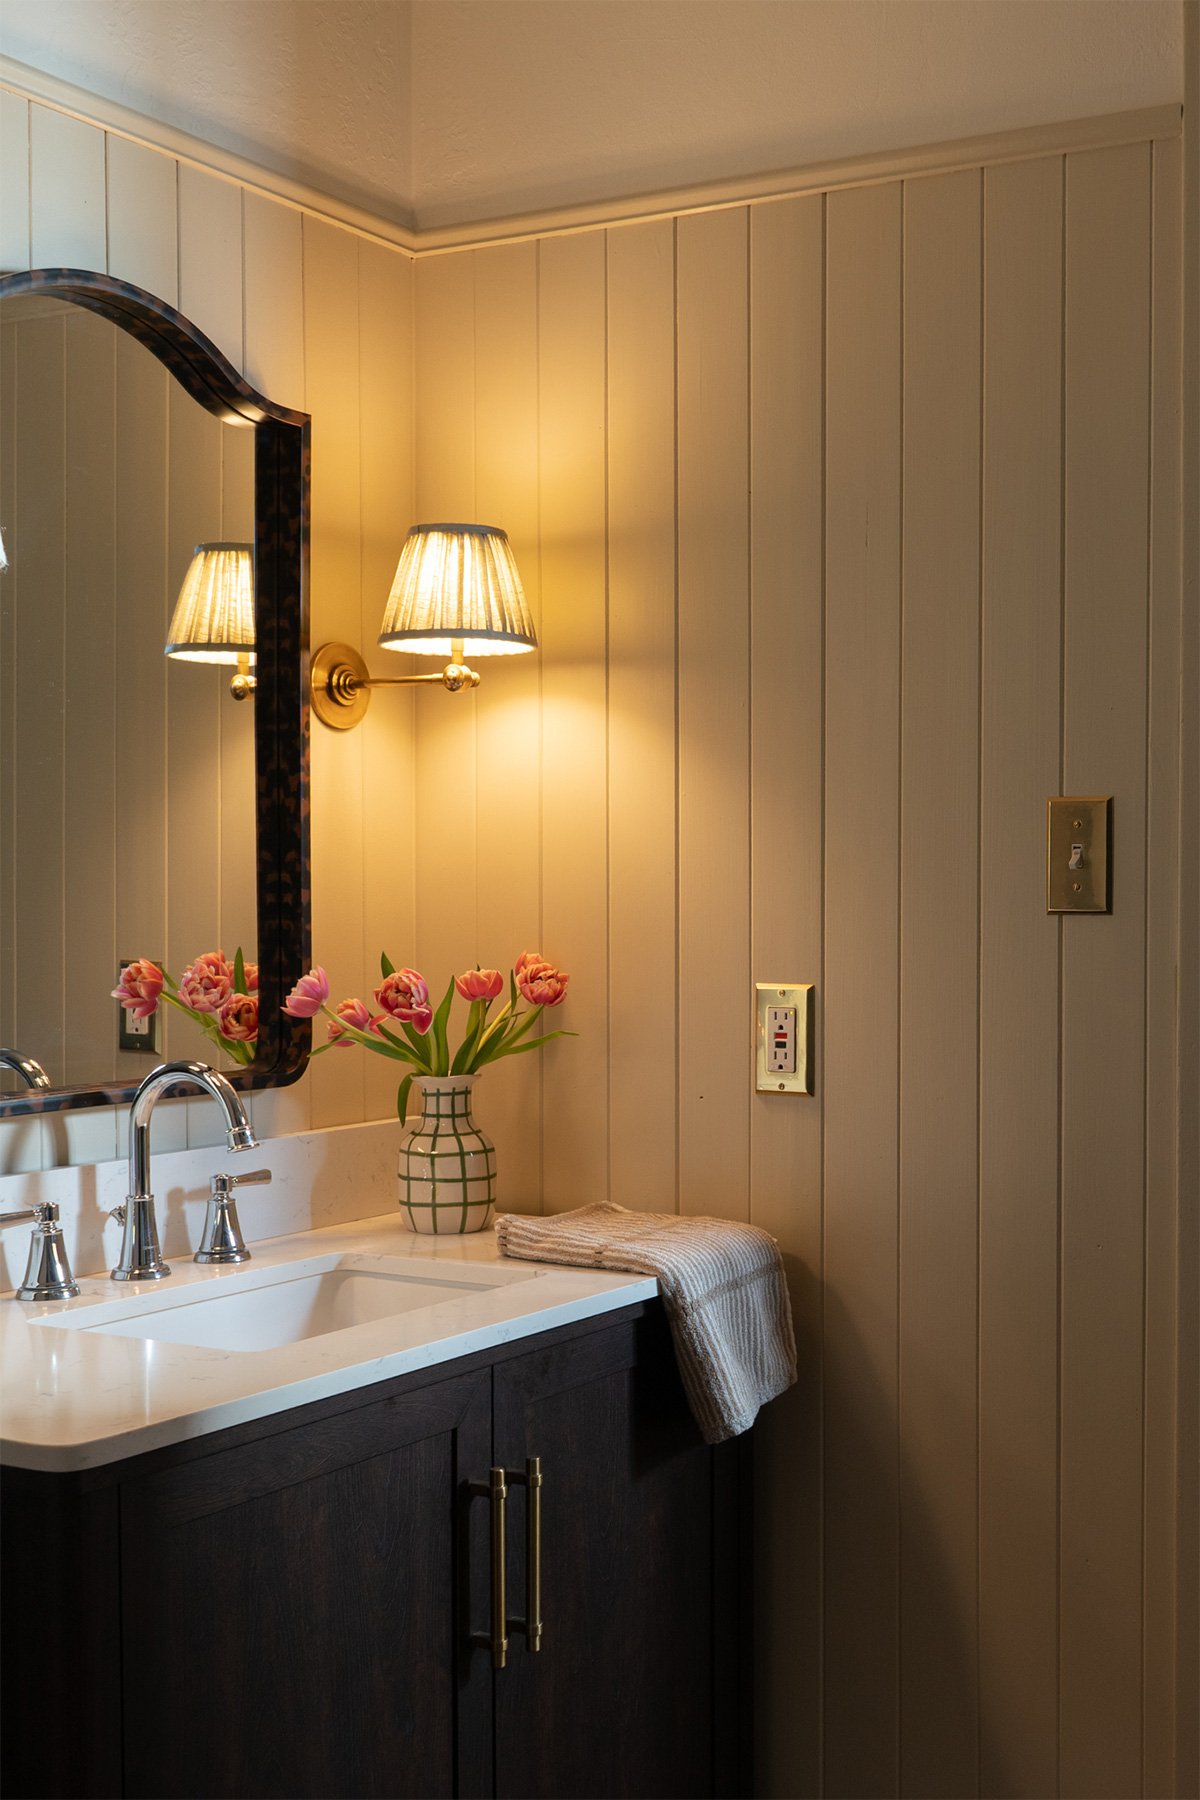
Wall planking was a big one.
I’ve used these wood planks in different areas of our home, and I keep coming back to them because they’re affordable, versatile, and add instant character.
They’re not perfect (and if you’re a perfectionist, they might drive you a little crazy 😅), but if you’re going for that old-home, lived-in feel…they’re so good.
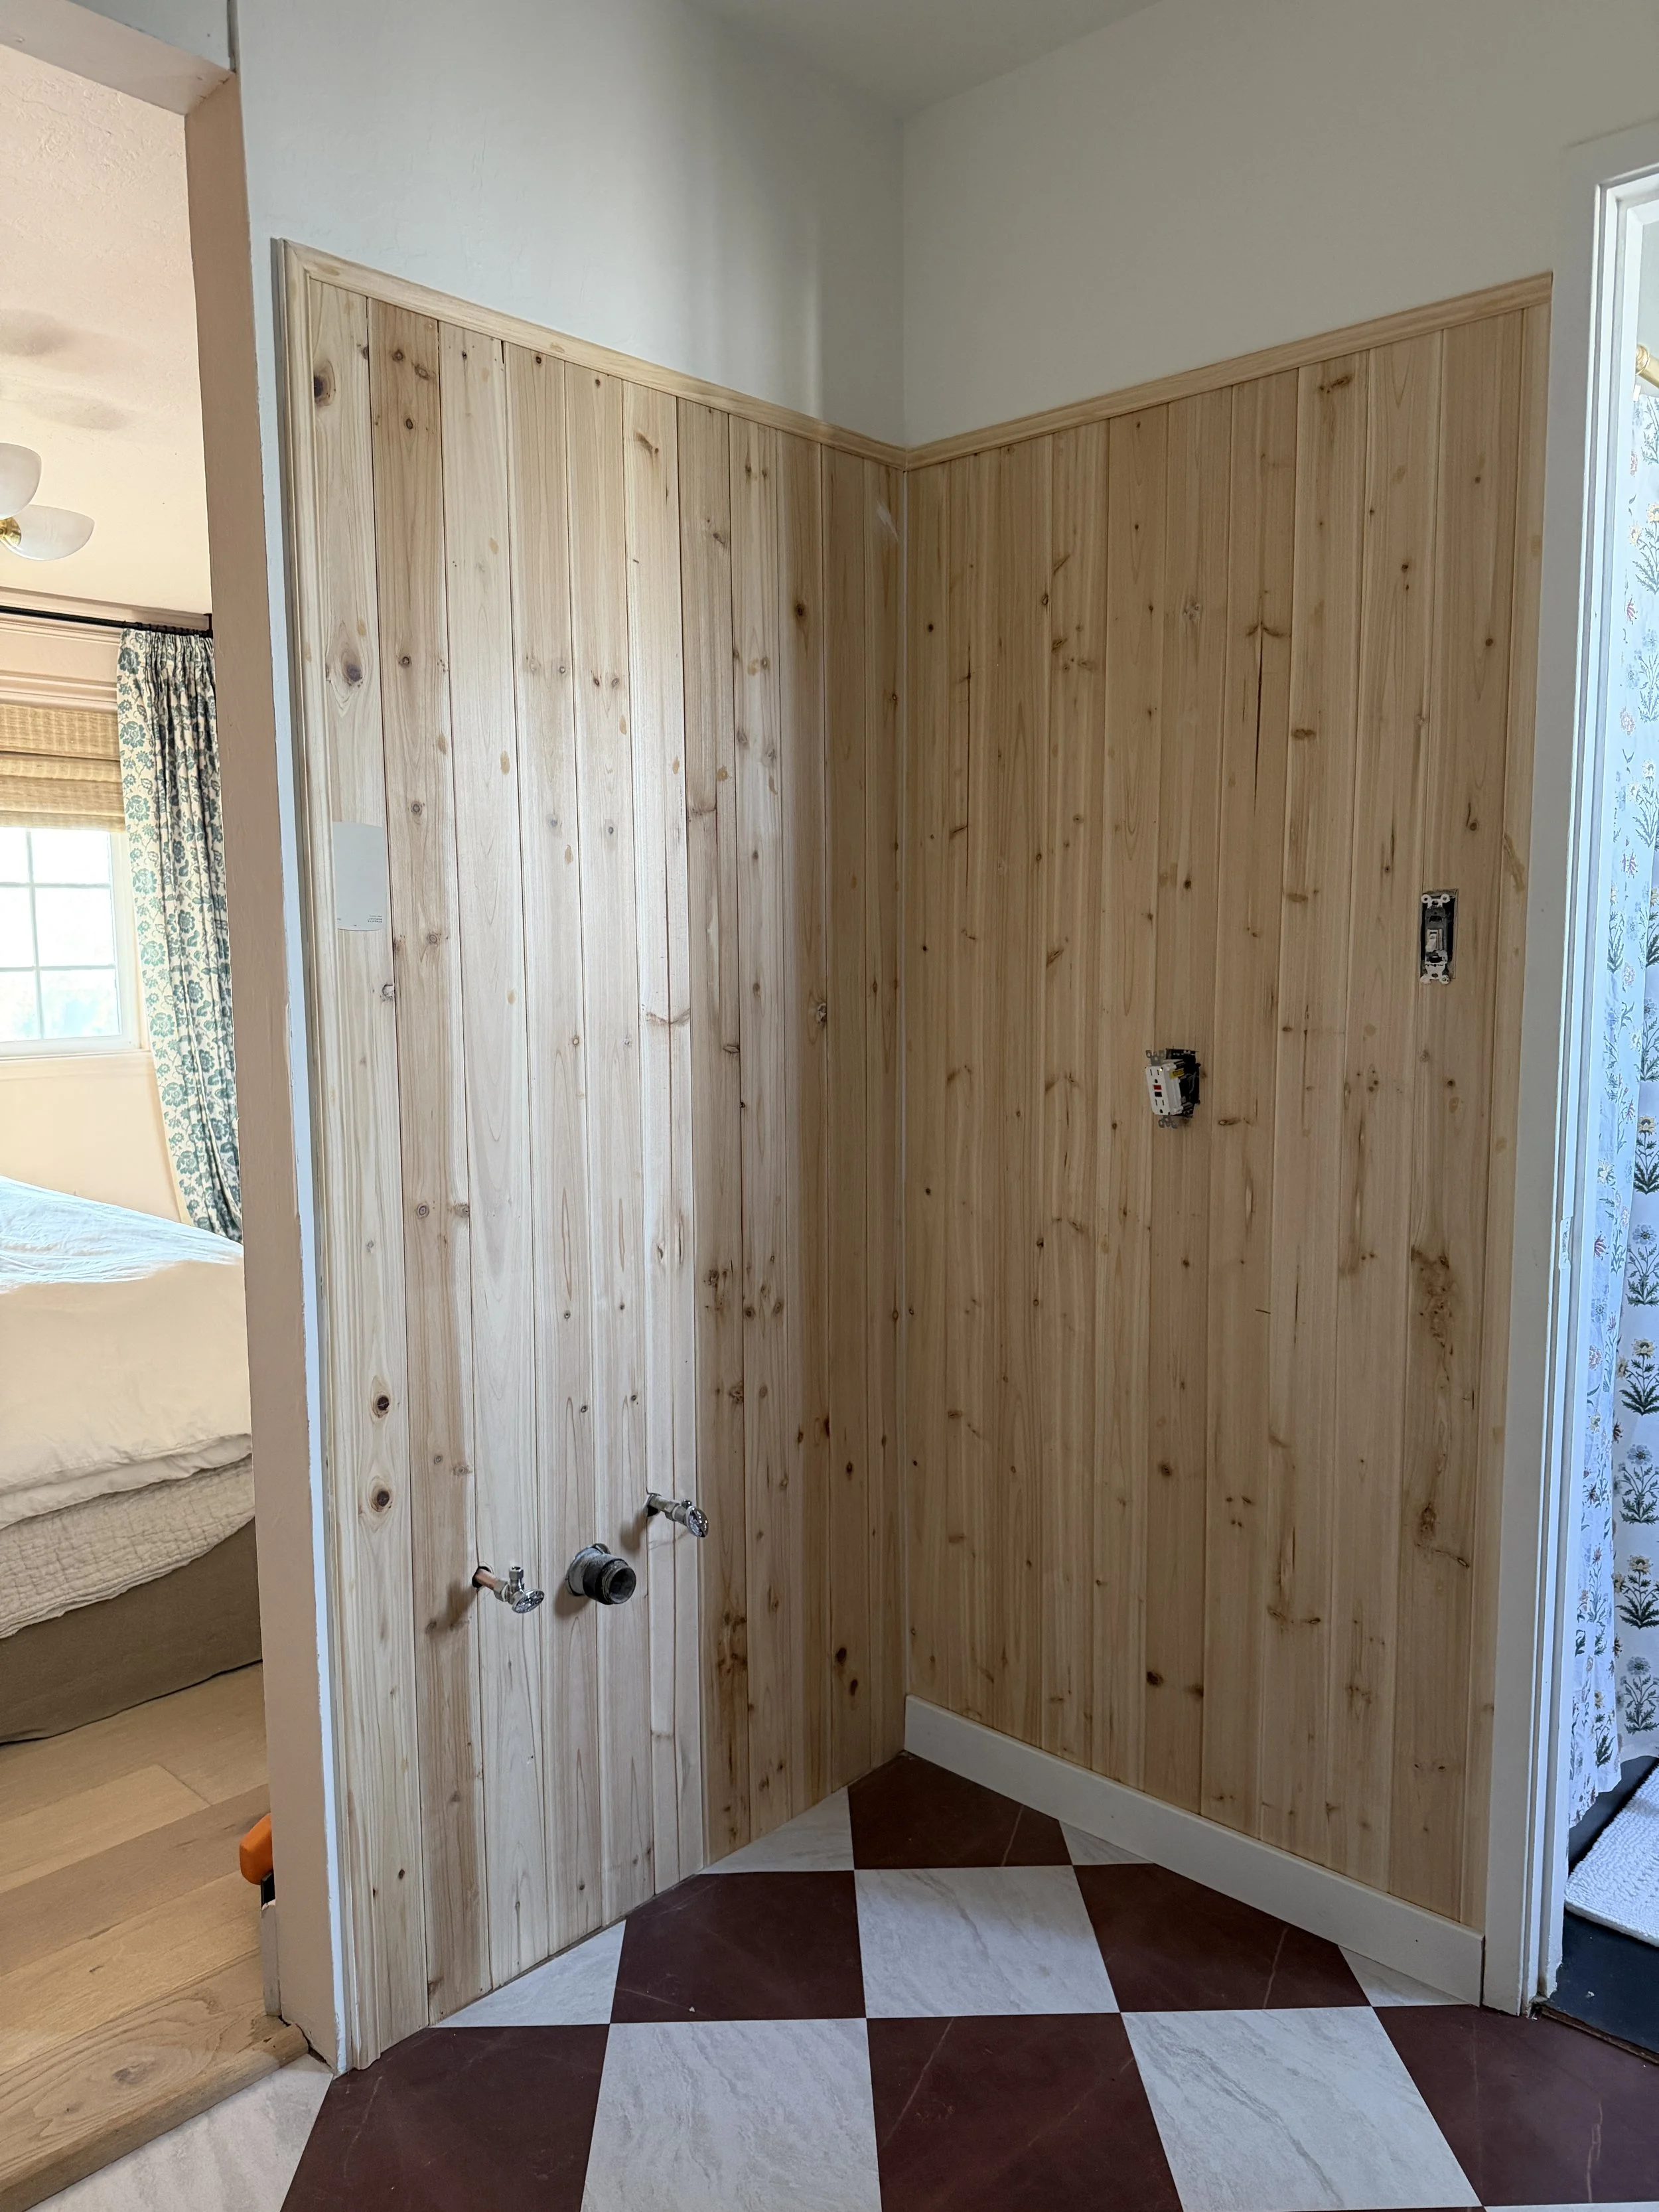
wood planks before painting
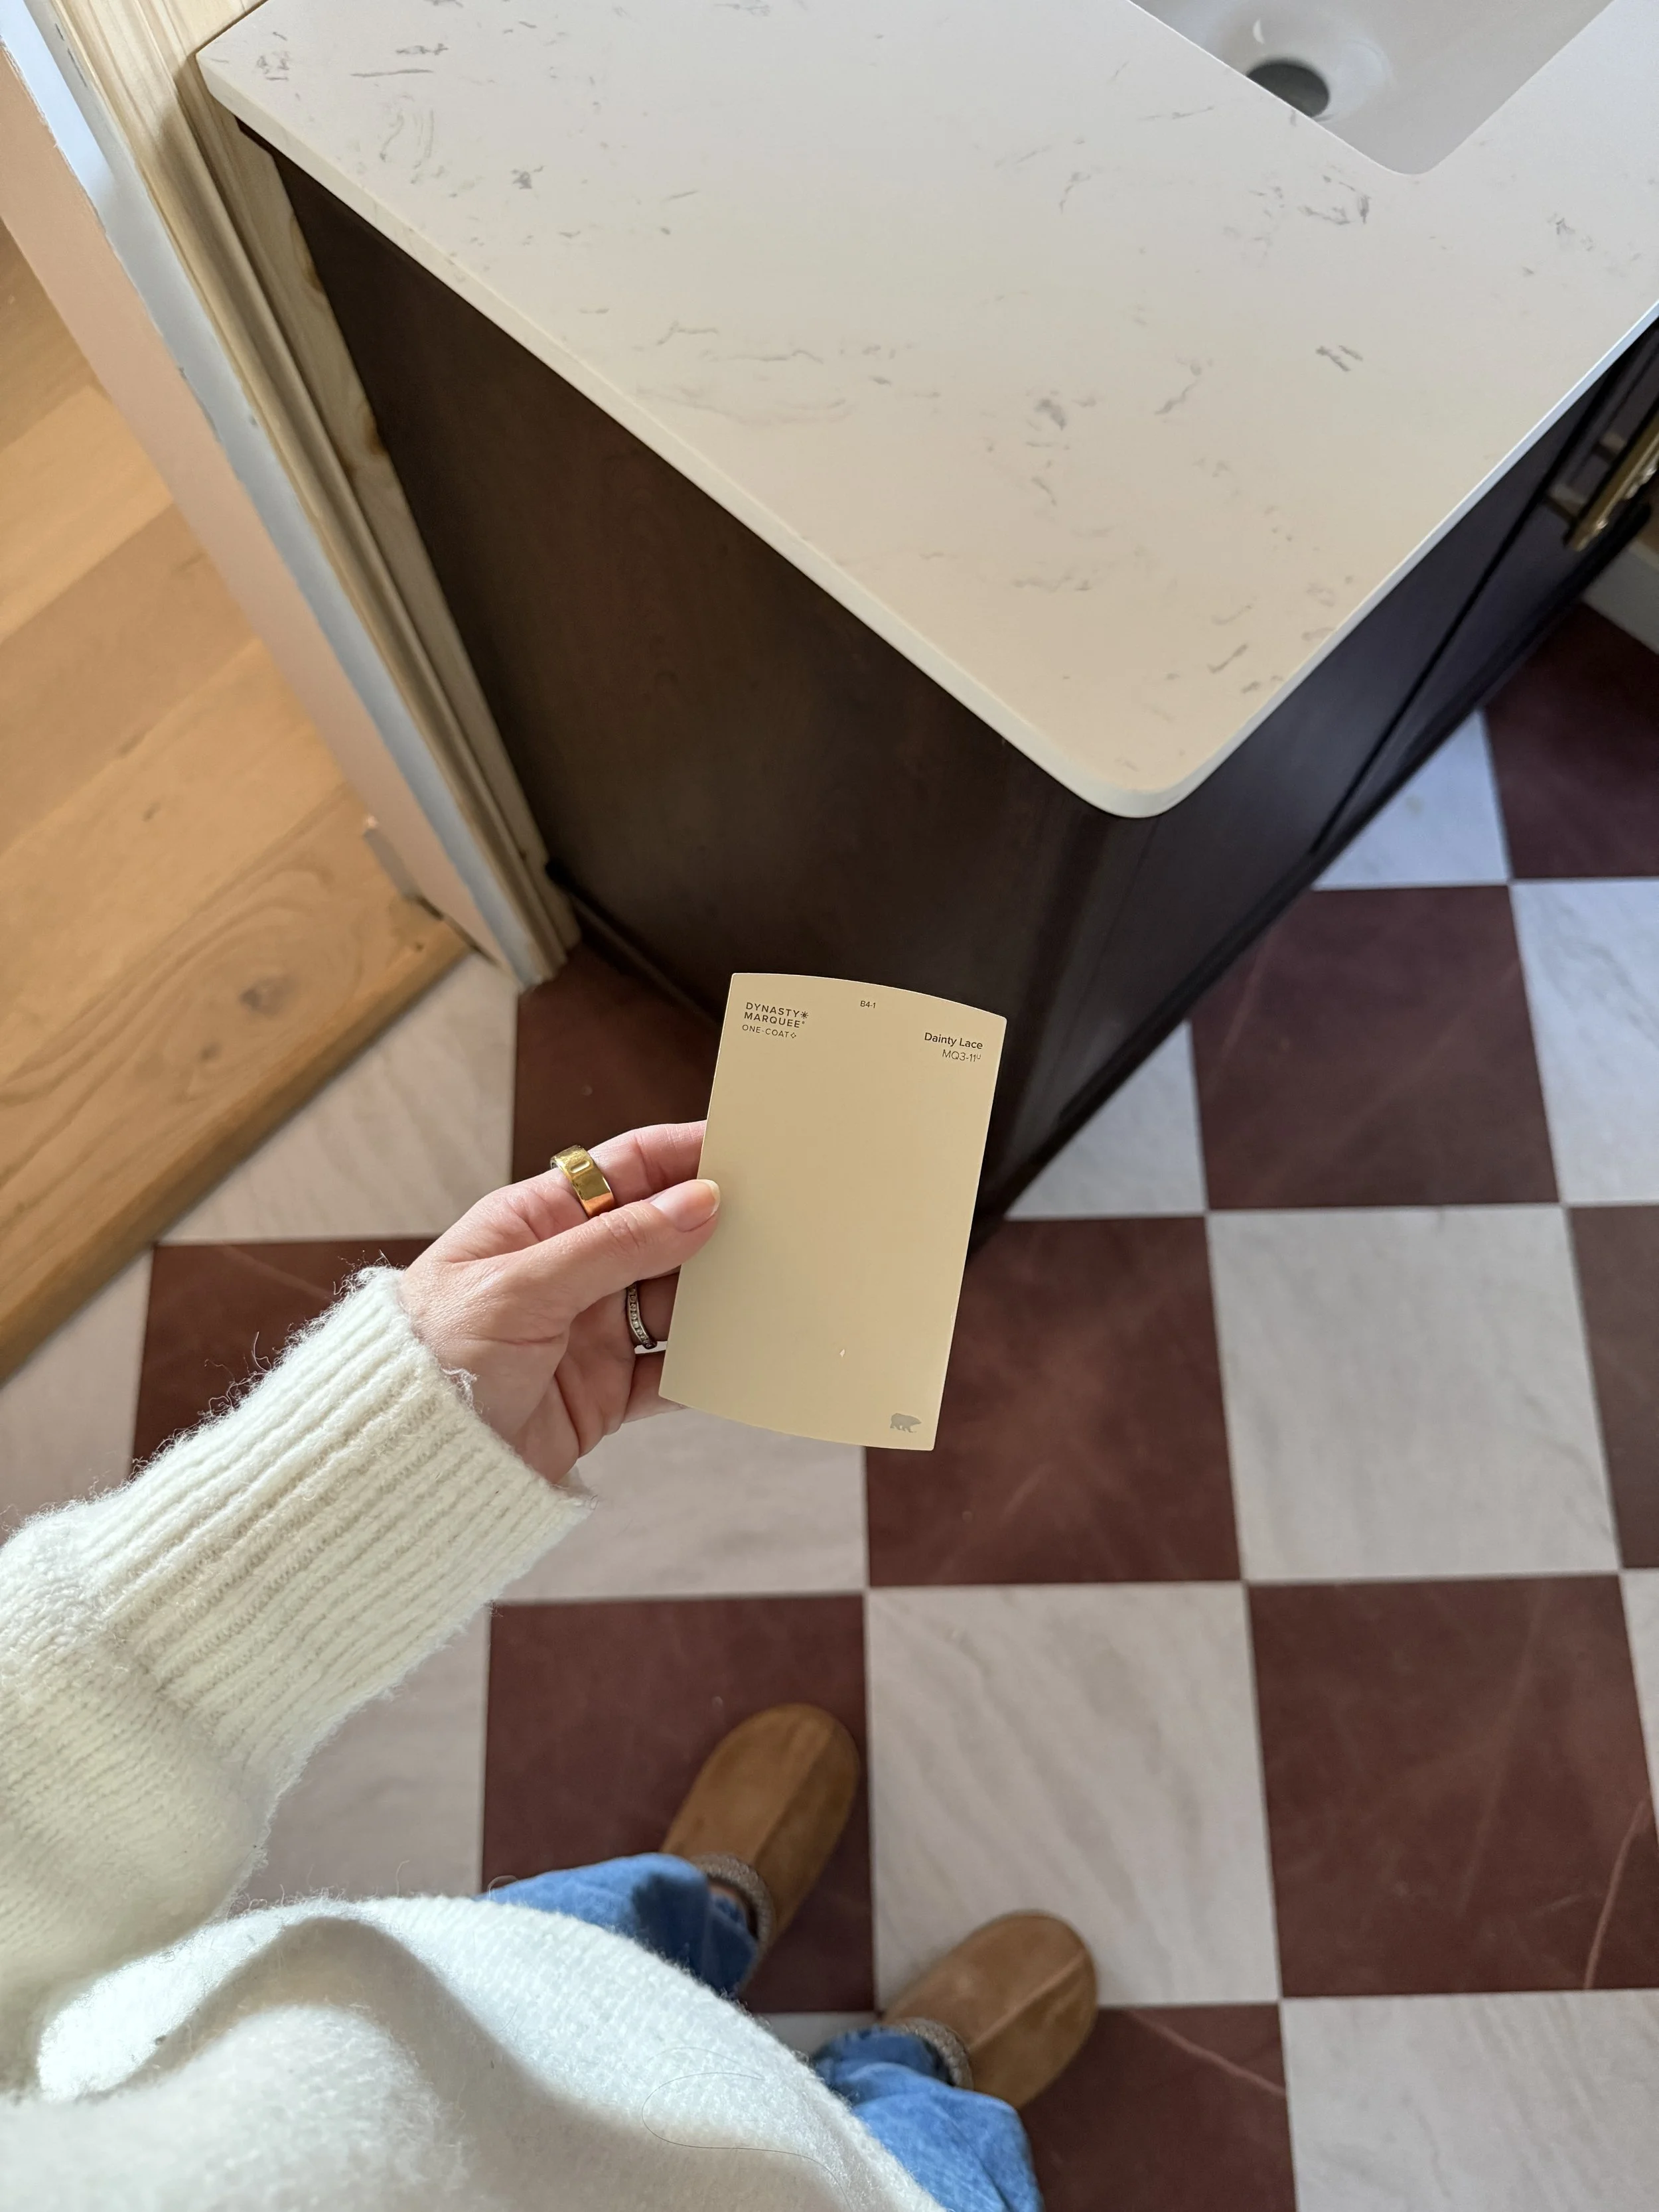
Dainty Lace by Behr on the planked walls.
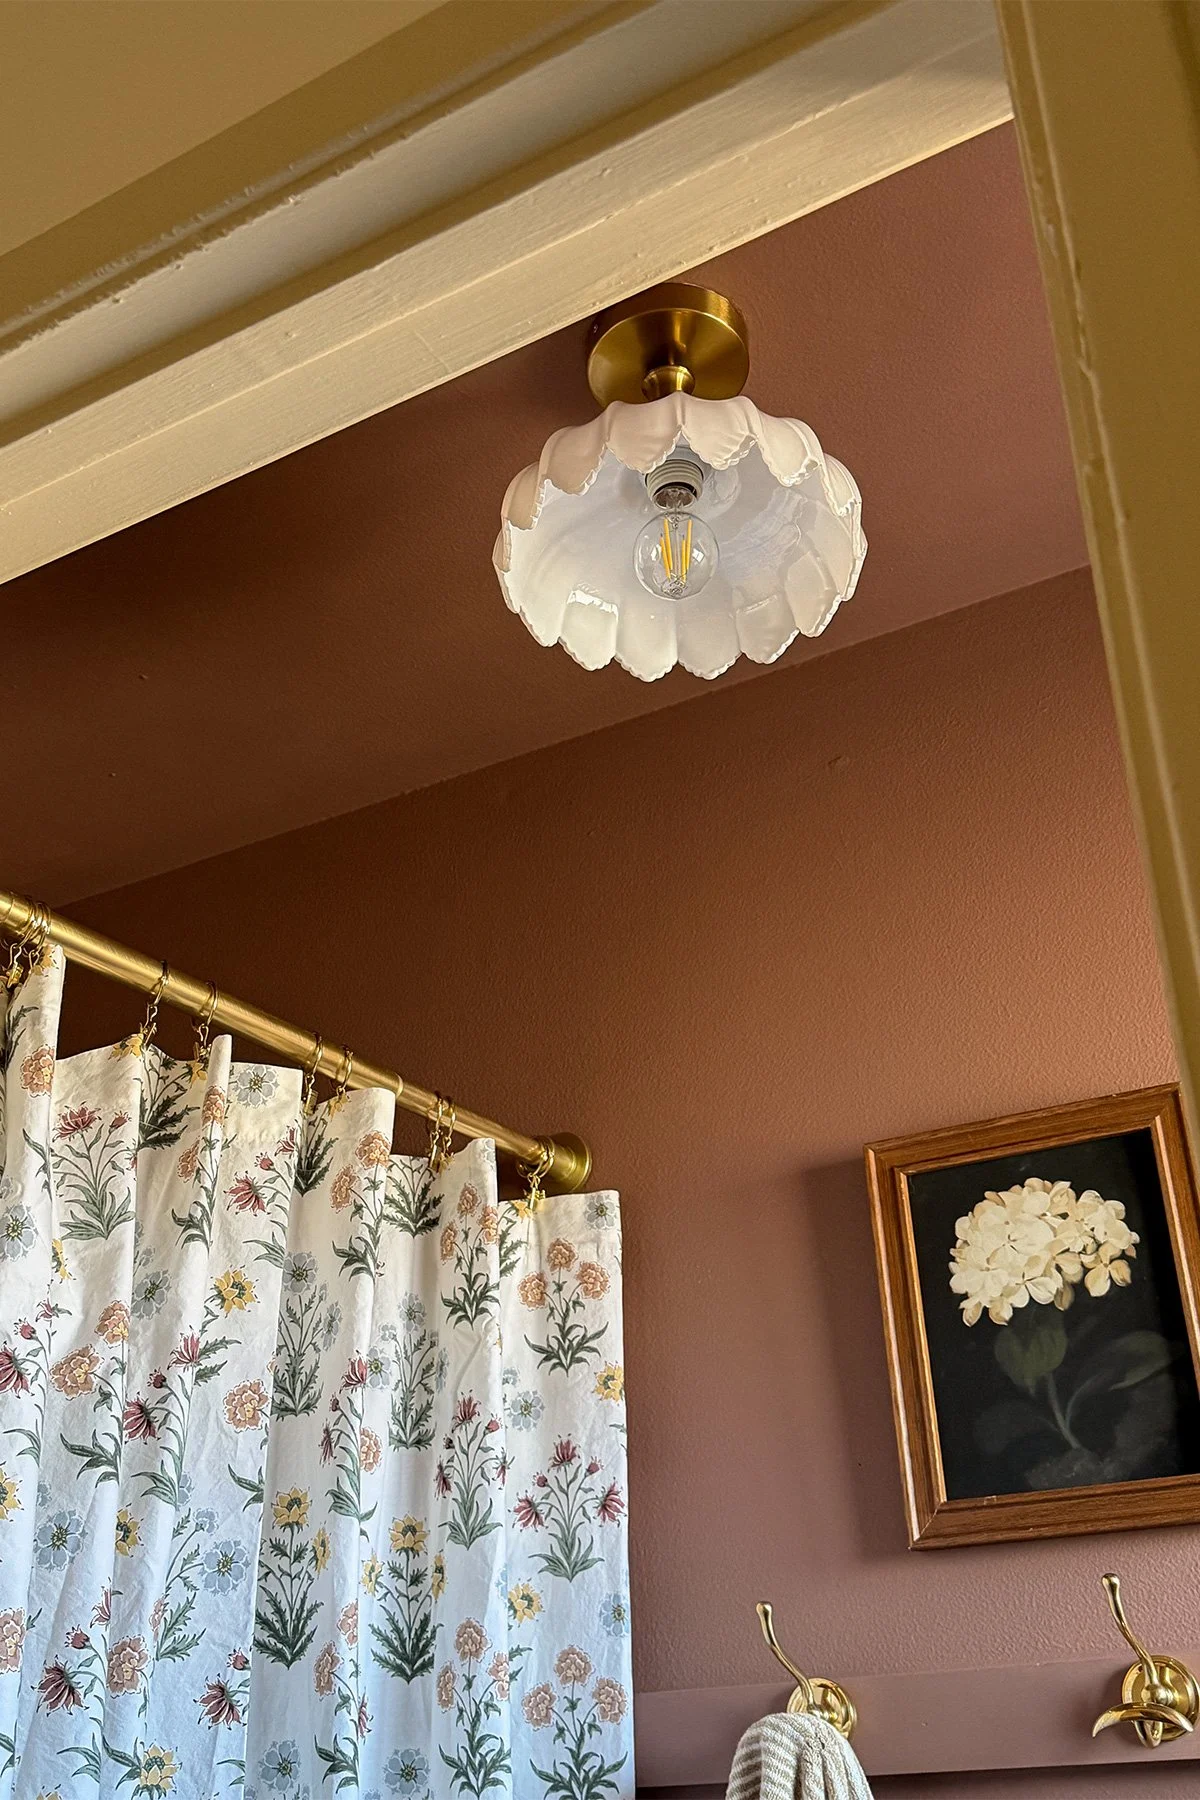
Color drenching the shower side also made a huge impact.
Keeping that side of the bathroom fully saturated in one tone helped it feel more cohesive and intentional, even without changing the shower itself.
Color: Nether Red by Little Greene
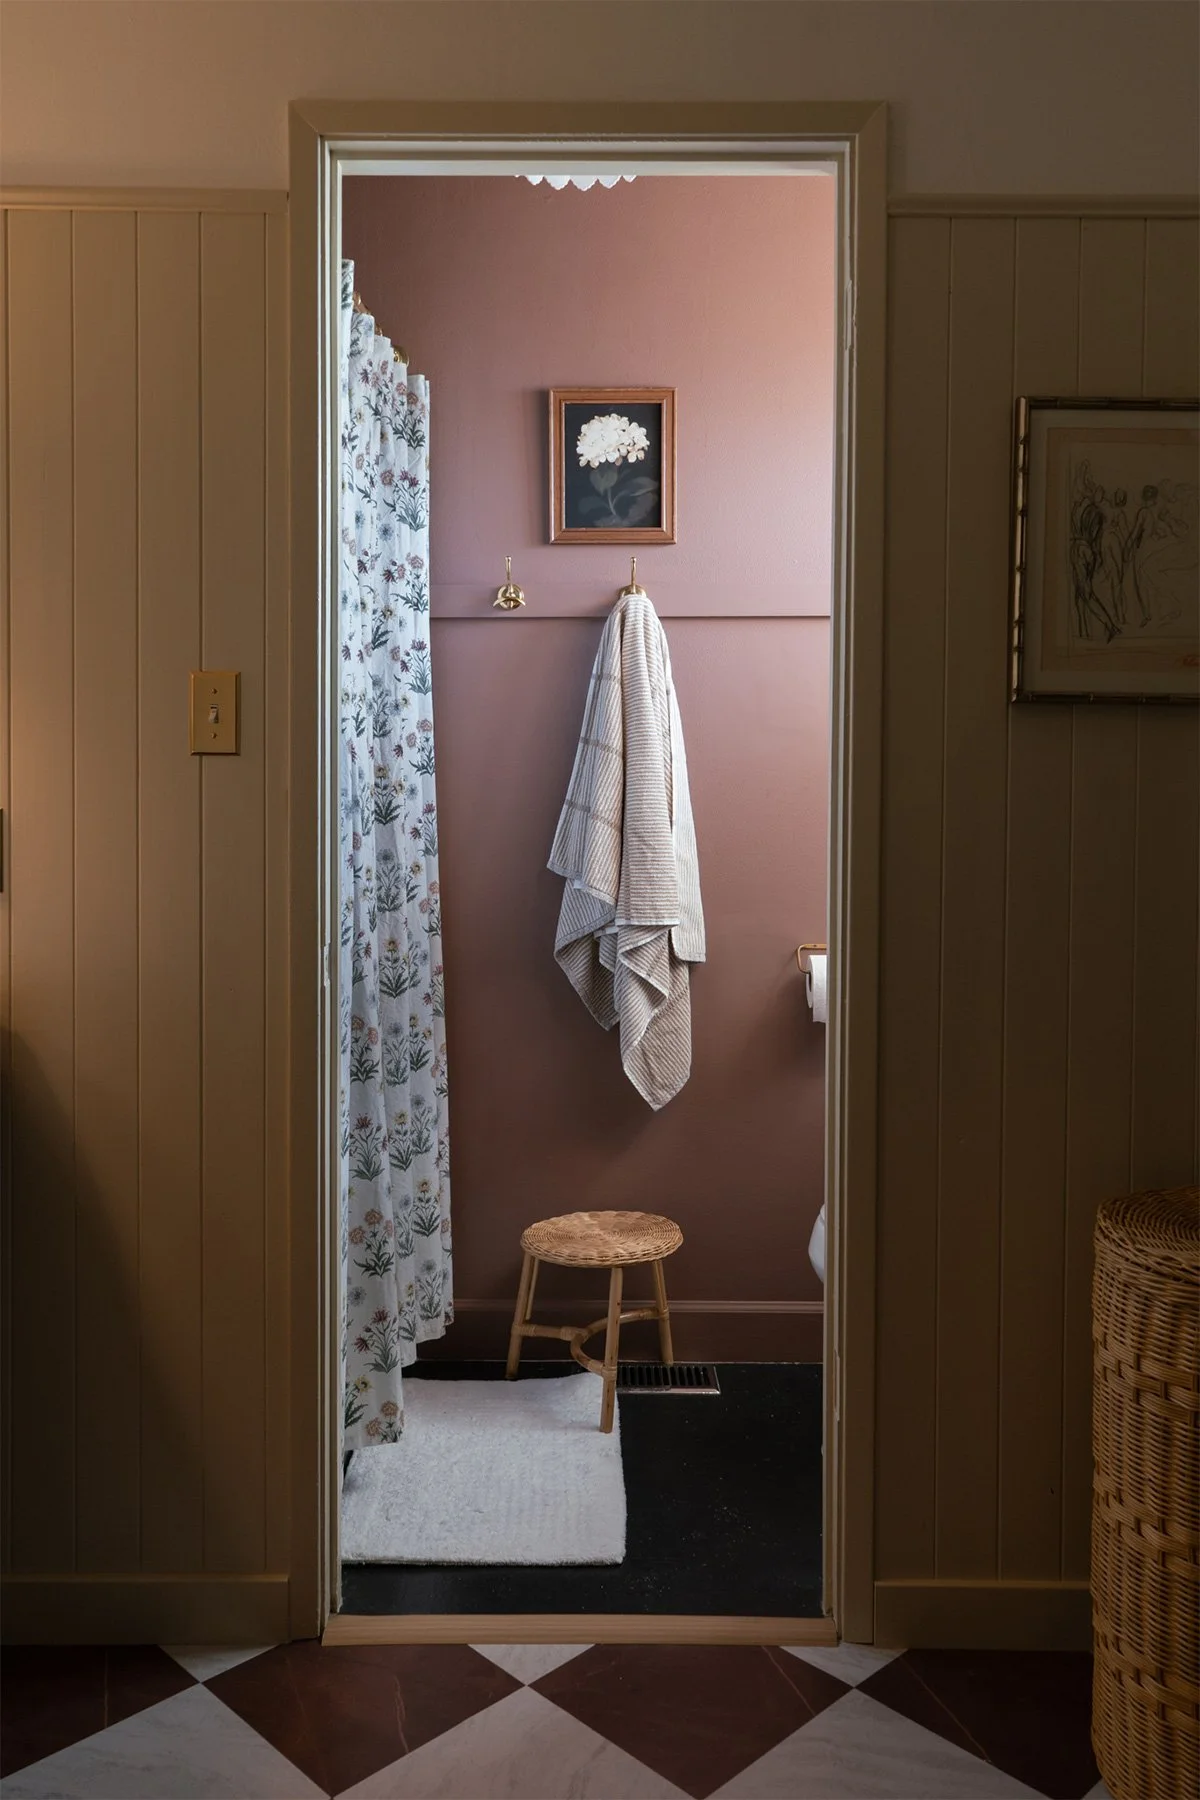
Towel hooks
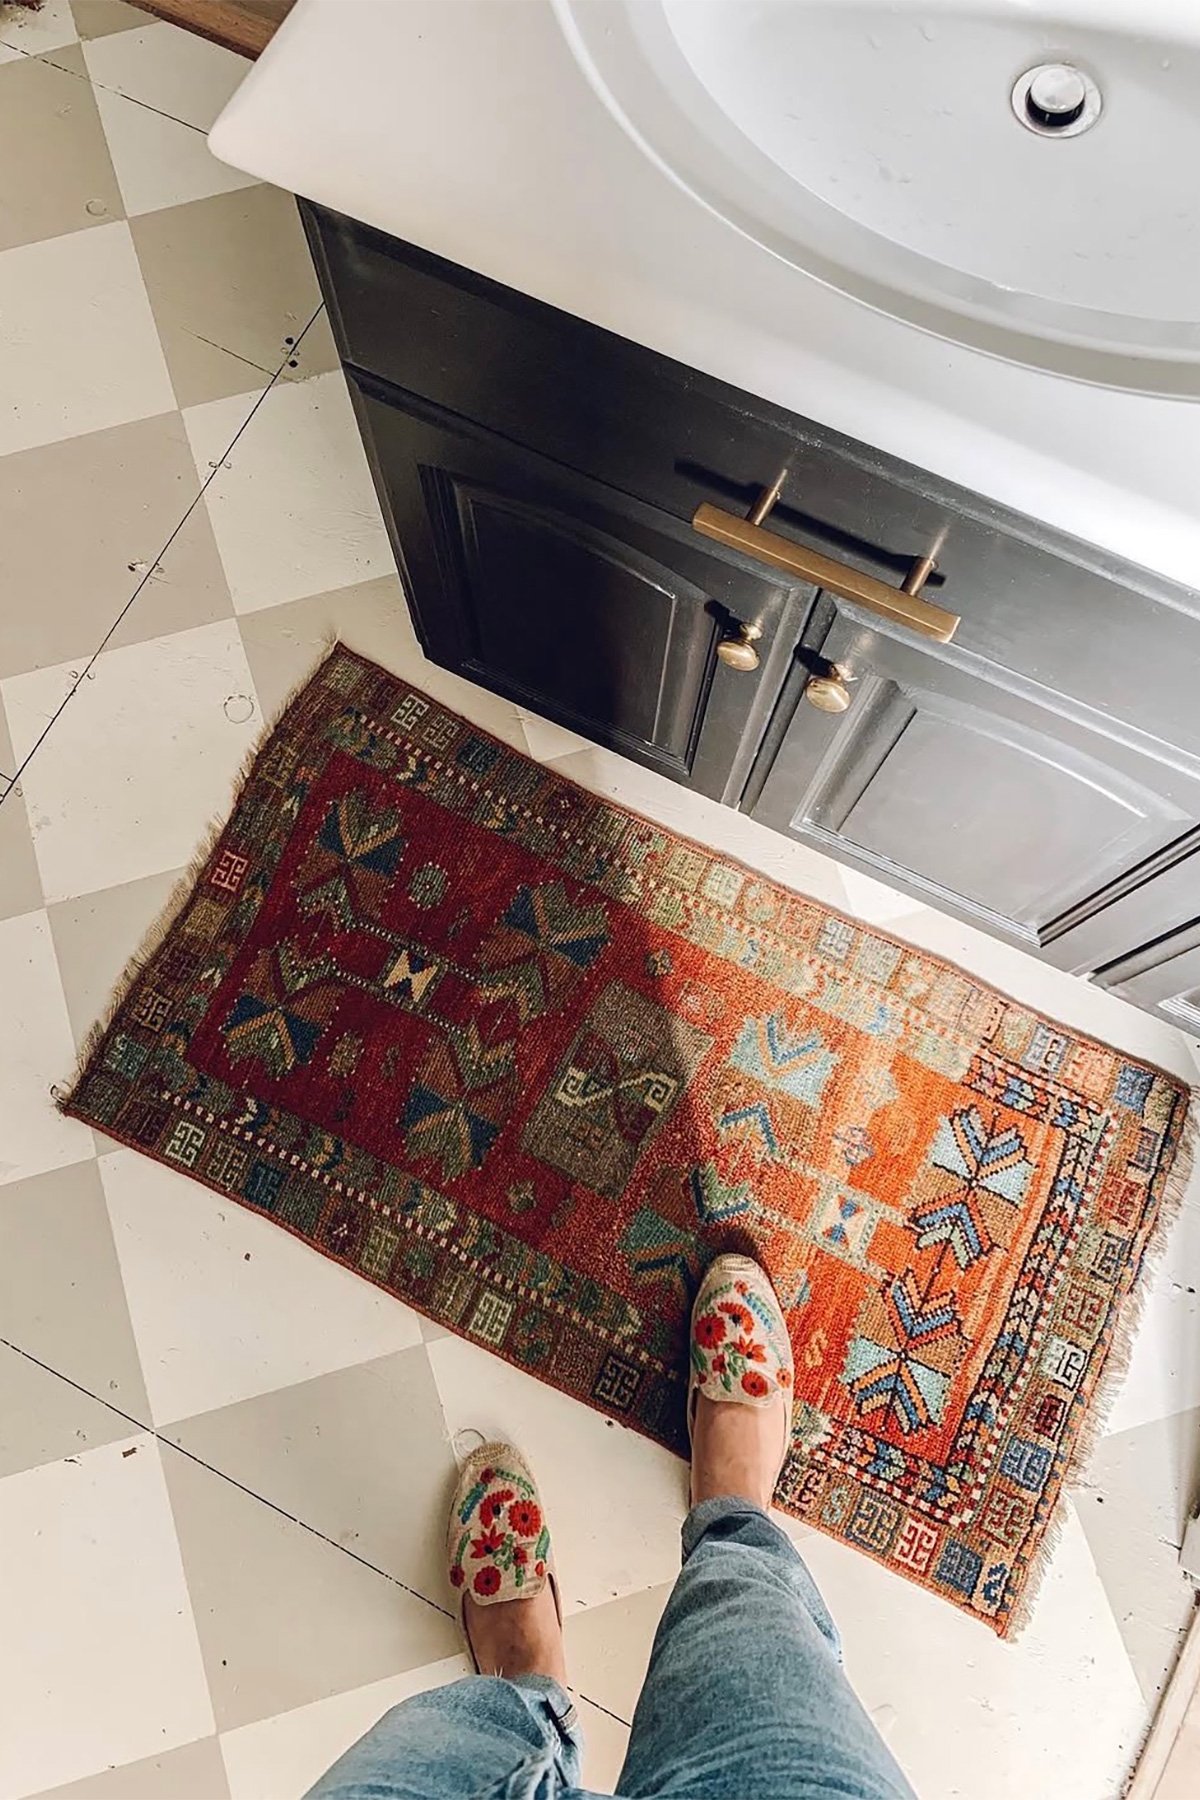
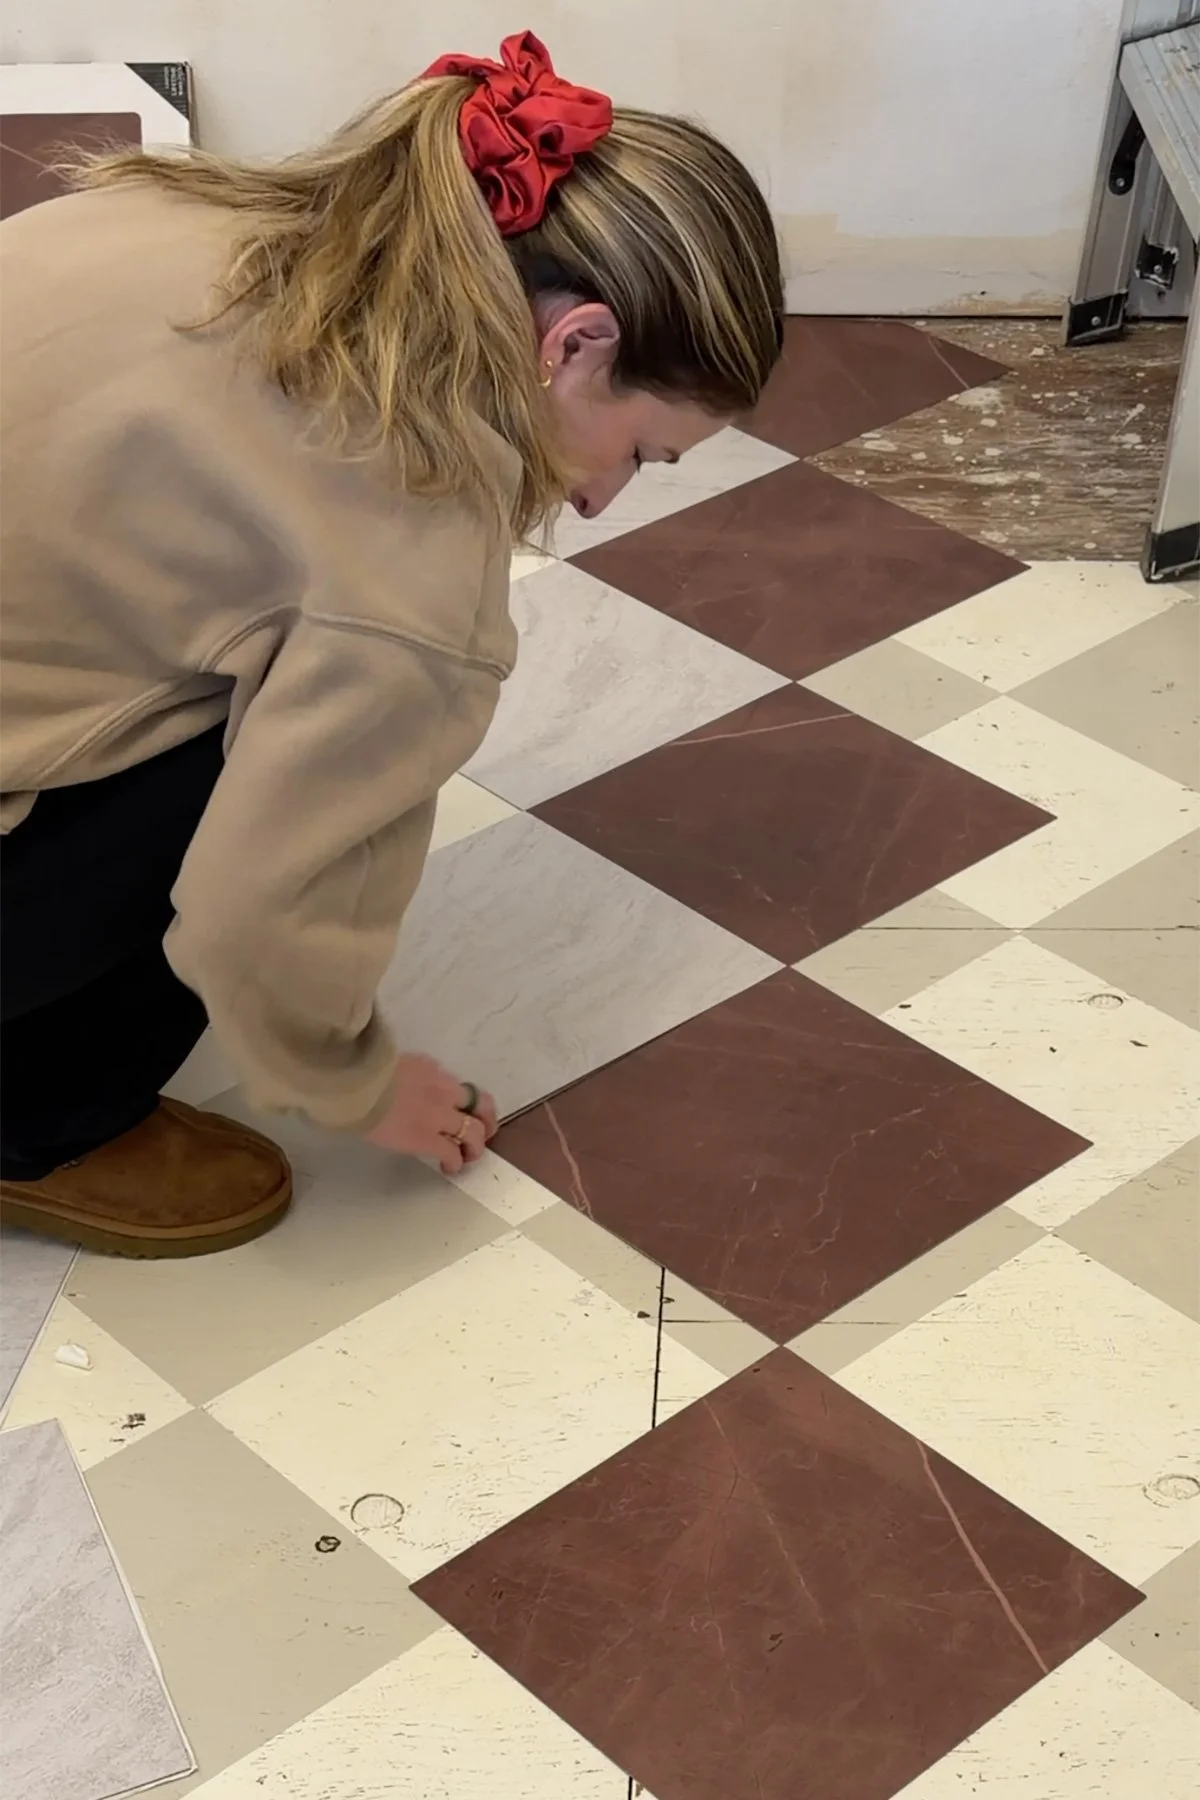
For the floors, I needed something simple and budget-friendly, so I went with peel-and-stick tiles again. I’ve used them before and had a good experience, so it felt like the right choice.
This time, I wanted to bring in a little color, so I chose a burgundy and white (ish) pattern and installed it in a diamond layout. For $100, it completely changed the feel of the space.
The Small Updates That Quietly Changed Everything
Sometimes it’s not the big pieces. It’s the tiny upgrades that make a space feel finished.
Swapped the toilet seat (such a simple change, but instantly felt cleaner and newer)
Upgraded the toilet lever (one of those “hardware is jewelry” moments)
Updated fixtures and small details that you interact with daily
None of these were expensive, but together they made the space feel more thoughtful and complete.
Cost Breakdown
Here’s a general breakdown of what we spent on this bathroom update:
Vanity + faucet: $678
Flooring (peel & stick tile): $102
Wood planking: $250
Paint: $50
Hardware (toilet lever, etc.): $100, hooks $95 (gifted)
Lighting $71, sconces $570 (gifted)
Textiles (towels, shower curtain) $250 (gifted)
Misc. supplies: $100 (additional trim)
Total: $2266
While this wasn’t a “cheap” update, it’s significantly more affordable than a full renovation, and proof that you don’t need to gut a space to completely change how it feels.
Where We Landed
This bathroom still isn’t my “dream renovation.” But it no longer feels forgotten. It feels fresh, intentional, and lived-in. My son says it looks like a fancy hotel, and I think he’s not wrong. Maybe that’s the biggest takeaway: your home doesn’t have to be completely “finished” to feel comforting and right. Often it’s about making thoughtful, meaningful updates that meet you where you are now and give the space room to grow with you.
Because home takes time. And it’s never just one big thing…it’s the layers.

Shop this post: